# Course: Content-driven web application foundations
https://www.sanity.io/learn/course/content-driven-web-application-foundations

Combine Sanity and Next.js and deploy to Vercel via GitHub to get the fundamentals right. Powering a fast and collaborative development and content editing experience.

---

## Navigation

**Track:** [Work-ready Next.js](https://www.sanity.io/learn/track/work-ready-next-js) · [View as markdown](https://www.sanity.io/learn/track/work-ready-next-js.md)

## Contents

1. [Building content-editable websites](https://www.sanity.io/learn/course/content-driven-web-application-foundations/building-a-content-editable-website) · [markdown](https://www.sanity.io/learn/course/content-driven-web-application-foundations/building-a-content-editable-website.md)
2. [Create a new Next.js 16 application](https://www.sanity.io/learn/course/content-driven-web-application-foundations/create-a-new-next-js-application) · [markdown](https://www.sanity.io/learn/course/content-driven-web-application-foundations/create-a-new-next-js-application.md)
3. [Create a new Sanity project](https://www.sanity.io/learn/course/content-driven-web-application-foundations/create-a-new-sanity-project) · [markdown](https://www.sanity.io/learn/course/content-driven-web-application-foundations/create-a-new-sanity-project.md)
4. [The next-sanity toolkit](https://www.sanity.io/learn/course/content-driven-web-application-foundations/the-next-sanity-toolkit) · [markdown](https://www.sanity.io/learn/course/content-driven-web-application-foundations/the-next-sanity-toolkit.md)
5. [Query content with GROQ](https://www.sanity.io/learn/course/content-driven-web-application-foundations/writing-groq-queries) · [markdown](https://www.sanity.io/learn/course/content-driven-web-application-foundations/writing-groq-queries.md)
6. [Generate TypeScript Types](https://www.sanity.io/learn/course/content-driven-web-application-foundations/generate-typescript-types) · [markdown](https://www.sanity.io/learn/course/content-driven-web-application-foundations/generate-typescript-types.md)
7. [Fetch Sanity Content](https://www.sanity.io/learn/course/content-driven-web-application-foundations/fetch-sanity-content) · [markdown](https://www.sanity.io/learn/course/content-driven-web-application-foundations/fetch-sanity-content.md)
8. [Git-based workflows](https://www.sanity.io/learn/course/content-driven-web-application-foundations/git-based-workflows) · [markdown](https://www.sanity.io/learn/course/content-driven-web-application-foundations/git-based-workflows.md)
9. [Go live on Vercel](https://www.sanity.io/learn/course/content-driven-web-application-foundations/deploy-to-vercel) · [markdown](https://www.sanity.io/learn/course/content-driven-web-application-foundations/deploy-to-vercel.md)
10. [Displaying images](https://www.sanity.io/learn/course/content-driven-web-application-foundations/displaying-images) · [markdown](https://www.sanity.io/learn/course/content-driven-web-application-foundations/displaying-images.md)
11. [Block content and rich text](https://www.sanity.io/learn/course/content-driven-web-application-foundations/block-content-and-rich-text) · [markdown](https://www.sanity.io/learn/course/content-driven-web-application-foundations/block-content-and-rich-text.md)
12. [Build up the blog](https://www.sanity.io/learn/course/content-driven-web-application-foundations/build-up-the-blog) · [markdown](https://www.sanity.io/learn/course/content-driven-web-application-foundations/build-up-the-blog.md)
13. [Fundamentals quiz](https://www.sanity.io/learn/course/content-driven-web-application-foundations/fundamentals-quiz) · [markdown](https://www.sanity.io/learn/course/content-driven-web-application-foundations/fundamentals-quiz.md)

---

## Lesson 1: Building content-editable websites
https://www.sanity.io/learn/course/content-driven-web-application-foundations/building-a-content-editable-website

Sanity powers content operations beyond a single website or application, while Next.js focuses on best-in-class content delivery. Combine them into a powerful modern stack to build content-driven experiences.

> [Video: Building content-editable websites](https://www.sanity.io/learn/course/content-driven-web-application-foundations/building-a-content-editable-website)

> [!WARNING]
> The videos in this course, in parts, are out of step with the written lessons. Follow the lesson text and code examples for the latest implementation best practices.


There are no shortcuts to achieving outstanding results. Time spent learning the fundamentals of website development in a modern context will set you up for future success.


## About this course


There are [ready-made templates](https://www.sanity.io/templates) to create websites.


There are "One-click Deploy" buttons to rapidly get something online.


You'll get *something* faster with those but learn very little.


This course will teach you how developer teams build production-ready web applications from the ground up and gain an appreciation of Sanity and Next.js from first principles.


To complete this course, you will copy and paste commands, create and modify local files, set up your repository, and deploy from your Vercel account.


### Building "Layer Caker"


![An index of blog posts for a website about cakes](https://cdn.sanity.io/images/3do82whm/next/bf8ad9ca2dc4c162305171cc1d5e8973d3d0c3a7-2240x1480.png)

Throughout the courses in this track, you'll play the role of a developer tasked with beginning the construction of a web application for a cake-manufacturing superstore, Layer Caker. 


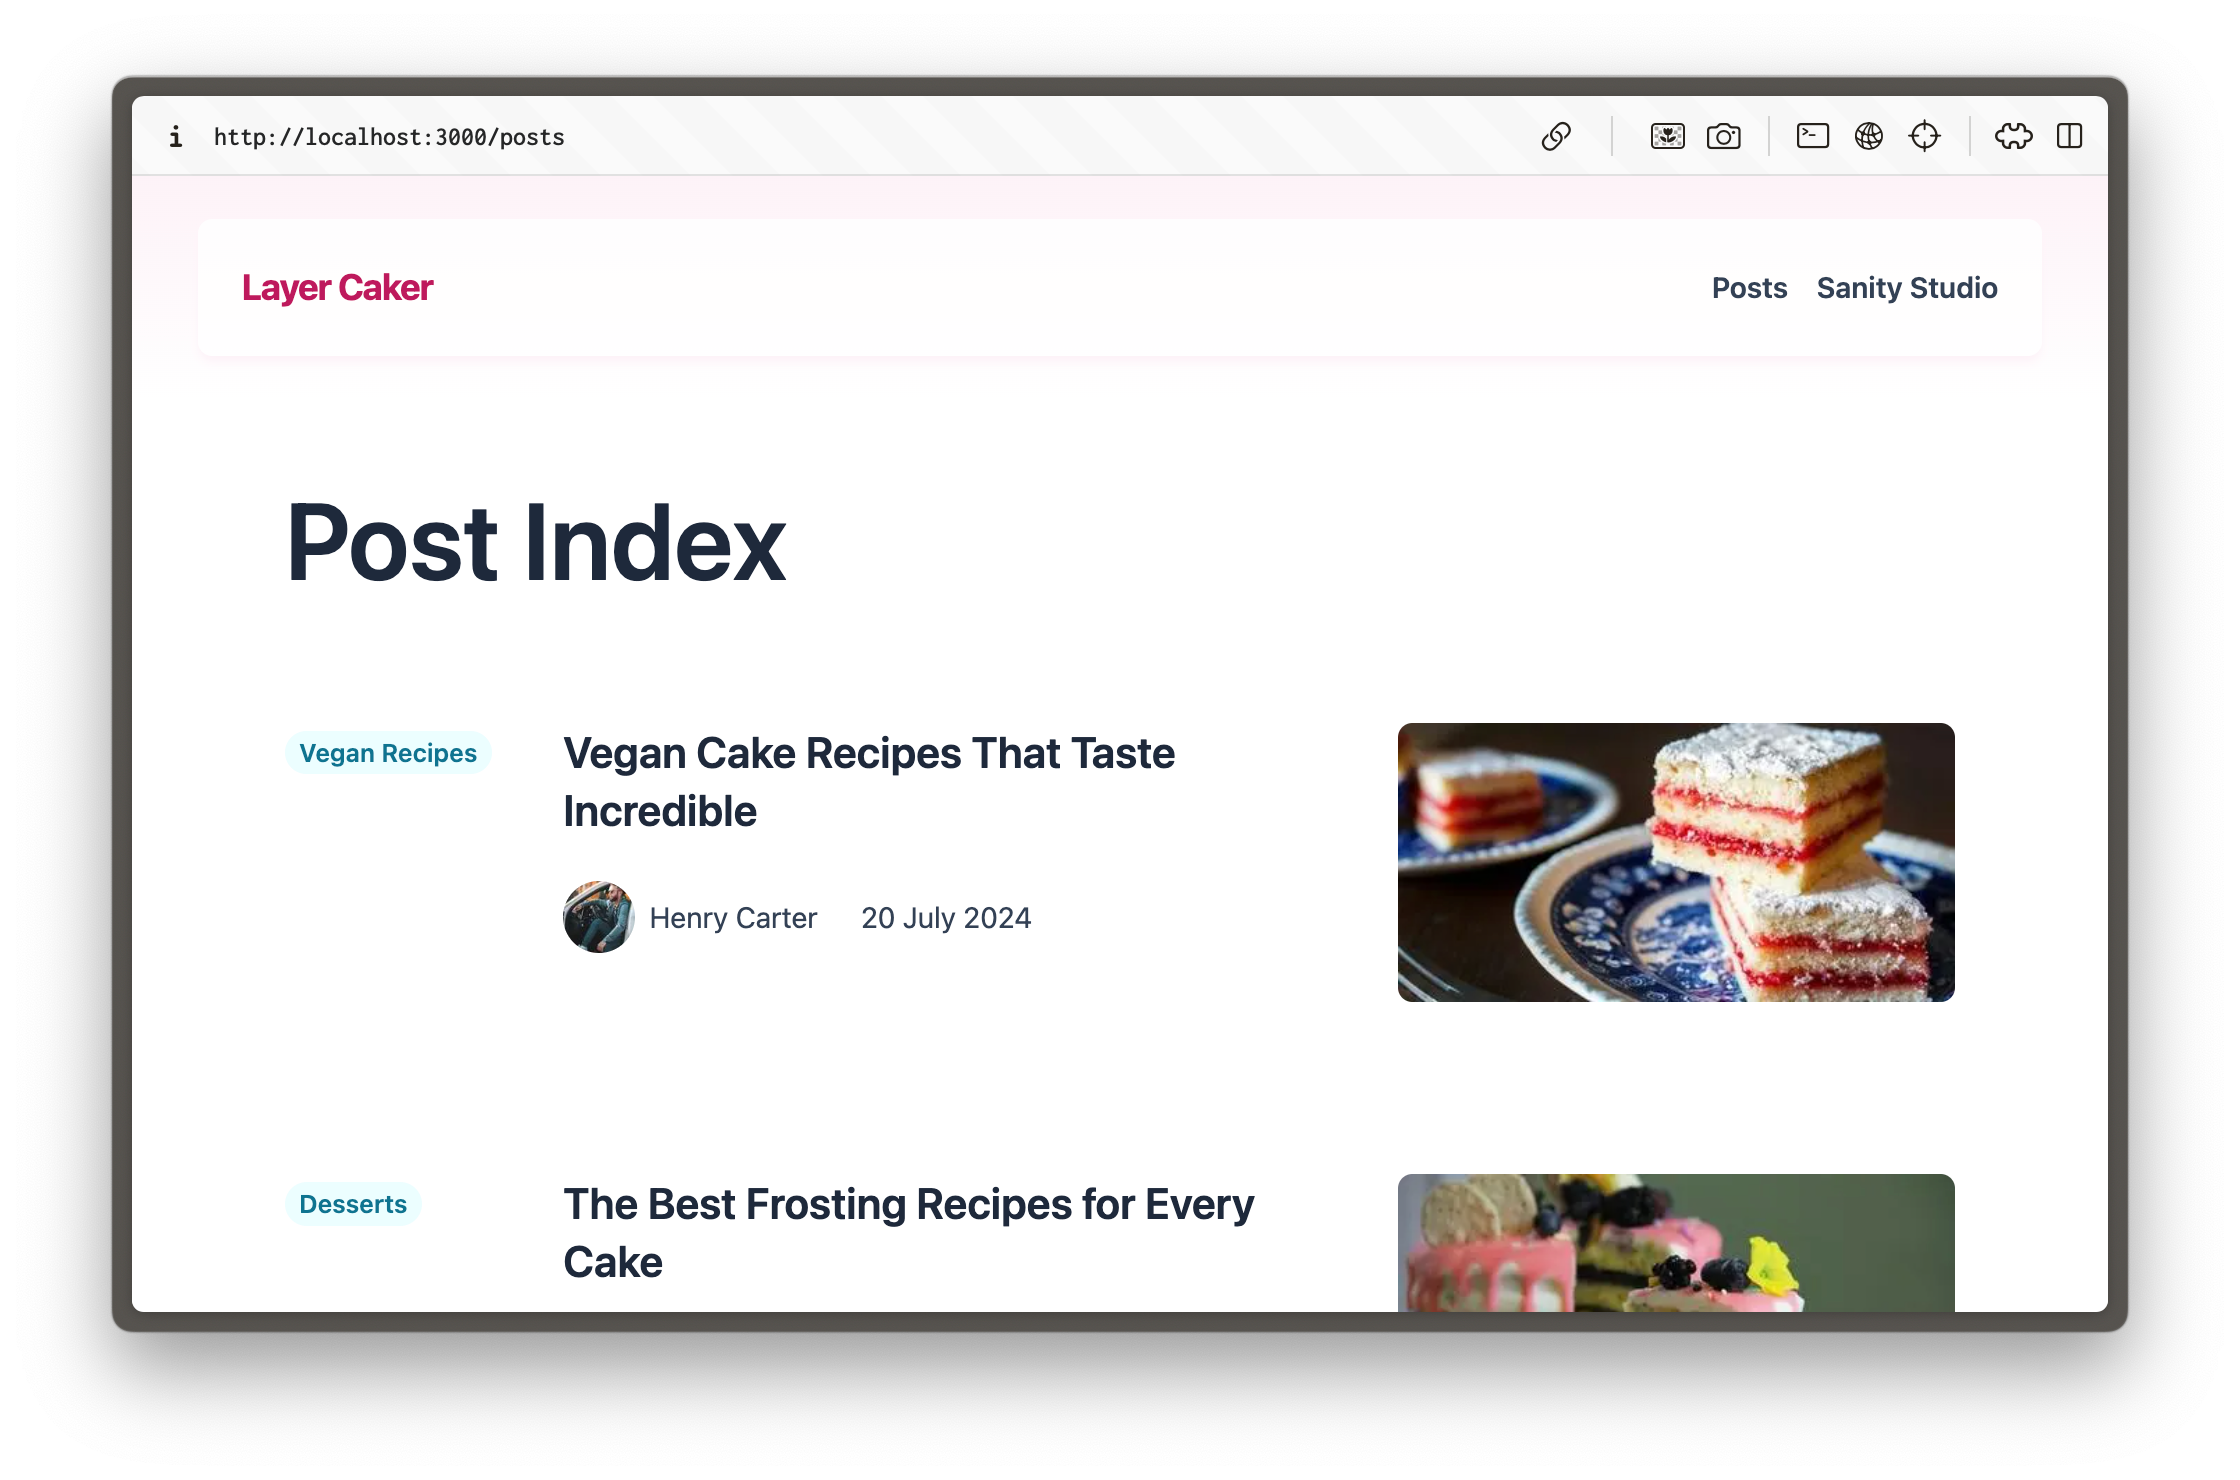
By the end of this first course, you will have created and deployed a blog on Next.js using Tailwind CSS for styling and an embedded, configurable content management dashboard called Sanity Studio. 


Future courses within this track will continue to expand on this with interactive live previews for Visual Editing and website specifics like page building and SEO. There will also be demonstrations of moving away from presentational thinking and towards structured content.


### About the author


My name is Simeon Griggs, and I've been building, deploying, and selling content-editable websites for over a decade. I wrote this course to help you make great websites for your end-users, collaborate confidently, and power the best content operations for creators.


Throughout this course, you'll work through lessons with the least friction possible to accelerate your momentum. I've worked with, on, and at Sanity to understand how it is best used. I have also done the research with Next.js to give you best-practice choices, not decision fatigue or burdensome homework. 


I wrote this course to do things quickly and correctly. That means a little setup work on your first project, but once you've built a solid foundation, you'll fly through future projects.


You'll learn plenty.


### Why build a content-driven website?


As a developer, you should not be a bottleneck to the availability of accurate and valid content for end-users. Your content creators deserve the tools to perform content operations rapidly without developer intervention.


Content Management Systems (CMSes) have come a long way since monolithic platforms with click-and-play website builders. Sanity Studio—the configurable dashboard you will embed in your Next.js application—is just the CMS part of the Sanity platform which also includes features like a content delivery CDN, asset management and webhooks. 


User expectations both to consume and create content are higher than ever. Thankfully, the technology for powering great experiences from content is also more sophisticated.


## Getting started


The first course in this track focuses on the **basics** of developing a Next.js web application. If you're more experienced and seeking concise guidance on topics like TypeScript and caching, the [`next-sanity` readme](https://github.com/sanity-io/next-sanity) might be a better place to start.


### Prerequisites


To complete this course, you will need the following:


- A free Sanity account to create new projects and initialize a new Sanity Studio. If you do not yet have an account, you'll be prompted later in this course to create one.

- Some familiarity with running commands from the terminal. Wes Bos' [Command Line Power User](https://commandlinepoweruser.com/) video course is free and can get you up to speed with the basics.

- [Node and npm installed](https://docs.npmjs.com/downloading-and-installing-node-js-and-npm) (or [an npm-compatible JavaScript runtime](https://developer.mozilla.org/en-US/docs/Learn/Tools_and_testing/Understanding_client-side_tools/Package_management#what_exactly_is_a_package_manager)) to install and run the Next.js development server locally.

- [`pnpm` installed](https://pnpm.io), though you could swap out commands for `npm`

- Some familiarity with JavaScript and React. The code examples in this course can all be copied and pasted and are written in TypeScript, but you will not need advanced knowledge of TypeScript to proceed.


If you're stuck or have feedback on the lessons here on Sanity Learn, [join the Community Slack](https://slack.sanity.io/) or use the feedback form at the bottom of every lesson.


Ready? Let's start by creating a new Next.js application.


---

## Lesson 2: Create a new Next.js 16 application
https://www.sanity.io/learn/course/content-driven-web-application-foundations/create-a-new-next-js-application

Create a new, clean Next.js application with a few opinionated choices for TypeScript and Tailwind CSS.

> [Video: Create a new Next.js 16 application](https://www.sanity.io/learn/course/content-driven-web-application-foundations/create-a-new-next-js-application)

There are many technology choices available to make a web application. So why was Next.js chosen for this course?


- JavaScript is the most popular programming language for writing server and client web applications. 

- React is the most popular library for writing JavaScript-powered applications. 

- By a large margin, Next.js is the most popular meta-framework for React.

- Next.js also has a large community following for extra support and useful utilities.

- It also has an excellent deployment developer experience with Vercel.

- Best of all, Next.js has a tight integration with Sanity.


In short, if your day job involves building web applications on a developer team, there's a good chance you're doing it with Next.js. 


Next.js is not without its challenges. It typically operates at the leading edge of React, so you may interact with React features not yet considered stable. Some architectural decisions, such as caching, can cause confusion. However, this course aims to demystify some of these challenges.


## Create a new Next.js application


- [ ] **Run** the following command to create a new Next.js application:


```sh
pnpm dlx create-next-app@16 layer-caker --typescript --tailwind --eslint --app --src-dir --import-alias="@/*" --turbopack --react-compiler
```

The options in the command above configure your app to use: 


- TypeScript

- [Tailwind CSS](https://tailwindcss.com/)

- [eslint](https://eslint.org/)

- The [App router](https://nextjs.org/docs/app)

- A `src` directory for your application's files

- The default import alias for your application's files

- Turbopack

- React Compiler


These are all the default settings for a new Next.js application. The flags in the command above save you from having to select these options.


You may modify the command above to make different choices, but the following lessons contain code snippets that assume these are the settings you used.


- [ ] **Run** the development server


```sh
pnpm run dev
```

Your app should start up in the terminal in development mode:


```
> layer-caker@0.1.0 dev
> next dev

   ▲ Next.js 16.0.1 (Turbopack)
   - Local:        http://localhost:3000
   - Network:      http://192.168.4.154:3000

 ✓ Starting...
 ✓ Ready in 591ms
```

Open [http://localhost:3000](http://localhost:3000). You should see the default home page for a new Next.js application like the one below:


![A new Next.js 16 application](https://cdn.sanity.io/images/3do82whm/next/8b1bdbc2d8bae8a9a9ed4adeda120338aee712fe-2240x1488.png)

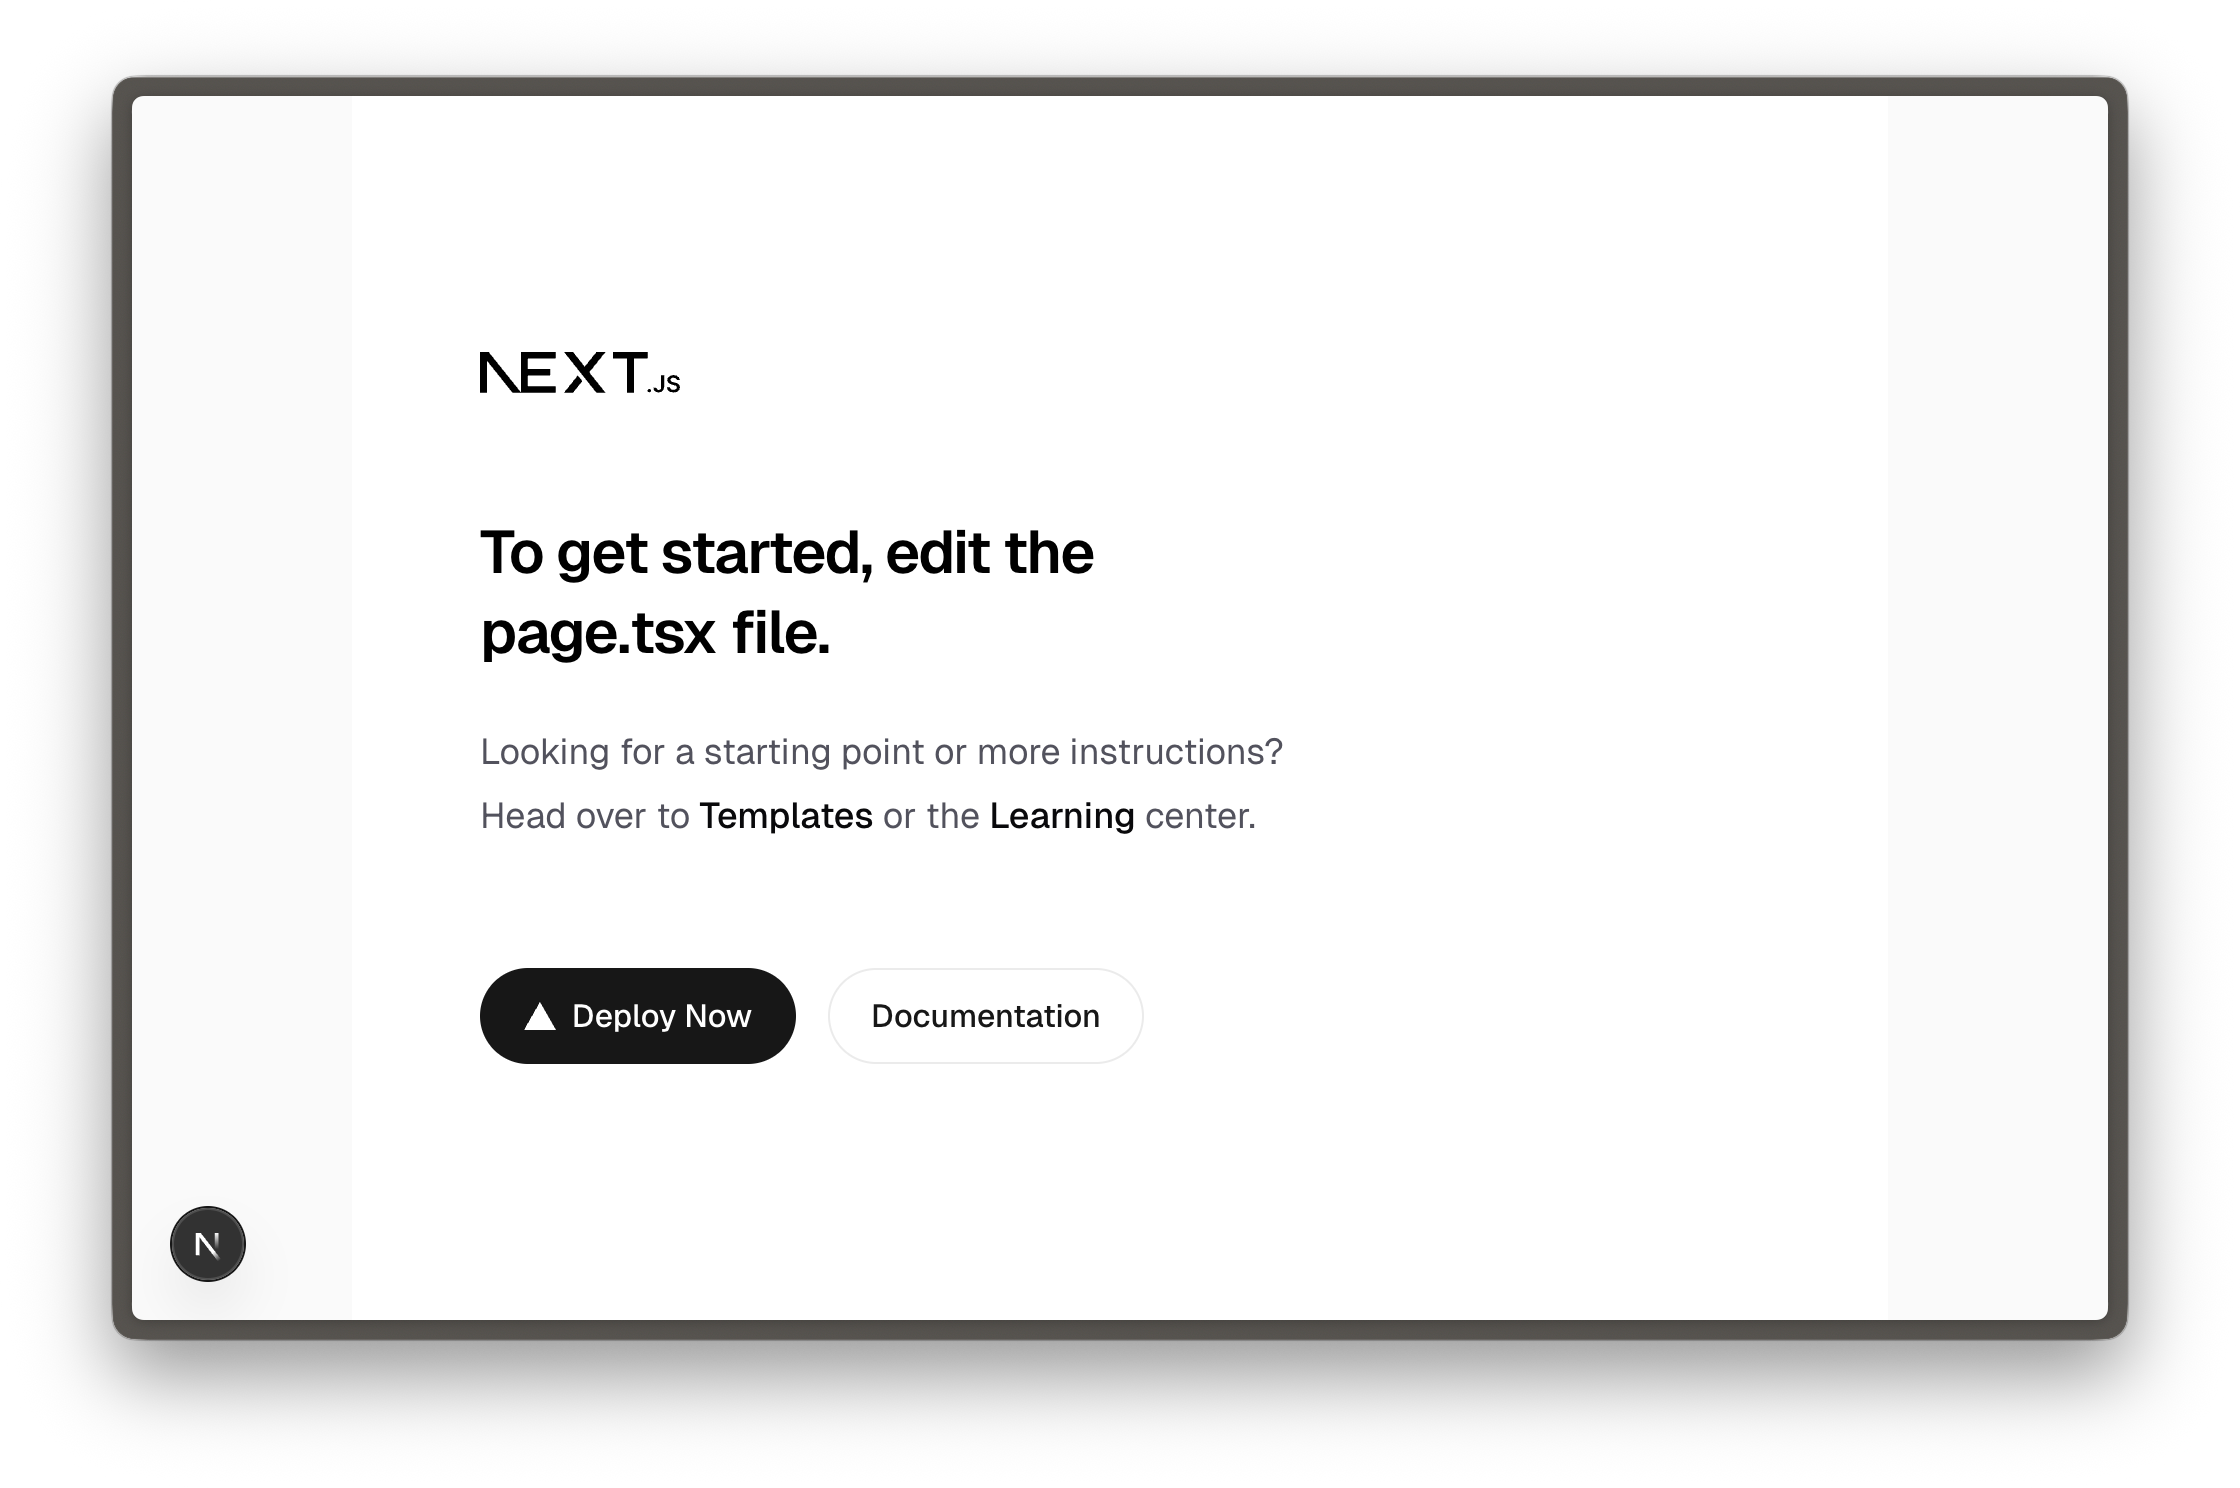
As recommended, you can edit the `src/app/page.tsx` file and see updates instantly. In the following lessons, you'll be given code examples to update this home page route and create new pages.


## Update Tailwind CSS implementation


> [!WARNING]
> The video for this lesson shows Tailwind 3 configuration, but you now have Tailwind 4 installed. Follow the code examples below.


The Next.js starter has fonts and styles you don't need for this course, so you'll remove them for simplicity.


- [ ] **Update **`layout.tsx` to remove custom fonts


```tsx:src/app/layout.tsx
import type { Metadata } from "next";
import "./globals.css";

export const metadata: Metadata = {
  title: "Create Next App",
  description: "Generated by create next app",
};

export default function RootLayout({
  children,
}: Readonly<{
  children: React.ReactNode;
}>) {
  return (
    <html lang="en">
      <body>{children}</body>
    </html>
  );
}
```

- [ ] **Update** `globals.css` to remove anything other than Tailwind's import


```css:src/app/globals.css
@import "tailwindcss";
```

The app in development should still look mostly the same. You'll add more content and styling in the following lessons.


You now have a Next.js application with Tailwind CSS for styling. However, it lacks content management, so the next step is to set up a Sanity account and initialize Sanity Studio inside your Next.js project.


---

## Lesson 3: Create a new Sanity project
https://www.sanity.io/learn/course/content-driven-web-application-foundations/create-a-new-sanity-project

Create a new free Sanity project from the command line and automatically install Sanity Studio configuration files into your Next.js project.

> [Video: Create a new Sanity project](https://www.sanity.io/learn/course/content-driven-web-application-foundations/create-a-new-sanity-project)

For your Next.js application, Sanity will play the role of content storage for documents and assets such as images. That content is cloud-hosted in what we call the Sanity [Store and query structured content](https://www.sanity.io/learn/content-lake).


In this lesson, you'll create a new project at Sanity and embed an editing interface—[Studio](https://www.sanity.io/learn/sanity-studio)—inside the Next.js application. An embedded Studio allows you to create, edit, and publish content hosted in the Content Lake from your Next.js application's development environment or wherever it is deployed.


The Sanity Content Lake also powers content operations workflows, such as firing fine-grained [GROQ-powered webhooks](https://www.sanity.io/learn/content-lake/webhooks) so your business can react to content changes as they happen. In time, your Next.js application may also *write* content – such as comments and likes – into the Content Lake from the front end. 


While this course focuses on building a web application, Sanity is more than a website-focused CMS (content management system). 


In a nutshell, Sanity is a *Content Operating System*, with a configurable, React-based administration panel, cloud-hosted data storage, and a worldwide CDN for content delivery.


## Create a new project


The Sanity CLI can initialize a new Sanity project within a Next.js application. It detects the framework during the process and prompts you to make appropriate choices.


If you do not yet have a Sanity account, follow the prompts to create one. 


> [!NOTE]
> You can create new free Sanity projects at any time.


- [ ] **Run** the following command inside your Next.js application to create a new free project from the command line:


```sh
pnpm dlx sanity@latest init
```

When prompted, make the following selections. If you accidentally select the wrong option, you can cancel and re-run the command again.


- [ ] **Create** a new project, call it what you like, for example `layer-caker`

- [ ] **Create** a dataset with the default settings: public and named `production`

- [ ] **Add** configuration files to the Next.js folder

- [ ] **Use **TypeScript

- [ ] **Embed** Sanity Studio at `/studio`

- [ ] **Select** the `blog` template

- [ ] **Add** your project details to an `.env.local` file


### What just happened?


This command: 


1. Created a new Sanity **project** and **dataset**, which are remotely configured and hosted on the Content Lake

1. A **dataset** is a collection of content (text and assets) within a project hosted in the Sanity [Store and query structured content](https://www.sanity.io/learn/content-lake). 

2. A **project** can have many datasets and is also where you'd configure other project-level settings like members, webhooks, and API tokens.

2. Added relevant files to your local Next.js application and installed some dependencies that you'll need to get started. 


Your Sanity Studio code in the Next.js application is like a "window" into the remotely hosted content. Your Studio configuration code determines which document types are available to create, update, and delete. All the content you author is hosted in the Content Lake. 


In short, with Sanity:


- **Studio configuration** is performed locally with code.

- **Content **(text and assets) is hosted remotely.

- **Project configuration** is handled at [sanity.io/manage](https://www.sanity.io/manage).


### New project files


**In addition to** your Next.js files, you should have the following files in your project. These files configure: 


- Sanity Studio for creating content

- Sanity Client for querying content

- A helper file to display images on the front end, `src/sanity/lib/image.ts`


```
.
├── .env.local
├── sanity.cli.ts
├── sanity.config.ts
├── (...and all your Next.js files)
└── src
    ├── app
    │   └── studio
    │       └── [[...tool]]
    │           └── page.tsx
    └── sanity
        ├── lib
        │   ├── client.ts
        │   ├── image.ts
        │   ├── live.ts
        ├── schemaTypes
        │   ├── authorType.ts
        │   ├── blockContentType.ts
        │   ├── categoryType.ts
        │   ├── postType.ts
        ├── env.ts
        └── schema.ts
```

### Hello, Sanity Studio


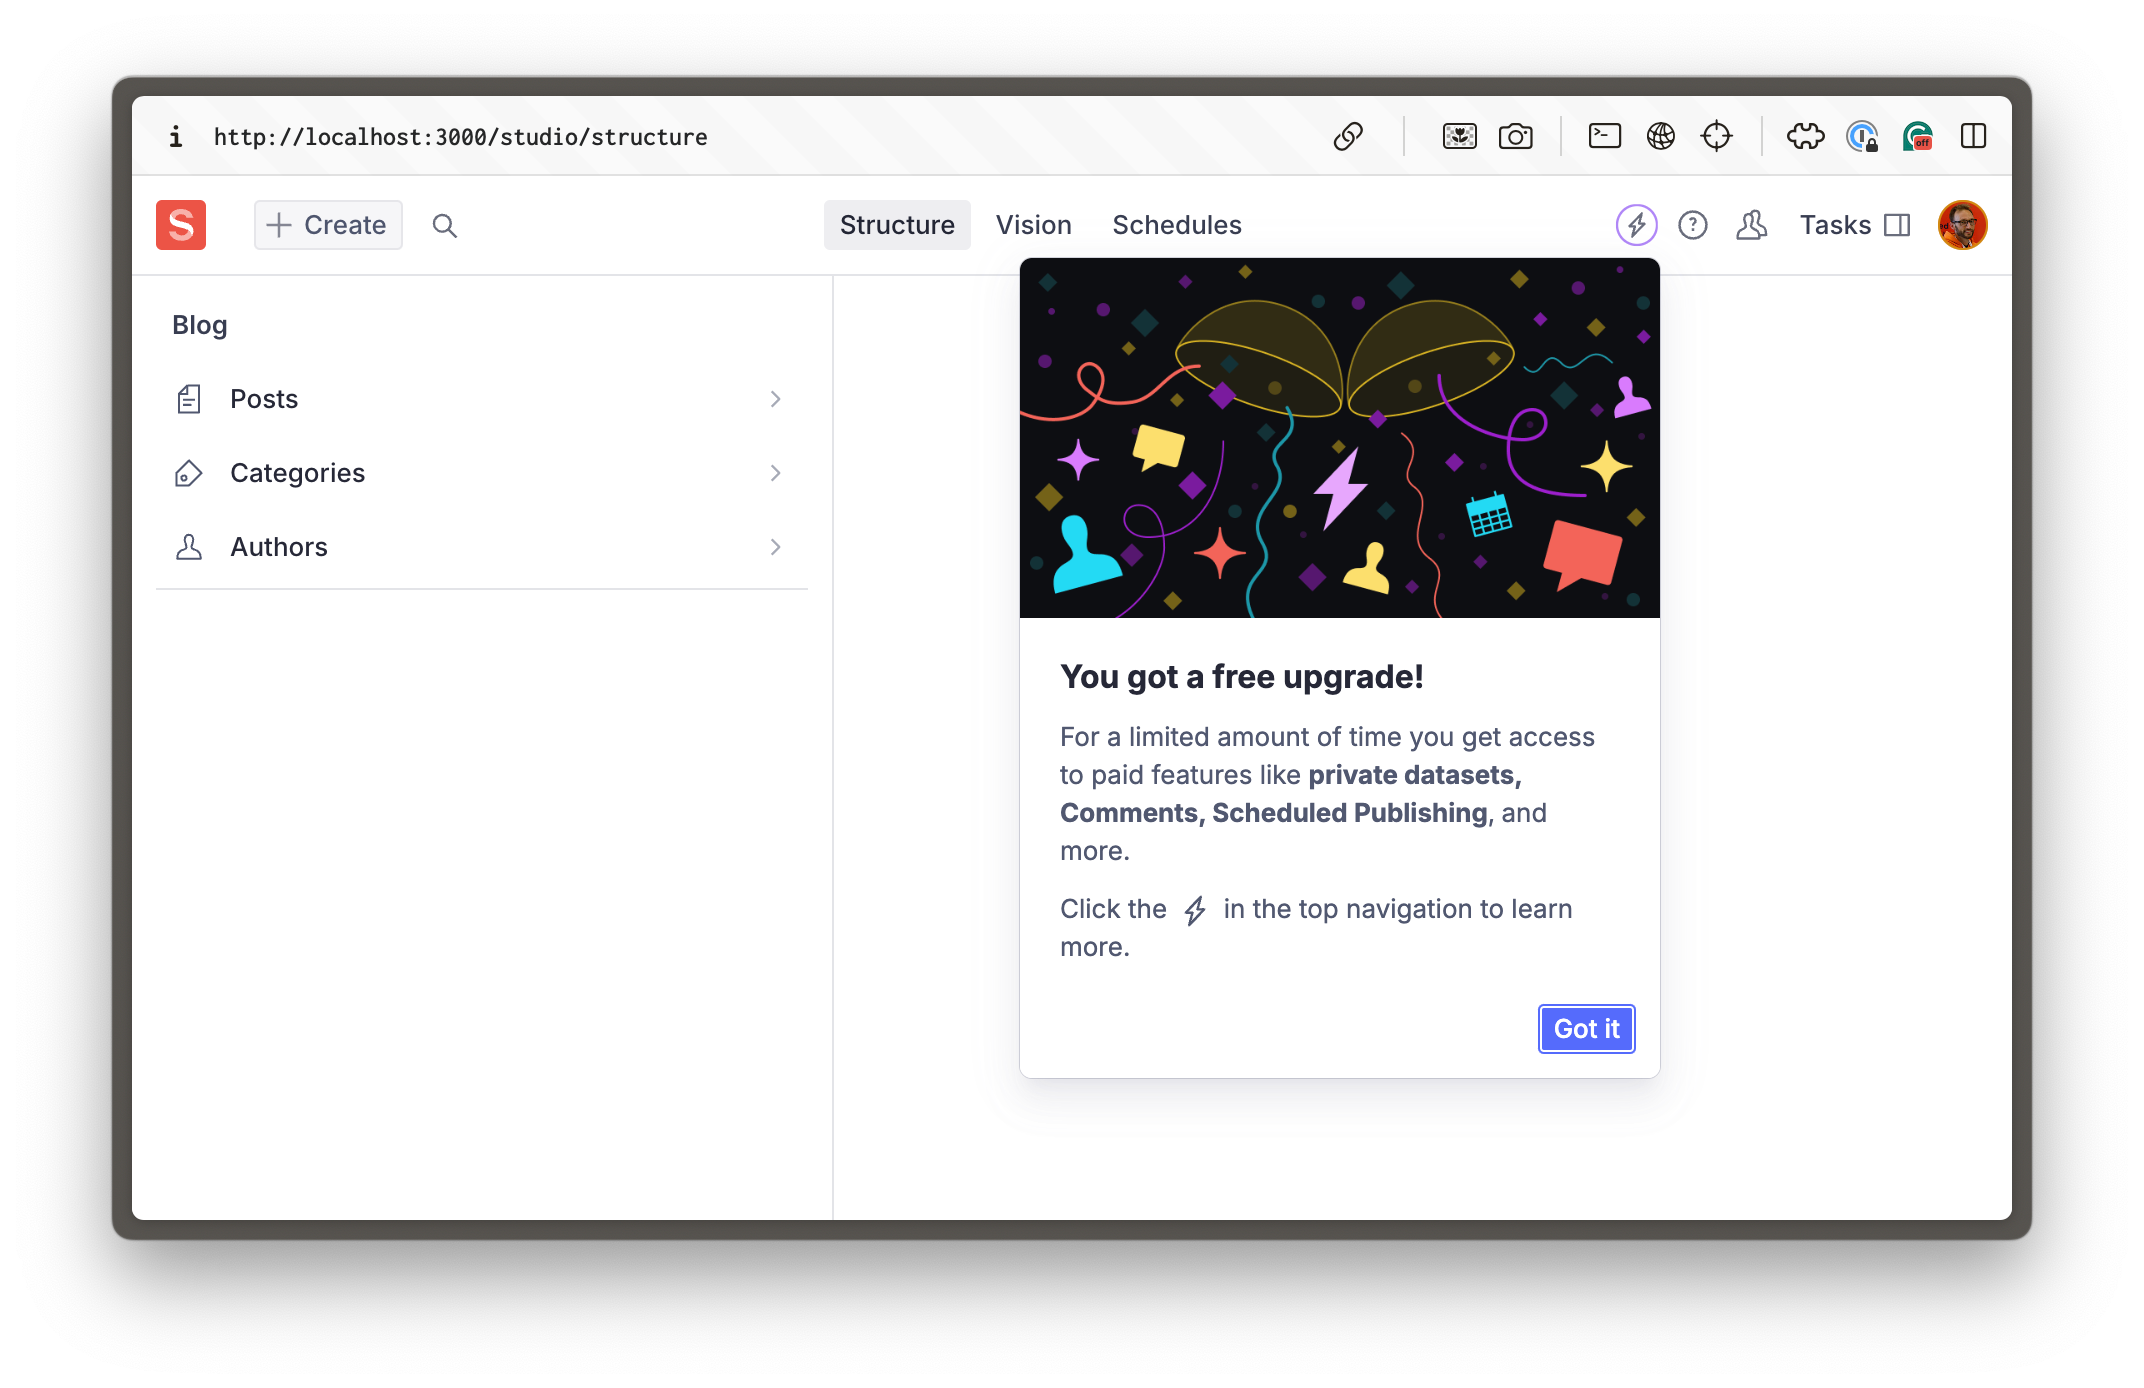
Browse your embedded Sanity Studio route at [http://localhost:3000/studio](http://localhost:3000/studio) to see your built-in content management system. 


Make sure you log in with the same credentials you used to log in to the Sanity CLI in your terminal.


> [!WARNING]
> If you see the Studio but not these three document types (posts, categories, authors) on the left-hand side, you may have chosen the "clean" template instead. Re-run the `sanity init` command above to change.


![A new Sanity Studio with the blog schema types installed](https://cdn.sanity.io/images/3do82whm/next/25830b878dbeb7bc279ba11bc5d3efa1d7c57544-2144x1388.png)

You're embedding the Sanity Studio within the Next.js application for the convenience of managing everything in one repository**.** It's also convenient for authors to only need to know one URL for their front end and content administration. However, it can promote website-specific thinking. 


> [!NOTE]
> Remember, content representing your business goes far beyond a few web pages. For now you only have blog content schema types in your Sanity Studio, but you can expand it to much more!


Fortunately, if you ever decide to separate your Sanity Studio into its repository—or both applications into a mono repo—it should be a straightforward process of moving the configuration files around. The data storage of your text and assets would remain unchanged in the Content Lake.


The `blog` template gave you three website-specific schema types: `post`, `category` and `author`. You can now create content of these types within your embedded Sanity Studio.


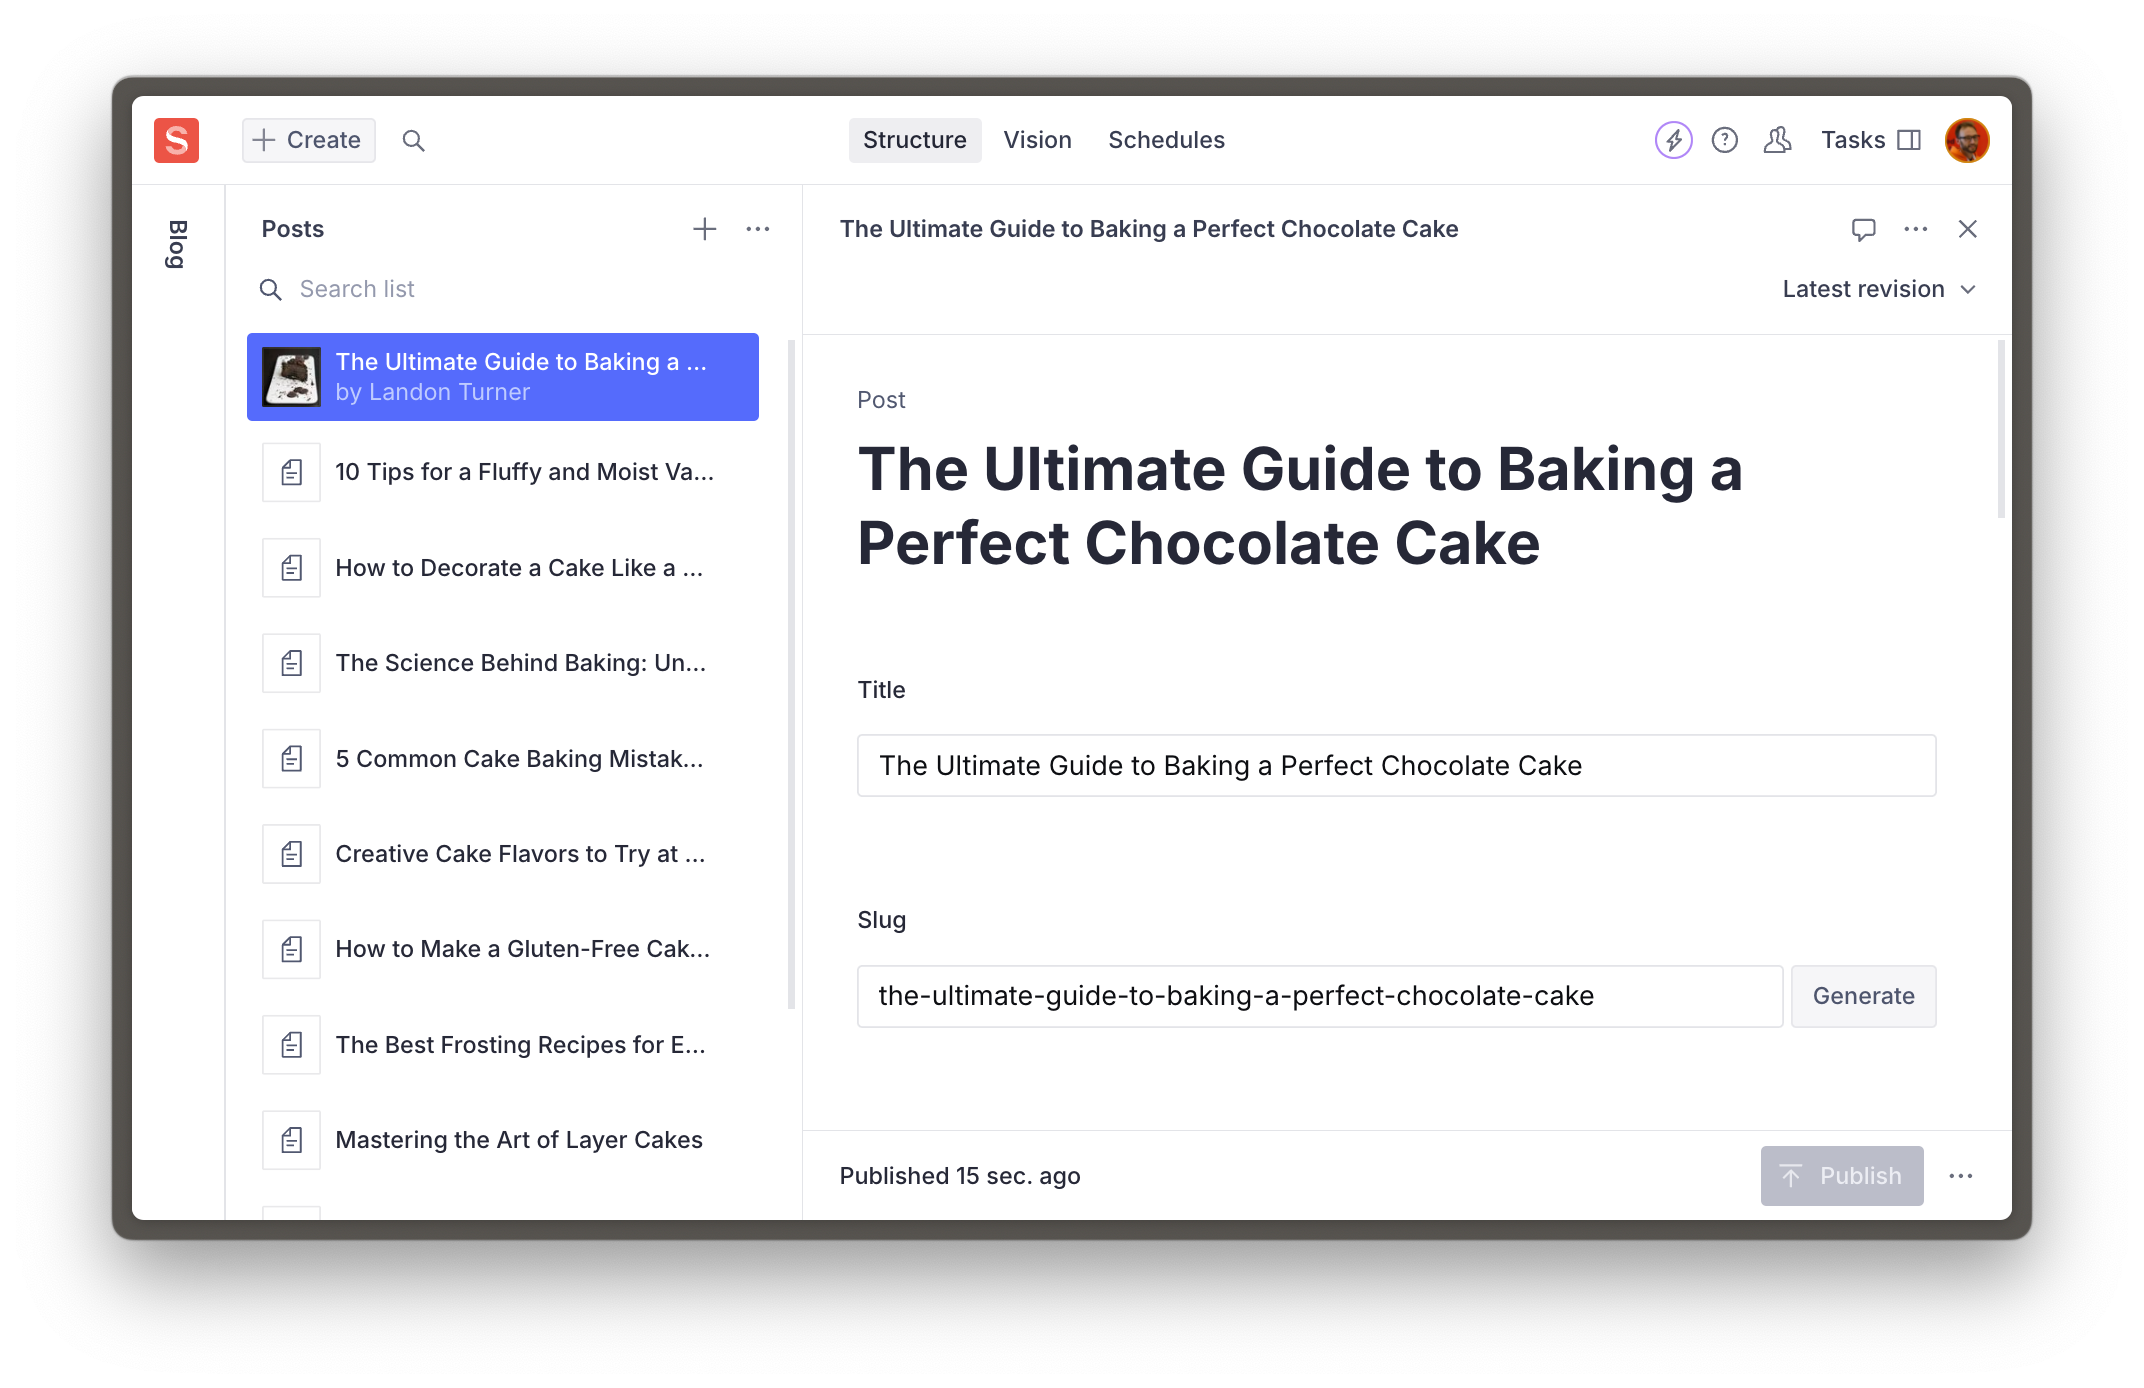
## Create and publish posts


Soon, you'll be querying for content on the front end. For this to work, you'll need to create some.


- [ ] **Create** and **Publish** at least one `post` document type


![Sanity Studio showing a published blog post](https://cdn.sanity.io/images/3do82whm/next/d56d2d90395a3c4c041c1d7ef8a8b17ed23d67e9-2144x1388.png)

### Or use our seed data


We have prepared a dataset for you to speed up the process. You can optionally download and import this into your project.


> [!TIP]
> Download `production.tar.gz` – a pre-prepared dataset backup with assets, posts, categories, and authors.


Place this file in the root of your project and import it using the CLI.


```sh:Terminal
pnpm dlx sanity dataset import production.tar.gz production
```

Delete the backup file once the import successfully completes.


```sh:Terminal
rm production.tar.gz
```

You have content in your Studio, but your front-end is not yet configured to display it. In the next lesson, let's unpack the bridge between your Sanity content and front-end.


---

## Lesson 4: The next-sanity toolkit
https://www.sanity.io/learn/course/content-driven-web-application-foundations/the-next-sanity-toolkit

Unpack next-sanity, the all-in-one Sanity toolkit for "live by default," production-grade content-driven Next.js applications.

> [Video: The next-sanity toolkit](https://www.sanity.io/learn/course/content-driven-web-application-foundations/the-next-sanity-toolkit)

One of the dependencies automatically installed during `sanity init` in the last lesson was [`next-sanity`](https://github.com/sanity-io/next-sanity), a collection of utilities and conventions for data fetching, live updates, Visual Editing, and more. You could look through the readme for full details on what it provides. 


For now, let's examine some of the files that were automatically created in the previous lesson and explain their purpose.


## Environment variables


A `.env.local` file should have been created with your Sanity project ID and dataset name. These are not considered sensitive, and so are prepended with `NEXT_PUBLIC_`.


> [!TIP]
> See the Next.js documentation about [public and private environment variables](https://nextjs.org/docs/app/building-your-application/configuring/environment-variables).


In future lessons, you'll add secrets and tokens to this file. It is important that you **do not** check this file in your Git repository. Also, remember that values in this file will need to be recreated when deploying the application to hosting. We'll remind you of this when we get there.


- [ ] **Confirm** you have an `.env.local` file at the root of your application.


```scss:.env.local
NEXT_PUBLIC_SANITY_PROJECT_ID="your-project-id"
NEXT_PUBLIC_SANITY_DATASET="production"
```

Additionally, a file to retrieve, export, and confirm these values exist has been written to `src/sanity/env.ts`


> [!NOTE]
> You can use Sanity CLI to update these values with a new or existing Sanity project by running `sanity init` again with the `--env` flag


```sh
pnpm dlx sanity@latest init --env
```

## Sanity Client


The file `client.ts` contains a lightly configured instance of Sanity Client.


```typescript:src/sanity/lib/client.ts
import { createClient } from 'next-sanity'
import { apiVersion, dataset, projectId } from '../env'

export const client = createClient({
  projectId,
  dataset,
  apiVersion,
  useCdn: true,
})
```

Sanity Client is a JavaScript library commonly used to interact with Sanity projects. Its most basic function is querying content, but once authenticated with a token, it can interact with almost every part of a Sanity project.


> [!TIP]
> See more about what [Sanity Client](https://www.sanity.io/docs/js-client) can do


You won't need to change the Sanity Client configuration now, but it is good to know where to make modifications later.


### sanityFetch and SanityLive


In the file `live.ts`, the preconfigured client is used to export a function `sanityFetch`, and the component `SanityLive`.


```typescript:src/sanity/lib/live.ts
import { defineLive } from "next-sanity/live";
import { client } from "@/sanity/lib/client";

export const { sanityFetch, SanityLive } = defineLive({client});
```

- `sanityFetch` is a helper function to perform queries, and under the hood it handles the integration with Next.js tag-based caching and revalidation, as well as Draft Mode. 

- `SanityLive` is a component which creates a subscription to the [Live Content API](https://www.sanity.io/learn/content-lake/live-content-api) and will automatically revalidate content as it changes.


These two exports are the foundation of "Live by default" experiences in Next.js applications. In future lessons you'll implement these and learn how they work.


## Sanity Config and CLI


The two root files `sanity.cli.ts` and `sanity.config.ts` are important for interacting with your project:


- `sanity.cli.ts` allows you to run CLI commands (like `dataset import` from the previous lesson) that affect the project while targeting the correct project ID and dataset

- `sanity.config.ts` is used to configure the Sanity Studio, including schema types, plugins, and more.

- [ ] Run the following command to show project details:


```sh
pnpm dlx sanity@latest debug
```

## Schema Types


In the `src/sanity/schemaTypes` folder are files for the three document types and one custom type which you can see in the Studio.


You're able to create `category`, `post` and `author` type documents because these have been registered to the Studio configuration. 


Datasets are schemaless, so data of any shape could be *written* into a dataset. But these are the only schema types currently configured in the *Studio*. In future lessons, you'll change and add to these schema types, but they give us enough to work with now.


> [!TIP]
> See [Improving the editorial experience](https://www.sanity.io/learn/course/studio-excellence/improving-the-editorial-experience) in [Day one content operations](https://www.sanity.io/learn/course/day-one-with-sanity-studio) to see how basic schema type configurations can be dramatically enhanced.


You now have a Next.js application with an embedded Sanity Studio for creating and publishing content. It's time to start integrating them.


Writing GROQ queries is the most common method of querying content from Sanity. In the next lesson, we'll set up conventions for this.


---

## Lesson 5: Query content with GROQ
https://www.sanity.io/learn/course/content-driven-web-application-foundations/writing-groq-queries

Organize and author queries for your content with best-practice conventions.

> [Video: Query content with GROQ](https://www.sanity.io/learn/course/content-driven-web-application-foundations/writing-groq-queries)

If you're new to Sanity, you're probably new to GROQ. It's an incredibly powerful way to query content, and thankfully, it's quick to get started with.


You'll only need to know the basics of writing queries for now. However, it is beneficial to learn GROQ when working with Sanity as it powers queries,  [GROQ-powered webhooks](https://www.sanity.io/learn/content-lake/webhooks) and content permissions when configuring [Roles](https://www.sanity.io/learn/user-guides/roles).


This lesson is focused on writing basic GROQ queries to serve our Next.js application. Future lessons will expand on these queries.


> [!TIP]
> See [Between GROQ and a hard place](https://www.sanity.io/learn/course/between-groq-and-a-hard-place) for more thorough lessons on how to write expressive queries with GROQ.


> [!TIP]
> The [Query Cheat Sheet - GROQ](https://www.sanity.io/learn/content-lake/query-cheat-sheet) is the most popular resource for quickly finding useful query examples.


## What about GraphQL?


Sanity content is typically queried with GROQ queries from a configured Sanity Client. [Sanity also supports GraphQL](https://www.sanity.io/docs/graphql?utm_source=github&utm_medium=readme&utm_campaign=next-sanity). You may prefer to use GraphQL in your application, but these courses will focus on querying with Sanity Client and GROQ.


## GROQ basics


You can break up most GROQ queries into three key parts. 


Consider this query:


```groq
*[_type == "post"]{title}
```

- `*`: returns **all documents** in a dataset as an array

- `[_type == "post"]` represents a **filter **where you narrow down the proceeding array

- `{ title }` represents a **projection** where you define which **attributes** in those array items you want to return in the response


## Organizing GROQ queries


`next-sanity` exports the `defineQuery` function which will give you syntax highlighting in VS Code with the Sanity extension installed.


- [ ] **Install** the [Sanity VS Code extension](https://marketplace.visualstudio.com/items?itemName=sanity-io.vscode-sanity) if this is the IDE you are using.


The `defineQuery` function also has another important role, [Sanity TypeGen](https://www.sanity.io/learn/apis-and-sdks/sanity-typegen) searches for variables that use it to generate Types for query results.


For convenience and organization, you'll write all queries inside a dedicated file in your project.


- [ ] **Create** a file to store two basic GROQ queries:


```typescript:src/sanity/lib/queries.ts
import {defineQuery} from 'next-sanity'

export const POSTS_QUERY = defineQuery(`*[_type == "post" && defined(slug.current)][0...12]{
  _id, title, slug
}`)

export const POST_QUERY = defineQuery(`*[_type == "post" && slug.current == $slug][0]{
  title, body, mainImage
}`)
```

- `POSTS_QUERY` will return an array of up to 12 published documents of the type `post` that have a slug. From each document, it will return the `_id`, `title` and `slug` attributes.

- This can be used on a "posts index" page to show the latest posts.

- `POST_QUERY` filters down to `post` documents of the post type where the value the `slug` matches a passed-in variable `$slug`. Only one document is returned because of the `[0]` filter. From this one document, it will return the `title`, `body` and `mainImage` attributes.


### Testing GROQ queries


Before using these queries in your front end, it's possible to test them at any time from within your Sanity Studio using the Vision tool.


- [ ] **Open** [http://localhost:3000/studio/vision](http://localhost:3000/studio/vision), paste the `POSTS_QUERY` GROQ query string and click **Fetch**


```groq
*[_type == "post" && defined(slug.current)][0...12]{
  _id, title, slug
}
```

You should see up to 12 items in the "result" panel.


![Vision tool in Sanity Studio showing a GROQ query and a response](https://cdn.sanity.io/images/3do82whm/next/3110d3eae0cfeac9e75f6f91aeb7c256ea56f88d-2144x1388.png)

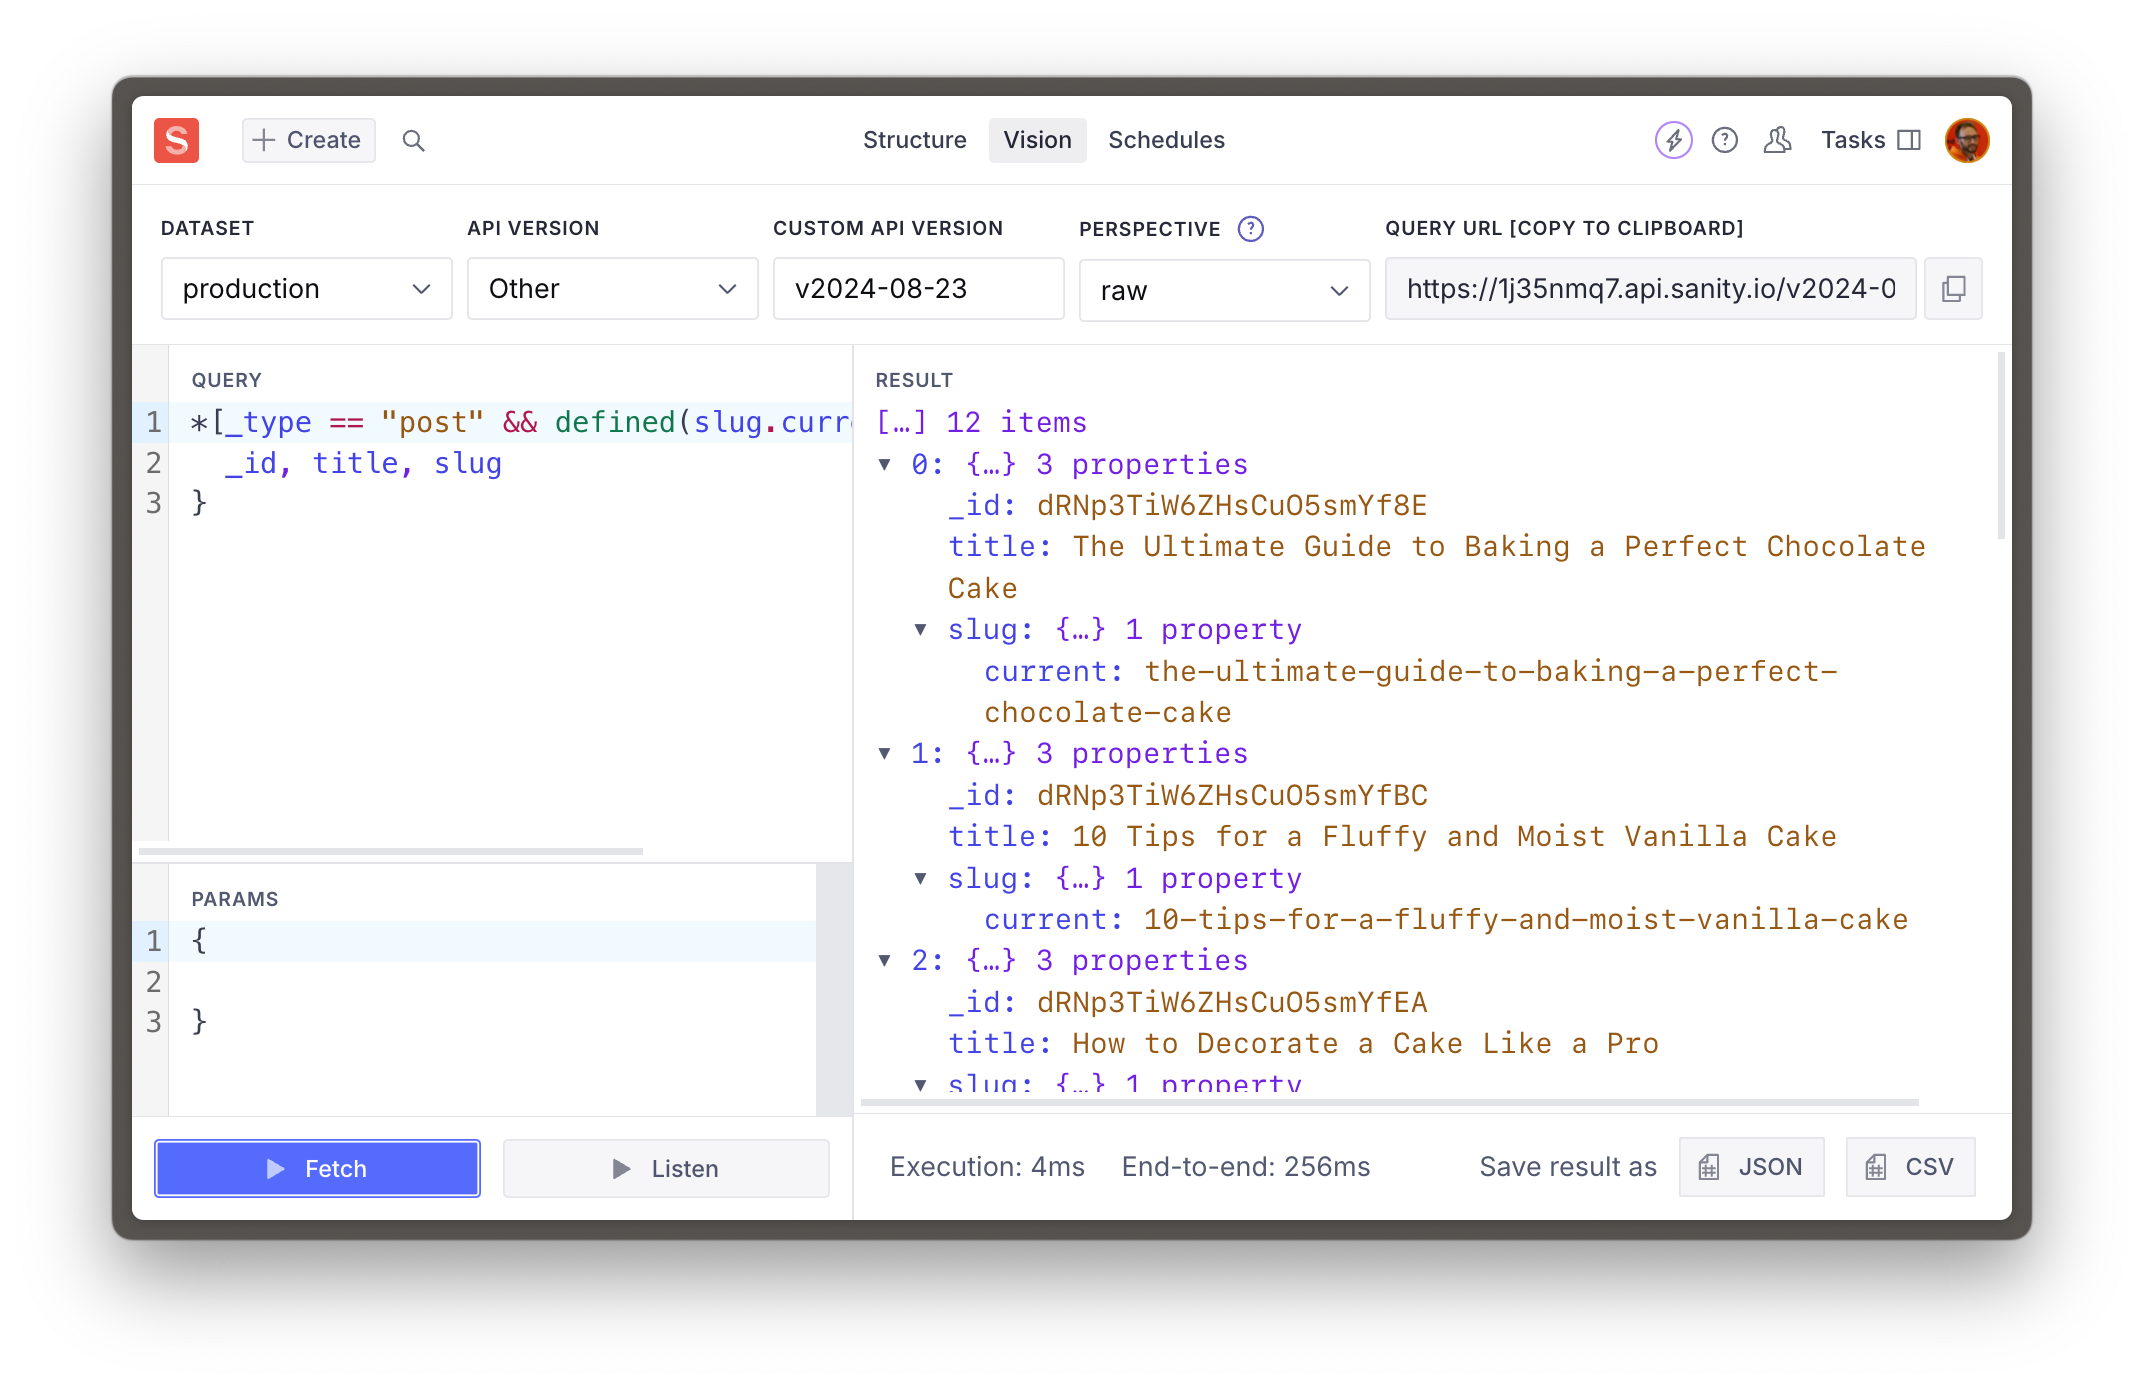
Queries fetched in Vision use the same user authentication that the Studio does. So it will return private documents when using the [default perspective](https://www.sanity.io/learn/docs/content-lake/perspectives) – `raw`. 


> [!NOTE]
> In a **public** dataset, a document is private if it has a period "`.`" in the `_id`, such as `{ _id: "drafts.asdf-1234" }` and can only be queried by an authenticated request. In a **private** dataset all documents are private.


The Sanity Client for your front end is not authenticated (unless you give it `token`) so it will only return publicly visible documents in a public dataset.


> [!TIP]
> See [Datasets](https://www.sanity.io/learn/content-lake/datasets) for more information about Public and Private datasets.


> [!TIP]
> [Perspectives for Content Lake](https://www.sanity.io/learn/content-lake/perspectives) determine whether published or draft documents are returned in the response.


Now that you've proven that your GROQ queries get results, let's automatically generate TypeScript types for these responses.


---

## Lesson 6: Generate TypeScript Types
https://www.sanity.io/learn/course/content-driven-web-application-foundations/generate-typescript-types

Add Type-safety to your project and reduce the likelihood that you will write code that produces errors. 

> [Video: Generate TypeScript Types](https://www.sanity.io/learn/course/content-driven-web-application-foundations/generate-typescript-types)

In the case of working with [Sanity TypeGen](https://www.sanity.io/learn/apis-and-sdks/sanity-typegen), it can create Types for Sanity Studio schema types and GROQ query results. So, as you build out your front end, you only access values within documents that exist, as well as defensively code against values that could be `null`.


> [!TIP]
> The [Generating types](https://www.sanity.io/learn/course/day-one-with-sanity-studio/generating-types) Lesson has a more in-depth exploration of the `sanity typegen` command.


Sanity TypeGen will [create Types for queries](https://www.sanity.io/docs/sanity-typegen#c3ef15d8ad39) that are assigned to a variable and use the `defineQuery` function.


> [!NOTE]
> Note: The video in this lesson shows the older configuration method using sanity-typegen.json. As of Sanity CLI version 4.19.0, typegen configuration should be added to sanity.cli.ts instead. The instructions below reflect the current recommended approach.


## Extracting schema


You're able to use the Sanity CLI from inside the Next.js application because of the `sanity.cli.ts` file at the root of your project.


- [ ] **Run** the following command in your terminal 


```sh
pnpm dlx sanity@latest schema extract --path=./src/sanity/extract.json
```

> [!NOTE]
> Re-run this every time you modify your schema types


The `--path` argument is provided so the schema file is written to the same folder as all our other Sanity utilities.


You should see a response like the one below and a newly generated `extract.json` file in your `src/sanity` directory


```sh
✅ Extracted schema
```

This file contains all the details about your Sanity Studio schema types, which TypeGen will need to create types from.


## Generating types


By default, TypeGen will create a file for types at the project's root. To keep Sanity-specific files colocated, you'll configure TypeGen in your `sanity.cli.ts` file to keep the project root tidy.


> [!WARNING]
> Without this configuration, Typegen will look for your schema in the default named `schema.json` file instead of the `extract.json` file we have created.


- [ ] **Update** the `sanity.cli.ts` file at the root of your project


```typescript:sanity.cli.ts
import {defineCliConfig} from 'sanity/cli'

export default defineCliConfig({
  api: {
    projectId: 'your-project-id',
    dataset: 'your-dataset',
  },
  typegen: {
    path: './src/**/*.{ts,tsx,js,jsx}',
    schema: './src/sanity/extract.json',
    generates: './src/sanity/types.ts'
  },
})
```

The `typegen` configuration will:


1. Scan the `src` directory for GROQ queries to create Types.

2. Additionally, use the `extract.json` file created during the previous task.

3. Write a new `types.ts` file with our other Sanity utilities.

- [ ] **Run** the following command in your terminal


```sh
pnpm dlx sanity@latest typegen generate
```

> [!NOTE]
> Re-run this every time you modify your schema types or GROQ queries


You should see a response like the one below and a newly created `src/sanity/types.ts` file in your project.


```sh
✅ Generated TypeScript types for 15 schema types and 2 GROQ queries in 1 files into: ./src/sanity/types.ts
```

Success! You now have Types for your Sanity Studio schema types and GROQ queries.


## Automating TypeGen


The `extract.json` file will need to be updated every time you update your Sanity Studio schema types and TypeGen every time you do or update your GROQ queries.


Instead of doing these steps separately, you can include scripts in your `package.json` file to make running these automatic and more convenient.


- [ ] Update `package.json` scripts


```json:package.json
"scripts": {
  // ...all your other scripts
  "predev": "pnpm run typegen",
  "prebuild": "pnpm run typegen",
  "typegen": "sanity schema extract --enforce-required-fields --path=./src/sanity/extract.json && sanity typegen generate"
},
```

You can now run both the schema extraction and TypeGen commands with one line:


```sh
pnpm run typegen
```

You now have all the tools and configurations to author and query Sanity content with a Type-safe, excellent developer experience. Now it's finally time to query and display Sanity content.


## Automatic type inference


Sanity TypeGen contains a feature to map GROQ queries against their types automatically. However, this is done by extending the Sanity Client package, as you will see at the bottom of the automatically generated types file.


```typescript:src/sanity/types.ts
// Query TypeMap
import "@sanity/client";
declare module "@sanity/client" {
```

Since we are using the next Sanity package and have not installed Sanity Client directly, this automatic type inference may not work. 


**Install** Sanity Client as a dependency to solve this before the next lesson.


```sh
pnpm add @sanity/client
```


---

## Lesson 7: Fetch Sanity Content
https://www.sanity.io/learn/course/content-driven-web-application-foundations/fetch-sanity-content

Query for your content using Sanity Client, a library compatible with the Next.js cache and React Server Components for modern, integrated data fetching.

> [Video: Fetch Sanity Content](https://www.sanity.io/learn/course/content-driven-web-application-foundations/fetch-sanity-content)

Sanity content is typically queried with GROQ queries from a configured [Sanity Client](https://www.sanity.io/docs/js-client). Fortunately, one has already been created for you.


- [ ] **Open** `src/sanity/lib/client.ts` to confirm it exists in your project.


Sanity Client is built to run in any JavaScript run time and in any framework. It is also compatible with Next.js caching features, React Server Components, and the App Router. 


It also provides ways to interact with Sanity projects and even write content back to the Content Lake with mutations. You'll use some of these features in later lessons.


It's time to put everything we've set up to work. In this lesson, you'll create a route to serve as a Post index page and a dynamic route to display an individual post.


## Next.js App Router


For now, you'll focus on data fetching at the top of each route. React Server Components allow you to perform fetches from inside individual components. Future lessons may address where this is beneficial. For now, our queries are simple enough – and GROQ is expressive enough – to get everything we need at the top of the tree.


> [!TIP]
> See the [Next.js App Router](https://nextjs.org/docs/app/building-your-application/routing) documentation for more details about file-based routing and how file and folder names impact URLs


The most significant change we'll make first is creating a separate "Route Group" for the entire application front end. This route group will separate the front end layout code from the Studio without affecting the URL. It is also useful when integrating Visual Editing and displaying the front end *inside* the Studio.


- [ ] **Create** a new `(frontend)` directory and **duplicate** `layout.tsx` into it


```sh
mkdir -p "src/app/(frontend)" && cp "src/app/layout.tsx" "src/app/(frontend)/"
```

You should now have **two** `layout.tsx` files inside the app folder at these locations:


```
src
└── app
    ├── // all other files
    ├── layout.tsx
    └── (frontend)
        └── layout.tsx
```

The `(frontend)/layout.tsx` file has duplicated `html` and `body` tags, but you'll update the file those later in the lesson.


- [ ] **Update **the root `layout.tsx` file to remove `globals.css` 


## Update the home page


Later in this track, the home page will become fully featured. For now, it just needs a link to the posts index.


- [ ] **Move** `page.tsx` into the `(frontend)` folder

- [ ] **Update** your home page route to add basic navigation to the posts index.


```tsx:src/app/(frontend)/page.tsx
import Link from "next/link";

export default async function Page() {
  return (
    <section className="container mx-auto grid grid-cols-1 gap-6 p-12">
      <h1 className="text-4xl font-bold">Home</h1>
      <hr />
      <Link href="/posts">Posts index &rarr;</Link>
    </section>
  );
}
```

> [!TIP]
> Next.js provides the [`<Link />` component](https://nextjs.org/docs/pages/api-reference/components/link) as an enhancement to the [HTML anchor](https://developer.mozilla.org/en-US/docs/Web/HTML/Element/a) (`<a>`) element.


You should now have a basic home page like this:


![Basic home page](https://cdn.sanity.io/images/3do82whm/next/6f35be43157c8edf9d8c478c5e9b8f39743f0a6a-2144x1388.png)

## Create a post-index page


This page will list up to 12 of the latest post documents. Inside this route:


- The configured Sanity Client is imported as `client`

- The GROQ query `POSTS_QUERY` is used by `client.fetch`

- Thanks to automatic type inference, the response will be typed `POSTS_QUERYResult`

- [ ] **Create** a new directory for a post-index page to fetch all `post` type documents


```tsx:src/app/(frontend)/posts/page.tsx
import Link from "next/link";
import { client } from "@/sanity/lib/client";
import { POSTS_QUERY } from "@/sanity/lib/queries";

const options = { next: { revalidate: 60 } };

export default async function Page() {
  const posts = await client.fetch(POSTS_QUERY, {}, options);

  return (
    <main className="container mx-auto grid grid-cols-1 gap-6 p-12">
      <h1 className="text-4xl font-bold">Post index</h1>
      <ul className="grid grid-cols-1 divide-y divide-blue-100">
        {posts.map((post) => (
          <li key={post._id}>
            <Link
              className="block p-4 hover:text-blue-500"
              href={`/posts/${post?.slug?.current}`}
            >
              {post?.title}
            </Link>
          </li>
        ))}
      </ul>
      <hr />
      <Link href="/">&larr; Return home</Link>
    </main>
  );
}
```

> [!TIP]
> Next.js supports [React Server Components](https://nextjs.org/docs/app/building-your-application/rendering/server-components), which allow you to fetch and `await` data within the component. Read more on the Next.js documentation.


### Viewing the post-index


You should now have a post index page at [http://localhost:3000/posts](http://localhost:3000/posts) like this:


![Blog posts index web page](https://cdn.sanity.io/images/3do82whm/next/f7951171b80f0ed0024178315cb49450ca6c1e75-2144x1388.png)

### Current cache configuration


The `options` variable passed into the Sanity Client is a light configuration for Next.js caching. You should know that with these settings, the cache has been configured to only update pages at most every 60 seconds.


Finding the right balance between fresh and stale content is a complex topic, and there are ways to mitigate the concerns of your content creators and end users to find a solution for everyone. 


If you'd like to learn more on the topic and continue to configure caching manually, see: [Controlling cached content in Next.js](https://www.sanity.io/learn/course/controlling-cached-content-in-next-js). 


What's better than manually configuring the cache? **Never doing it.**


## Live by default


The `next-sanity` package contains helper functions to perform fetches that take advantage of the [Live Content API](https://www.sanity.io/learn/content-lake/live-content-api). So every fetch for data is automatically cached and revalidated using the built-in tag-based revalidation.


- [ ] **Update **the frontend `layout.tsx` file to include `SanityLive`


```tsx:src/app/(frontend)/layout.tsx
import { SanityLive } from '@/sanity/lib/live'

export default function FrontendLayout({
  children,
}: Readonly<{
  children: React.ReactNode
}>) {
  return (
    <>
      {children}
      <SanityLive />
    </>
  )
}
```

- [ ] **Update** the post index page's fetch from `client` to `sanityFetch`


```tsx:src/app/(frontend)/posts/page.tsx
import Link from "next/link";
import { sanityFetch } from "@/sanity/lib/live";
import { POSTS_QUERY } from "@/sanity/lib/queries";

export default async function Page() {
  const { data: posts } = await sanityFetch({ query: POSTS_QUERY });

  return (
    <main className="container mx-auto grid grid-cols-1 gap-6 p-12">
      <h1 className="text-4xl font-bold">Post index</h1>
      <ul className="grid grid-cols-1 divide-y divide-blue-100">
        {posts.map((post) => (
          <li key={post._id}>
            <Link
              className="block p-4 hover:text-blue-500"
              href={`/posts/${post?.slug?.current}`}
            >
              {post?.title}
            </Link>
          </li>
        ))}
      </ul>
      <hr />
      <Link href="/">&larr; Return home</Link>
    </main>
  );
}
```

Now when you publish changes in Sanity Studio, you should see those updates take place live. No more caching. No more hammering the refresh button.


### Sanity TypeGen in Beta


The GROQ query included a filter to ensure only documents with a `slug.current` was defined – but the TypeGen generated a type where `slug.current` could be `null`. 


This is a known limitation of TypeGen while it is in beta.


## Create an individual post page


The GROQ query `POST_QUERY` used a variable `$slug` to match a route with a `post` in the dataset. For this, you can use a "Dynamic Route," where a segment in the URL is made available to the server component for the route as a prop.


> [!TIP]
> Read more about [Next.js Dynamic Routes](https://nextjs.org/docs/app/building-your-application/routing/dynamic-routes) on their documentation


So, for example, because you're creating a route at:


```
src/app/(frontend)/posts/[slug]/page.tsx
```

If you visited the URL:


```
http://localhost:3000/posts/hello-world
```

The route would have this `params` object in its `props`:


```json
{ "slug": "hello-world" }
```

Which can then be passed into Sanity Client to match the value of `slug` to a value in a document.


- [ ] **Create** a new route for an individual post


```tsx:src/app/(frontend)/posts/[slug]/page.tsx
import { sanityFetch } from "@/sanity/lib/live";
import { POST_QUERY } from "@/sanity/lib/queries";
import { notFound } from "next/navigation";
import Link from "next/link";

export default async function Page({
  params,
}: {
  params: Promise<{ slug: string }>;
}) {
  const { data: post } = await sanityFetch({
    query: POST_QUERY,
    params: await params,
  });

  if (!post) {
    notFound();
  }

  return (
    <main className="container mx-auto grid grid-cols-1 gap-6 p-12">
      <h1 className="text-4xl font-bold text-balance">{post?.title}</h1>
      <hr />
      <Link href="/posts">&larr; Return to index</Link>
    </main>
  );
}
```

You should now be able to click any of the links on the posts index page and see the title of a blog post with a link back to the index:


![Individual post page showing just the title](https://cdn.sanity.io/images/3do82whm/next/14545936d26cac969adafd662cda50621ddd1ded-2144x1388.png)

You now have a basic – but functional – web application. It's currently trapped in your local development environment. And while it isn't much, it's an excellent habit to deploy early and often so you can get into a habit of continuous improvement. 


You'll deploy your web application to the world in the following lessons.


---

## Lesson 8: Git-based workflows
https://www.sanity.io/learn/course/content-driven-web-application-foundations/git-based-workflows

Version control, collaborate on, and deploy your Next.js application by storing it in a Git repository.

> [Video: Git-based workflows](https://www.sanity.io/learn/course/content-driven-web-application-foundations/git-based-workflows)

If you've built modern web applications with a developer team, you may already be familiar with Git and GitHub. This lesson explains the basics for anyone new to Git-based version control or unfamiliar with branch-based workflows for collaborating with other developers on a project. 


A strategy for safely iterating on a project is the key to working confidently on updates, new features, and improvements.


> [!TIP]
> If you're entirely new to Git, Epic Web has a [free Git Fundamentals tutorial](https://www.epicweb.dev/tutorials/git-fundamentals), which will get you up to speed with the basics.


## Create a remote repository


For this lesson, you will need an account on GitHub. You could use other Git providers if you choose, but you would need to adapt the tasks in this lesson accordingly.


Currently, your Next.js application is only available on your machine. It must be deployed on Vercel's hosting to be shared with the world. To do that, there is an intermediary step of uploading your files to a Git repository.


- [ ] **Create or log in** to your [GitHub account](https://github.com/)

- [ ] From the GitHub dashboard, click "New" to create a new repository.


![GitHub dashboard for creating a new repository](https://cdn.sanity.io/images/3do82whm/next/473b6851f9d2f67b32341802df97be05a5529b49-2144x1388.png)

You can give your repository any name. You can also choose to make it Public or Private.


On the next screen, you should see instructions for "quick setup" and commands to run for either a new or existing repository. When you ran `create-next-app`, it initialized one automatically, so you can follow the instructions "... or push an existing repository from the command line."


![GitHub instructions for pushing an existing repository](https://cdn.sanity.io/images/3do82whm/next/7c68715dc8e1aba960da361ba0891f46998033a0-2144x1388.png)

The code for my repository looks like this above, but the first line will differ from yours as it has your account and repository name.


- [ ] **Run** the command to push an existing repository

- [ ] **Refresh** the page, and you should now see *most* of your local files in your remote GitHub repository


![Image](https://cdn.sanity.io/images/3do82whm/next/2483919ccd3687615dc0ae9ee4ac739317a4632d-2144x1388.png)

## Updating remote


Currently, the remote repository only contains the **original** files created when you ran `create-next-app`, not any Sanity-related files you created or changed after that. 


You must "commit" those files locally and push them to the `main` branch.


- [ ] **Run** the following from your terminal to add the remaining local files to `main`


```sh
git add .
git commit -m "add sanity files"
git push origin main
```

Refresh your repository on GitHub, and you should see the additional files.


> [!WARNING]
> Pushing directly to the `main` branch like this is *okay* this once, but it's not great for tracking the history of changes and is *terrible* for working collaboratively with others. Continuing to do this will likely result in problems.


Before connecting your repository to Vercel to host your application, it's good to have a strategy **now** for working locally on new features and updating remotely.


## Workflow for making changes


Your local files are now stored remotely on GitHub as a point-in-time snapshot. At this moment, your local and remote files are in sync. 


Each time you work locally, you will need to update your remote Git repository to update your hosted Next.js application.


Most commonly, this would be done by: 


1. creating a "branch" off of the `main` branch

2. committing changes to local files

3. pushing that branch to remote

4. creating a "pull request" from the branch to `main`

5. merging those changes into the `main` branch remotely

6. updating your `main` branch locally


Let's try this now.


- [ ] **Run** the following command to create a new branch named `update-readme`


```sh
git checkout -b update-readme
```

- [ ] **Update** the `README.md` with the following:


```markdown
# Sanity and Next.js

This is a [Sanity.io](https://sanity.io) and [Next.js](https://nextjs.org) project created following a Course on [Sanity Learn](https://sanity.io/learn).

## Getting Started

First, run the development server:

```bash
npm run dev
```

- Open [http://localhost:3000](http://localhost:3000) with your browser to see the result.
- Open [http://localhost:3000/studio](http://localhost:3000/studio) to edit content.
```

> [!NOTE]
> Keeping the readme of a project up to date with helpful notes for new developers joining the project in the future is good practice.


- [ ] **Run** this command to check the current local status of all files:


```sh
git status
```

You should see the following, which shows us that the `README.md` file has been modified, but nothing is yet staged for a commit:


```text
On branch update-readme
Changes not staged for commit:
  (use "git add <file>..." to update what will be committed)
  (use "git restore <file>..." to discard changes in working directory)
        modified:   README.md

no changes added to commit (use "git add" and/or "git commit -a")
```

- [ ] **Run** the following commands to add all changed files and create a commit message:


```
git add .
git commit -m "update readme"
```

- [ ] **Run** this command to push the local state of this branch to the remote:


```
git push -u origin update-readme
```

You should get a confirmation in the terminal that it was successfully completed, and a URL to visit to create a pull request.


- [ ] **Create** a pull request: On GitHub, in your repository, go to the "Pull requests" tab and create a new one to merge `update-readme` into `main`.


You should then see a page just like this: 


![Image](https://cdn.sanity.io/images/3do82whm/next/c0935c0bba2a40b969b327c0d4be1bfe290e5327-2144x1388.png)

Creating a "PR" is an essential step in your future workflow for your fellow developers and content creators. 


On a developer team, you may have a colleague review and approve your changes before they are merged.


For your authors, and once you have connected this repository to Vercel, this will create a "Preview build" of your Next.js application so that you can see the results of your latest round of changes in the hosted environment *before* merging.


Preview builds are great for collaboration so you can share updated versions of the application without affecting the production environment. This is useful for testing new front end features as well as showing authors any updated Sanity Studio configuration.


From this page, you can also see an overview of the changes being made. In this PR, it is only one file with a few lines changed.


- [ ] Scroll to the bottom and click "Merge pull request" and "Confirm merge."


Now, the `main` branch has the latest version of your code, but only remotely. In your local development environment, the `main` branch is out of date.


- [ ] **Run** the following in the terminal to switch back to the main branch:


```
git checkout main
```

If you open `README.md` now you'll notice it has reverted to the previous version, because this is what it looked like when you were last **locally** working on `main`.


- [ ] **Run** the following in the terminal to pull the latest version of main from remote:


```
git pull origin main
```

Now `README.md` is as you had it before, and both your local and remote versions of the `main` branch are up to date.


You now have a *basic* version of a Git workflow to follow. Once other developers are working on the same repository, they'll all have their branches and pull requests which you may be involved in reviewing. You'll also need to update your local version of the `main` branch before creating any new branches.


> [!TIP]
> Larger teams may benefit from even more structure around Git workflows. [Conventional commits](https://www.conventionalcommits.org/) is one commonly implemented pattern.


Your code is now hosted remotely, but your web application is not. With this setup, it's time to go live. Let's connect Vercel to your repository in the next lesson.


---

## Lesson 9: Go live on Vercel
https://www.sanity.io/learn/course/content-driven-web-application-foundations/deploy-to-vercel

Publish your web application to the world. Vercel's hosting and Next.js are made for one another, so it just makes sense to put them together for this project. 

> [Video: Go live on Vercel](https://www.sanity.io/learn/course/content-driven-web-application-foundations/deploy-to-vercel)

For this lesson, you'll need a free account at Vercel. If you don't already have one, you'll be prompted to create one.


Vercel is an app deployment platform, cloud hosting provider, and much more. Not only can we host the production application there, but its tight integration with Git will create preview builds when developing new features.


In this lesson you'll connect Vercel to your GitHub account in a new project to automatically and continuously deploy your Next.js application to its hosting.


## Create a new Vercel project


- [ ] **Create** a new Vercel project at [vercel.com/new](https://vercel.com/new)


Connect the Vercel project to the repository you made in the last Lesson.


- [ ] Ensure the **Framework Preset** has been set to **Next.js**

- [ ] Populate all of the **Environment Variables** with values from your local `.env.local` file.


![Vercel new project settings page](https://cdn.sanity.io/images/3do82whm/next/3b243f446c2476c2cd6b604210abfe2a162f7390-2144x1388.png)

- [ ] Click **Deploy**

> [!WARNING]
> **Getting a deploy error? **You may need to remove `--turbopack` from the build script in `package.json`, this is likely a temporary issue.


You should now be able to watch the **Build Logs** update as your repository is cloned, its dependencies installed, the site built, and your production Next.js application deployed to hosting.


The same site you were working on locally should now be deployed online for everyone to see.


![Blog post index page hosted on Vercel](https://cdn.sanity.io/images/3do82whm/next/637b757ab1096e237c9dfe0336d607e1dbe87904-2144x1388.png)

### The Vercel CLI


It's worth noting that Vercel also has a CLI tool for interacting with projects locally.


> [!TIP]
> Read about the [Vercel CLI](https://vercel.com/docs/cli) in their documentation.


### Hosted Sanity Studio


On the hosted web application, visit `/studio` to open your Sanity Studio. The first time you do you'll be prompted to add the current URL as a CORS origin. This is required for every unique URL that wishes to interact with your Sanity content client-side. It is okay to click "Continue."


> [!TIP]
> For more detail on CORS and Sanity see the documentation: [Access your data (CORS)](https://www.sanity.io/learn/content-lake/cors)


### Datasets as environments


You can make changes to content in your hosted Studio, and those changes will also be mirrored locally. This is because wherever your Studio is used, it is always writing to and reading from the Content Lake.


For this reason, developer teams will often use Sanity datasets as a proxy for "environments." 


Creating and migrating content between datasets is made simple with the Sanity CLI. The commands below cover creating a new dataset named `development`, and updating it to the current state of the `production` dataset.


- [ ] **Run** the following to create a new dataset named `development`


```sh
pnpm dlx sanity@latest dataset create development
```

Choose a **public** dataset again for this project. For your mission-critical future projects, you may prefer **private**. 


- [ ] **Run** this to export the current documents and assets from the `production` dataset


```sh
pnpm dlx sanity@latest dataset export production
```

- [ ] Run this to import the `production.tar.gz` dataset backup into the `development` dataset


```sh
npx sanity@latest dataset import production.tar.gz development
```

- [ ] **Update** the value of your local `.env` file to use the `development` dataset


```text:.env.local
NEXT_PUBLIC_SANITY_DATASET="development"
```

Now your content updates during development and testing won't impact the production site. You may also choose to configure Vercel to target a different dataset for preview and production builds.


You can now delete the `production.tar.gz` backup file.


> [!TIP]
> [Cross-Dataset Duplicator](https://www.sanity.io/plugins/cross-dataset-duplicator) is a popular plugin for allowing authors to move content between datasets from inside the Studio.


## Quick review


You now have the foundational skills to build a content-editable web application:


- An account at Sanity for storing content

- A basic Next.js application for displaying that content

- A lightly-configured Sanity Studio for content editing

- An account at GitHub for version controlling your files

- A Git workflow for branching, committing changes and merging

- An account at Vercel for hosting preview and production builds of your web application


This is all *functional*, but it's far from *finished*. In the next lessons you'll look at doing more interesting things on the front end with your content.


---

## Lesson 10: Displaying images
https://www.sanity.io/learn/course/content-driven-web-application-foundations/displaying-images

Sanity stores your image assets, learn how both the Sanity CDN and Next.js's Image component help optimize rendering them.

> [Video: Displaying images](https://www.sanity.io/learn/course/content-driven-web-application-foundations/displaying-images)

## Why optimized assets matter


For most web applications, the majority of data sent over the network will be for assets – such as images and videos. Your end users want your application to load as fast as possible. It's also well-known that faster-loading sites directly improve conversion rates.


Optimizing web applications for performance is an intense topic. This lesson aims to give essential guidance for serving images using utilities provided by Sanity and Next.js.


> [!TIP]
> See [Optimising Largest Contentful Paint](https://csswizardry.com/2022/03/optimising-largest-contentful-paint/) on CSS Wizardry for an example of how much further this topic goes.


## Git workflow reminder


This is the last time we'll remind you to create a branch when working on new features. We trust you'll get in the habit from now on.


- [ ] **Create** a new local branch before continuing.


```
git checkout -b add-images
```

## Uploading and querying images


Assets uploaded to the Content Lake are available on the Sanity CDN to render on your front end. Parameters can be added to an image URL to determine its size, cropping, file type, and more.


> [!TIP]
> See [Presenting images](https://www.sanity.io/learn/apis-and-sdks/presenting-images) in the documentation for more details


When you upload an image to the Content Lake, an additional document is created to represent that asset, along with details of its metadata and more. 


Uploading an image from within a document creates a reference to that asset document.


- [ ] **Upload** an image to the "Main image" field of a `post` document and publish


Now you can query for a single post-type document with an image and return just the image field.


- [ ] **Run** the query below in Vision in your Sanity Studio


```groq
*[_type == "post" && defined(mainImage)][0]{
  mainImage
}
```

The response should contain a `_ref` inside the `asset` attribute.


There may also be crop information and an `alt` string field.


```json
{
  "mainImage": {
    "_type": "image",
    "asset": {
      "_ref": "image-a9302e7a5555e209623897eeec703c39499db23e-5785x3857-jpg",
      "_type": "reference"
    }
  }
}
```

### Additional fields and alt text


The `image` field schema type is similar to the `object` type in that it can have additional fields. One is already configured for you for "alternative text."


"Alt" text is used as a fallback when the image is not yet loaded and helps describe the image for screen readers. It is an essential addition to the accessibility of your web application.


> [!TIP]
> [See the MDN documentation](https://developer.mozilla.org/en-US/docs/Web/API/HTMLImageElement/alt) for more information about the `alt` attribute.


> [!TIP]
> Your current schema type setup stores the `alt` text in **this** document. The popular [Media browser plugin](https://www.sanity.io/plugins/sanity-plugin-media) writes alt text to the **asset** document.


Including alt text for images is important enough that your Studio schema should enforce it as a requirement. Use a custom validation rule to require the alt field when the asset field has a value.


- [ ] **Update** the post-type schema to add a validation rule to the `alt` text field


```typescript:src/sanity/schemaTypes/postType.ts
defineField({
  name: 'alt',
  type: 'string',
  title: 'Alternative text',
  validation: rule => rule.custom((value, context) => {
    const parent = context?.parent as {asset?: {_ref?: string}}

    return !value && parent?.asset?._ref ? 'Alt text is required when an image is present' : true
  }),
})
```

### Resolving the asset reference


Using the GROQ operator to resolve a reference (`->`) you can return everything from the `asset` attribute.


- [ ] **Run** the query below in Vision to return the referenced asset document


```json
*[_type == "post" && defined(mainImage)][0]{
  mainImage {
    ...,
    asset->
  }
}
```

You should now have a much larger response, and within it, a `url` attribute with the full path to the original image. 


This is useful, however:


- It would be slow for end-users and wasteful of bandwidth to serve a full-size image for every request.

- Because Sanity image URLs follow a strict convention, the [`@sanity/image-url`](https://www.sanity.io/docs/image-url) package allows you to create image URL's *without* resolving references – using just the project ID, dataset and asset ID.

> [!TIP]
> [`@sanity/asset-utils`](https://www.npmjs.com/package/@sanity/asset-utils) is another handy library for working with Sanity Assets using just their ID


Next, you'll update the front-end to display the "main image" with a dynamically generated URL.


## On-demand transformations


Images served from Sanity's CDN can be resized and delivered in different qualities and formats, all by appending specific parameters to the URL. Serving images closer to the size they are viewed and in the most efficient format is the best way to reduce bandwidth and loading times.


When you ran `sanity init` with the Next.js template, a file was created for you with the image builder preconfigured with your project ID and dataset name:


```typescript:src/sanity/lib/image.ts
import createImageUrlBuilder from '@sanity/image-url'
import { SanityImageSource } from "@sanity/image-url/lib/types/types";

import { dataset, projectId } from '../env'

// https://www.sanity.io/docs/image-url
const builder = createImageUrlBuilder({ projectId, dataset })

export const urlFor = (source: SanityImageSource) => {
  return builder.image(source)
}
```

This `urlFor` function will accept a Sanity image – as a full asset document, or even just the ID as a string – and return a method for you to generate a full URL.


- [ ] **Update** your individual post route to render an image if it exists:


```tsx:src/app/posts/[slug]/page.tsx
import { notFound } from "next/navigation";
import Link from "next/link";
import { sanityFetch } from "@/sanity/lib/live";
import { POST_QUERY } from "@/sanity/lib/queries";
import { urlFor } from "@/sanity/lib/image";

export default async function Page({
  params,
}: {
  params: Promise<{ slug: string }>;
}) {
  const { data: post } = await sanityFetch({
    query: POST_QUERY,
    params: await params,
  });

  if (!post) {
    notFound();
  }

  return (
    <main className="container mx-auto grid grid-cols-1 gap-6 py-12">
      {post?.mainImage ? (
        <img
          className="w-full aspect-[800/300]"
          src={urlFor(post.mainImage)
            .width(800)
            .height(300)
            .quality(80)
            .auto("format")
            .url()}
          alt={post?.mainImage?.alt || ""}
          width="800"
          height="300"
        />
      ) : null}
      <h1 className="text-4xl font-bold text-balance">{post?.title}</h1>
      <hr />
      <Link href="/posts">&larr; Return to index</Link>
    </main>
  );
}
```

The post to which you uploaded an image and published the changes should now render the image from Sanity.


![Blog post web page showing an image and title](https://cdn.sanity.io/images/3do82whm/next/cb8c7a29637e54a732c50101281c18d0034ba0b6-2144x1388.png)

Take note of the methods passed along to `urlFor`, which created a unique URL to the image which was cropped to `800x300` pixels, a quality of 80%, in the most efficient file format that the current browser can display, and finally returned a string to the complete URL.


> [!TIP]
> See [`@sanity/image-url`](https://www.sanity.io/docs/image-url) for the full list of available methods and their uses.


If you inspect the URL of the image, you should see a result like this:


```
https://cdn.sanity.io/images/mml9n8hq/production/a9302e7a5555e209623897eeec703c39499db23e-5785x3857.jpg?rect=0,845,5785,2169&w=800&h=300&q=80&auto=format
```

### Crop and hotspot


While the front end is set to determine the size of the image, your content creators may want to draw focus to a specific region. In other CMSes, this typically means uploading several versions of the same image at different crop sizes. With Sanity, you can store the crop and focal intentions as data.


Within your Sanity Studio `post` schema type, the "main image" field contains an option of `hotspot` set to `true`.


```typescript
defineField({
  name: 'mainImage',
  type: 'image',
  options: {
    hotspot: true,
  },
  // ... other settings
}),
```

This enables the crop and hotspot tool inside Sanity Studio, allowing creators to set the bounds of the image that should be displayed and, when cropped, which area it should focus on.


![Crop and hotspot tool on an image in Sanity Studio](https://cdn.sanity.io/images/3do82whm/next/a10d0d6b80db2e3d67c8293097b5dd5dbf366412-2144x1388.png)

Because the crop and hotspot values were returned from the GROQ query for the asset, they were sent along when creating the URL.


- [ ] **Update** the image in the document with a crop area and focal point and publish the document.


Now, your image should look somewhat different on the front end, with its best efforts made to utilize the crop area and focal point.


![A blog post web page with an image of a cake in focus](https://cdn.sanity.io/images/3do82whm/next/4724a08b1324ac081458f2feac34446011f8913f-2144x1388.png)

You've now successfully uploaded, editorialized, and displayed an image from Sanity on the front end that is performant and accessible. However, your IDE may be showing a warning that the use of the `<img>` element may produce sub-par performance. There is some logic to this, as the rendering of an image can be further enhanced for performance than what you currently have.


Next.js prefers you use their `Image` component, we can switch to that now.


## Next.js Image component


Fast image rendering is crucial to fast web applications, so any improvements that can be made in this area are beneficial. Next.js ships an `Image` component for this reason.


> [!TIP]
> See Vercel's documentation for more about the [Next.js Image component](https://nextjs.org/docs/app/building-your-application/optimizing/images) and optimization


### Update Next.js config


The Next.js documentation mentions that you'll need to update the Next.js config to accept the Sanity CDN URL to use the `Image` component with remote images.


- [ ] **Update** `next.config.ts` to include the Sanity CDN URL


```javascript:next.config.ts
import type { NextConfig } from "next";

const nextConfig: NextConfig = {
  images: {
    remotePatterns: [
      {
        protocol: "https",
        hostname: "cdn.sanity.io",
      },
    ],
  },
};

export default nextConfig;
```

Now update your individual post route to use the imported Next.js component `<Image />` instead of the HTML `<img>`. It is important to note that this component requires a specified height and width.


- [ ] **Update** the post route to use `Image` from `next/image`:


```tsx:src/app/(frontend)/posts/[slug]/page.tsx
import { notFound } from "next/navigation";
import Image from "next/image";
import Link from "next/link";
import { sanityFetch } from "@/sanity/lib/live";
import { POST_QUERY } from "@/sanity/lib/queries";
import { urlFor } from "@/sanity/lib/image";

export default async function Page({
  params,
}: {
  params: Promise<{ slug: string }>;
}) {
  const { data: post } = await sanityFetch({
    query: POST_QUERY,
    params: await params,
  });

  if (!post) {
    notFound();
  }

  return (
    <main className="container mx-auto grid grid-cols-1 gap-6 p-12">
      {post?.mainImage ? (
        <Image
          className="w-full aspect-[800/300]"
          src={urlFor(post.mainImage)
            .width(800)
            .height(300)
            .quality(80)
            .auto("format")
            .url()}
          alt={post?.mainImage?.alt || ""}
          width="800"
          height="300"
        />
      ) : null}
      <h1 className="text-4xl font-bold text-balance">{post?.title}</h1>
      <hr />
      <Link href="/posts">&larr; Return to index</Link>
    </main>
  );
}
```

Once the page reloads, open the web inspector and look at the generated `<img>` element. You will notice it has several more attributes than before. The `loading` and `decoding` attributes, in particular, are subtle performance improvements.


```html
<img 
  alt="Chocolate layer cake" 
  loading="lazy" 
  width="800" 
  height="300" 
  decoding="async" 
  data-nimg="1" 
  class="w-full aspect-[800/300]" 
  style="color:transparent" 
  srcset="/_next/image?url=https..."
>
```

You're now retrieving images from Sanity's CDN with the best possible front end performance thanks to the Next.js `Image` component.


The next building block of web applications to render is rich text and block content. Let's get acquainted with Portable Text in the next lesson.


---

## Lesson 11: Block content and rich text
https://www.sanity.io/learn/course/content-driven-web-application-foundations/block-content-and-rich-text

Put the power of Portable Text to work for rendering simple formatted text up to complex block objects.

> [Video: Block content and rich text](https://www.sanity.io/learn/course/content-driven-web-application-foundations/block-content-and-rich-text)

You may be familiar with "rich text" from almost every text editing interface you've used. Any text with formatting applied — like bold, italic, etc — is considered rich text. Displaying rich text is one of the fundamental building blocks of the web.


"Block content" is a more modern concept in which rich media — like video and images — or complex objects are editable as "blocks" within paragraphs of rich text. 


Editing block content and rich text typically takes one of two forms.


Visual editors like Notion or WordPress' "Gutenberg" block editor allow you to author block content and rich text with a focus on visuals and a locked-down interface. Extracting the blocks and text as data is not simple and typically does not follow a published standard.


The alternative is authoring the formatting markup of text inline. Examples include Markdown and MDX, where there are many "standards," authoring the styles inline requires deep knowledge, and rendering the content requires complex parsers.


Sanity created, standardized, and maintains tooling for Portable Text to address these challenges.


## What is Portable Text?


Portable Text is a published standard for storing block content and rich text as an array of objects compatible with JSON. 


> [!TIP]
> If you're interested, the [specification for Portable Text](https://www.portabletext.org/) is published on GitHub.


Portable Text is not intended to be human-readable or human-authored. Tooling is provided for both of these purposes.


### Authoring Portable Text


The Portable Text editor — which you see as the `body` field inside `post`-type documents — is maintained by Sanity for the authoring of Portable Text. It has many options as part of the Studio configuration API. Your content creators style rich text and insert blocks, and the Portable Text editor creates the correct data structures.


### Querying Portable Text


One of the significant benefits of authoring in this standard is that the data structures it writes are queryable with GROQ. It makes queries like *"find every post document with a link"* or *"extract all the headings from this text to generate a table of contents"* possible.


### Rendering Portable Text


Converting this array of objects into HTML (or any other output) is a matter of mapping over it and serializing each item into the desired output. Fortunately Sanity also provides tooling for this.


Before doing this in your project, let's get some styling in place first.


## Tailwind Typography


Tailwind CSS provides a plugin to add "good defaults" to blocks of rich text – and an option to revert to default styles for blocks – with the [Typography Plugin](https://github.com/tailwindlabs/tailwindcss-typography). Install it now into the project.


- [ ] **Run** the following to install the Tailwind Typography plugin


```sh
pnpm add -D @tailwindcss/typography
```

- [ ] **Update** the `globals.css` file to use it


```css:src/app/globals.css
@import "tailwindcss";
@plugin "@tailwindcss/typography";

```

## @portabletext/react


Sanity provides a `PortableText` component from [`@portabletext/react`](https://www.npmjs.com/package/@portabletext/react) to render Portable Text blocks into React components. It was installed as part of `next-sanity`. You can now import this component


- [ ] **Update** the individual post page route


```tsx:src/app/(frontend)/posts/[slug]/page.tsx
import { notFound } from "next/navigation";
import Image from "next/image";
import Link from "next/link";
import { PortableText } from "next-sanity";
import { sanityFetch } from "@/sanity/lib/live";
import { POST_QUERY } from "@/sanity/lib/queries";
import { urlFor } from "@/sanity/lib/image";

export default async function Page({
  params,
}: {
  params: Promise<{ slug: string }>;
}) {
  const { data: post } = await sanityFetch({
    query: POST_QUERY,
    params: await params,
  });

  if (!post) {
    notFound();
  }

  return (
    <main className="container mx-auto grid grid-cols-1 gap-6 p-12">
      {post?.mainImage ? (
        <Image
          className="w-full aspect-[800/300]"
          src={urlFor(post.mainImage)
            .width(800)
            .height(300)
            .quality(80)
            .auto("format")
            .url()}
          alt={post?.mainImage?.alt || ""}
          width="800"
          height="300"
        />
      ) : null}
      <h1 className="text-4xl font-bold text-balance">{post?.title}</h1>
      {post?.body ? (
        <div className="prose">
          <PortableText value={post.body} />
        </div>
      ) : null}
      <hr />
      <Link href="/posts">&larr; Return to index</Link>
    </main>
  );
}
```

![A blog post web page showing paragraphs of text](https://cdn.sanity.io/images/3do82whm/next/1c7dff07f120b31a98f4e22fbe2826b7dcc6980e-2144x1388.png)

You should now see the rich text of any published document rendered with sensible default styling. The base configuration of the `PortableText` component includes rendering headings (`h1`, `h2`, etc) and lists (`li`, `ol`, etc).


We don't yet have any block content. Let's look at that in the Studio first, then render on the front end.


## Adding blocks to the editor


Open `blockContentType.ts` and you will see the current configuration of the Portable Text editor. It contains styles, lists, marks, and annotations you could add or remove.


You can load additional blocks into the editor at the end of the array. An `image` field is already configured.


- [ ] **Add** an image to any Portable Text field and publish the document.


![Sanity Studio with an image block inside the Portable Text editor](https://cdn.sanity.io/images/3do82whm/next/fa165f876fd17e9d91e8564d2315e7a986bcef20-2144x1388.png)

If you refresh your front end for this post now, you won't see the image rendered on the page. This is because the `PortableText` component does not know what to do with it.


To solve this, you can create an object of components that can replace or extend the defaults.


- [ ] **Create** a new file for Portable Text components


```tsx:src/sanity/portableTextComponents.tsx
import Image from "next/image";
import { PortableTextComponents } from "next-sanity";
import { urlFor } from "@/sanity/lib/image";

export const components: PortableTextComponents = {
  types: {
    image: (props) =>
      props.value ? (
        <Image
          className="rounded-lg not-prose w-full h-auto"
          src={urlFor(props.value)
            .width(600)
            .height(400)
            .quality(80)
            .auto("format")
            .url()}
          alt={props?.value?.alt || ""}
          width="600"
          height="400"
        />
      ) : null,
  },
};
```

- [ ] **Update** your post route to import this components configuration 


```tsx:src/app/(frontend)/posts/[slug]/page.tsx
import { components } from "@/sanity/portableTextComponents";
```

- [ ] **Update** the `PortableText` component to accept it as a prop


```tsx:src/app/(frontend)/posts/[slug]/page.tsx
<PortableText value={post.body} components={components} />
```

You should now have the image from your Portable Text field rendered inline. You could adjust the styling or size to give it different treatment.


![Blog post web page showing image of a stand mixer](https://cdn.sanity.io/images/3do82whm/next/b844e4a546669375d902708c439c8b6d9ba0caf7-2144x1388.png)

You might also extend the `image` field inside the `body` field to give your authors some additional options for presenting the image.


You've now finished your final fundamental. Your functional blog lacks some polish. Let's spruce it up in the next lesson.


---

## Lesson 12: Build up the blog
https://www.sanity.io/learn/course/content-driven-web-application-foundations/build-up-the-blog

With all the basics in place, let's blow out our blog front end into something more visually impressive.

> [Video: Build up the blog](https://www.sanity.io/learn/course/content-driven-web-application-foundations/build-up-the-blog)

![A nicely designed post index page](https://cdn.sanity.io/images/3do82whm/next/456fd8b7757f0c0a8a279a154b0fb75f5b5ba02c-2144x1388.png)

For the remaining courses in this track, a much richer front end that requests and renders more content from your three schema types will be helpful. In this lesson, you'll build the blog into something more interesting.


## Install new dependency


To format date strings returned from Sanity documents, install [Day.js](https://www.npmjs.com/package/dayjs).


- [ ] **Run** the following to install Day.js


```sh
pnpm add dayjs
```

## Update queries and types


- [ ] **Update** your queries to request more content, including resolving `category` and `author` references.


```typescript:src/sanity/lib/queries.ts
import { defineQuery } from 'next-sanity'

export const POSTS_QUERY =
  defineQuery(`*[_type == "post" && defined(slug.current)]|order(publishedAt desc)[0...12]{
  _id,
  title,
  slug,
  body,
  mainImage,
  publishedAt,
  "categories": coalesce(
    categories[]->{
      _id,
      slug,
      title
    },
    []
  ),
  author->{
    name,
    image
  }
}`)

export const POSTS_SLUGS_QUERY =
  defineQuery(`*[_type == "post" && defined(slug.current)]{ 
  "slug": slug.current
}`)

export const POST_QUERY =
  defineQuery(`*[_type == "post" && slug.current == $slug][0]{
  _id,
  title,
  body,
  mainImage,
  publishedAt,
  "categories": coalesce(
    categories[]->{
      _id,
      slug,
      title
    },
    []
  ),
  author->{
    name,
    image
  }
}`)
```

- [ ] **Run** Typegen to update your query Types


```sh
pnpm run typegen
```

> [!NOTE]
> This command was setup during [Generate TypeScript Types](https://www.sanity.io/learn/course/content-driven-web-application-foundations/generate-typescript-types)


## Create new components


As some content will be rendered on both the post index and the individual post routes, abstracting these elements into components helps keep code somewhat DRY (don't repeat yourself).


You may like to adapt the Tailwind CSS class names to your liking.


> [!NOTE]
> Create a new directory — `/src/components` — in your Next.js application for storing components. These aren't stored in `/app`  since that directory is primarily for generating routes.


- [ ] **Create** an `Author` component


```tsx:src/components/author.tsx
import { POST_QUERYResult } from '@/sanity/types'
import { urlFor } from '@/sanity/lib/image'
import Image from 'next/image'

type AuthorProps = {
  author: NonNullable<POST_QUERYResult>['author']
}

export function Author({ author }: AuthorProps) {
  return author?.image || author?.name ? (
    <div className="flex items-center gap-2">
      {author?.image ? (
        <Image
          src={urlFor(author.image).width(80).height(80).url()}
          width={80}
          height={80}
          alt={author.name || ''}
          className="bg-pink-50 size-10 shadow-inner rounded-full"
        />
      ) : null}
      {author?.name ? (
        <p className="text-base text-slate-700">{author.name}</p>
      ) : null}
    </div>
  ) : null
}
```

- [ ] **Create** a `Categories` component


```tsx:src/components/categories.tsx
import { POST_QUERYResult } from '@/sanity/types'

type CategoriesProps = {
  categories: NonNullable<POST_QUERYResult>['categories']
}

export function Categories({ categories }: CategoriesProps) {
  return categories.map((category) => (
    <span
      key={category._id}
      className="bg-cyan-50 rounded-full px-2 py-1 leading-none whitespace-nowrap text-sm font-semibold text-cyan-700"
    >
      {category.title}
    </span>
  ))
}
```

- [ ] **Create** a `PublishedAt` component


```tsx:src/components/published-at.tsx
import { POST_QUERYResult } from '@/sanity/types'
import dayjs from 'dayjs'

type PublishedAtProps = {
  publishedAt: NonNullable<POST_QUERYResult>['publishedAt']
}

export function PublishedAt({ publishedAt }: PublishedAtProps) {
  return publishedAt ? (
    <p className="text-base text-slate-700">
      {dayjs(publishedAt).format('D MMMM YYYY')}
    </p>
  ) : null
}
```

- [ ] **Create** a `Title` component for rendering a page title in a `<h1>`


```tsx:src/components/title.tsx
import { PropsWithChildren } from 'react'

export function Title(props: PropsWithChildren) {
  return (
    <h1 className="text-2xl md:text-4xl lg:text-6xl font-semibold text-slate-800 text-pretty max-w-3xl">
      {props.children}
    </h1>
  )
}
```

- [ ] **Create** a `Post` component for rendering the above components on a single post page


```tsx:src/components/post.tsx
import { PortableText } from 'next-sanity'
import Image from 'next/image'

import { Author } from '@/components/author'
import { Categories } from '@/components/categories'
import { components } from '@/sanity/portableTextComponents'
import { POST_QUERYResult } from '@/sanity/types'
import { PublishedAt } from '@/components/published-at'
import { Title } from '@/components/title'
import { urlFor } from '@/sanity/lib/image'

export function Post(props: NonNullable<POST_QUERYResult>) {
  const { title, author, mainImage, body, publishedAt, categories } = props;

  return (
    <article className="grid lg:grid-cols-12 gap-y-12">
      <header className="lg:col-span-12 flex flex-col gap-4 items-start">
        <div className="flex gap-4 items-center">
          <Categories categories={categories} />
          <PublishedAt publishedAt={publishedAt} />
        </div>
        <Title>{title}</Title>
        <Author author={author} />
      </header>
      {mainImage ? (
        <figure className="lg:col-span-4 flex flex-col gap-2 items-start">
          <Image
            src={urlFor(mainImage).width(400).height(400).url()}
            width={400}
            height={400}
            alt=""
          />
        </figure>
      ) : null}
      {body ? (
        <div className="lg:col-span-7 lg:col-start-6 prose lg:prose-lg">
          <PortableText value={body} components={components} />
        </div>
      ) : null}
    </article>
  );
}
```

- [ ] **Create** a `PostCard` component for rendering the above components on the post index page


```tsx:src/components/post-card.tsx
import Link from 'next/link'
import Image from 'next/image'

import { Author } from '@/components/author'
import { Categories } from '@/components/categories'
import { POSTS_QUERYResult } from '@/sanity/types'
import { PublishedAt } from '@/components/published-at'
import { urlFor } from '@/sanity/lib/image'

export function PostCard(props: POSTS_QUERYResult[0]) {
  const { title, author, mainImage, publishedAt, categories } = props

  return (
    <Link className="group" href={`/posts/${props.slug!.current}`}>
      <article className="flex flex-col-reverse gap-4 md:grid md:grid-cols-12 md:gap-0">
        <div className="md:col-span-2 md:pt-1">
          <Categories categories={categories} />
        </div>
        <div className="md:col-span-5 md:w-full">
          <h2 className="text-2xl text-pretty font-semibold text-slate-800 group-hover:text-pink-600 transition-colors relative">
            <span className="relative z-[1]">{title}</span>
            <span className="bg-pink-50 z-0 absolute inset-0 rounded-lg opacity-0 transition-all group-hover:opacity-100 group-hover:scale-y-110 group-hover:scale-x-105 scale-75" />
          </h2>
          <div className="flex items-center mt-2 md:mt-6 gap-x-6">
            <Author author={author} />
            <PublishedAt publishedAt={publishedAt} />
          </div>
        </div>
        <div className="md:col-start-9 md:col-span-4 rounded-lg overflow-hidden flex">
          {mainImage ? (
            <Image
              src={urlFor(mainImage).width(400).height(200).url()}
              width={400}
              height={200}
              alt={mainImage.alt || title || ''}
            />
          ) : null}
        </div>
      </article>
    </Link>
  )
}
```

- [ ] **Create** a `Header` component for the top nav of the site


```tsx:src/components/header.tsx
import Link from 'next/link'

export function Header() {
  return (
    <div className="from-pink-50 to-white bg-gradient-to-b p-6">
      <header className="bg-white/80 shadow-md flex items-center justify-between p-6 rounded-lg container mx-auto shadow-pink-50">
        <Link
          className="text-pink-700 md:text-xl font-bold tracking-tight"
          href="/"
        >
          Layer Caker
        </Link>
        <ul className="flex items-center gap-4 font-semibold text-slate-700">
          <li>
            <Link
              className="hover:text-pink-500 transition-colors"
              href="/posts"
            >
              Posts
            </Link>
          </li>
          <li>
            <Link
              className="hover:text-pink-500 transition-colors"
              href="/studio"
            >
              Sanity Studio
            </Link>
          </li>
        </ul>
      </header>
    </div>
  )
}
```

## Update your routes


Now that you have many small components, it's time to import them into your routes to complete the design.


- [ ] **Update** the root layout to display the site-wide navigation


```tsx:src/app/layout.tsx
import { Header } from '@/components/header'
import { SanityLive } from '@/sanity/lib/live'

export default function FrontendLayout({
  children,
}: Readonly<{
  children: React.ReactNode
}>) {
  return (
    <section className="bg-white min-h-screen">
      <Header />
      {children}
      <SanityLive />
    </section>
  )
}
```

- [ ] **Update** the root page to use the `Title` component


```tsx:src/app/(frontend)/page.tsx
import Link from 'next/link'
import { Title } from '@/components/title'

export default async function Page() {
  return (
    <section className="container mx-auto grid grid-cols-1 gap-6 p-12">
      <Title>Layer Caker Home Page</Title>
      <hr />
      <Link href="/posts">Posts index &rarr;</Link>
    </section>
  )
}
```

- [ ] **Update** the post index page to use the `PostCard` component


```tsx:src/app/(frontend)/posts/page.tsx
import Link from 'next/link'
import { sanityFetch } from '@/sanity/lib/live'
import { POSTS_QUERY } from '@/sanity/lib/queries'

export default async function Page() {
  const { data: posts } = await sanityFetch({ query: POSTS_QUERY })

  return (
    <main className="container mx-auto grid grid-cols-1 gap-6 p-12">
      <h1 className="text-4xl font-bold">Post index</h1>
      <ul className="grid grid-cols-1 divide-y divide-blue-100">
        {posts.map((post) => (
          <li key={post._id}>
            <Link
              className="block p-4 hover:text-blue-500"
              href={`/posts/${post?.slug?.current}`}
            >
              {post?.title}
            </Link>
          </li>
        ))}
      </ul>
      <hr />
      <Link href="/">&larr; Return home</Link>
    </main>
  )
}
```

- [ ] **Update** the individual post route to use the `Post` component


```tsx:src/app/(frontend)/posts/[slug]/page.tsx
import { notFound } from 'next/navigation'

import { sanityFetch } from '@/sanity/lib/live'
import { POST_QUERY } from '@/sanity/lib/queries'
import { Post } from '@/components/post'

export default async function Page({
  params,
}: {
  params: Promise<{ slug: string }>
}) {
  const { data: post } = await sanityFetch({
    query: POST_QUERY,
    params: await params,
  })

  if (!post) {
    notFound()
  }

  return (
    <main className="container mx-auto grid grid-cols-1 gap-6 p-12">
      <Post {...post} />
    </main>
  )
}
```

## All done!


Click around the site now. You should have a richer site-wide header, post index, and individual post pages.


![A blog post web page with a nice design](https://cdn.sanity.io/images/3do82whm/next/bf2cc448c4f1ce6b4b05a74c29218c92da511323-2144x1388.png)

You're also in a much better position for the remaining lessons in this track. Let's test what you've learned in the final lesson.


---

## Lesson 13: Fundamentals quiz
https://www.sanity.io/learn/course/content-driven-web-application-foundations/fundamentals-quiz

A quick test of everything you've learned through this course.

> [Video: Fundamentals quiz](https://www.sanity.io/learn/course/content-driven-web-application-foundations/fundamentals-quiz)

With the skills learned in this course, you can now build and deploy content-editable applications that serve three user groups that are impacted by the work we do:


- **Developers** can now collaboratively code, deploy, and repeat.

- **Authors** can now collaboratively write, publish, and repeat.

- **End users** can now consume content and act on it.


Here are a few quiz questions designed to reinforce what you've learned.


> **Question:** What is the purpose of using Sanity and Next.js?
>
> 1. To create a content-editable application for end users and authors **[correct]**
> 2. To ensure we're on the cutting edge
> 3. To generate TypeScript types
> 4. To make a website

> **Question:** Which command creates a new Sanity project inside a Next.js application
>
> 1. npm install sanity
> 2. next init
> 3. sanity init **[correct]**
> 4. yarn add sanity

> **Question:** What enables route-level fetching in async components?
>
> 1. React Query
> 2. React Server Components **[correct]**
> 3. Sanity Client
> 4. Promises

> **Question:** What is the purpose of using Git in a development workflow?
>
> 1. Deploying the application to Vercel
> 2. Collaboration with developer team members
> 3. Creating preview builds from branches
> 4. All of the above **[correct]**

> **Question:** Why use the Next.js Image component?
>
> 1. To silence eslint warnings
> 2. Improved performance and optimization **[correct]**
> 3. You can't display images without it
> 4. GIF support

> **Question:** What format does the Portable Text editor write?
>
> 1. Markdown
> 2. HTML
> 3. Portable Text **[correct]**
> 4. Textile

> **Question:** What is the purpose of the PortableText React component?
>
> 1. To convert Portable Text to MDX
> 2. To author Portable Text
> 3. To serialize Portable Text into components **[correct]**
> 4. To query Portable Text

> **Question:** How are TypeScript types generated from schema and queries?
>
> 1. Sanity Studio
> 2. Sanity TypeGen **[correct]**
> 3. Sanity Manage
> 4. GROQ

## What's next?


With the fundamentals finished, it's time to make the rendering and editing experience even more robust by completing the following courses in this track.


---

## Related Resources

- [Track overview](https://www.sanity.io/learn/track/work-ready-next-js.md)
- [All courses and lessons](https://www.sanity.io/learn/sitemap.md)
- [Complete content for LLMs](https://www.sanity.io/learn/llms-full.txt)
