
Get content out of your code
If you have an existing Sanity project, you may prefer to read the Visual Editing Docs for details on how to set it up in your application.
What's covered in this guide
You'll create a new free Sanity project using the Next.js template, interact with a live preview in Sanity Studio and explore how Visual Editing works.
Create a new project
Get started by clicking here to create a new free Sanity project using the Next.js template. Or use the command below to get started via the command line.
If you don't already have an account with Sanity, you'll be prompted to create one.
Building later? This guide requires a terminal. Email yourself this command + get an extended 60-day trial of Sanity's paid features to start building when you're back at your desk.
npm create sanity@latest -- --template sanity-io/sanity-template-nextjs-clean --coupon=typo-guide
Now inside this directory, start the development server.
npm run devYou should now have two apps running:
- http://localhost:3000 – Your Next.js app
- http://localhost:3333 – Your Sanity Studio
These apps are separately configured in the following directories:
├─ /nextjs-app
└─ /studio
The Sanity Studio is configured with code, edits you make to the configuration will render immediately in the development environment.
Content in Sanity Studio is written to a schemaless, cloud-hosted Dataset in what we call the Content Lake.
The Next.js app fetches content using Sanity Client with the GROQ query language.
Enter the Studio
Open http://localhost:3333 and log in to your Sanity Studio. The first tab that will open is the Presentation tool.
The Presentation tool is used to view your Next.js front end (http://localhost:3000) within an Iframe so that you can interact with your content.
Add a CORS origin
By default, new Sanity projects only have the Studio's CORS origin supported. Click the prompt to open up Sanity Manage to add the Next.js origin as well.
Refresh your Sanity Studio and the message should have disappeared.
Add starter content
Sanity projects store text and assets in a Dataset. Your new project currently has no content. You could create new documents and upload assets in the Sanity Studio, however some starter content has been prepared for you.
The starter content is a compressed archive file of an existing Dataset, and can be imported using the Sanity CLI.
Run the following command from the root directory.
npm run import-sample-data
Note: If you named your Dataset something other than production, update the command below.
You should see a few messages which confirm the steps of importing data.
✅ [100%] Reading/validating data file (12ms)
✅ [100%] Importing documents (559ms)
✅ [100%] Importing assets (files/images) (4.68s)
✅ [100%] Setting asset references to documents (426ms)
✅ [100%] Strengthening references (392ms)
Done! Imported 9 documents to dataset "production"
You may even notice how the Studio updates with content as it's imported – without you having to press refresh. Sanity content is all real-time.
Start Visual Editing

You should now see 3 documents on the right hand side. These are documents from your Dataset that have been detected on the current page of your Next.js application.
(This magic is called "stega encoding" and is explained later in this guide.)
The "recent posts" block shows these posts. You can now highlight text from that block and see how each piece of text, when hovered, is individually highlighted with a purple border.
Click any of the pieces of text, and the document pane on the right hand side will update to show that source document and even highlight the field that content came from.
(This magic is called "Content Source Maps," again we'll get there!)
Preview draft content
When you begin making changes to documents, you'll see the content in the Next.js app update briefly after.
You now have an experience where content can be freely edited by content creators, using the front end as a means to navigate documents and go straight to the source of where any Sanity content came from.
Try drag-and-drop
In the URL bar of the presentation tool, visit http://localhost:3000/about which renders a page type document.
The Next.js app renders an array of objects in a pattern commonly referred to as a "Page Builder". Each block type loads a unique component.

These blocks have been configured with support for drag-and-drop. Where you can shift the order of the array by dragging the on-page elements. Hold down shift on your keyboard to watch the page zoom out to show all blocks in the array.
How this works
The Presentation tool first visited a route in your Next.js app – /api/draft-mode/enable – along with a secret code it stores in the Dataset.
That route in your Next.js app searches the same Dataset for that secret, and if it matches, enables Draft Mode. A native feature of Next.js.
Open the project in your code editor of choice.
Sanity Client
Open nextjs-app/sanity/lib/client.ts

The most common way to interact with Sanity projects in JavaScript applications is with Sanity Client. One has been configured in the Next.js app for you.
Within the default configuration are settings for the Project ID and Dataset which you created at the beginning of this guide. As well as settings for perspective, and stega.
Perspectives allow you to modify whether a query should return draft content or not. The setting of "published" ensures that when your Next.js app is not in Draft Mode, only published content is queried.
Stega encoding takes details about the source of every piece of Sanity content – from a Content Source Map – and encodes it into invisible characters appended to that piece of content. This is only added when the perspective is set to previewDrafts.
Sanity Live
Open nextjs-app/sanity/lib/live.ts
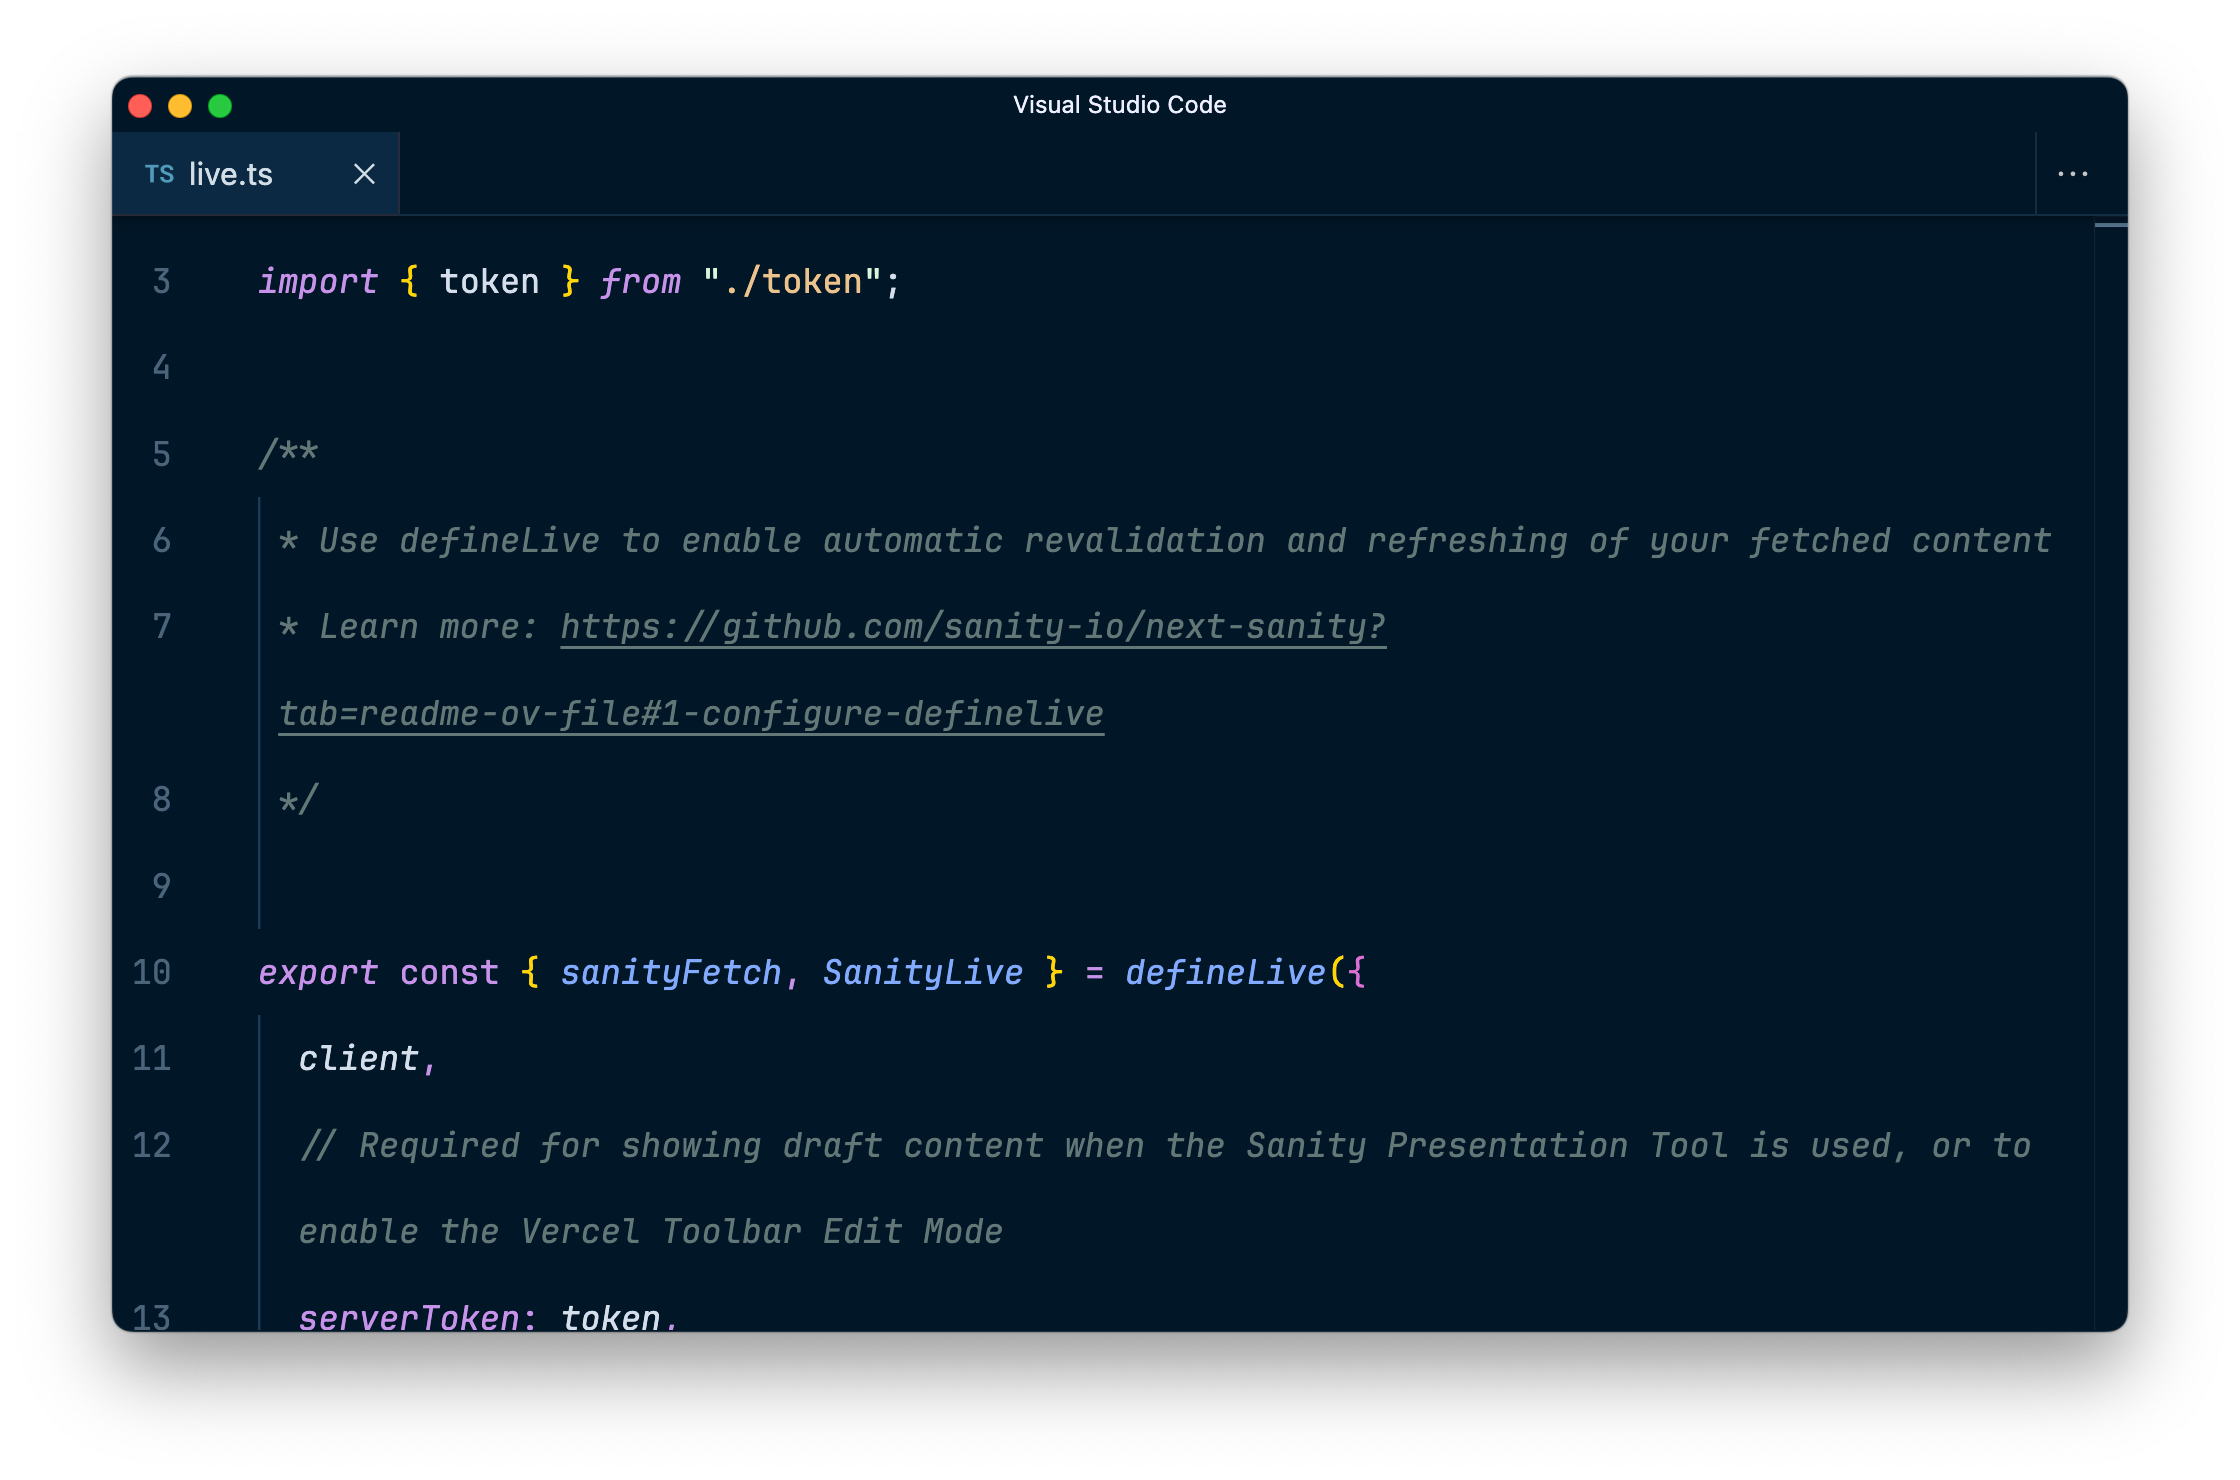
The defineLive helper from next-sanity allows you to turn a static fetch at load-time into a live-updating data source. Your Next.js app listens to published changes in your Dataset and refreshes content without the need to reload. It also handles caching.
When Draft Mode is active, the token supplied to this helper is used to receive updates to draft content as well. This Sanity project token was created when you first initialized the template.
Root layout components
Open nextjs-app/app/layout.tsx

There are two specific components to pay attention to that have been rendered into the root layout:
<SanityLive />comes from thedefineLivehelper and sets up the Event Source listener for content changes.<VisualEditing />scans the page for Stega encoding and creates the clickable Overlays for interactive live preview.
Together, they are powering live-updating content being rendered on the page, and Visual Editing affordances when the Next.js app is in Draft Mode.
Drag-and-drop setup
Open nextjs-app/app/components/PageBuilder.tsx

The data attributes added to the wrapping element of the pageBuilder array field – and to individual items within it – are read by the <VisualEditing /> component to add drag-and-drop interactivity to any array.
Next steps
Some ideas of what you might do next.
- Commit this repository to your Git provider and deploy to Vercel to share these live previews with content creators
- Add or edit Sanity Studio schema types. The template comes with a few already created, try adding a new field to
post.tsin the/studiodirectory and see how the Studio updates imediately. - Explore GROQ,
queries.tsin the/nextjs-appdirectory contains all the queries that the Next.js app currently makes. You can test queries in the Studio using the Vision tool. - Take the Day One with Sanity Studio Course to get a from-the-ground-up understanding of how to create new Sanity projects.

