Set up and configure Dashboard
Get started with Sanity Dashboard, the central hub of all your content operations.
Set up your content operations dashboard
Find your dashboard
To find your organization dashboard, visit www.sanity.io/welcome!
The Sanity Dashboard is the hub for your organization's content operations. Here you'll find your deployed studios, custom apps, and official Sanity apps like Canvas or Media Library.
Your dashboard is centered around your organization, and gives access to all deployed studios and apps within the organization, across projects and datasets.
Dashboard plugin
As the keen reader may have observed, there is already a "dashboard" in the Sanity ecosystem, namely the official dashboard plugin for Sanity Studio. This plugin will continue to be available for your intra-studio dashboard needs.
Disable dashboard
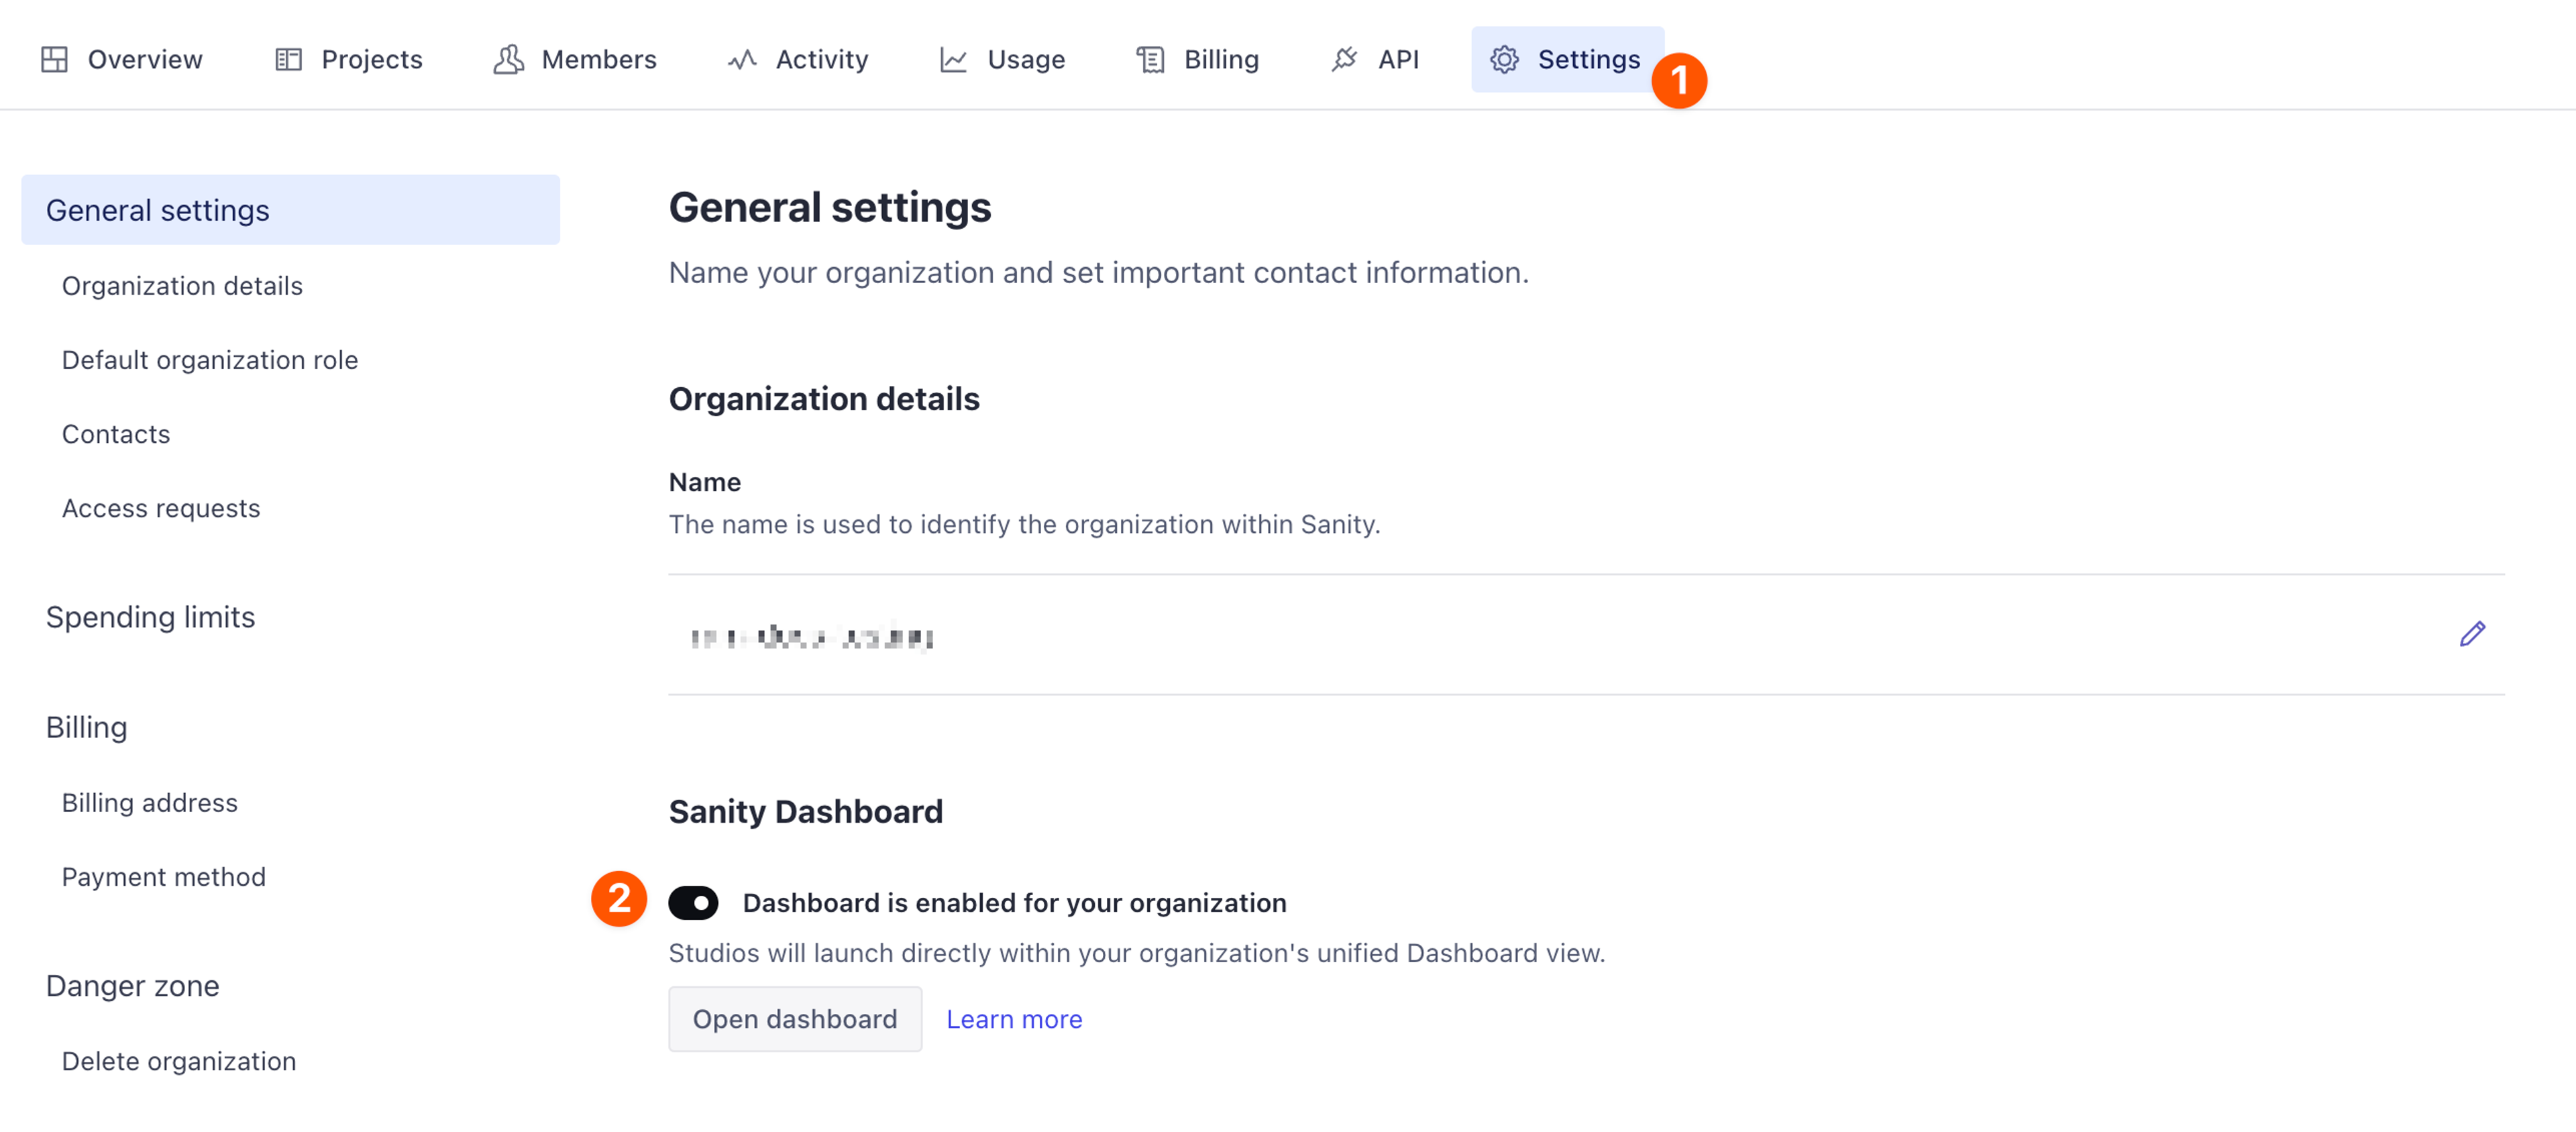
You can disable the dashboard for your organization by navigating to the organization in Sanity Manage.
From your organization's manage page:
- Select the "Settings" tab.
- Toggle the "Dashboard is enabled" switch to disable the dashboard.
This setting affects all users in your organization.
Hide a studio from Dashboard
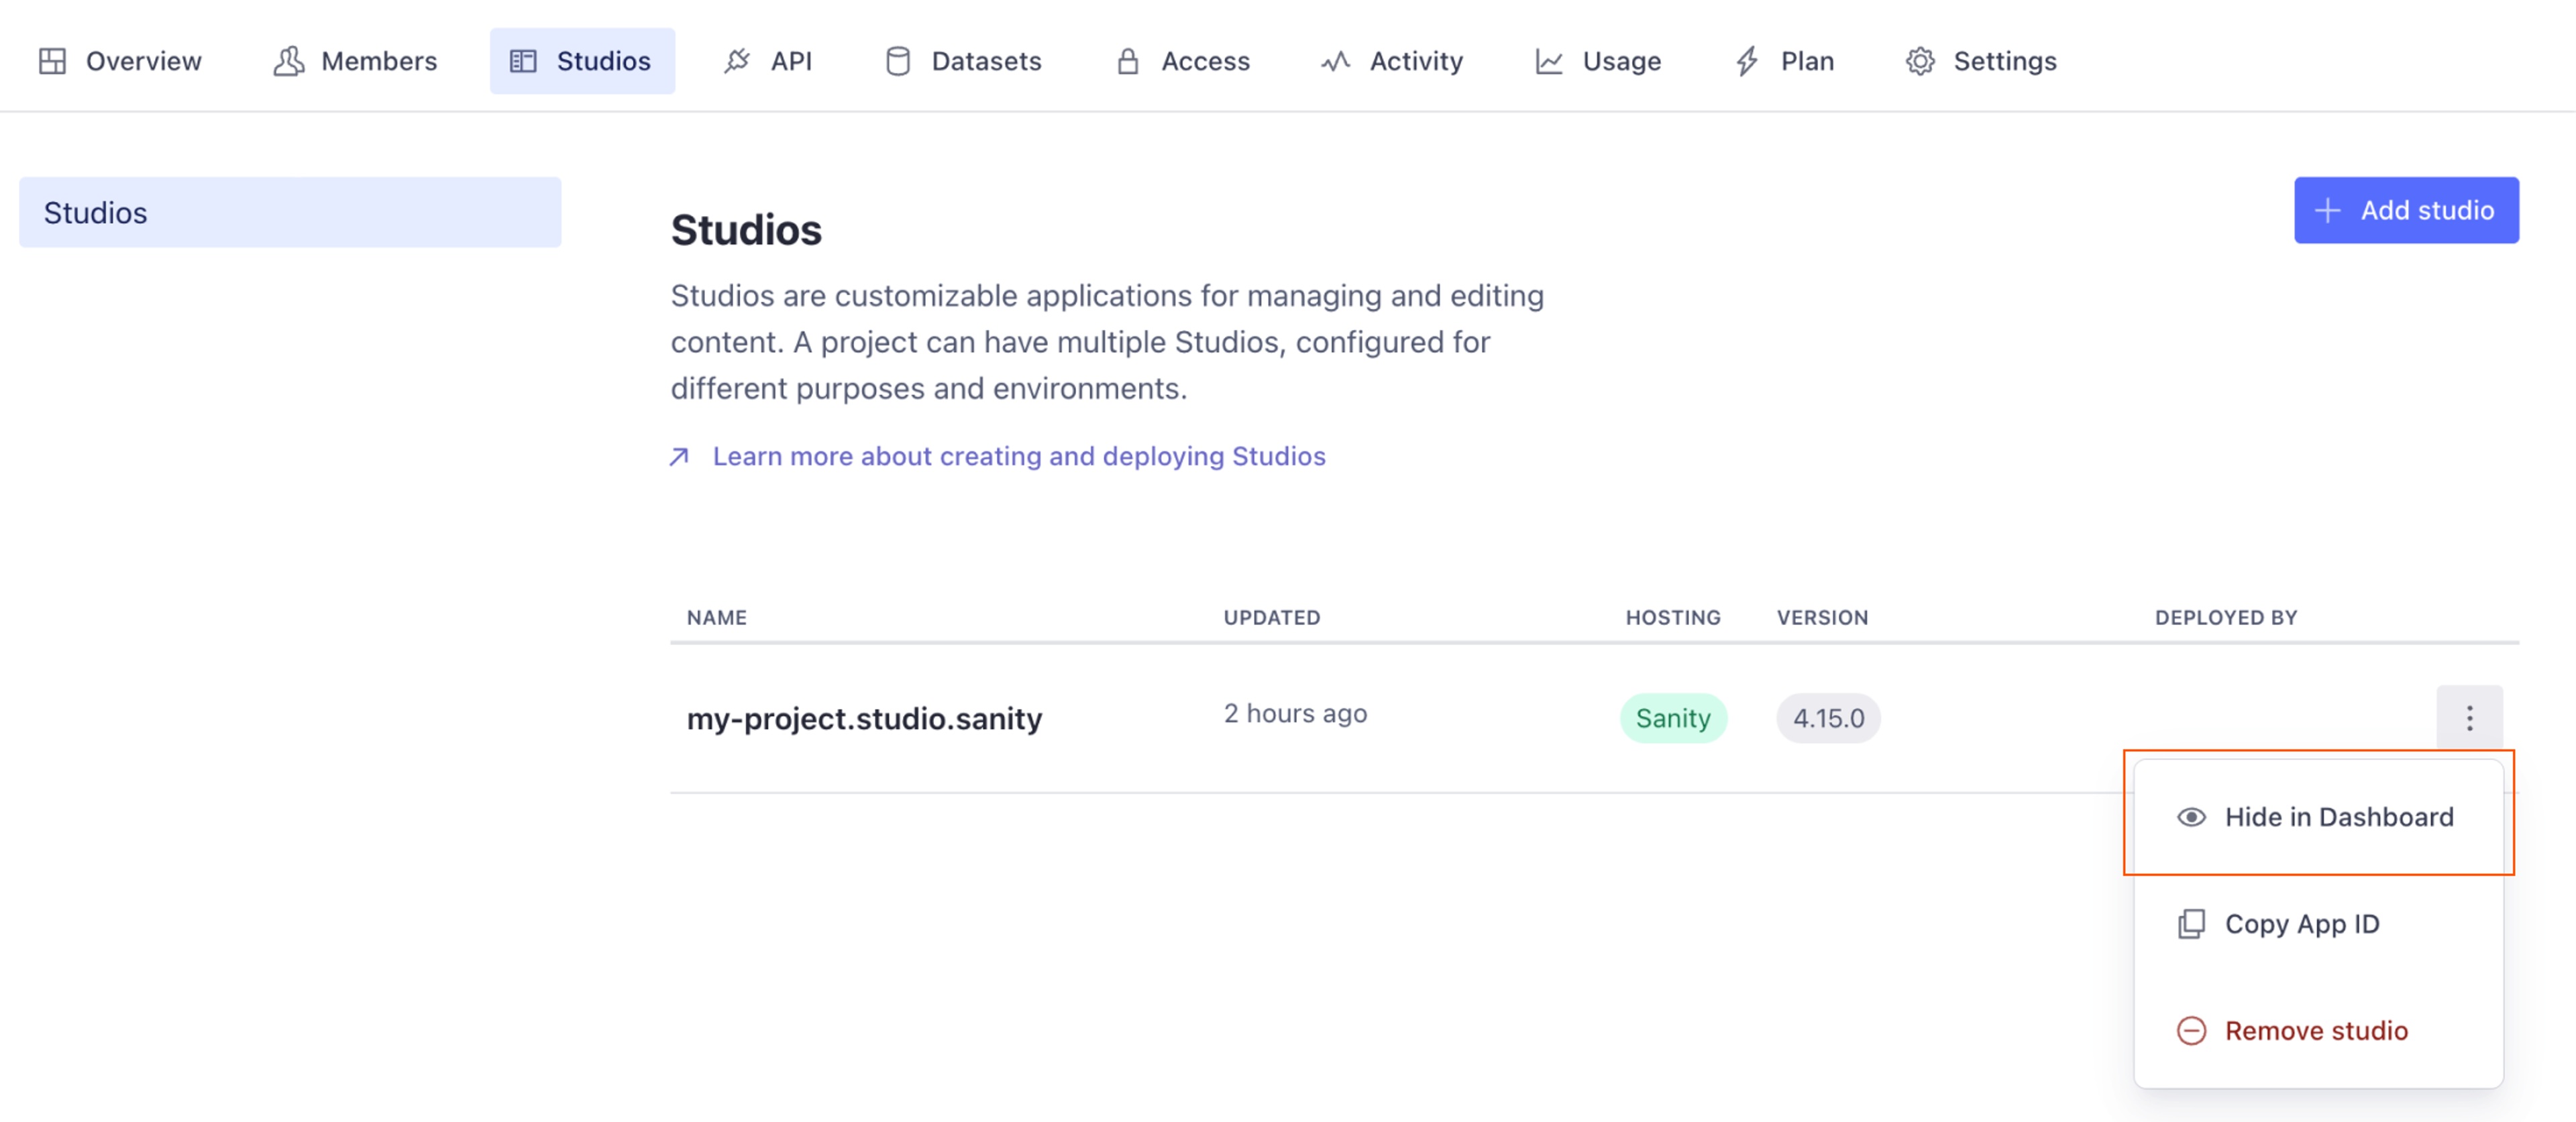
You can hide a studio from the dashboard in Sanity Manage.
- Open Sanity Manage and select your project.
- Navigate to the Studios tab.
- Open the context menu (⋯) for the studio you want to hide.
- Click Hide in Dashboard.
Configure your studios
For almost everyone: Your pre-dashboard studios will automatically work as before, with all your customization intact. To fully enjoy the benefits of the integrated dashboard, a studio deployment is required. Depending on your setup, this process will differ slightly.
Requirements
Dashboard should work with studios going all the way back to v2.28.0 (shoutout to OGs still running v2), but for the best experience we heartily recommend upgrading to @latest.
- Studio version must be:
- At least >=
v2.28.0 - Preferably >=
v3.88.1 - Ideally
@latest
- At least >=
- Schema and manifest files must be extracted and made available. For a detailed look at how schema deployment works, visit this article.
- Self-hosted and embedded studios must also define the canonical studio URL in the project management settings.
- For self-hosted and embedded studios that are not compiled using Sanity build tools (
sanity buildorsanity deploy), you'll also need to add a small bridge script to connect with the dashboard.
Sanity-hosted studio
If you are using Sanity's hosting service, you get the most straightforward route. To set up your project to automatically generate the necessary schema and manifest files on every deployment, follow these steps:
- Make sure your project is upgraded to
v3.88.1or later of Sanity Studio.@latestis always recommended! - Deploy your studio by running the commmand
npx sanity deploy.
The Sanity CLI will automatically build your studio and manifest files and deploy them to the configured host. The manifest file should be available at <studioHost>.sanity.studio/static/create-manifest.json
Even auto-updating studios?
Yes! Even if you are opted into auto-updating studios, you still need to make a one-time manual deployment in order to fully integrate with the dashboard.
Update your local studio to sanity@latest, then run npx sanity deploy.
Self-hosted studio
If you are not using Sanity's hosting service, you will need to manually deploy your studio schema and make sure the resulting files are available at the expected location.
- Make sure your project is updated to
v3.88.1or later of Sanity Studio.@latestis always recommended! - Generate and deploy the schema and manifest files by running
npx sanity schema deploy. - Serve the manifest files over HTTP GET from
<custom-studio-url>/static/<manifest-file>(see filenames above). - You can control where the manifest will be stored in your project by using the
--manifest-dirparameter. For example, to extract the files into./dist/staticyou'd runnpx sanity schema deploy --manifest-dir ./dist/static - Ensure the manifest files are publicly accessible on the internet without authentication.
- Add the studio URL in your project management settings.
In addition to the above, your studio must be publicaly accessible in order to appear in the dashboard.
Vercel
To self host your studio and schema files on Vercel, we recommend using the following configuration.
{
  "$schema": "https://openapi.vercel.sh/vercel.json",
  "framework": "sanity-v3",
  "buildCommand": "sanity build && sanity schema deploy --manifest-dir ./dist/static"
}
Studio embedded in Next.js
For Next.js projects with embedded studios, you should follow the same steps as in the previous section, with a small change to how you generate the manifest files.
- Make sure your project is upgraded to
v3.88.1or later of Sanity Studio.@latestis always recommended! - Generate the manifest files running
npx sanity manifest extract. You'll need to specify a--pathfor the generated files that corresponds to the path of your studio relative to the root of your Next.js project. E.g.,npx sanity manifest extract --path public/studio/static - Generate and deploy your schema by running
npx sanity schema deploy. - Next.js will handle serving your manifest over HTTP GET for Dashboard when you deploy your application.
- Add the studio URL in your project management settings. Make sure you include the full path to your studio. E.g.,
https://cool-domain.com/admin. - Finally, add the dashboard bridge script to your studio route as shown in the next section, and deploy your project.
Adding the bridge component
For self-hosted and embedded studios that are not compiled using sanity build or sanity deploy, OR using next-sanity you will also need to add a small script to enable the dashboard to properly interact with your studios.
<script src="https://core.sanity-cdn.com/bridge.js" async type="module" />
Exactly where you should put the script will vary depending on your exact setup, but a generalized example might look as follows:
import {preloadModule} from 'react-dom'

const bridgeScript = 'https://core.sanity-cdn.com/bridge.js'

export default function StudioLayout({
  children,
}: {
  children: React.ReactNode
}) {
  preloadModule(bridgeScript, {as: 'script'})
  return (
    <>
      <script src={bridgeScript} async type="module" />
      {children}
    </>
  )
}
Allow embedding for protected domains
Some services, such as Cloudflare’s domain protection and Vercel’s deployment previews, may restrict your studio’s ability to be embedded in Dashboard by setting restrictive headers.
X-Frame-Options
If this is set to DENY, Dashboard cannot embed your studio. If set to SAMEORIGIN, Dashboard can only embed if the origin matches the URL of the Dashboard (sanity.io). As both of these options alone will prevent Dashboard from embedding your studio, we suggest setting the frame-ancestors policy as described below.
Content-Security-Policy: frame-ancestors
If your service provider allows you to define custom headers, you can allow Dashboard by setting the Content-Security-Policy to include the frame-ancestors directive. The expression list must include at least one of the following:
selfhttps://www.sanity.iohttps://*.sanity.iohttps:
For example:
Content-Security-Policy: frame-ancestors https://*.sanity.io;Add a token for CI/CD pipelines
If you deploy your studio as part of an automated workflow, you will need to add a deploy token to your project in the Sanity project management settings and include a schema deployment step with the following command:
SANITY_AUTH_TOKEN=<deploy_token> npx sanity schema deploy
A deploy token can be obtained by navigating to the API section of your project management dashboard.
Update studio icons in Dashboard
Dashboard retrieves the icon for each studio workspace from the icon property defined in the respective studio’s workspace configuration.
// sanity.config.ts
import {defineConfig} from 'sanity'
import {structureTool} from 'sanity/structure'
import {schemaTypes} from './schemas'
import {StudioIcon} from './StudioIcon'

export default defineConfig({
  projectId: '<projectId>',
  dataset: '<dataset>',
  plugins: [structureTool()],
  schema: {
    types: schemaTypes,
  },
  icon: StudioIcon,
  // ... rest of config
})
// StudioIcon.tsx
import React from 'react'
export const StudioIcon = () => (
<svg width="1em" height="1em" viewBox="0 0 25 25">
<text x="50%" y="50%" textAnchor="middle" dominantBaseline="middle">
🤘
</text>
</svg>
)This icon must be a simple, serializable React component that renders a static element. Because the icon is extracted from the configuration and added to the studio manifest, it cannot depend on external values, context, hooks, or any dynamic logic. Static, self-contained SVG components work best.
To learn more about configuring studio workspaces, visit this article.
Canvas
Content-focused, AI-assisted writing app. In your dashboard.
Media Library
Keep track of your assets, from all throughout your organization.
Studio
Sanity Studio is an open-source, real-time collaborative content workbench where developers define content models using JavaScript objects. The Studio automatically generates a powerful editing environment based on these definitions, while offering extensive customization options through a React-based framework to tailor the editorial experience to your specific workflows.
App SDK
Create fully custom applications on the Sanity platform.