Enabling drag and drop for Visual Editing
Core concepts for enabling drag and drop functionality within the Presentation tool
Visual Editing offers page building capabilities that allow content editors to add, move, remove, and reorder content sections directly within their website's preview. Drag and drop enables content creators to visually rearrange content within the context of their application/website — allowing them to re-order array items with immediate visual feedback and dynamic zoomed-out overviews.
Prerequisites
To implement page building features, you need:
- Visual Editing configured and enabled, with up-to-date dependencies
- Content structured to using arrays for reorderable sections
- Some understanding of Stega/Content Source Maps and how to enable overlays manually.
- Studio on version
3.65.0or above (npm install sanity@latest)
Browser/device support
Drag and drop is supported in the following browsers/versions:
- Chrome ≥ 108
- Safari ≥ 15.6
- Firefox ≥ 115
- Edge ≥ 126
Gotcha
Drag and drop is currently not compatible with touch-based devices.
Understanding the building blocks
Presentation's drag and drop functionality is framework-agnostic and can be implemented without significant changes to your codebase. It uses Overlays for visual representation, and updates your structured content directly. It does not mutate or reorder the DOM.
In a Presentation drag and drop sequence:
- An Overlay element is dragged to a new position on the page.
- The array order in the Presentation tool is updated, reflecting the item’s new position.
- Your front-end receives the updated Sanity data and re-renders as normal.
Content modeling for page building
Drag and drop for page building, and similar layout systems, works with array-based content. Your schema (content model) should:
- Use arrays to represent reorderable sections
- Define content blocks as object types
// Example schema
defineField({
  name: 'sections',
  type: 'array',
  of: [
    defineArrayMember({ type: 'hero' }),
    defineArrayMember({ type: 'features' }),
    defineArrayMember({ type: 'callToAction' })
  ]
})
Protip
You can nest array type fields, but it is required that you wrap the nested array in an object type.
In your front end application
To enable the drag and drop functionality in your front end, you must:
- Implement Visual Editing
- Apply data attributes to the array items, and optionally the array parent if you want to enable click-to-edit for it
- Make sure the array is rendering as a client-side component (
'use client'with React Server Components-based frameworks)
Add data attributes to elements
Protip
There are a few different concepts of "paths" in Sanity. In the context below, we are discussing form paths in particular, which you can learn more about in this article: How form paths work.
To enable drag and drop functionality:
- Add
data-sanityattributes to the array elements - Include required information:
- Document ID (
_id) - Document type (
_type) - Array item key (
_key) - Path to array schema type (
arrayName[_key=="<the-section-key>"])
- Document ID (
These attributes connect your UI elements to the underlying content structure.
You can use the createDataAttribute helper function to achieve this:
// /components/SectionParent.tsx
import {createDataAttribute} from '@sanity/visual-editing'
import {Sections} from '@/compoents/Sections'

// Your Sanity configuration
const config = {
  projectId: 'YOUR_PROJECT_ID',
  dataset: 'YOUR_DATASET',
  baseUrl: 'https://your-studio-url.sanity.studio',
}

export function SectionParent({documentId, documentType, sections: initialSections}) {
  return (
    <div
      data-sanity={createDataAttribute({
        ...config,
        id: documentId,
        type: documentType,
        path: 'sections',
      }).toString()}
    >
      <Sections data={sections} />
    </div>
  )
}
Implement optimistic updates
Load the array item data through the useOptimistic hook from the Visual Editing package (or framework-specific toolkit) to ensure that the user experience is fast and not slowed down by network latency.
The useOptimistic hook exposes ways of controlling the state and when to update the UI, which you typically want only when the array data has changed:
const sections = useOptimistic<PageSection[] | undefined, SanityDocument<PageData>>(
  initialSections,
  (currentSections, action) => {
    // The action contains updated document data from Sanity
    // when someone makes an edit in the Studio

    // If the edit was to a different document, ignore it
    if (action.id !== documentId) {
      return currentSections
    }

    // If there are sections in the updated document, use them
    if (action.document.sections) {
      return action.document.sections
    }

    // Otherwise keep the current sections
    return currentSections
  }
)
Protip
The useOptimistic hook is supplementary to data fetching and works independently.
How useOptimistic works
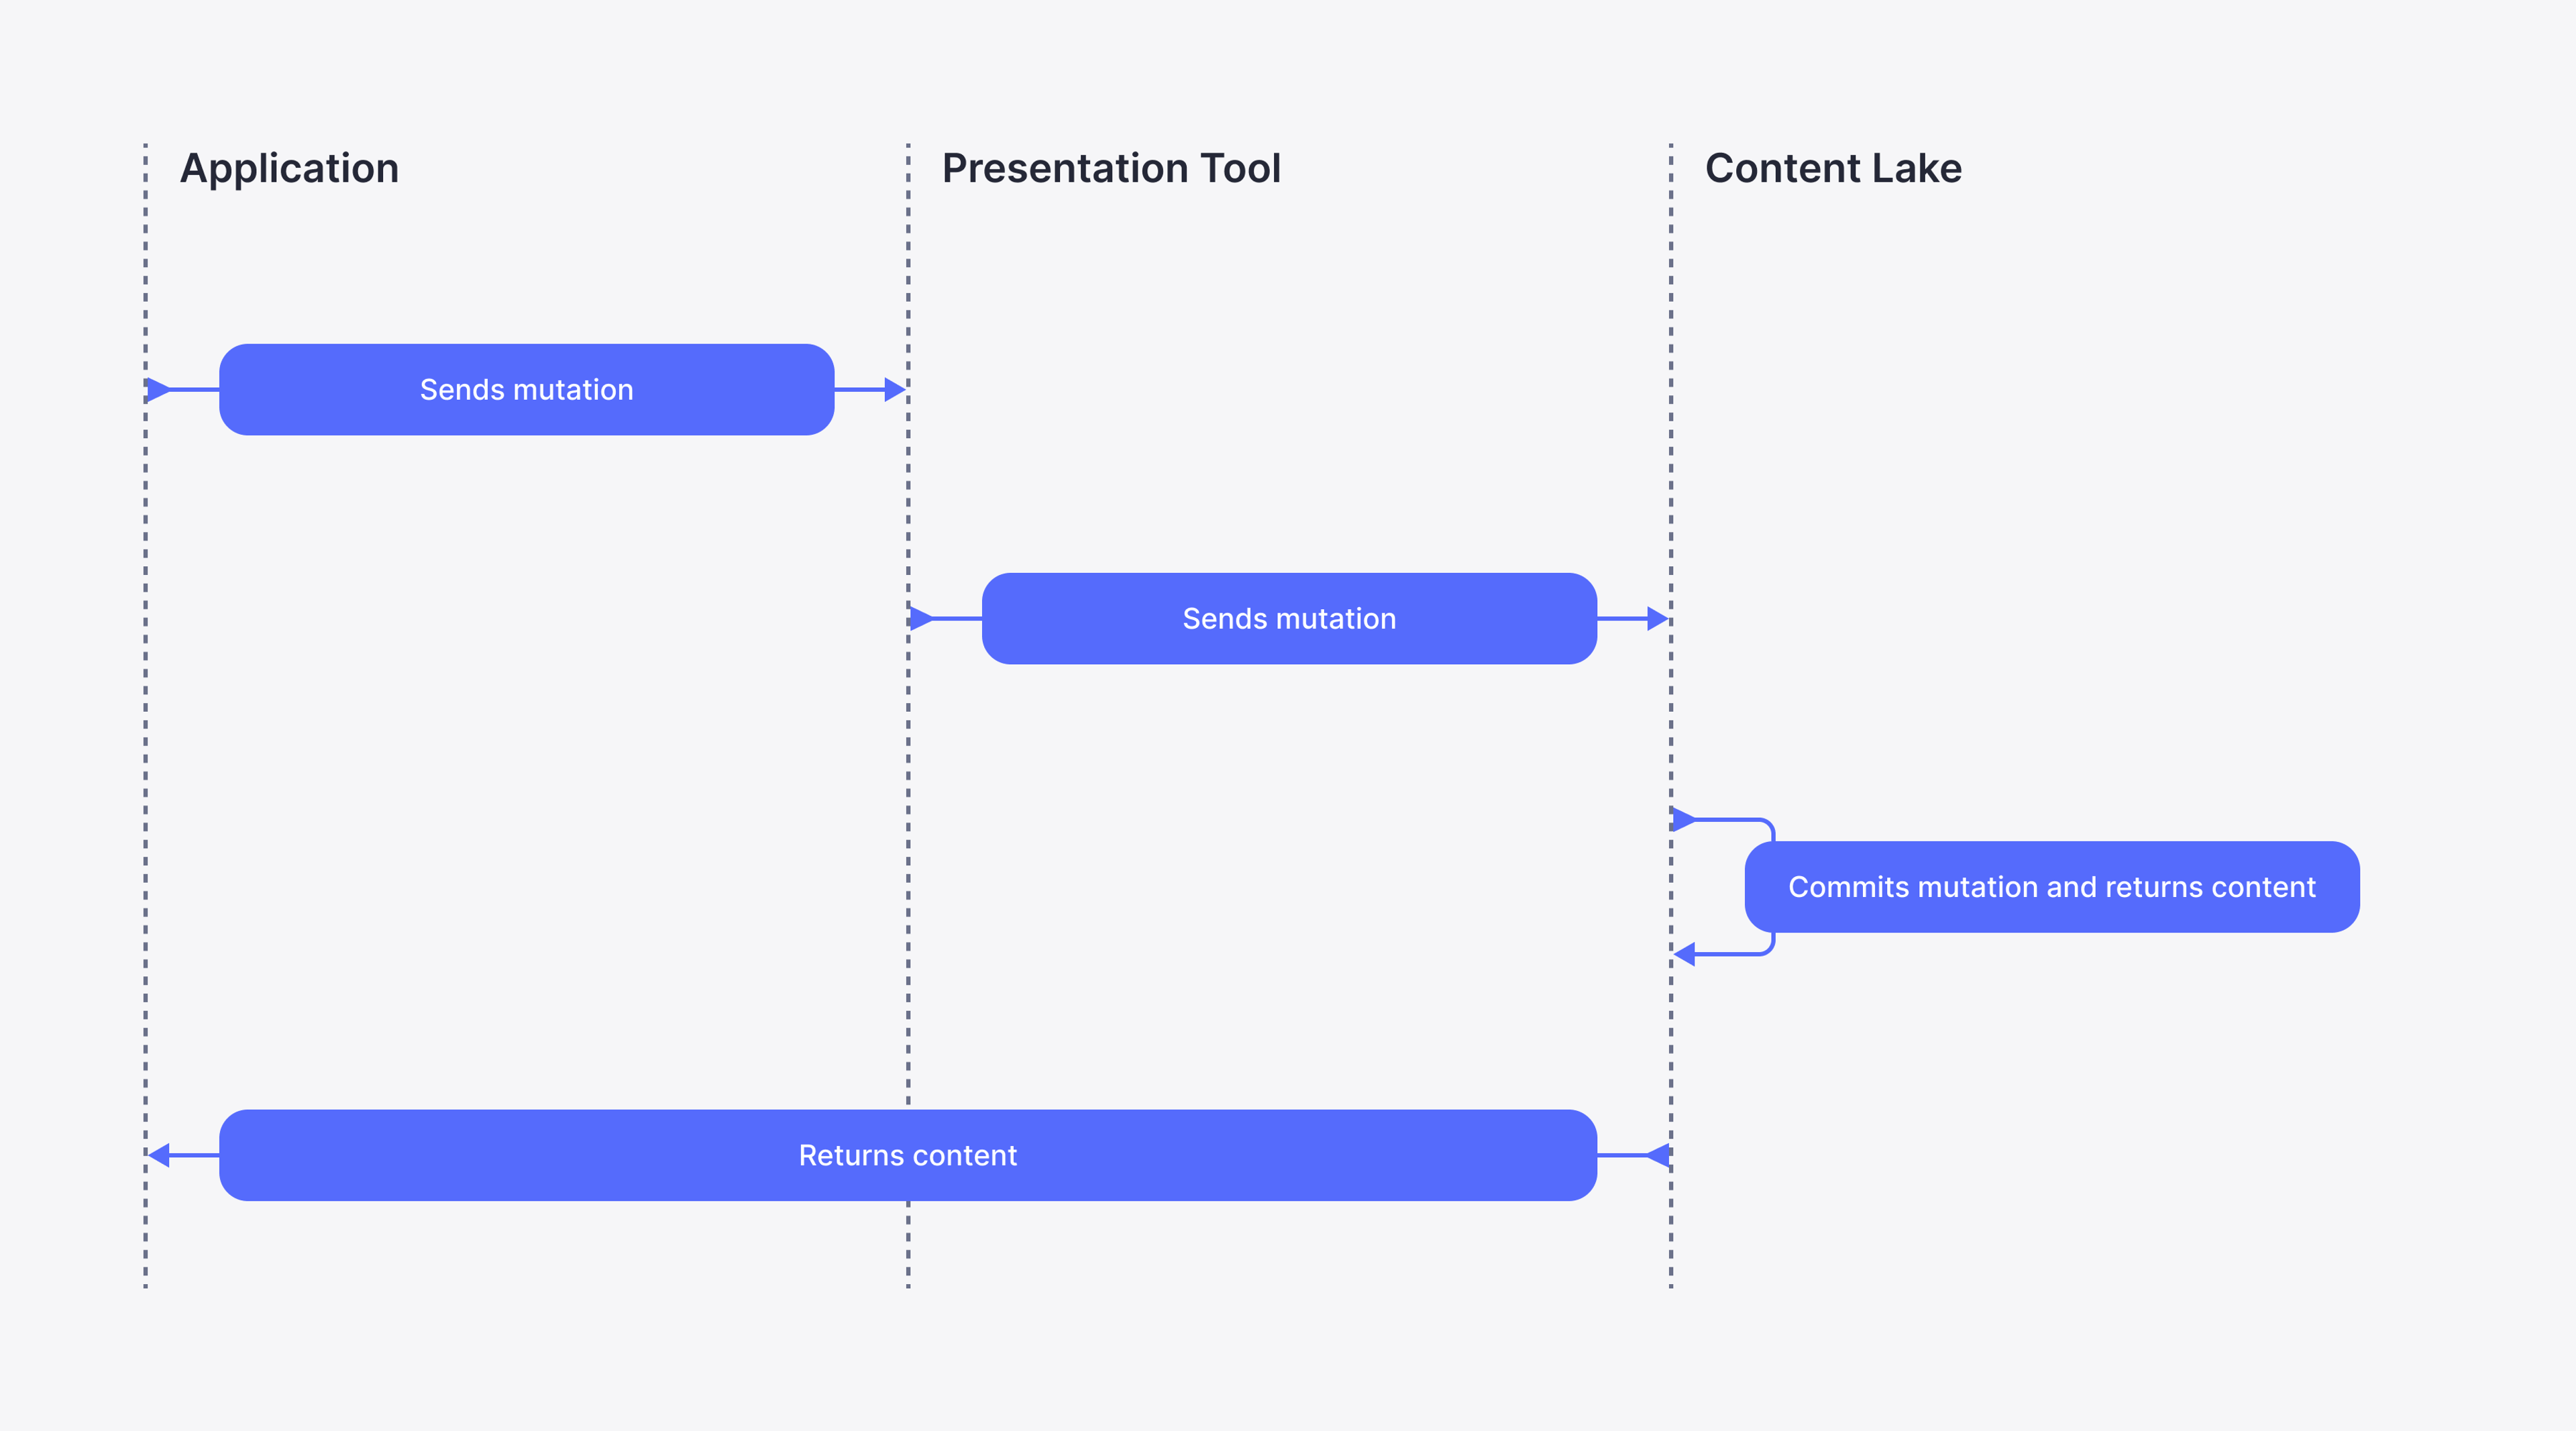
Typically, mutations created in your application need to be committed to Content Lake via the Presentation tool, and content refetched before the UI can be updated.
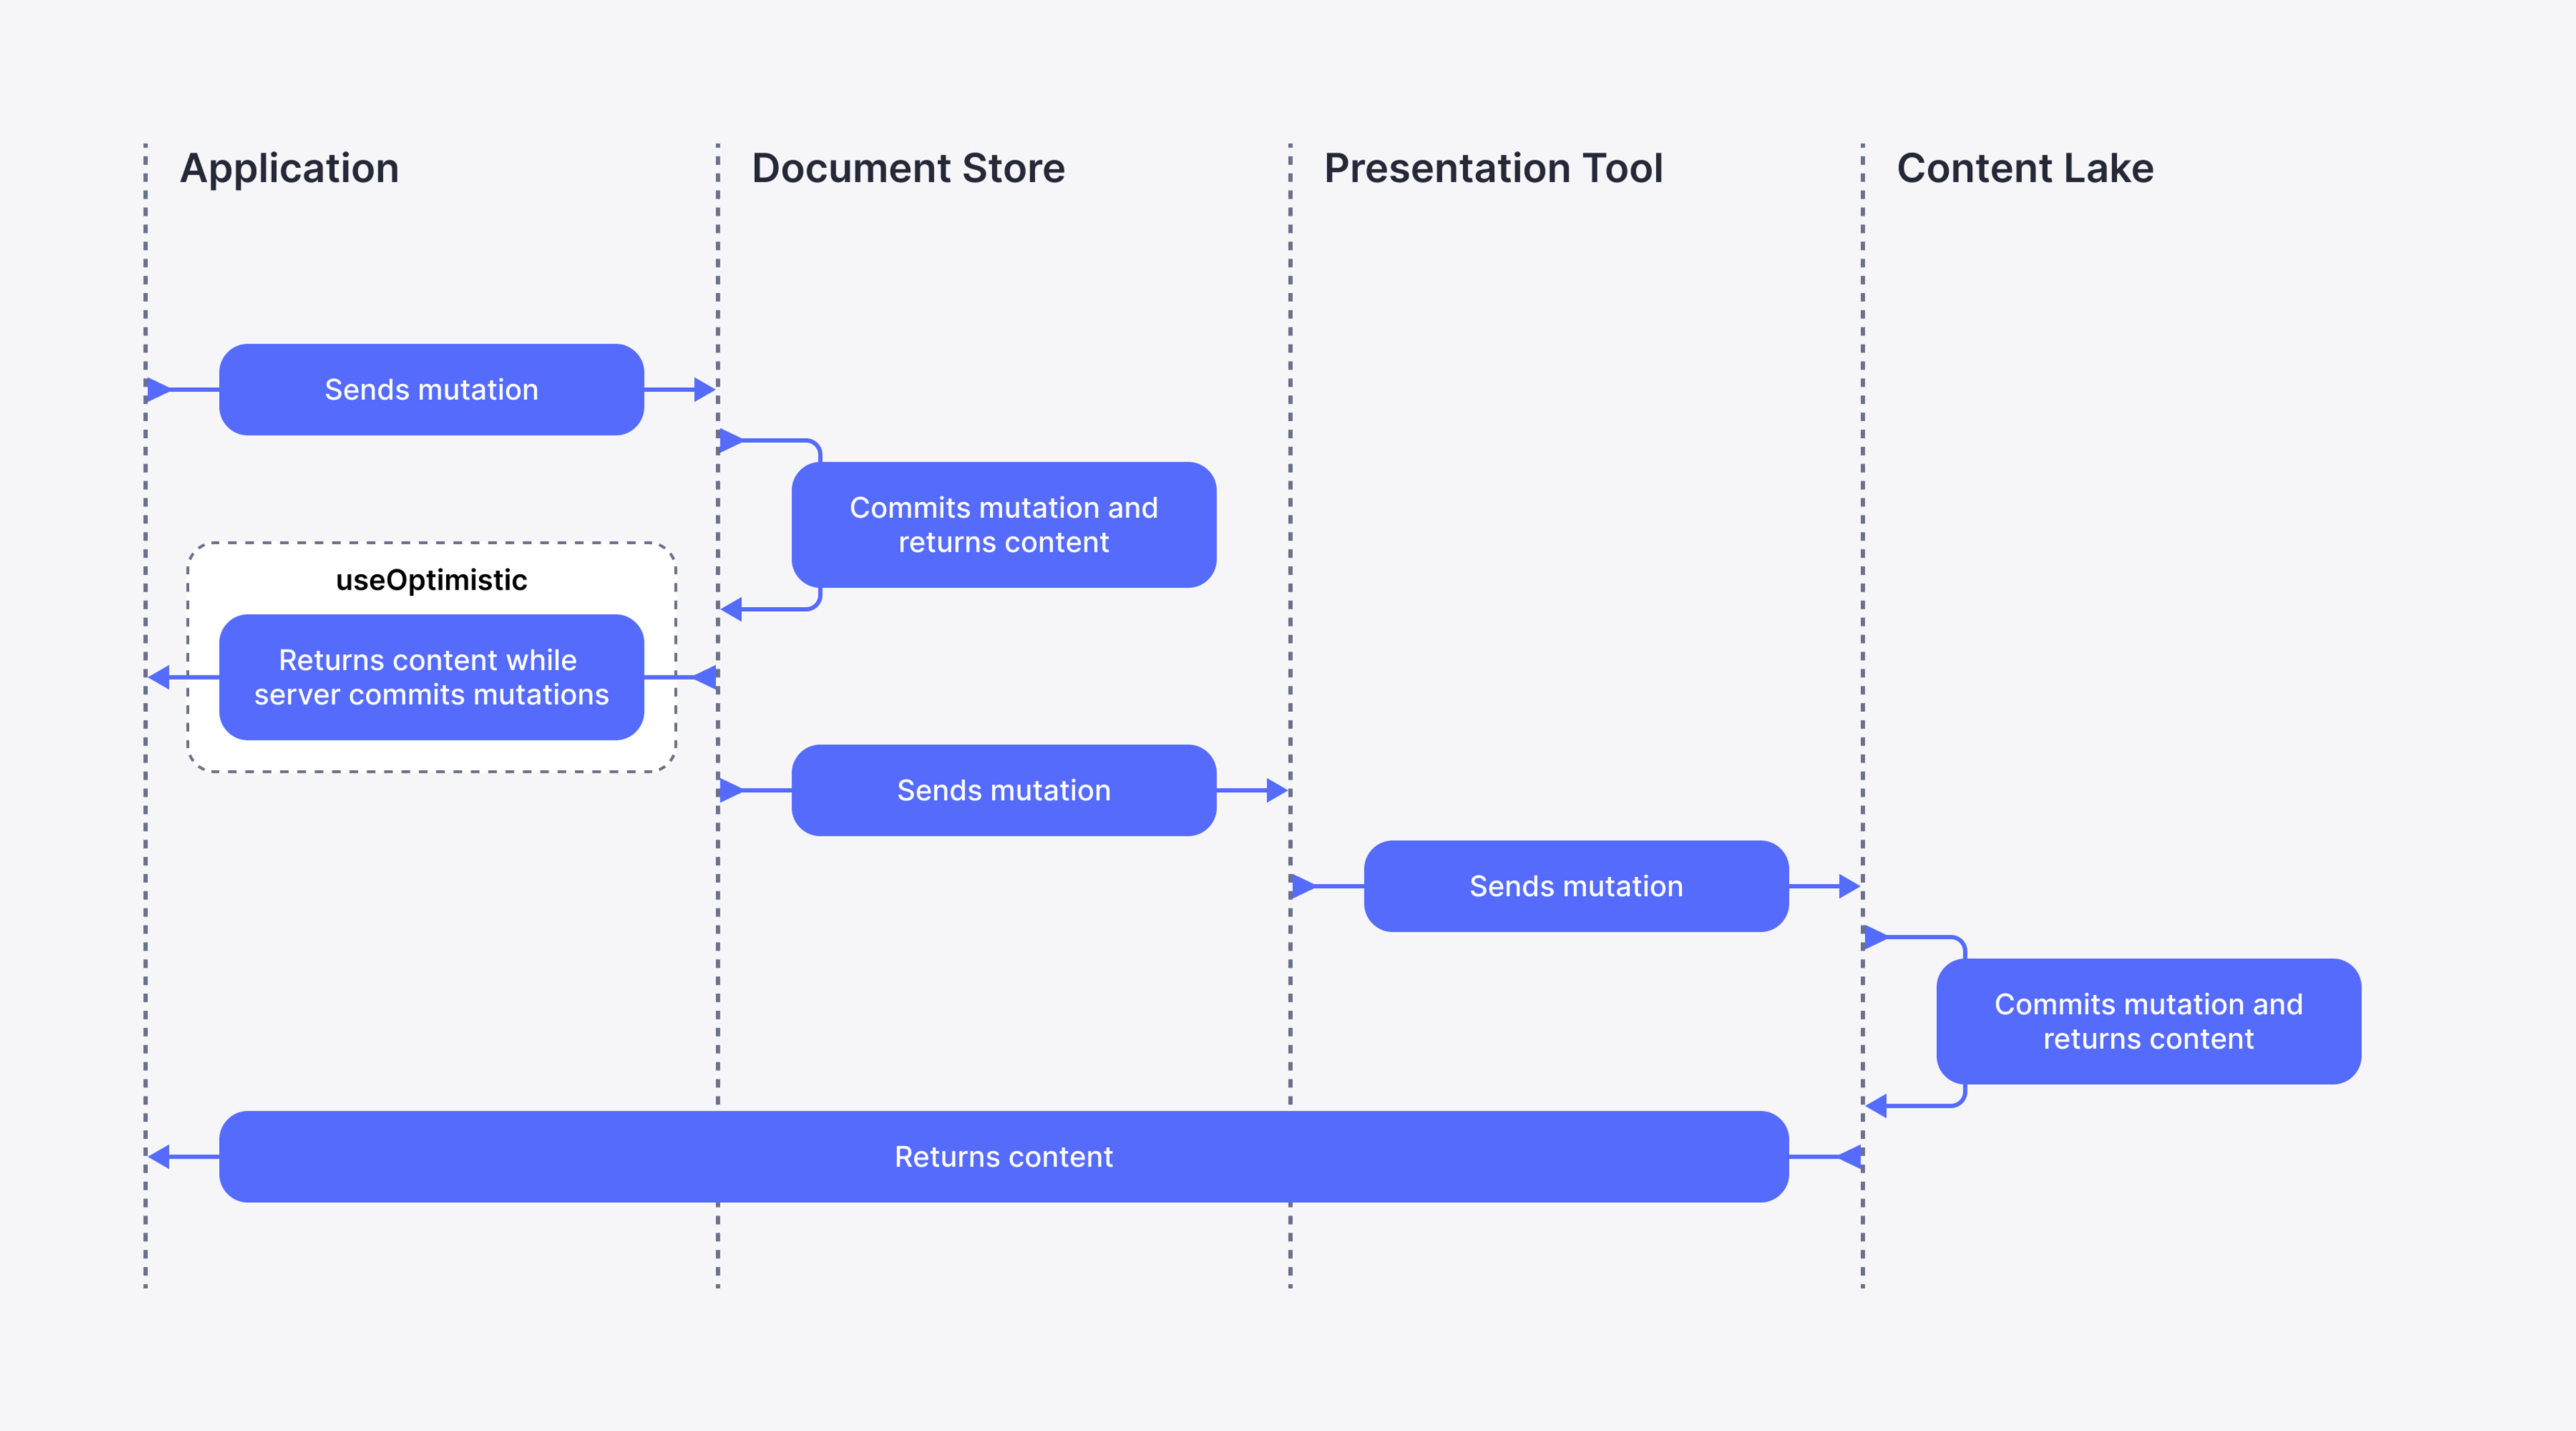
The useOptimistic hook uses a local document store to enable developers to opt-in to instant updates for specific content. UI can be updated with the anticipated result of a mutation, avoiding the delay required when submitting and refetching data from Content Lake.
useOptimistic detects when up-to-date content does eventually arrive and resets its internal state, ready to handle the next mutation.
Reconciling References
Array re-ordering is an ideal use case for useOptimistic. However, when composing pages with re-usable blocks, array items may contain references to other documents.
useOptimistic actions only provide an up-to-date snapshot of the mutated document, so you need to ensure that any references within the array item itself point to the correct documents in your original query result.
Typically, the optimistic ordering of an updated array can be used, with each item's content set using the data from the passthrough state value, if it exists.
const sections = useOptimistic(page.sections, (state, action) => {
  if (action.id === page._id) {
    return action.document.sections.map(
      (section) => state?.find((s) => s._key === section?._key) || section
    );
  }
  return state;
});
You can find the useOptimistic reference documentation here.
Minimal example
Below is a minimal example of how to implement drag and drop in React.
// /components/Sections.tsx
'use client'
import {createDataAttribute, useOptimistic} from '@sanity/visual-editing'
import type {SanityDocument} from '@sanity/client'

// Minimal type definitions
type PageSection = {
  _key: string
  _type: string
}

type PageData = {
  _id: string
  _type: string
  sections?: PageSection[]
}

type SectionsProps = {
  documentId: string
  documentType: string
  sections?: PageSection[]
}

// Your Sanity configuration
const config = {
  projectId: 'YOUR_PROJECT_ID',
  dataset: 'YOUR_DATASET',
  baseUrl: 'https://your-studio-url.sanity.studio',
}

export function Sections({documentId, documentType, sections: initialSections}: SectionsProps) {
  const sections = useOptimistic<PageSection[] | undefined, SanityDocument<PageData>>(
    initialSections,
    (currentSections, action) => {
      if (action.id === documentId && action.document.sections) {
        return action.document.sections
      }
      return currentSections
    },
  )

  if (!sections?.length) {
    return null
  }

  return (
    <div
      data-sanity={createDataAttribute({
        ...config,
        id: documentId,
        type: documentType,
        path: 'sections',
      }).toString()}
    >
      {sections.map((section) => (
        <div
          key={section._key}
          data-sanity={createDataAttribute({
            ...config,
            id: documentId,
            type: documentType,
            path: `sections[_key=="${section._key}"]`,
          }).toString()}
        >
          {/* Render your section content here */}
          {section._type}
        </div>
      ))}
    </div>
  )
}
Protip
On the 'use client' requirement
The component that holds the array needs to be rendered on the client for useOptimistic to work. While it's generally a good rule of thumb to avoid client-side JavaScript, the footprint of this hook is minimal, and it's only conditionally rendered when Visual Editing is enabled in preview.
It's important to remember that sometimes you hurt performance if you render too much on the server. If the JSON data you need, and the amount of JS required to render it, is less than the HTML you produce and send down the wire with RSC, then you should make it a client component.
With page building scenarios that can very often be the case.
The drag and drop enabled sections can now be imported into a page route component:
// /[slug]/page.tsx

import {notFound} from 'next/navigation'
import {sanityFetch} from '@/sanity/fetch'
import {PAGE_QUERY} from '@/sanity/queries'
import {Sections} from '@/components/Sections'

export default async function Page({params}) {
  const {data} = await sanityFetch({query: PAGE_QUERY, params})
  if (!data) {
    notFound()
  }

  return (
    <main>
      <Sections
        documentId={data._id}
        documentType={data._type}
        sections={data.sections}
      />
    </main>
  )
}
The user experience of drag and drop
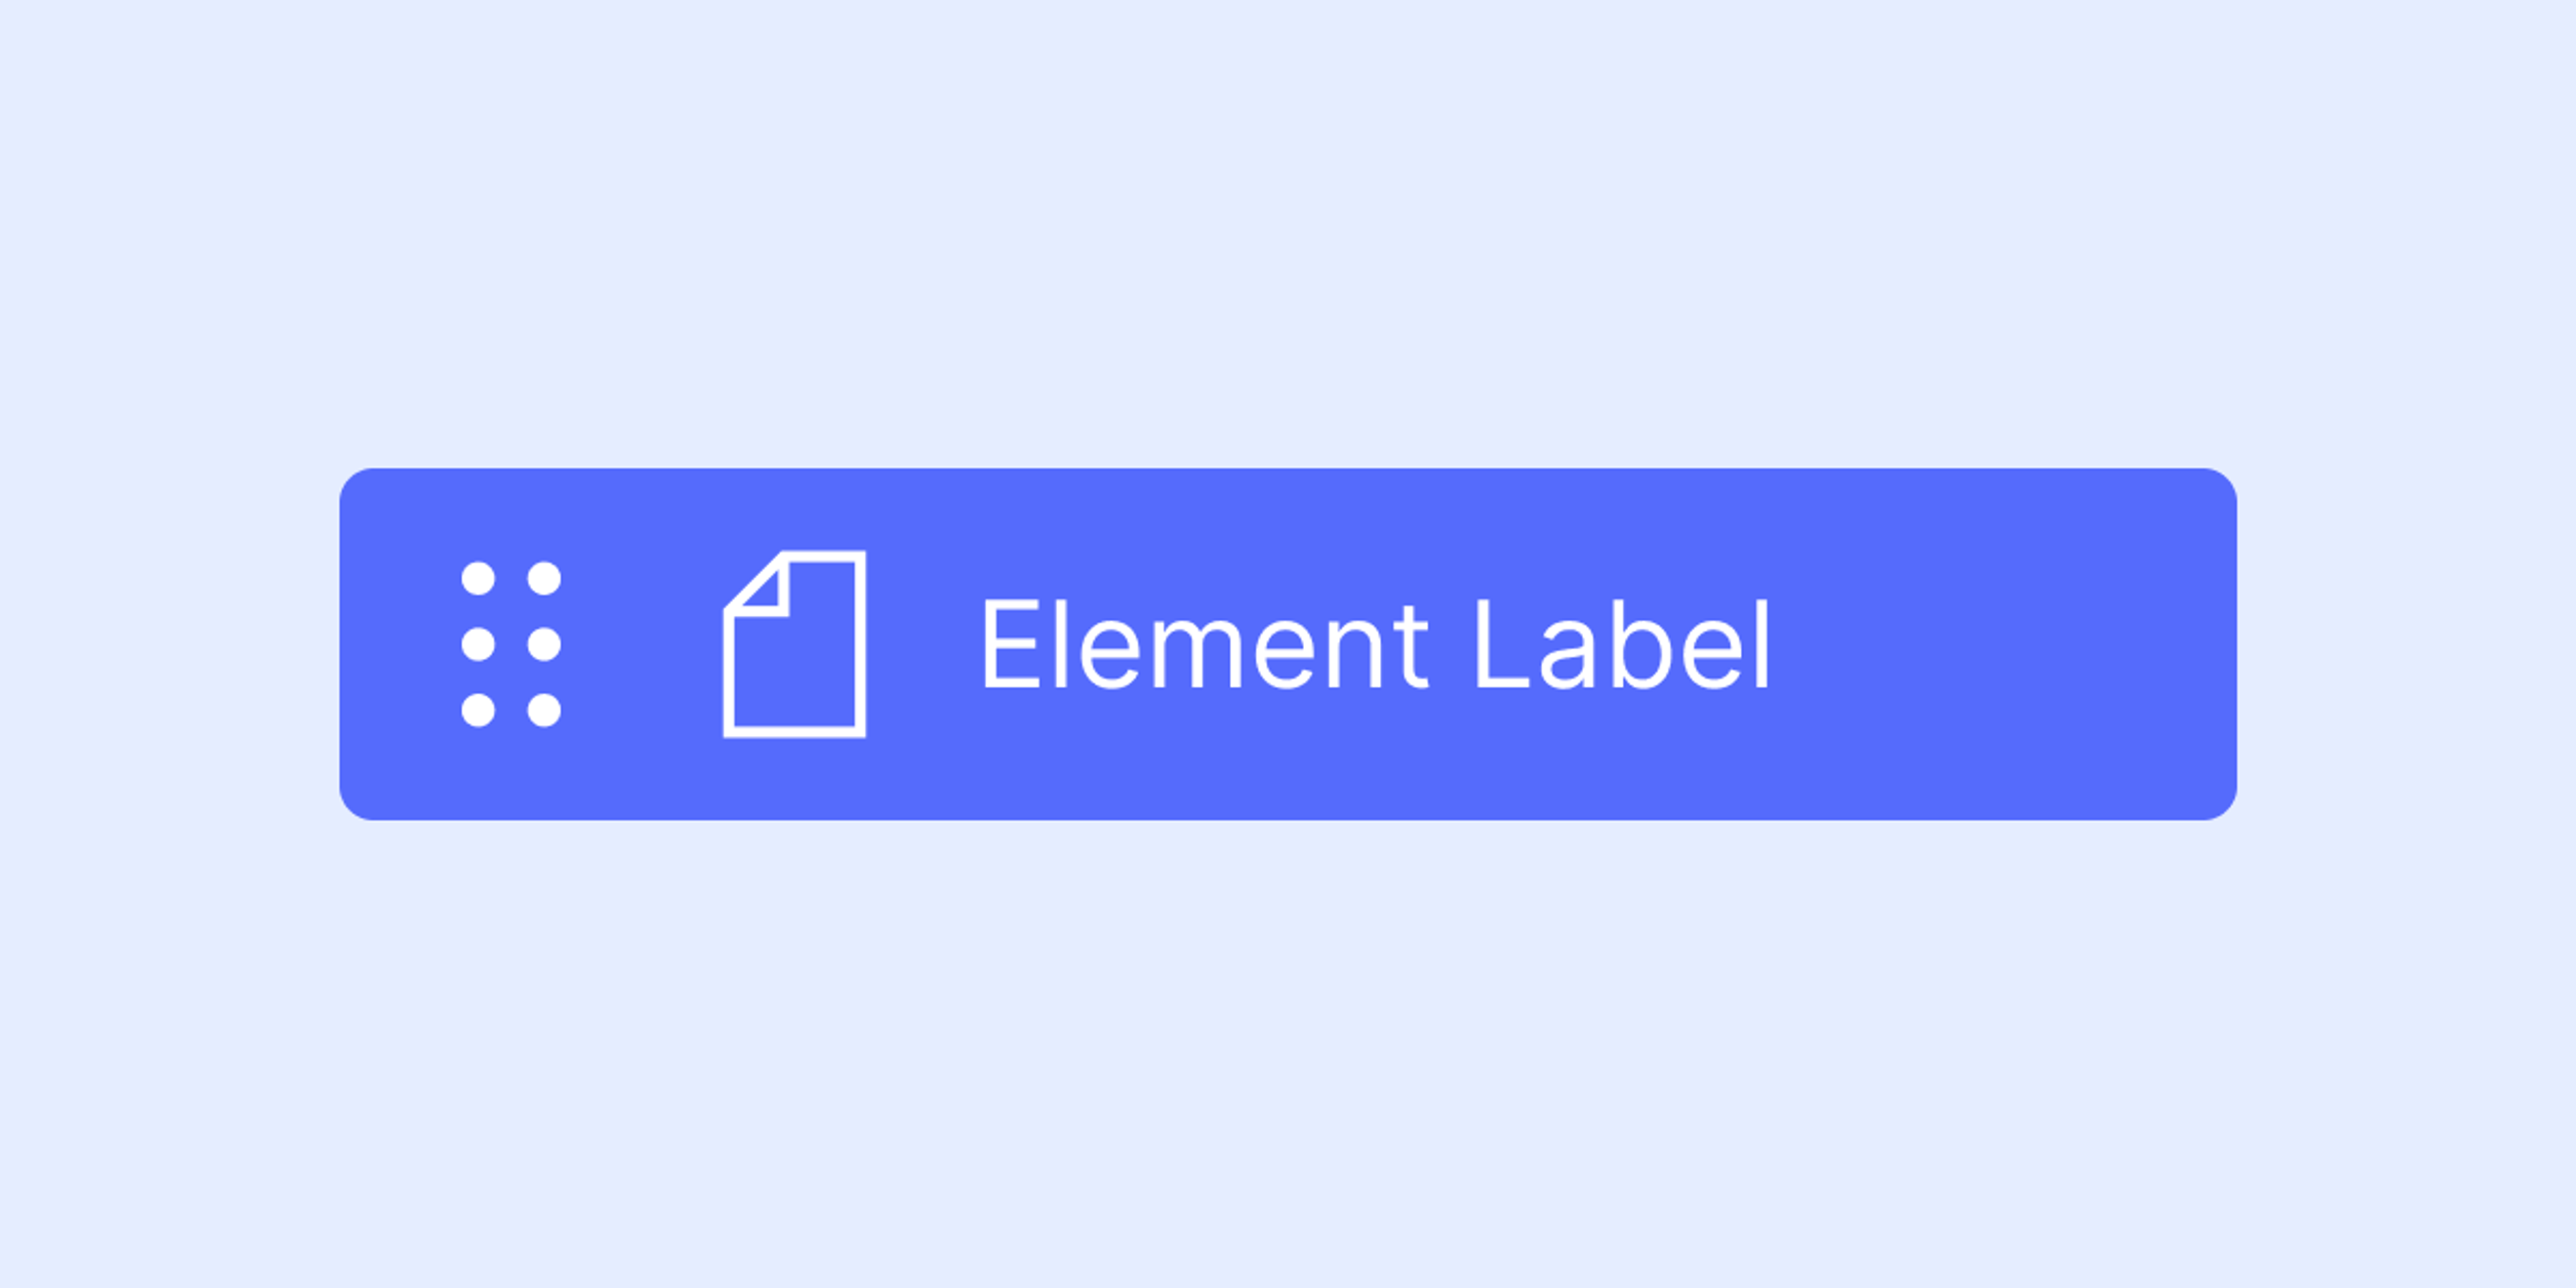
Once an array child has a data-sanity attribute, drag and drop will be enabled by default. This will be reflected in the element’s Overlay label:
Drag and drop is designed for simple UX and low-touch integration. To achieve this, it makes some assumptions:
- The web page is using a left-to-right, top-to-bottom format with a logical content flow.
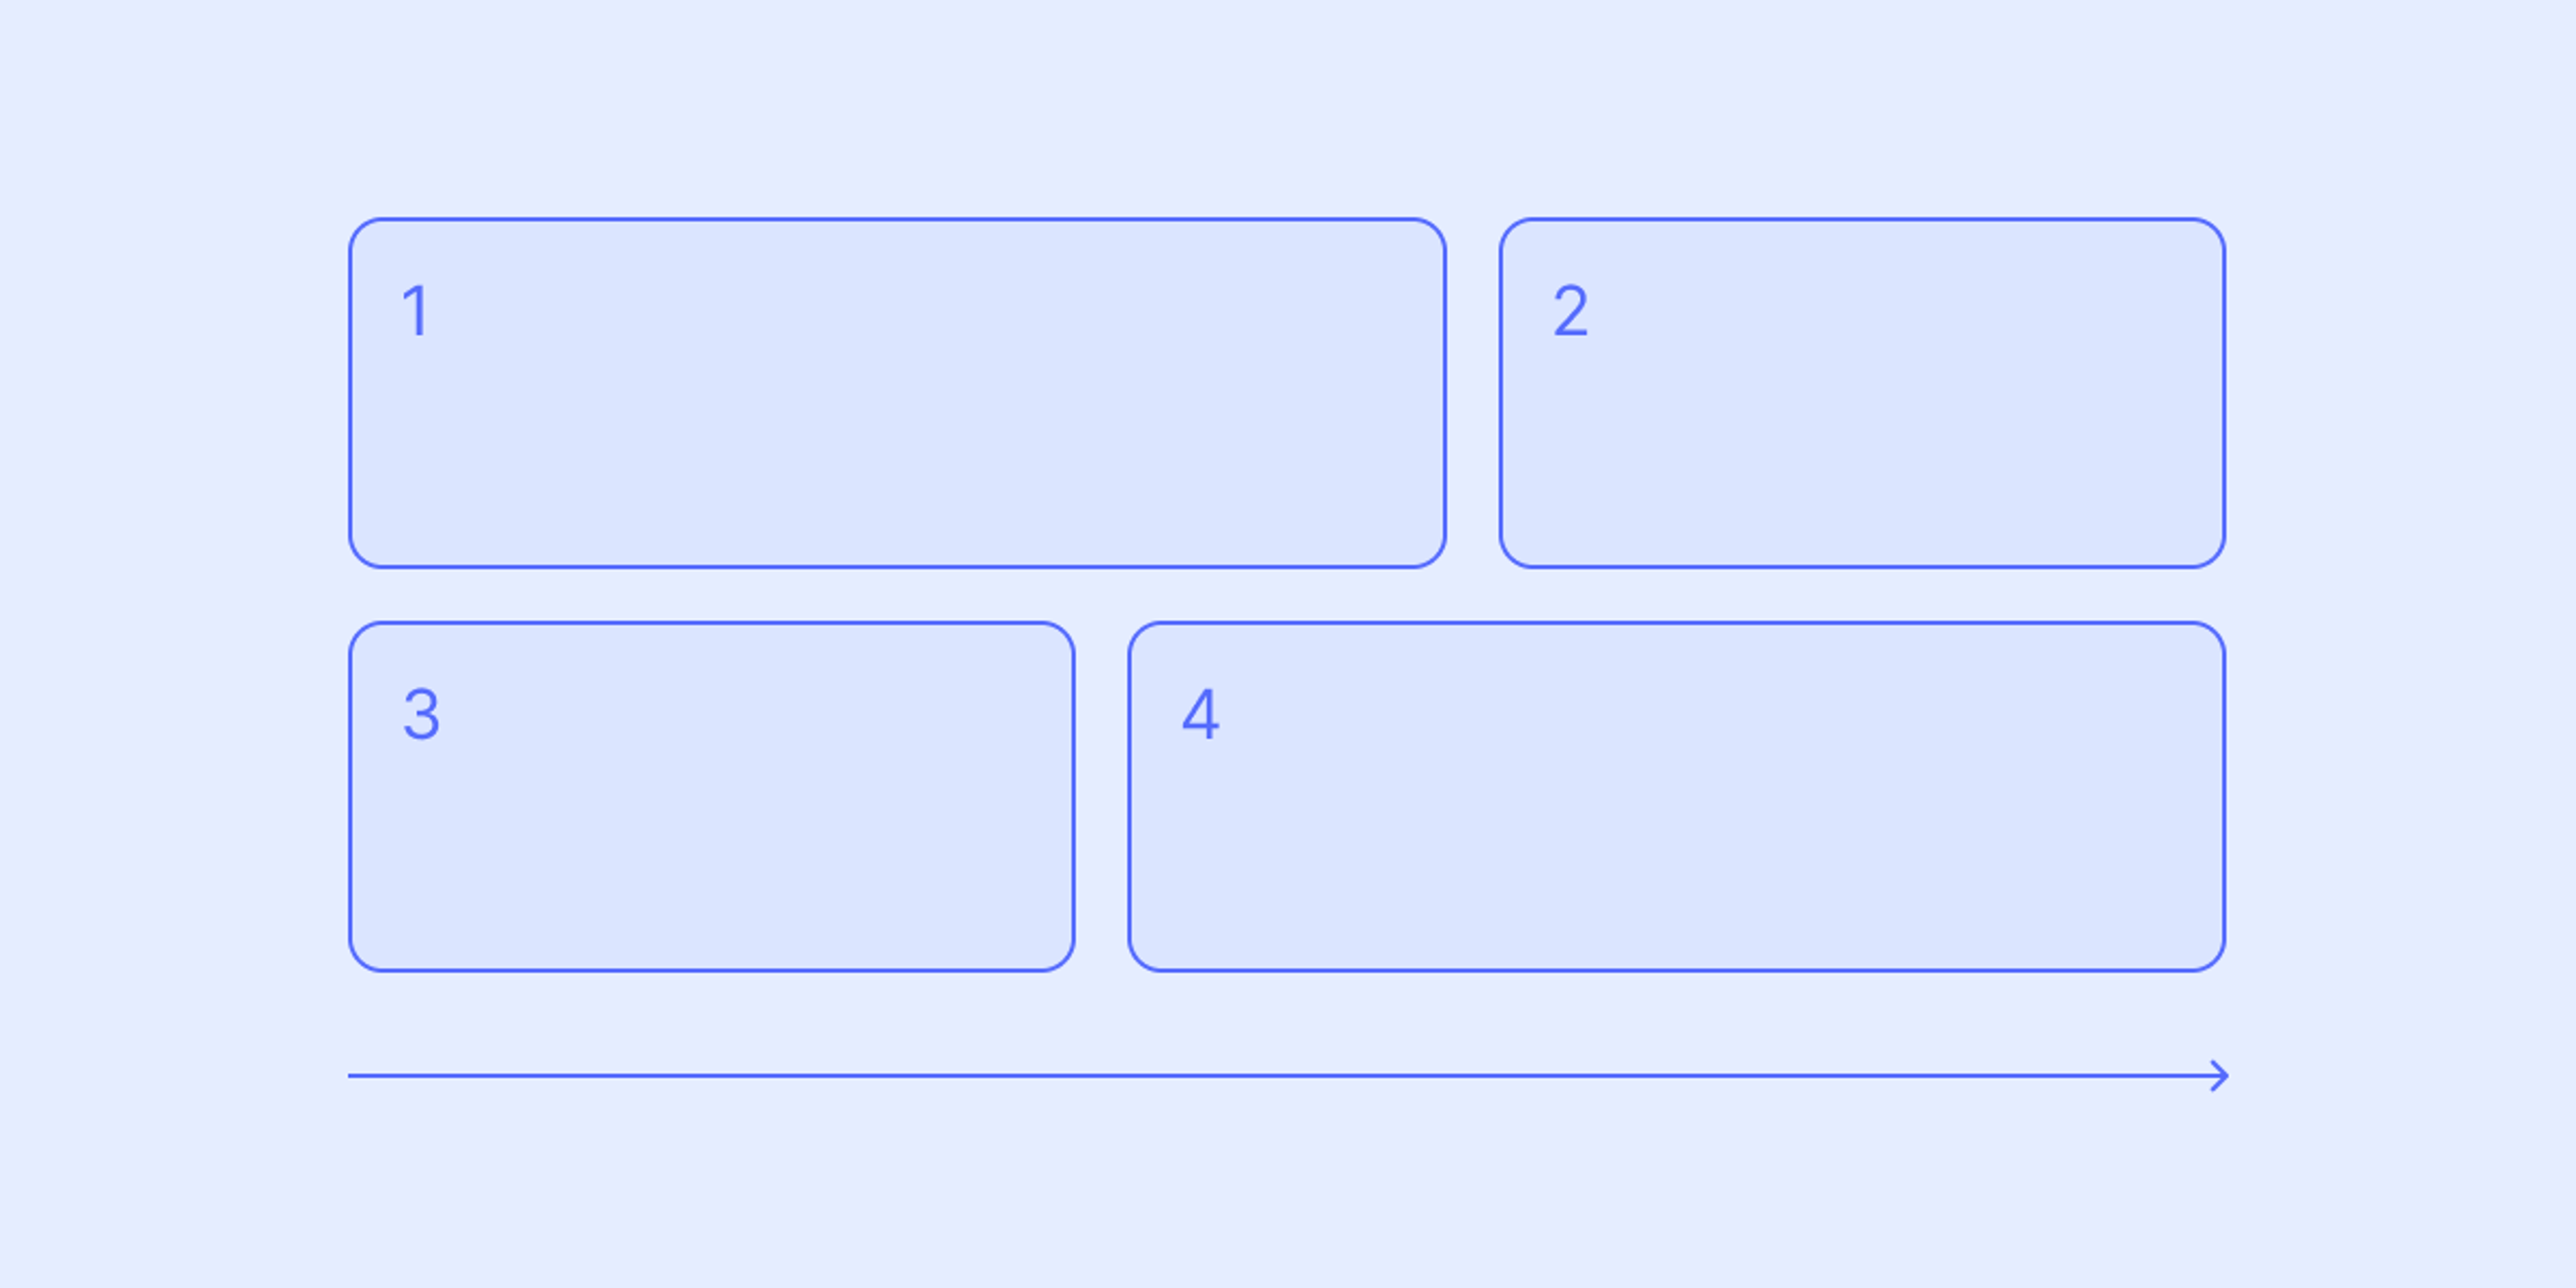
- Drag groups can be broken into two categories — horizontal and vertical.
Presentation will calculate the direction of a drag group based on the alignment of its children.
A drag group with children that share a y-axis is horizontal:
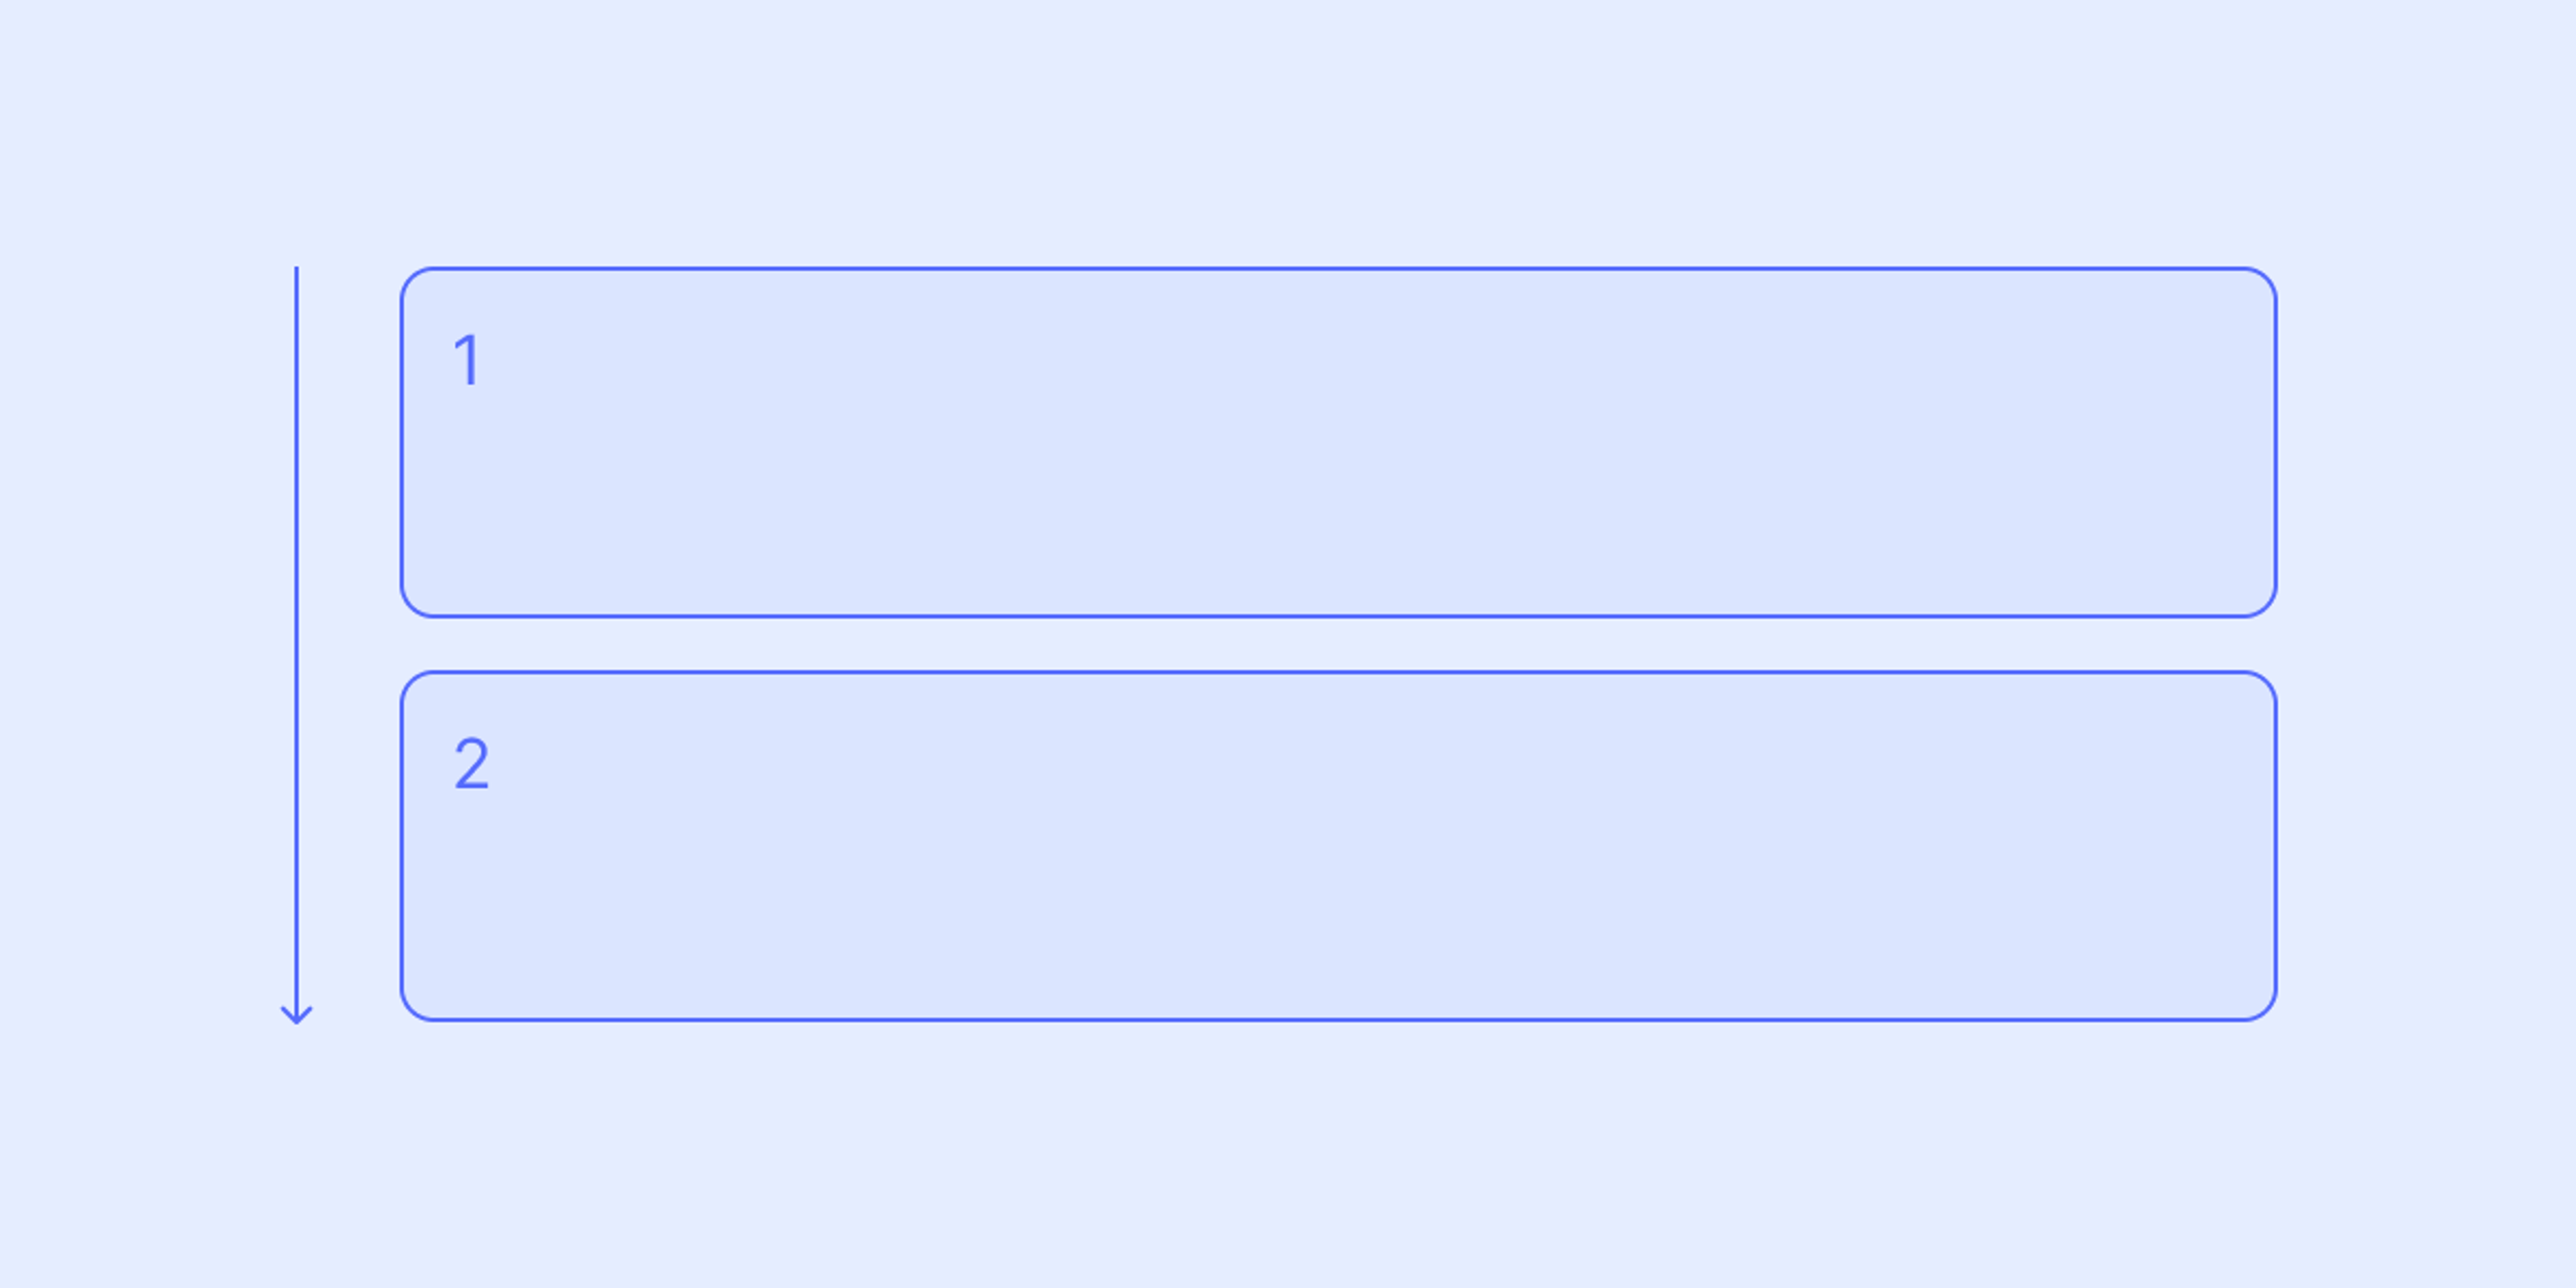
A drag group with children that do not share a y-axis is vertical:
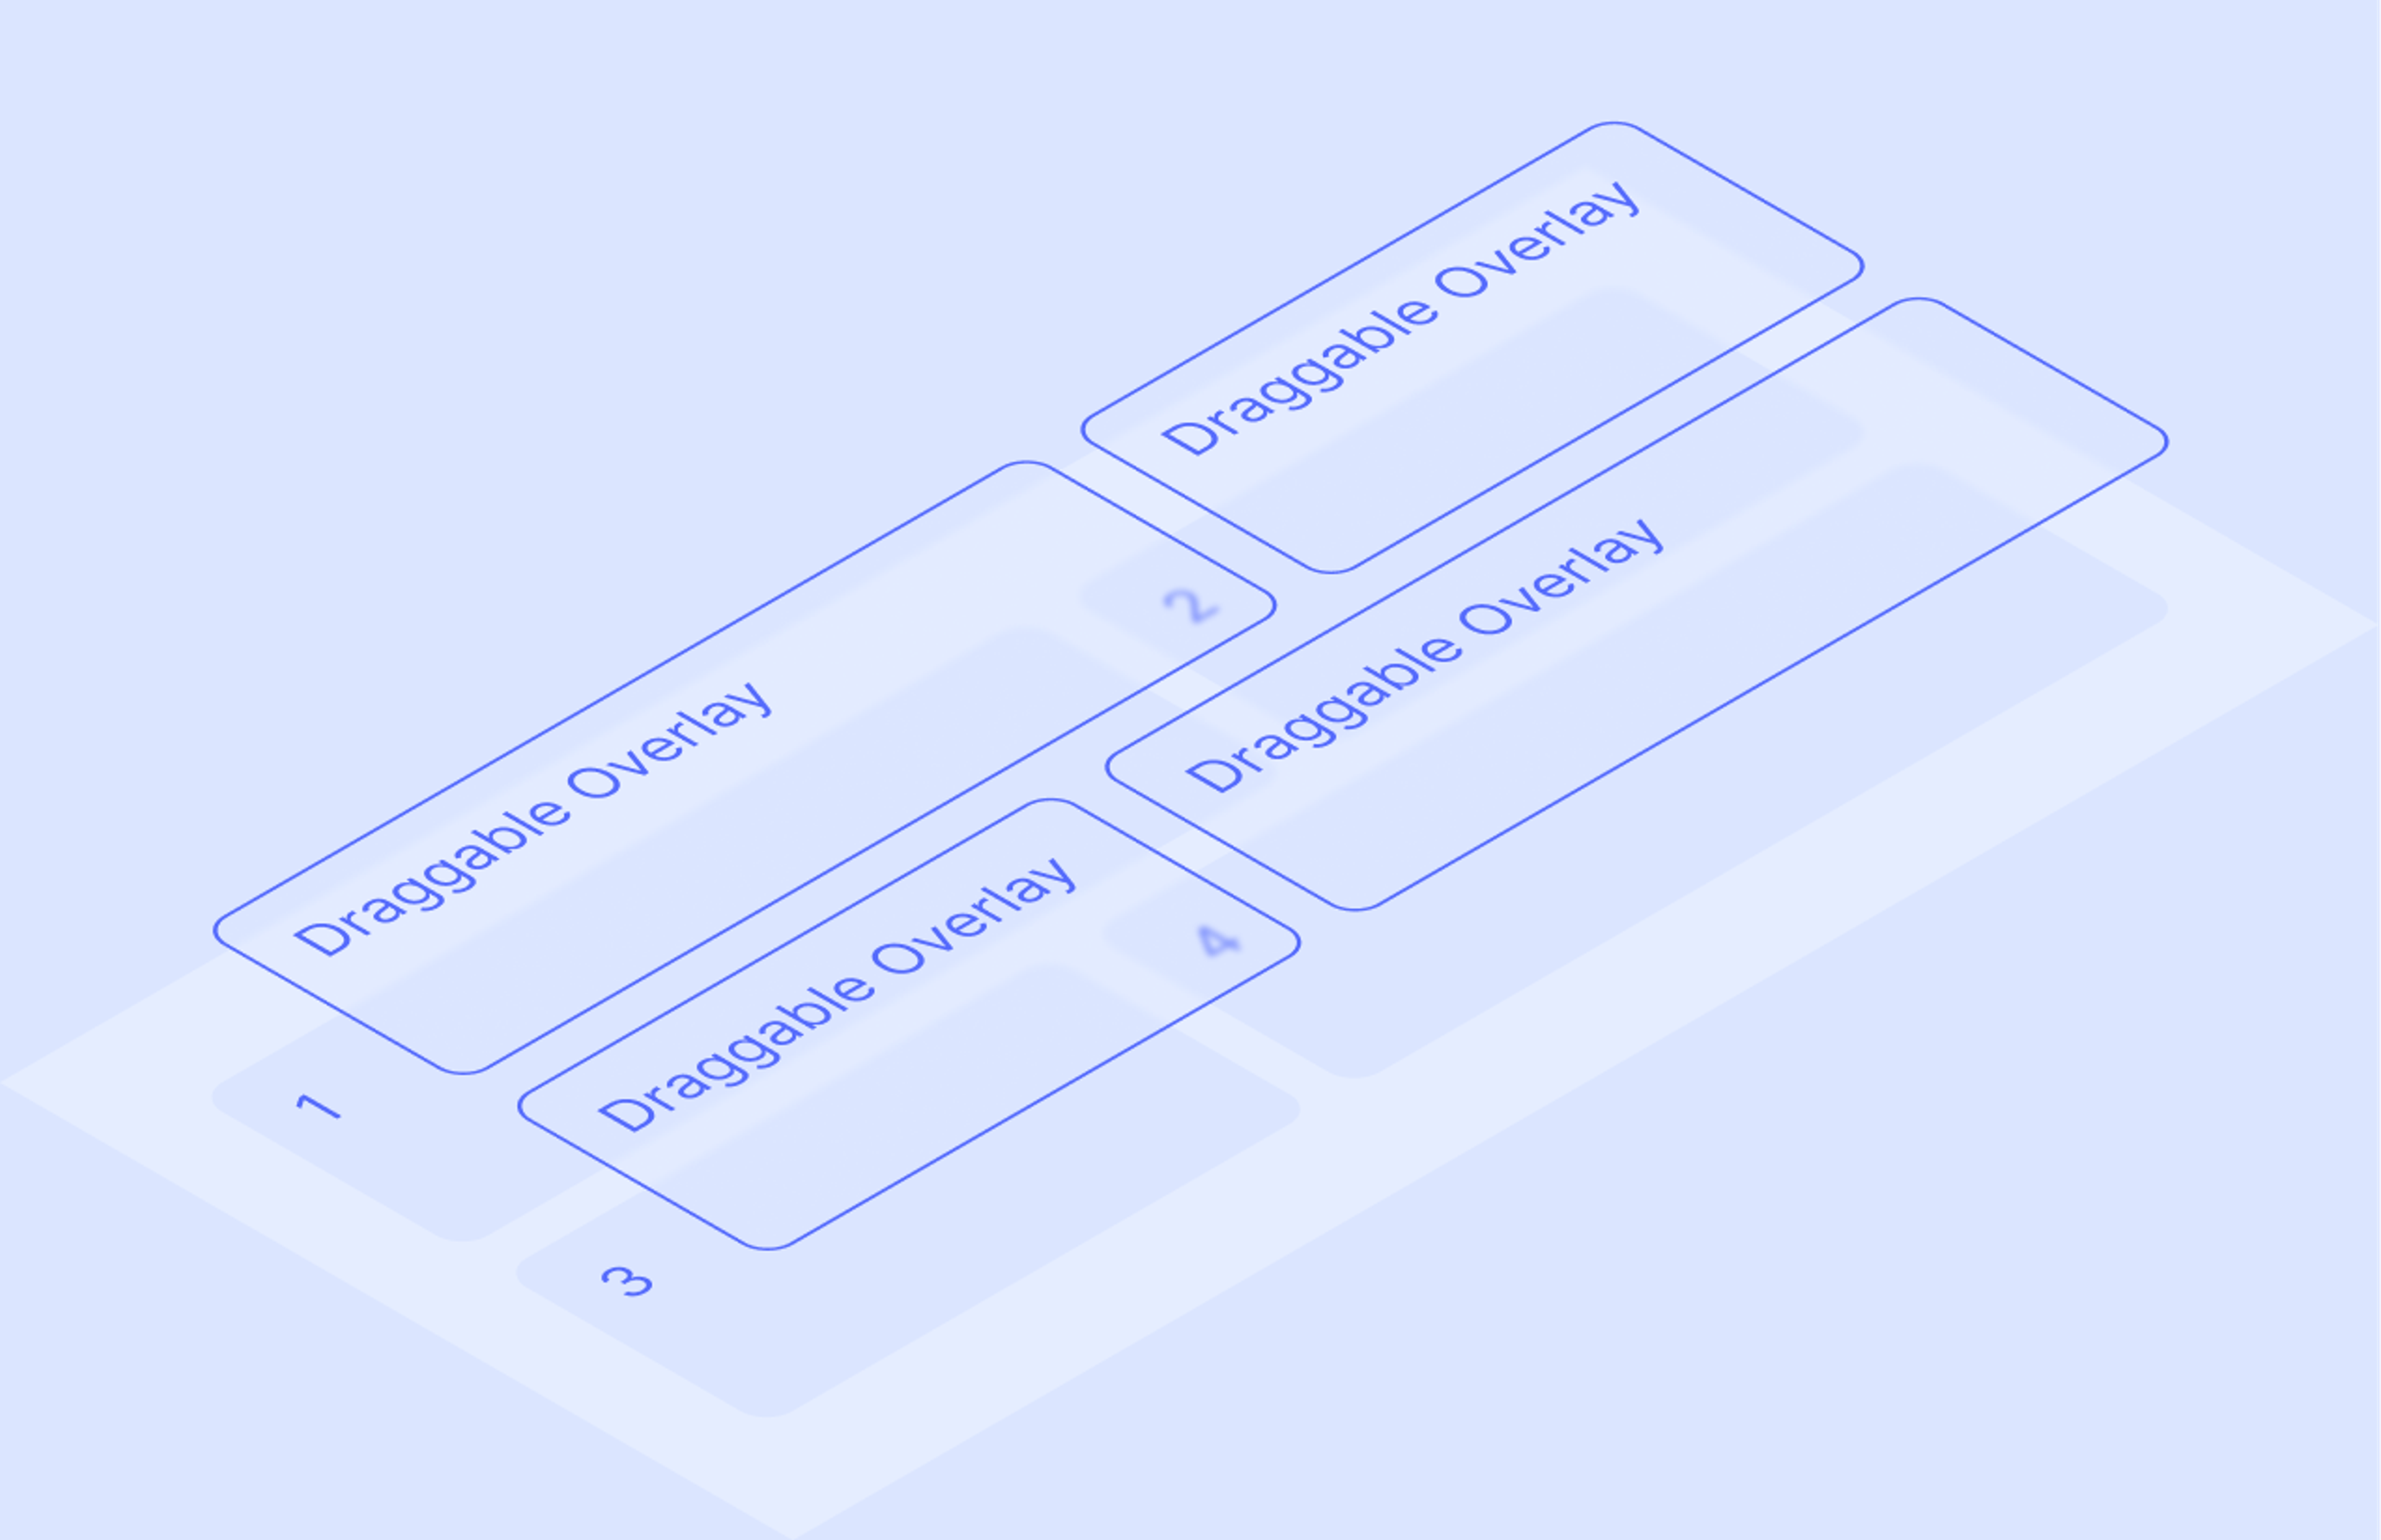
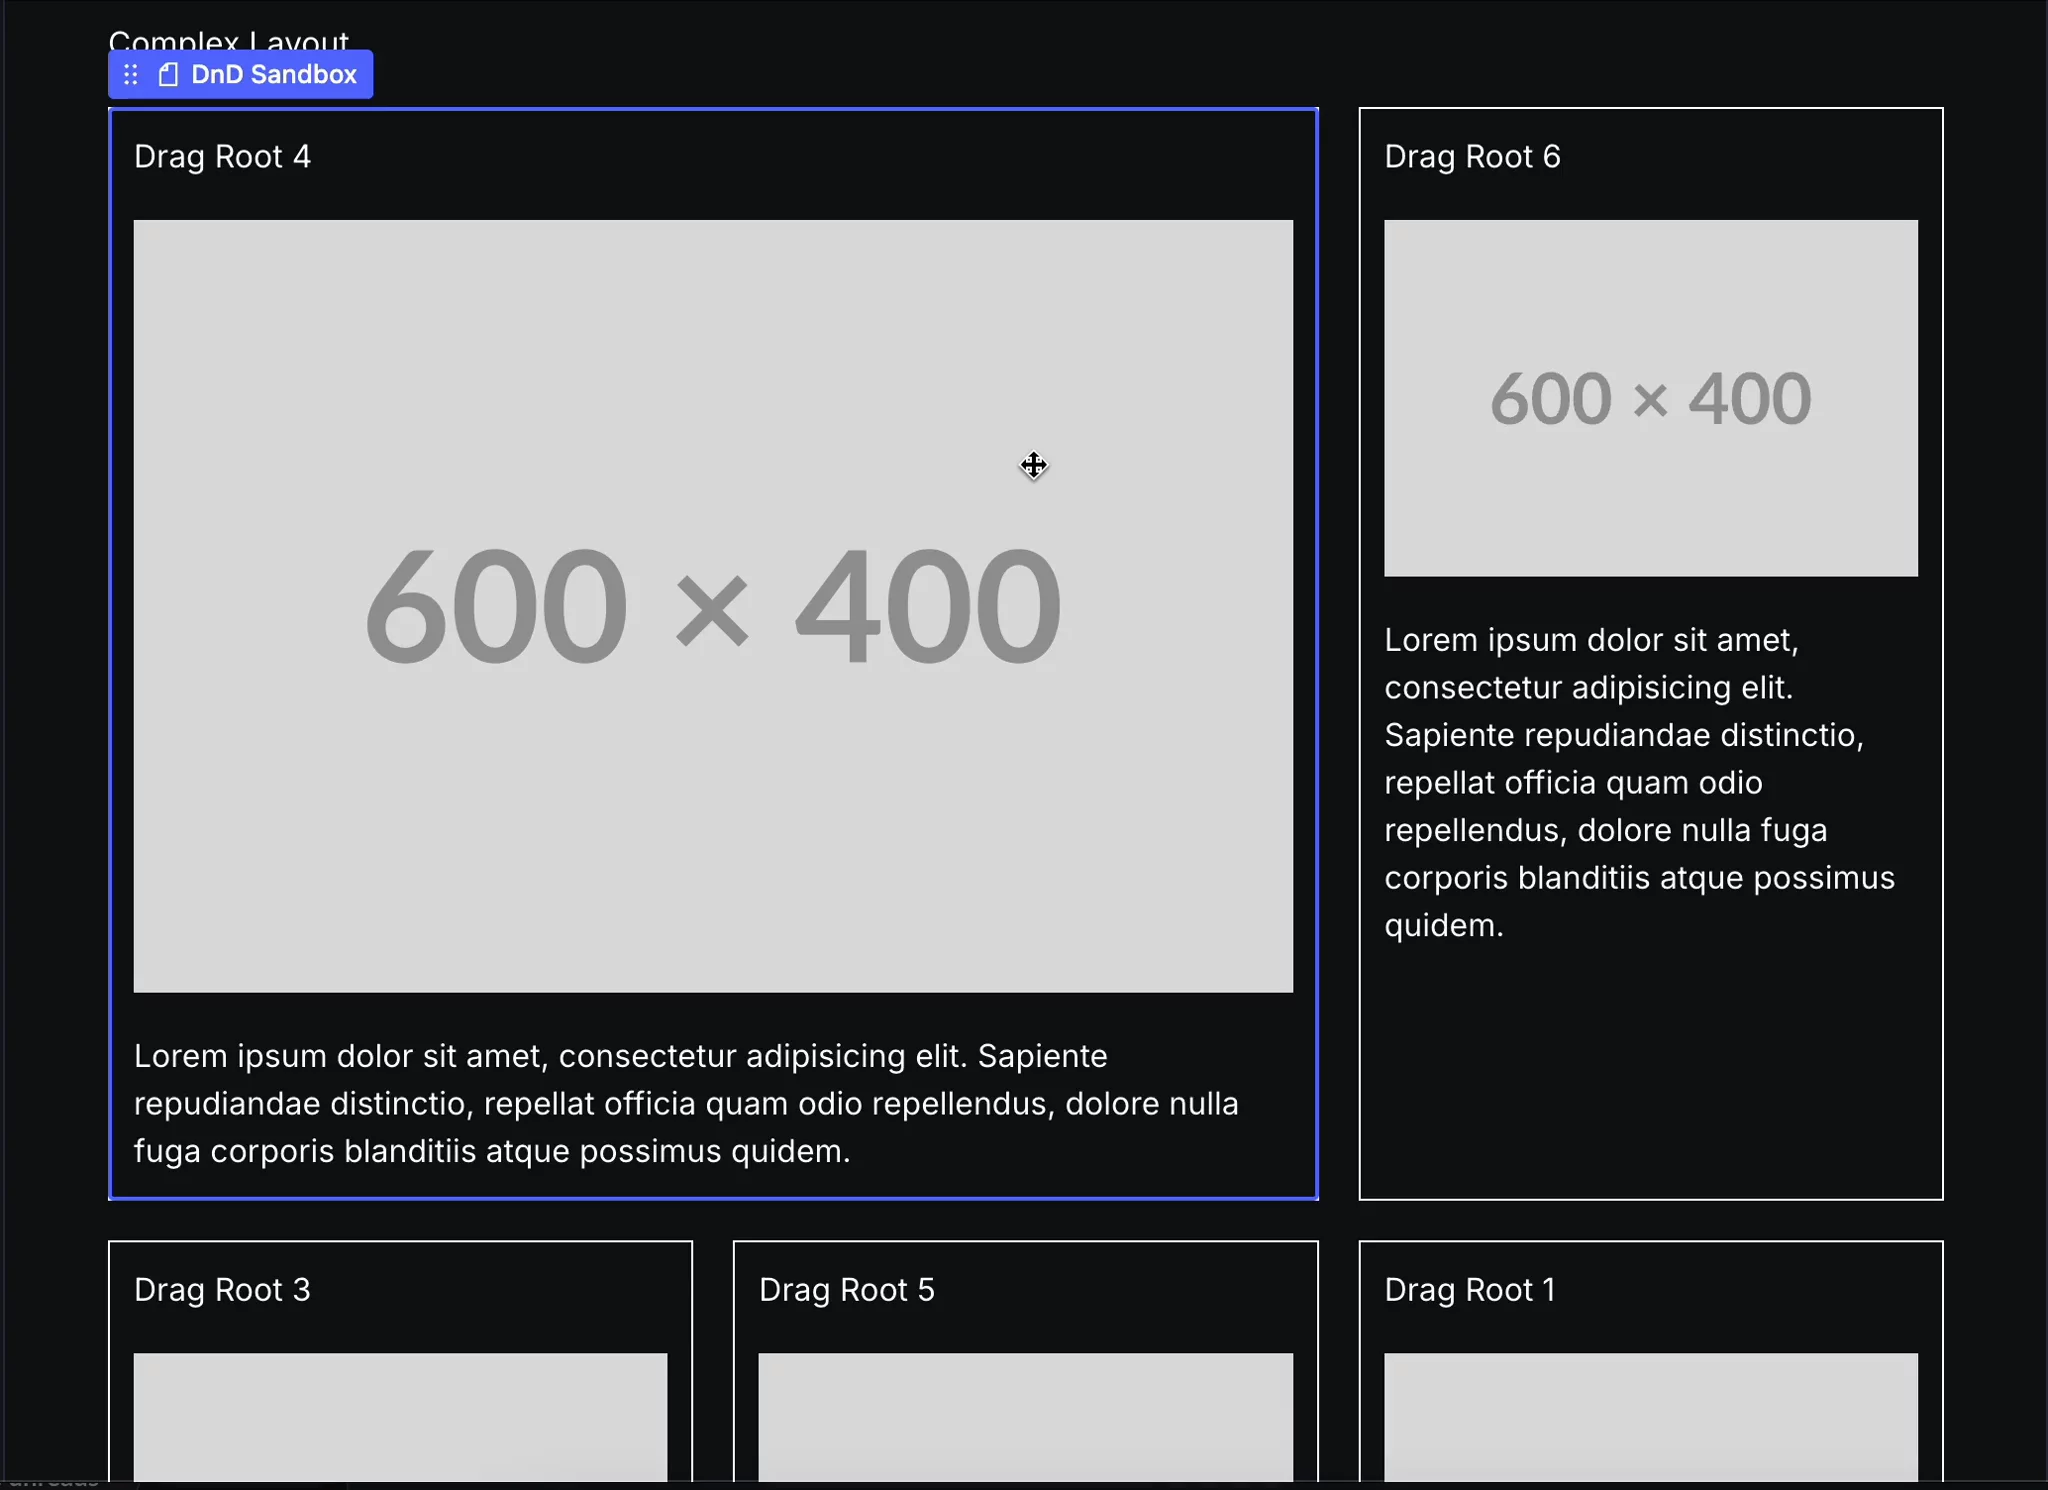
Minimap
When dragging an item that belongs to a group that is larger than the screen height, press the shift key while scrolling or dragging to enter minimap mode. This applies a three-dimensional transform to the page, focusing the group within the viewport. This makes it easier to move sections to slots outside of the immediate viewport:
Customizing drag and drop
You can customize the drag and drop behavior in the following ways:
Data attributes
Drag and drop’s default behavior can be customized using HTML data-attributes:
data-sanity-drag-disable: Disable drag and drop.data-sanity-drag-flow=(horizontal|vertical): Override the default drag direction.data-sanity-drag-group: Manually assign an element to a drag group. Useful when there are multiple elements representing the same data on a page.data-sanity-drag-prevent-default: Prevent data from updating after drag sequences. Useful for defining custom insert behavior (see Custom events below).data-sanity-drag-minimap-disable: Disable Minimap for specific element
Custom events
Drag and drop emits a custom sanity/dragEnd event when an element is dropped.
sanity/dragEnd events can be used alongside Presentation's useDocuments functionality to override the default drag and drop mutation logic. This is useful for defining custom behavior for non left-to-right/top-to-bottom languages, or other bespoke use cases.
The code below provides a boilerplate for adding custom patching logic to drag and drop events:
'use client'

import {at, createIfNotExists, insert, patch, remove} from '@sanity/mutate'
import {get as getFromPath} from '@sanity/util/paths'
import {getArrayItemKeyAndParentPath, useDocuments} from '@sanity/visual-editing'
import {useEffect} from 'react'

function getReferenceNodeAndInsertPosition(position: any) {
  if (position) {
    const {top, right, bottom, left} = position
    if (left || top) {
      return {node: (left ?? top)!.sanity, position: 'after' as const}
    } else if (right || bottom) {
      return {node: (right ?? bottom)!.sanity, position: 'before' as const}
    }
  }
  return undefined
}

export function DnDCustomBehaviour() {
  const {getDocument} = useDocuments()

  useEffect(() => {
    const handler = (e: CustomEvent) => {
      const {insertPosition, target, dragGroup} = e.detail

      if (dragGroup !== 'prevent-default') return

      const reference = getReferenceNodeAndInsertPosition(insertPosition)
      if (reference) {
        const doc = getDocument(target.id)
        // We must have access to the document actor in order to perform the
        // necessary mutations. If this is undefined, something went wrong when
        // resolving the currently in use documents
        const {node, position} = reference
        // Get the key of the element that was dragged
        const {key: targetKey} = getArrayItemKeyAndParentPath(target)
        // Get the key of the reference element, and path to the parent array
        const {path: arrayPath, key: referenceItemKey} = getArrayItemKeyAndParentPath(node)
        // Don't patch if the keys match, as this means the item was only
        // dragged to its existing position, i.e. not moved
        if (arrayPath && referenceItemKey && referenceItemKey !== targetKey) {
          doc.patch(async ({getSnapshot}) => {
            const snapshot = await getSnapshot()
            // Get the current value of the element we dragged, as we will need
            // to clone this into the new position
            const elementValue = getFromPath(snapshot, target.path)
            return [
              // Remove the original dragged item
              at(arrayPath, remove({_key: targetKey})),
              // Insert the cloned dragged item into its new position
              at(arrayPath, insert(elementValue, position, {_key: referenceItemKey})),
            ]
          })
        }
      }
    }

    window.addEventListener('sanity/dragEnd', handler as EventListener)

    return () => {
      window.removeEventListener('sanity/dragEnd', handler as EventListener)
    }
  }, [getDocument])

  return <></>
}
Gotcha
useDocuments is currently only available as a React hook.
Troubleshooting
Preventing Stega children from overriding array paths
Occasionally, a Stega-encoded string can override drag and drop on a parent array item. Here, the title string occupies the entire <button> element. The title automatically has an Overlay created for it, which prevents interaction with the parent Overlay:
<button
  data-sanity={dataAttribute({
    id: parentDocument._id,
    type: parentDocument._type,
    path: `arrayItems[_key=="${arrayItem._key}"]`,
  })}
>
  {arrayItem.title}
</button>
To prevent this, use stegaClean :
import {stegaClean} from '@sanity/client/stega'

<button
  ...
>
  {stegaClean(arrayItem.title)}
</button>
Or add some visual padding to the array child to create space for the “draggable” area:
<button
  ...
  style={{padding: '1rem'}}
>
  {arrayItem.title}
</button>