Content Releases user guide
Learn to use Content Releases to organize and schedule updates across multiple documents.
Content Releases allow teams to organize and schedule updates across multiple documents. Teams can plan, preview, and validate significant changes in advance, ensuring seamless and conflict-free content deployment.
Content Releases provide several key benefits:
- Coordinate updates: Simultaneously manage and publish updates across multiple pages and channels, ensuring consistency.
- Reduce manual effort and risk: Automate scheduling to minimize manual tracking and prevent errors or conflicting changes.
- Gain confidence with previews and validation: Preview and validate scheduled releases to guarantee readiness before going live
For developer documentation on how to configure, integrate, and interact with Content Releases programmatically, go here:
This is a paid feature
This feature is available on certain Enterprise plans. Talk to sales to learn more.
Scheduled Drafts is also available
For teams without access to Content Releases, or if you don’t need to schedule groups of documents to go out at once, the Scheduled Drafts feature is also available.
Before you begin
Content Releases requires that your studio and plugins are up to date. If you're experiencing issues using Content Releases, check with your administrator and direct them to the Studio configuration.
The Content Releases workflow
Content Releases introduces the concept of a release. Releases are a way to group multiple document changes together into a single unit that can be previewed, validated, scheduled, and published as one.
The most basic workflow is as follows:
- Create a release.
- Add documents to a release to create new document versions.
- Make changes to the documents.
- Publish the release.
Release types
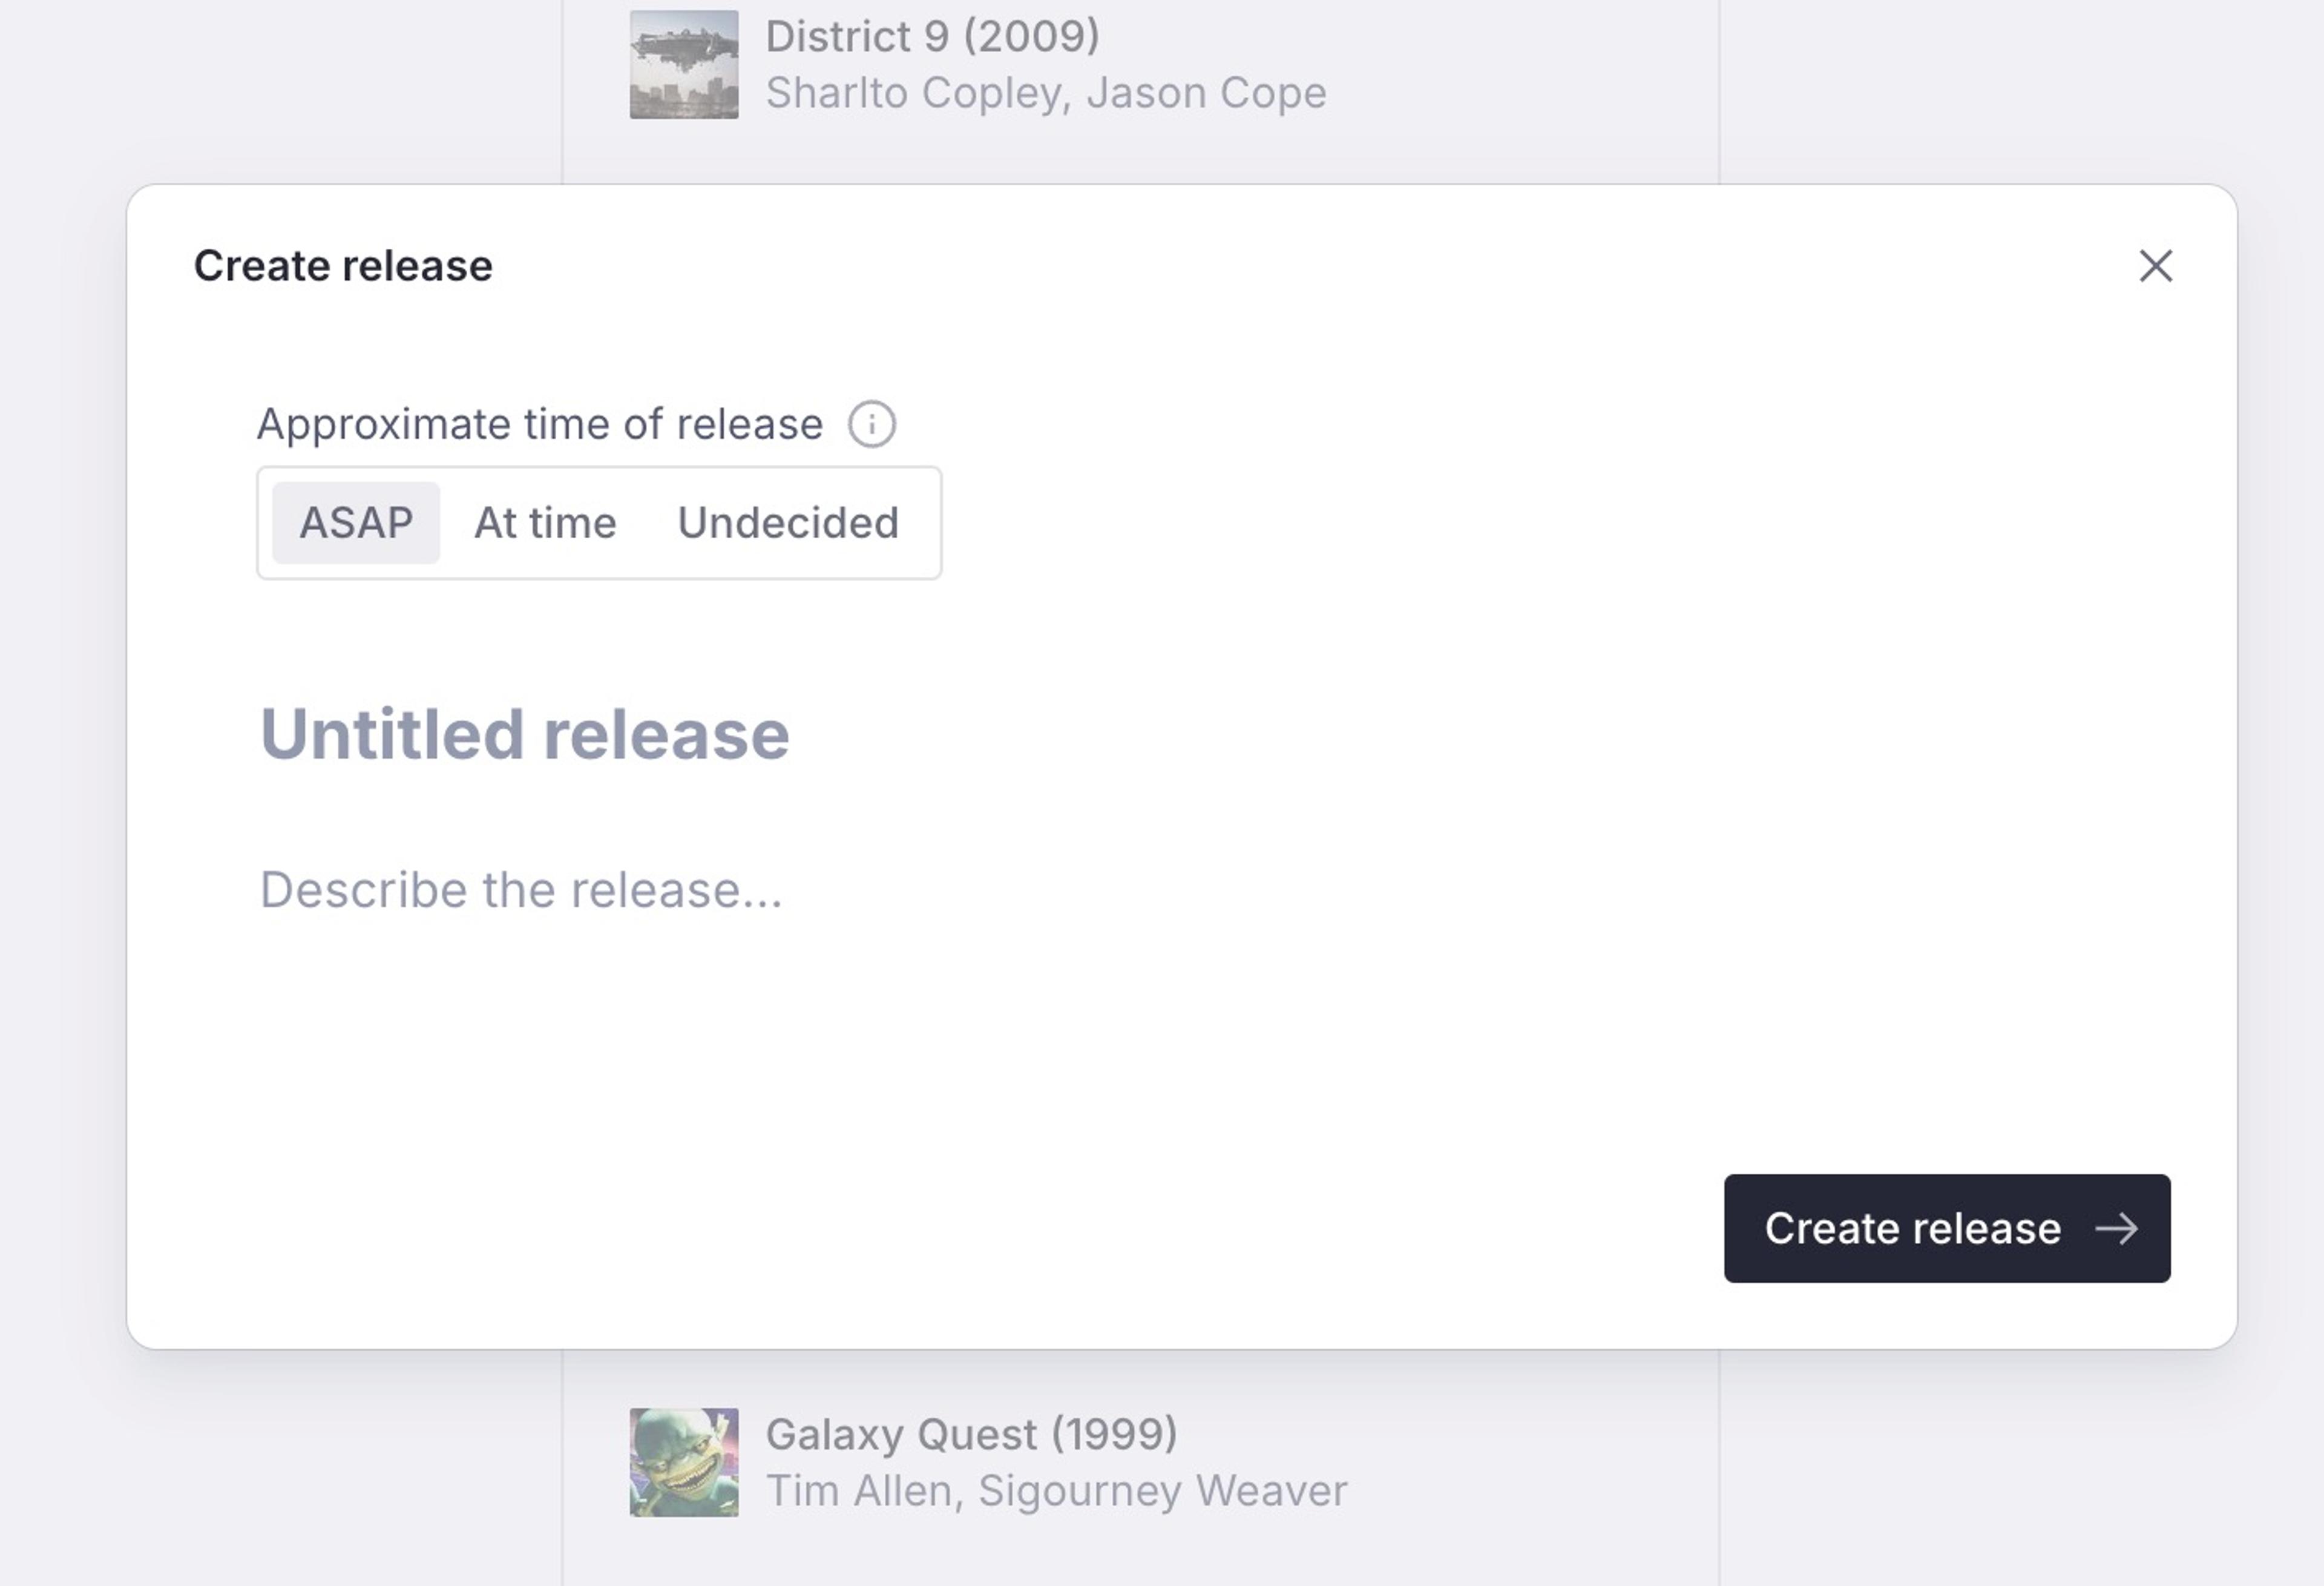
When you create a content release, you must choose a release type. There are three available types:
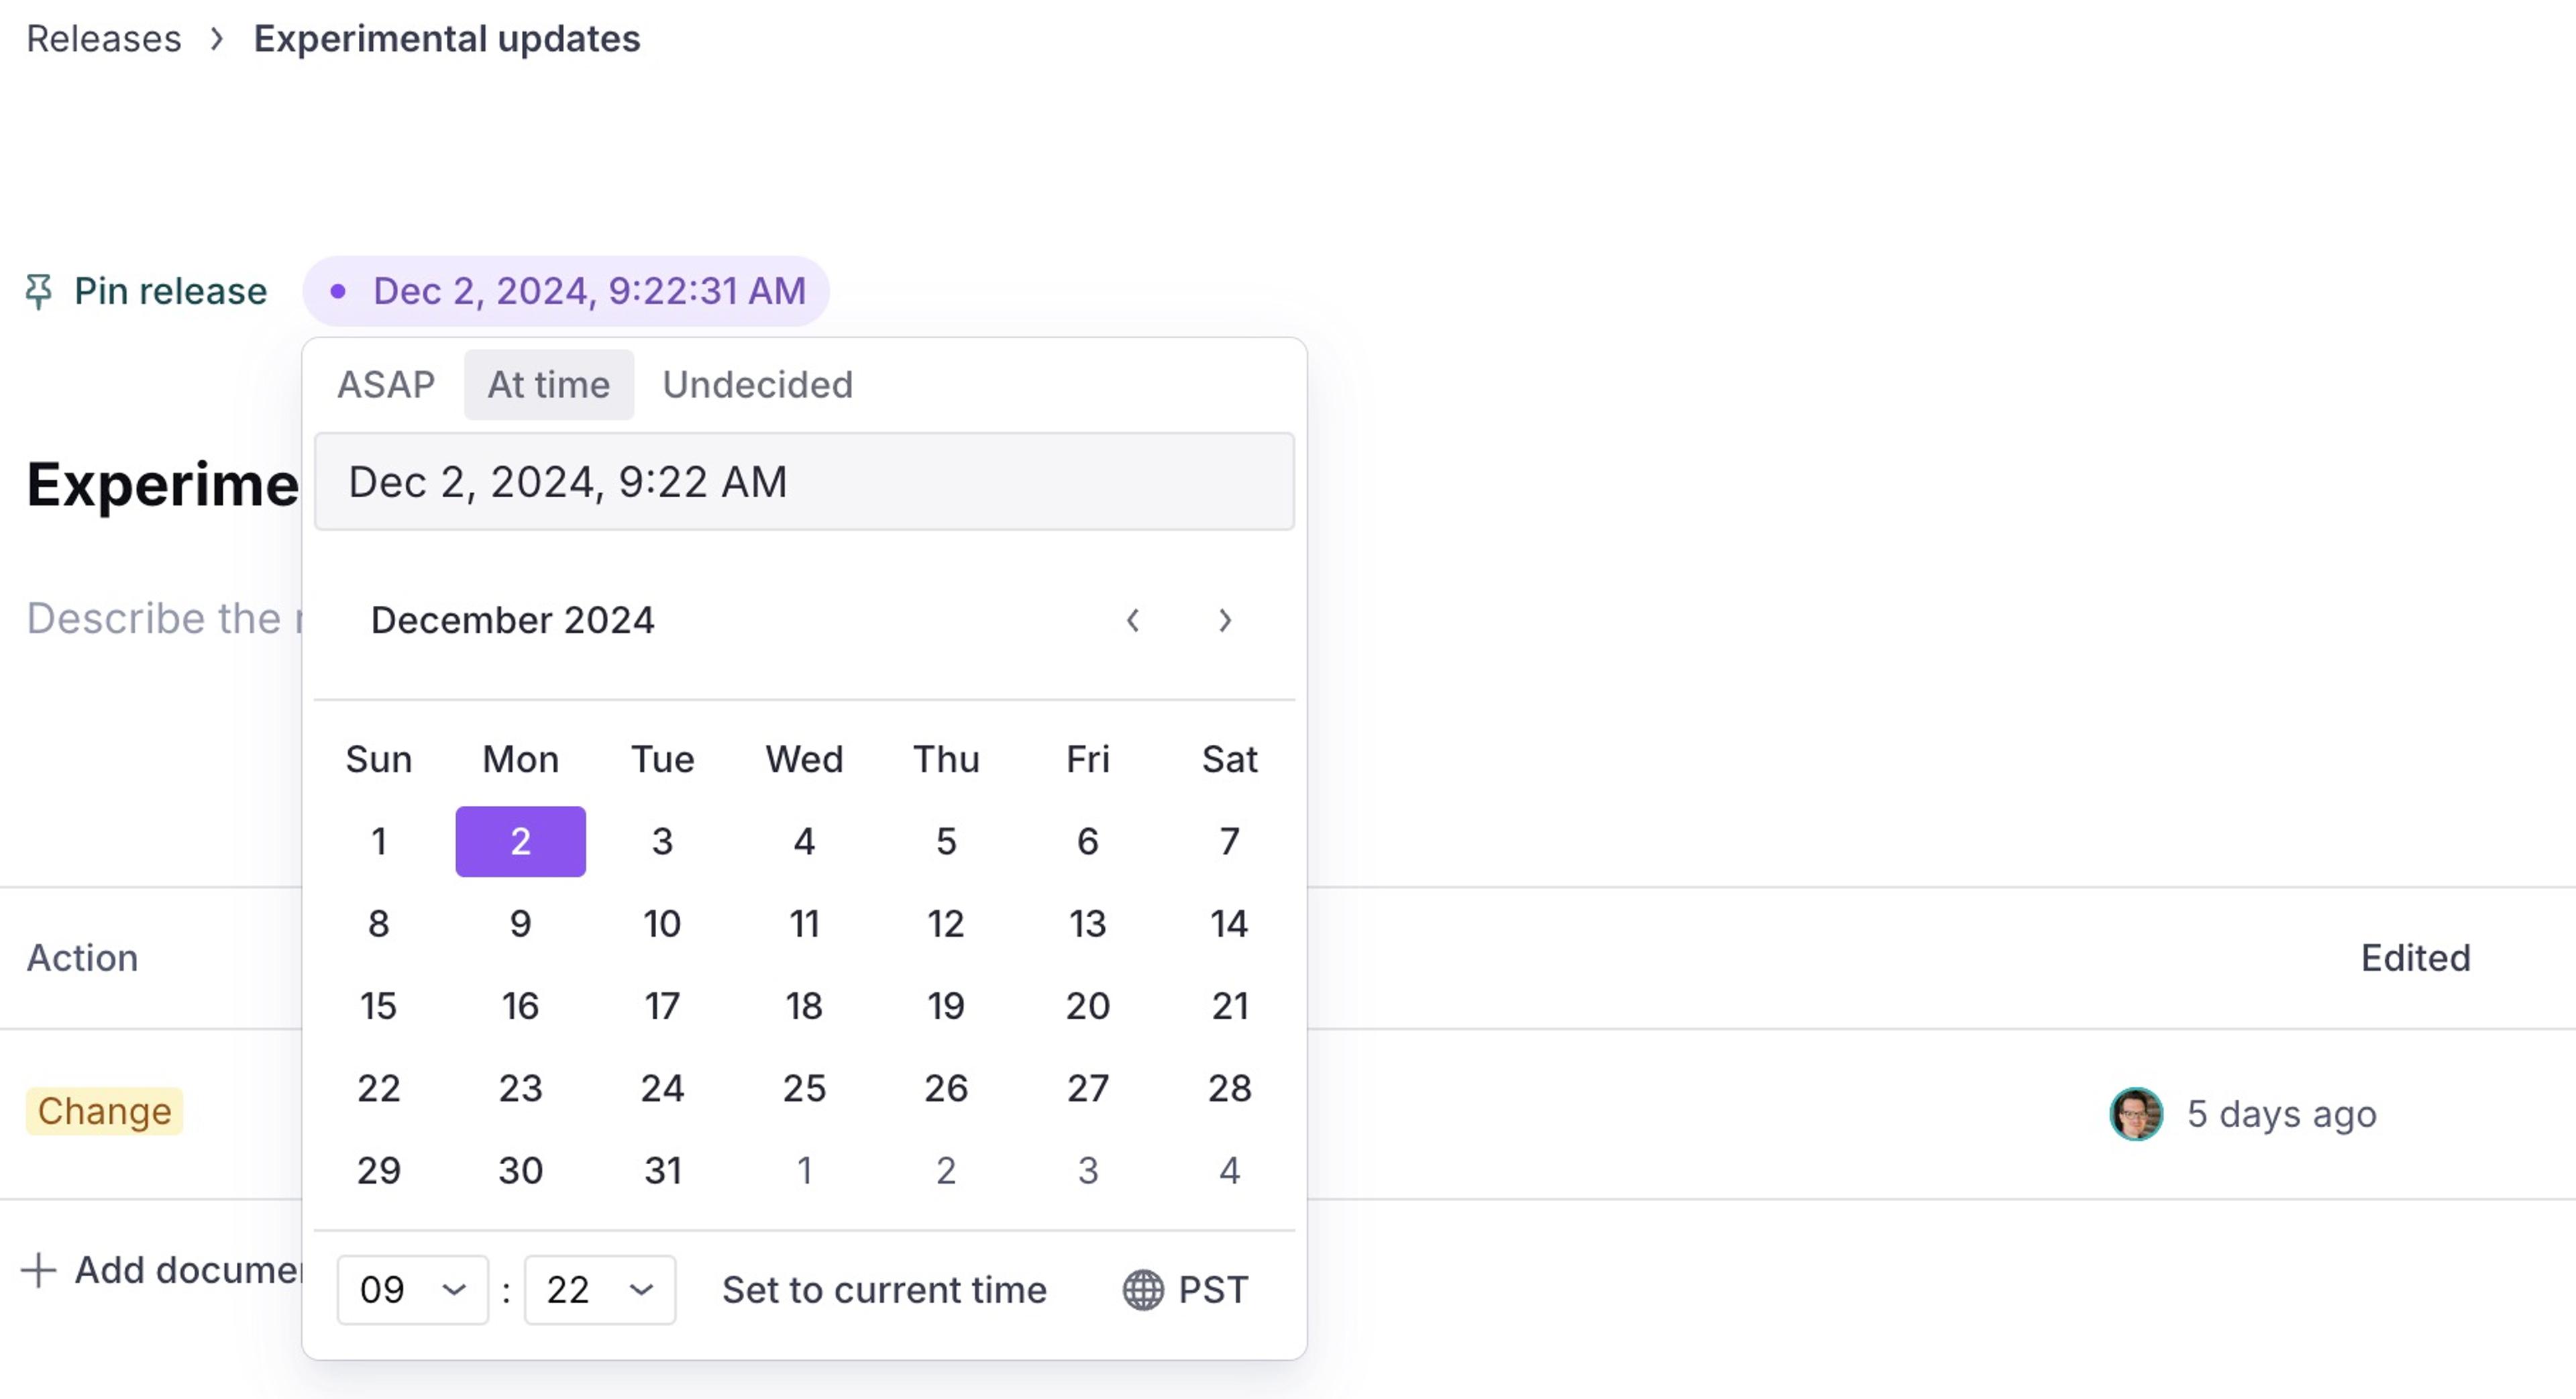
- ASAP: You plan for these changes to go live as soon as they're ready. They'll have a promenant "Run release" action available on the release details screen.
- At time: You have a planned date and time in mind. You'll be able to schedule these for a specific time from the release details screen.
- Undecided: You're unsure, or don't want to set a type. These will also hide the publish and schedule actions behind the release's "..." menu to prevent accidental publishes.
The type dictates the order a release shows up in Studio to reflect when it will publish compared to other releases, but you can change the type at any time from the release detail screen.
Release quotas
You plan dictates how many active releases your organization can have at a time. Any release that isn't "Archived" or "Published" is considered active, including scheduled releases that have yet to publish.
The document view
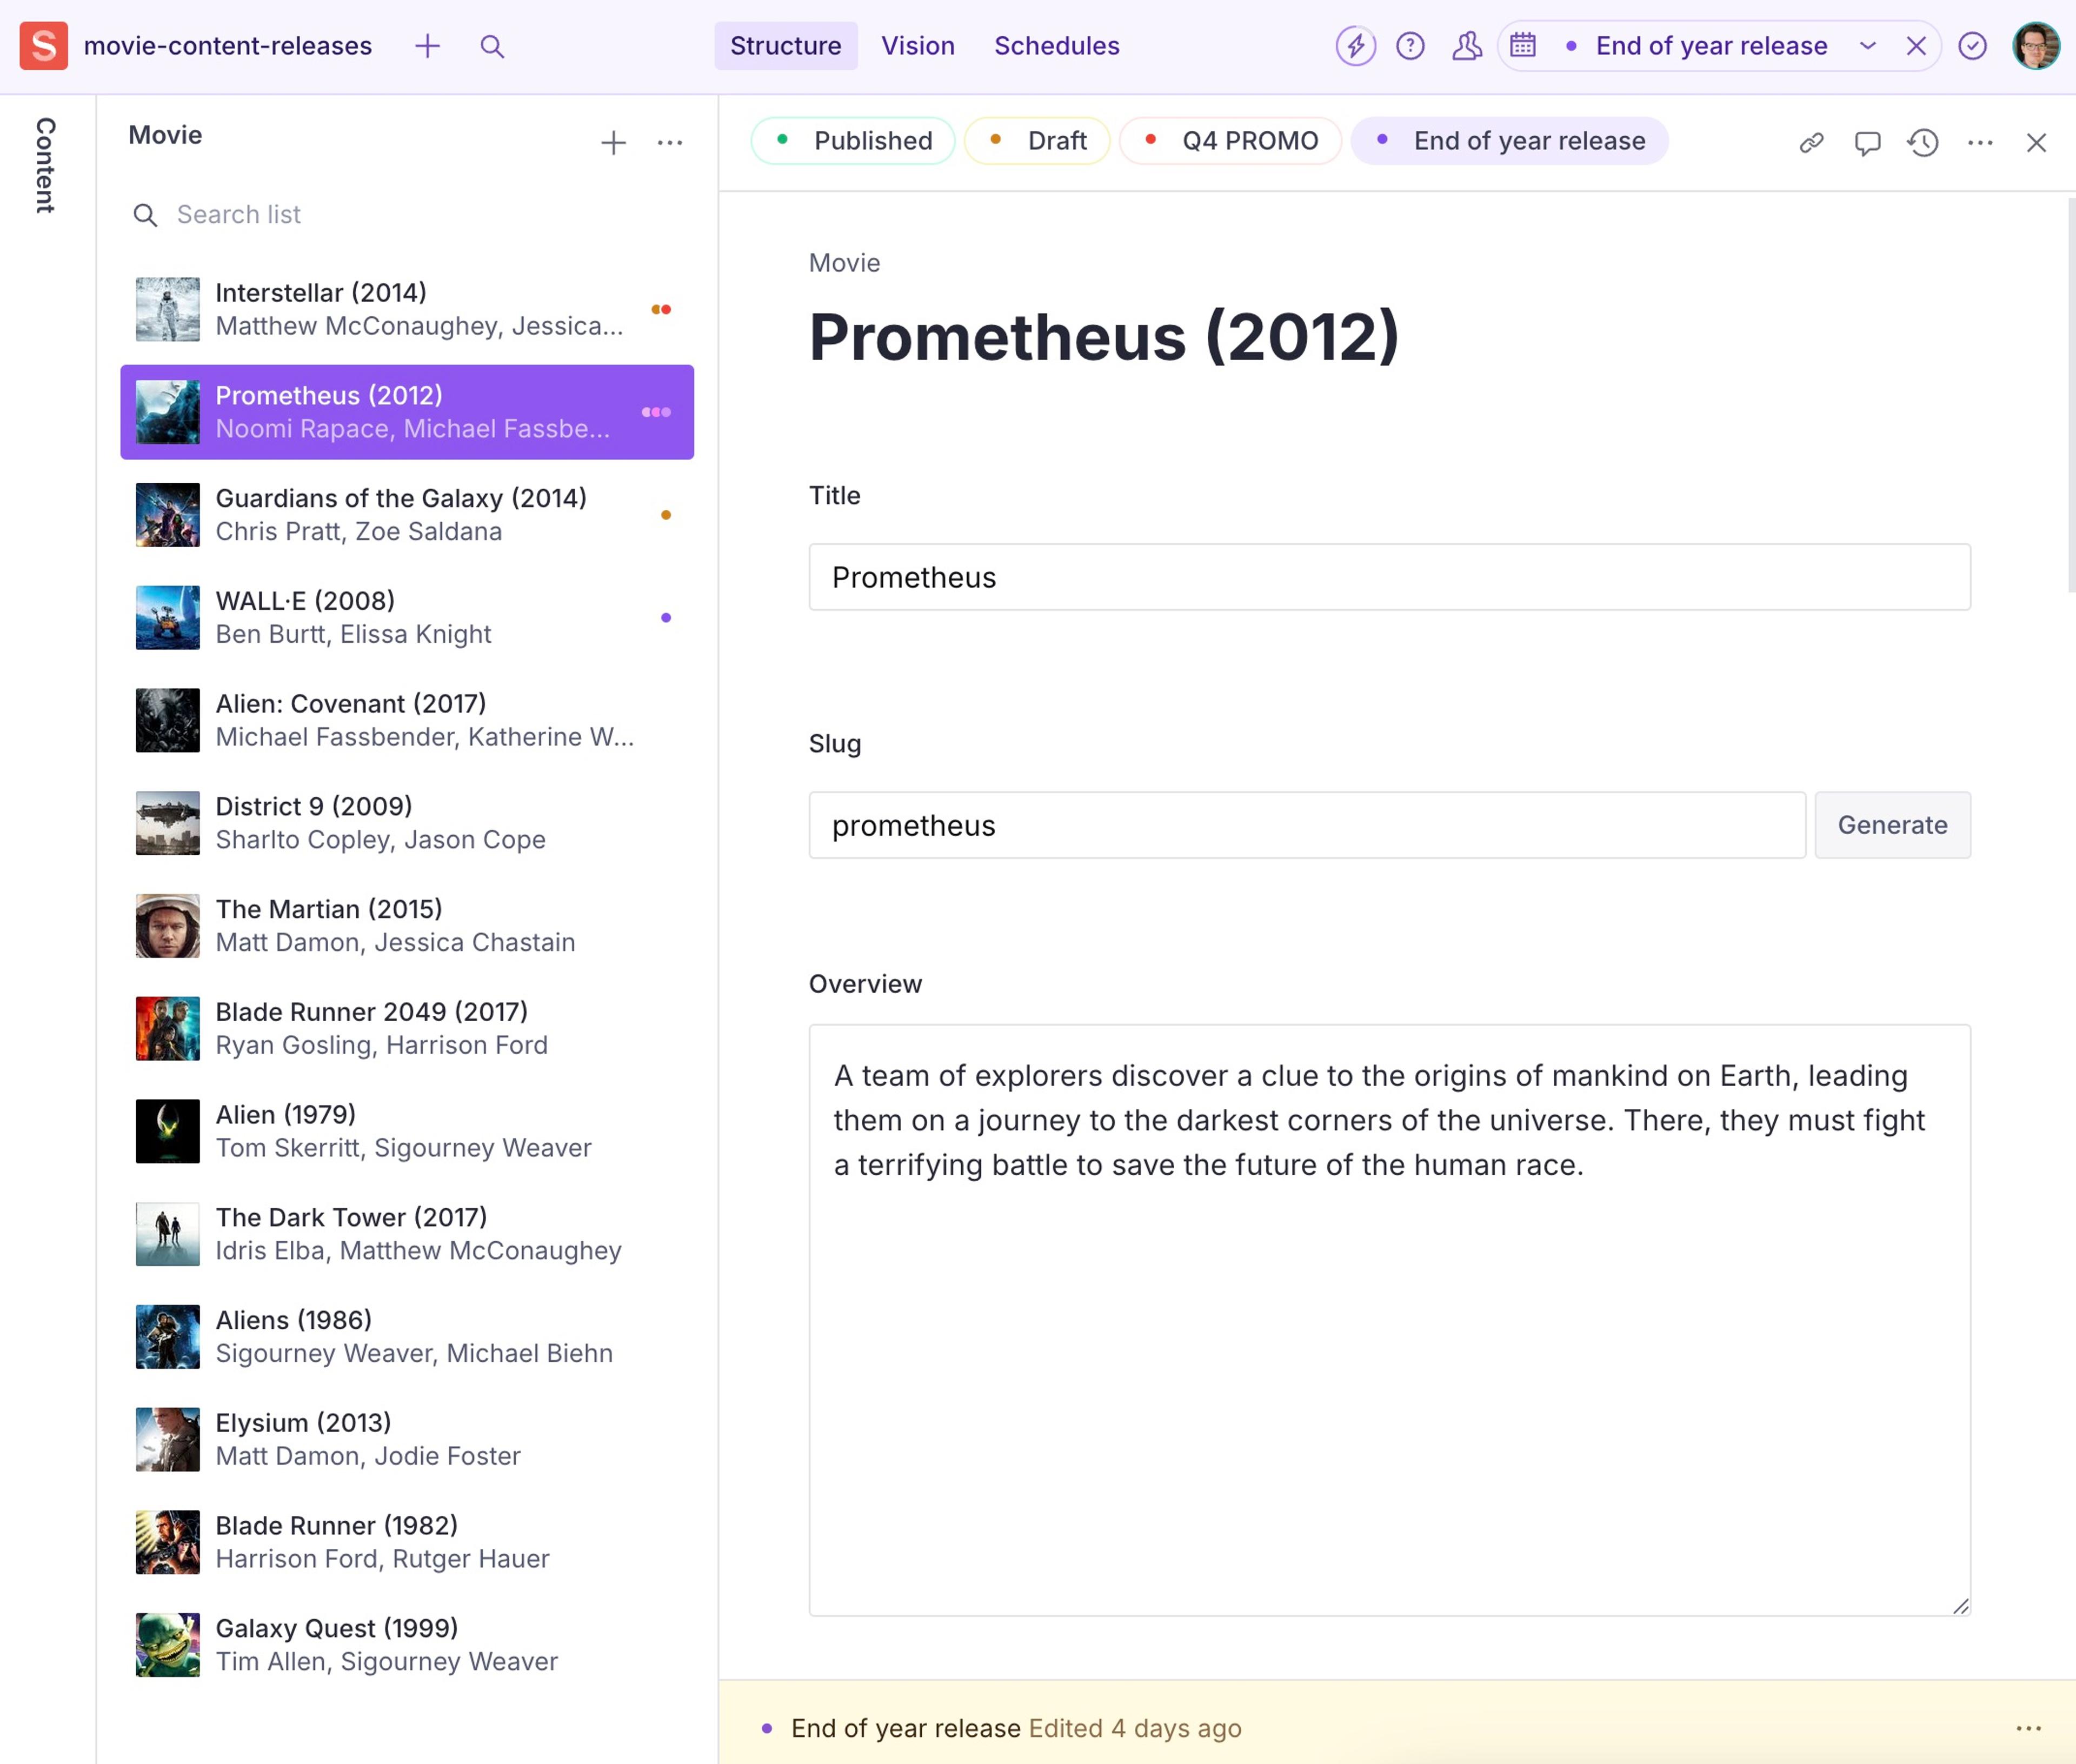
When you're working on a release, the document screen displays details about versions of the document. Document version names correspond to release names. Published and drafts are always enabled, but additional versions are displayed as documents are added to releases.
Much like each published document can only have one draft, each release can only contain one version of a document.
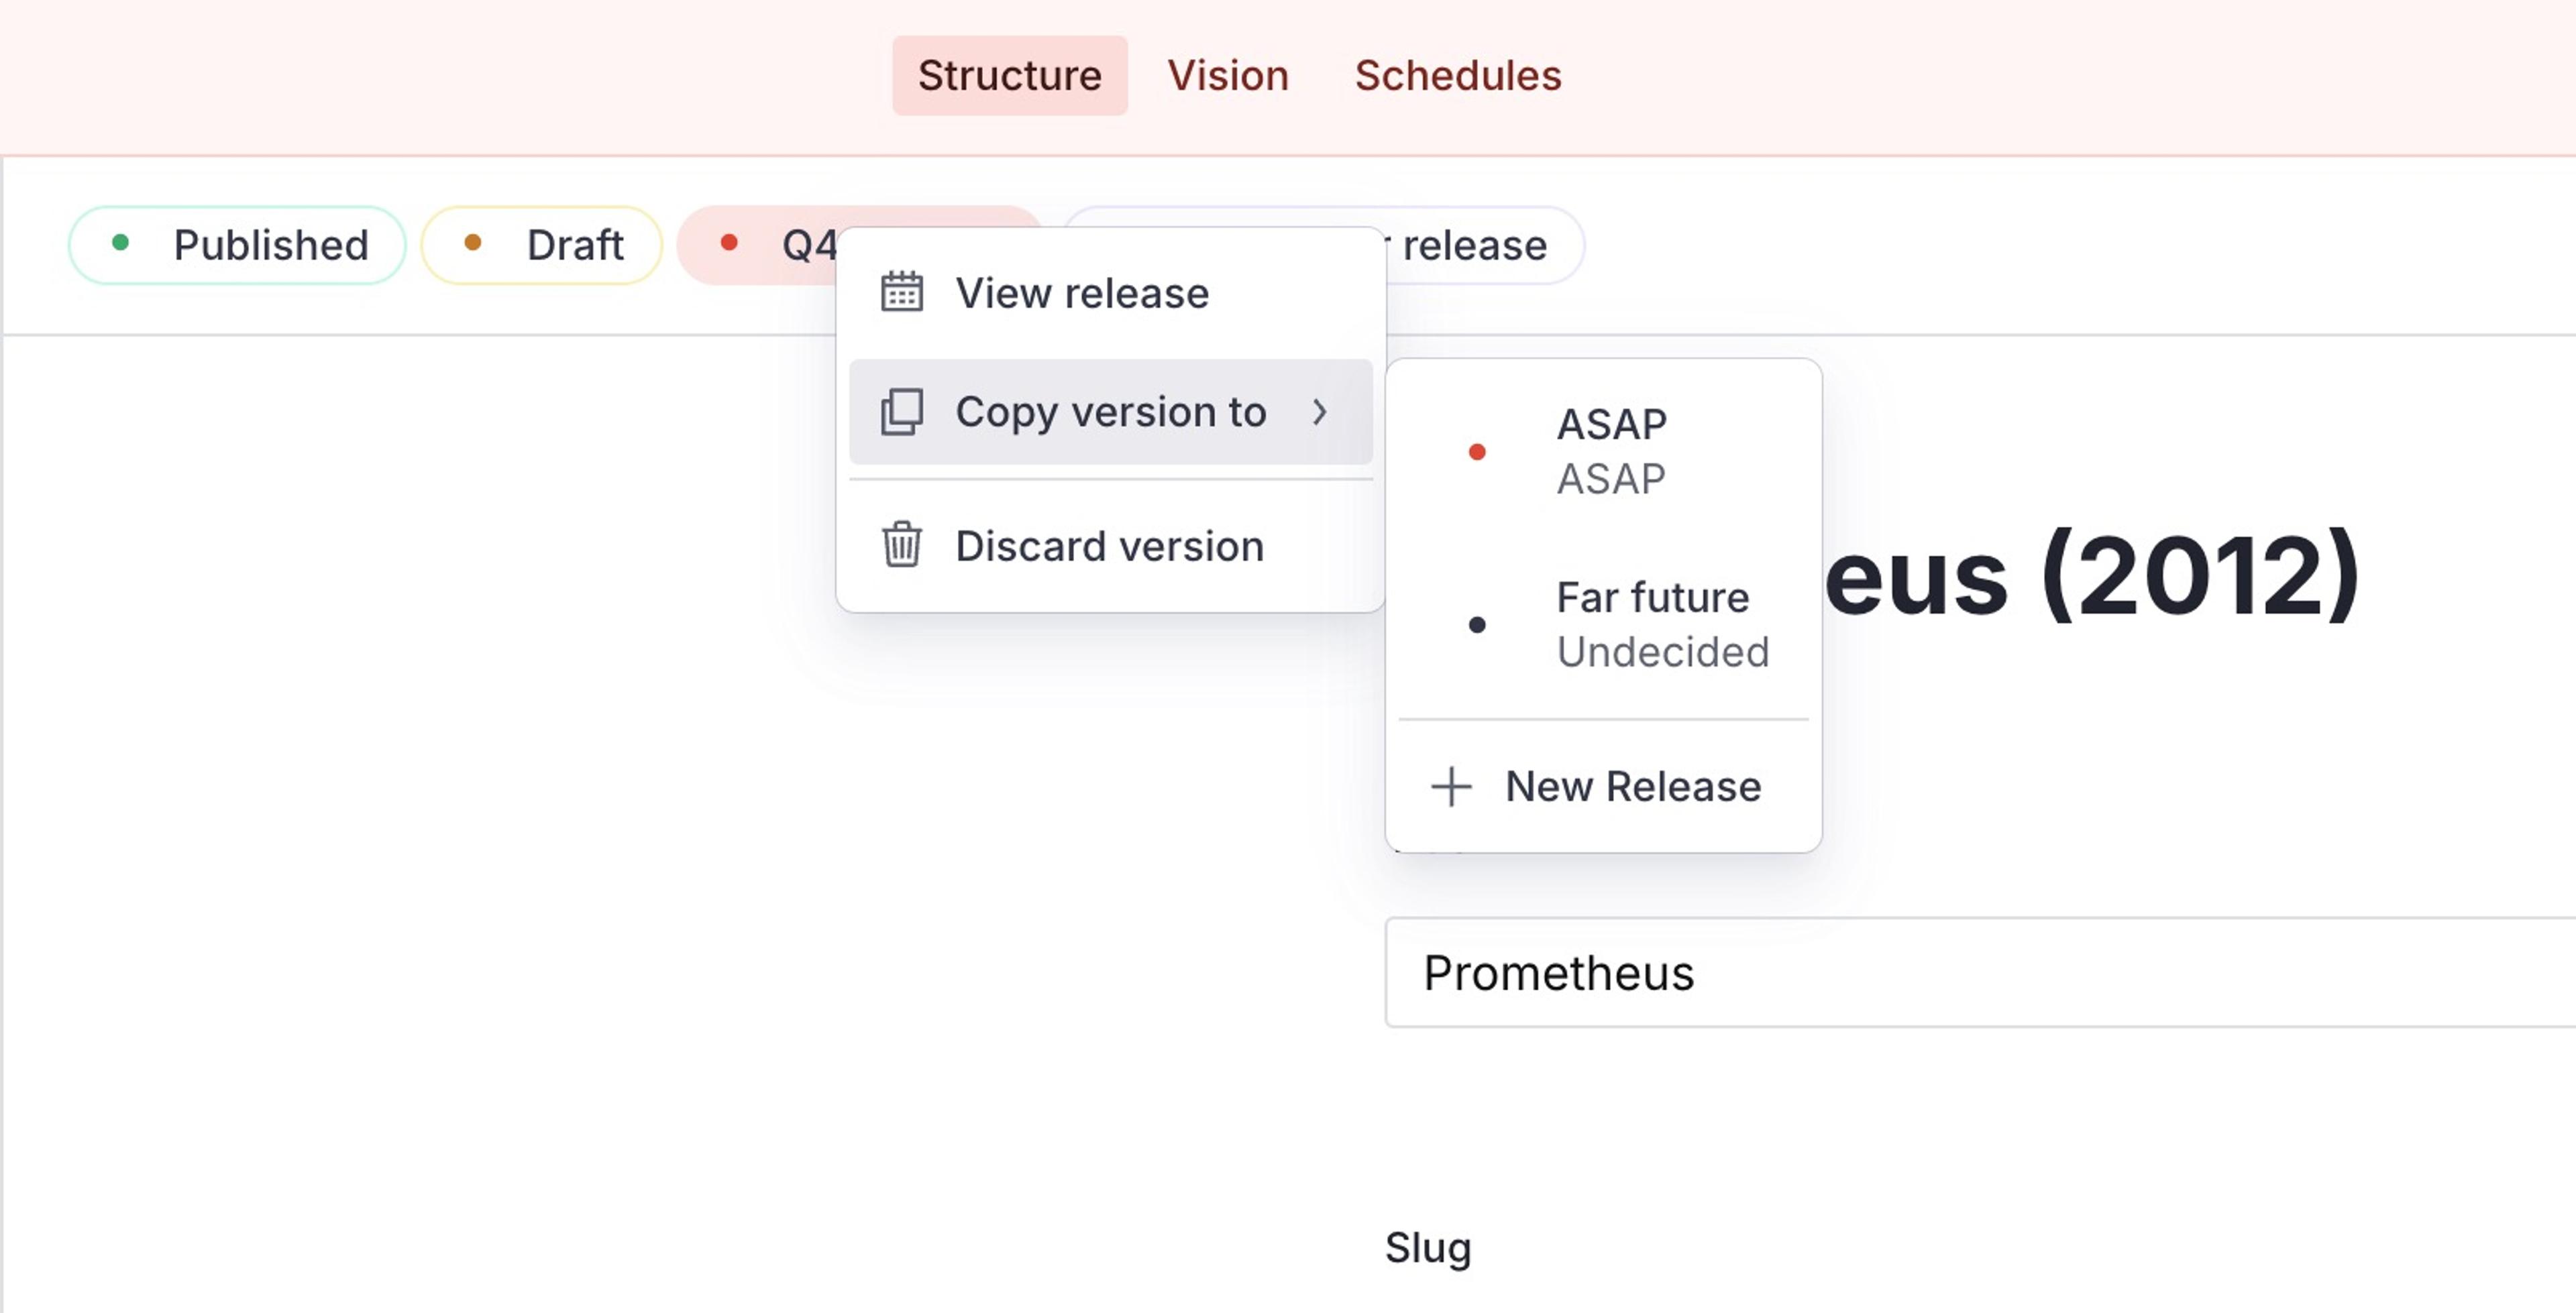
Select a version name to switch between versions. Right click the name to reveal a menu with options, including: copy versions between releases, or discard a version.
Protip
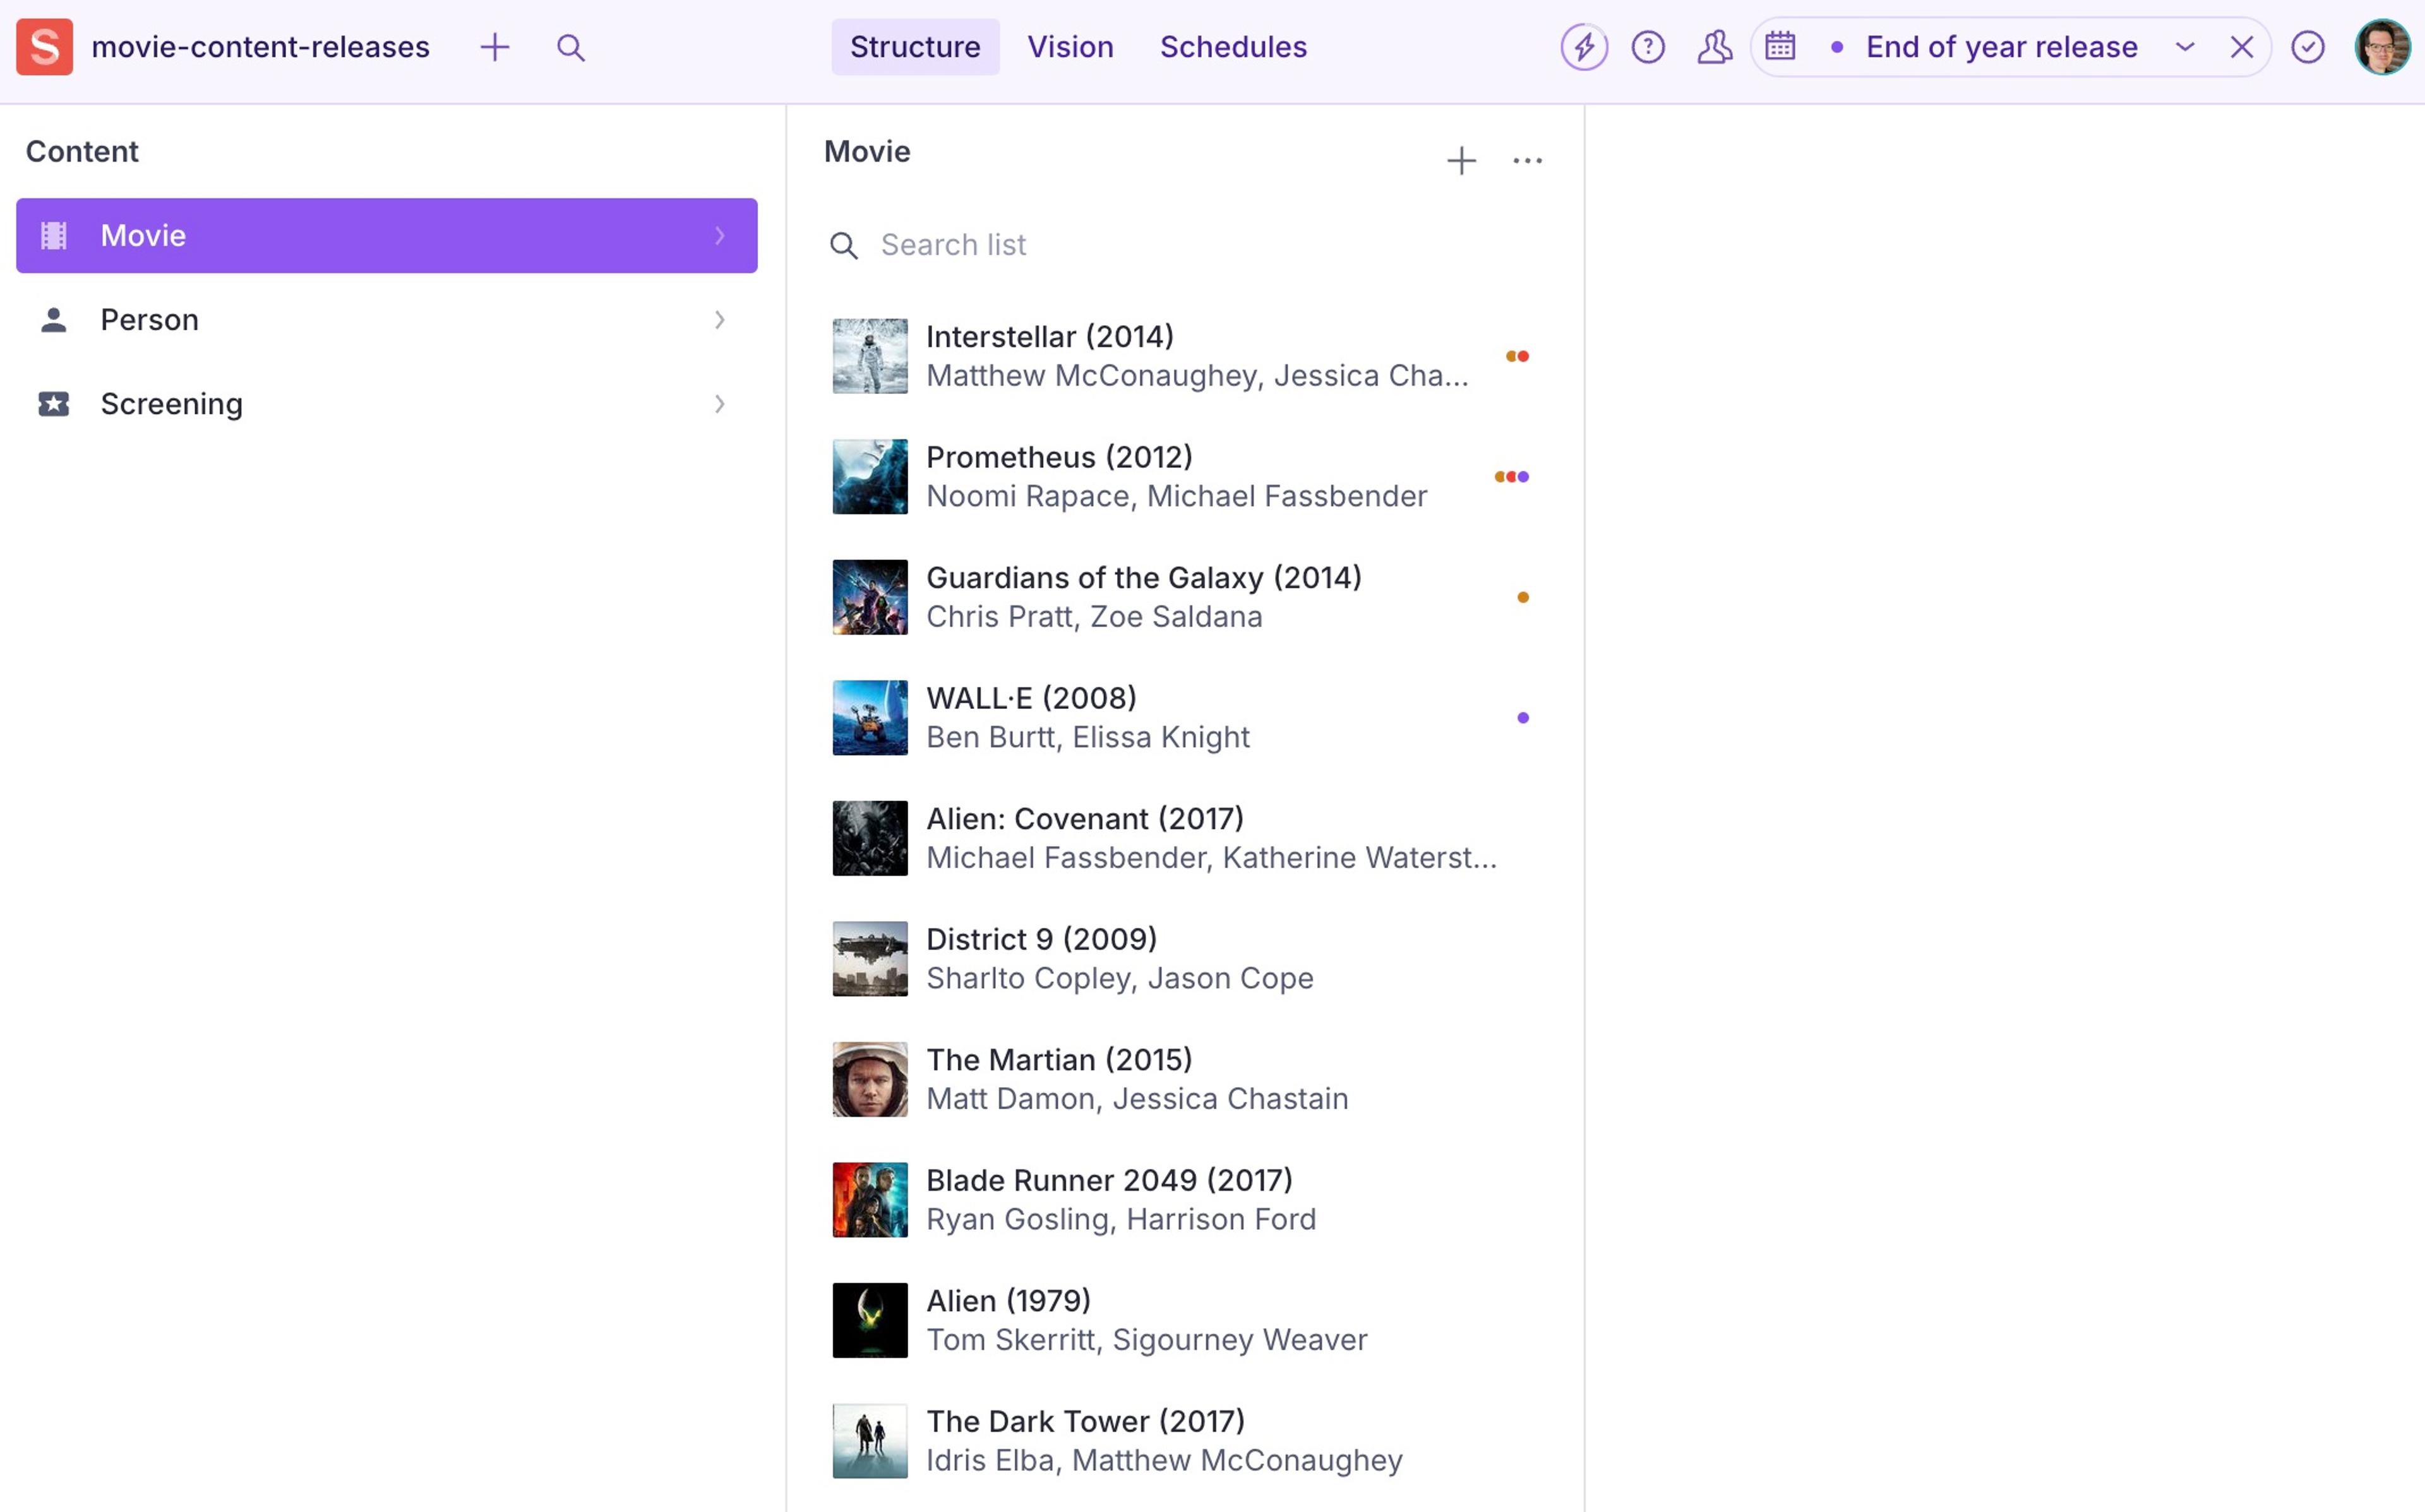
The release color highlights the global toolbar and document list to remind you that you're working on a specific release. "ASAP" releases are orange, "At time" releases are purple, and undecided releases are grey.
The releases view
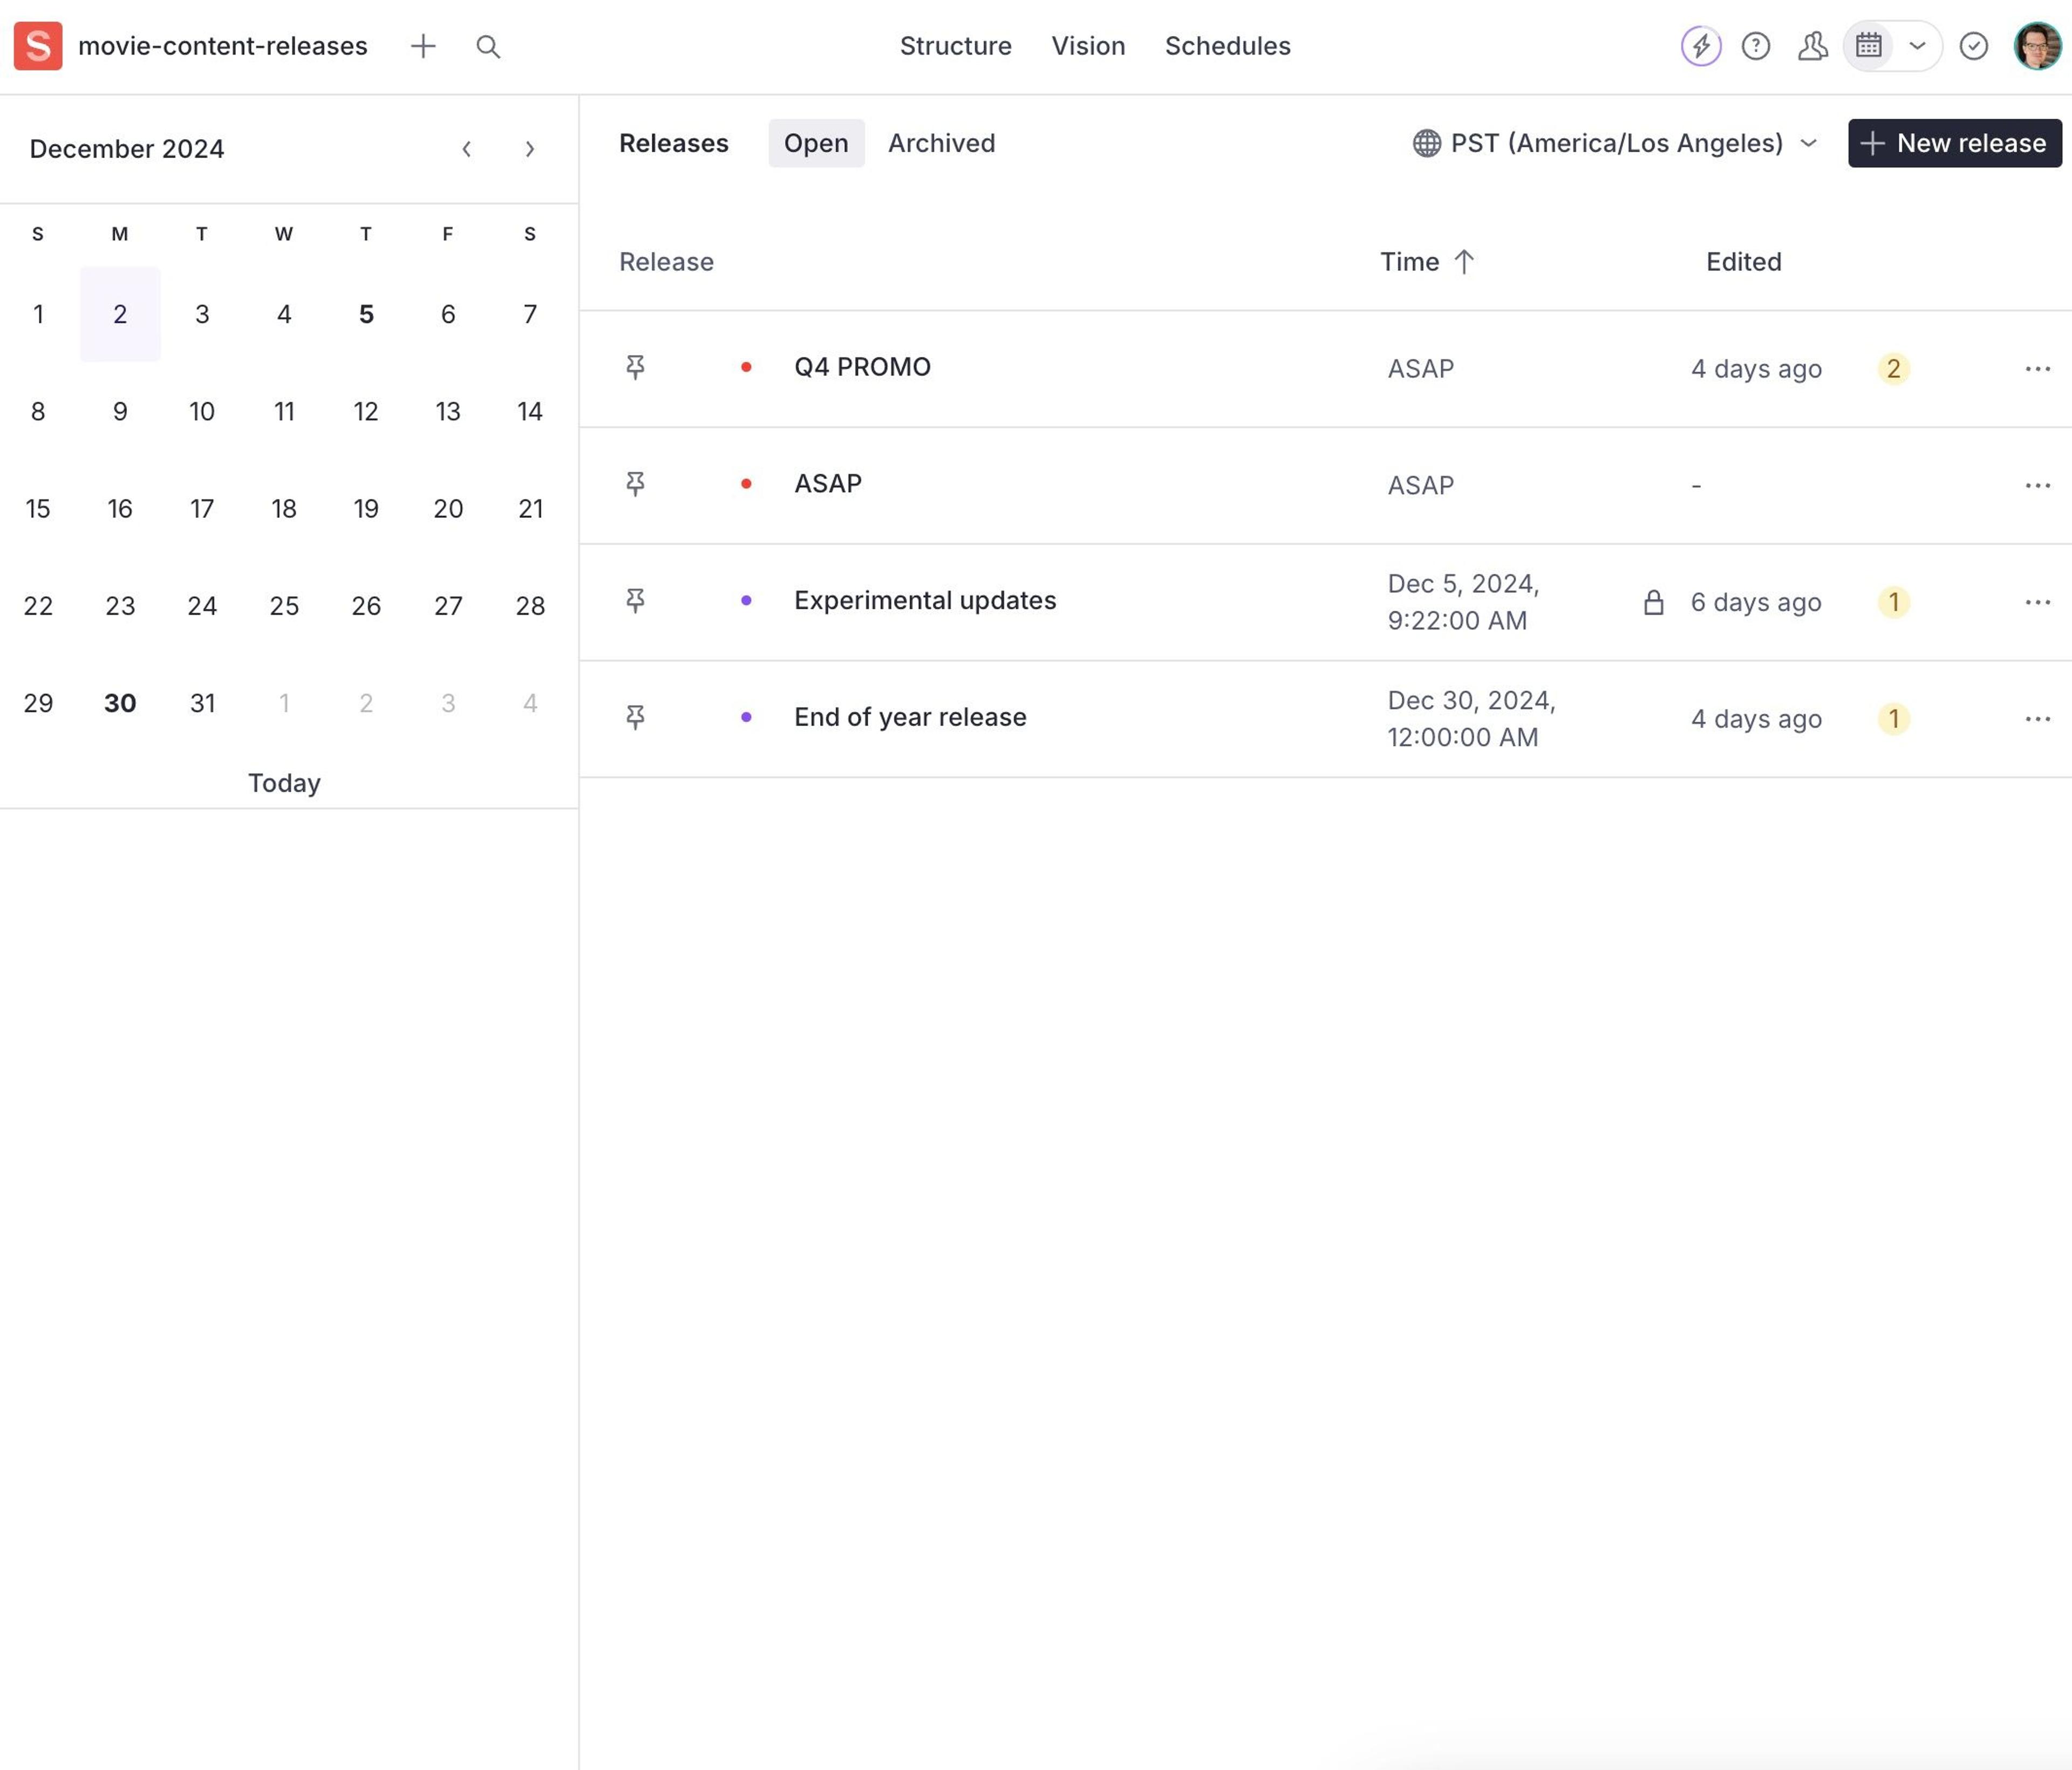
The releases screen displays any upcoming releases. Bold dates in the calendar indicate releases with date estimates. You can also see the number of changes in each release, and warnings if there are validation errors.
Global perspective
The global perspective is your view into the state of all documents relative to the selected release. By selecting a release, you're viewing not only its changes, but all changes in published documents and to-be-published documents. You can hide individual releases from view, if they are higher in the list than your selected release, or view just the Published perspective.
Gotcha
Does it seem like all documents are read-only? You might be in the Published perspective. Select Draft or a release from the document screen to make changes to a document.
How do drafts fit in with releases?
You can work directly on a draft and publish it without creating a release. You can also work on a draft, then copy it to a release.
One important thing to keep in mind. Publishing a release will not reset a draft. If you created a draft and made changes, then copied it to a release, that draft still exists. There are two ways you can keep these leftover drafts in check:
- If you know you're working on a release, start the changes in the release. This way a draft document is never created.
- After copying a draft to a release, return to the draft document and discard the draft version.
Technical limits
Content releases is designed to work with most workflows, but you may experience issues with exceptionally large documents and releases.
- A single content release can contain a maximum of 1000 documents.
- The total size of all of your JSON documents combined in a release cannot exceed 100MB. This is the size of the document's JSON data itself, not linked assets like images or files.
- Releases publish documents in batches based on size and reference connections. For larger releases, there may be small delays when individual documents go live. To avoid this, smaller releases of dependent documents can help ensure they release at the same time.
- Releases are published one at a time and are ordered by the time they will be published. If releases will be published at the same time, their order will be chosen at random.
- If a release is blocked by another release, it will wait for up to 10 minutes before marking the release as failed. If multiple large release are intended to be released at the same time, consider staggering their release times.
Create a release
To add new documents and changes to a release, you first need to create a release.
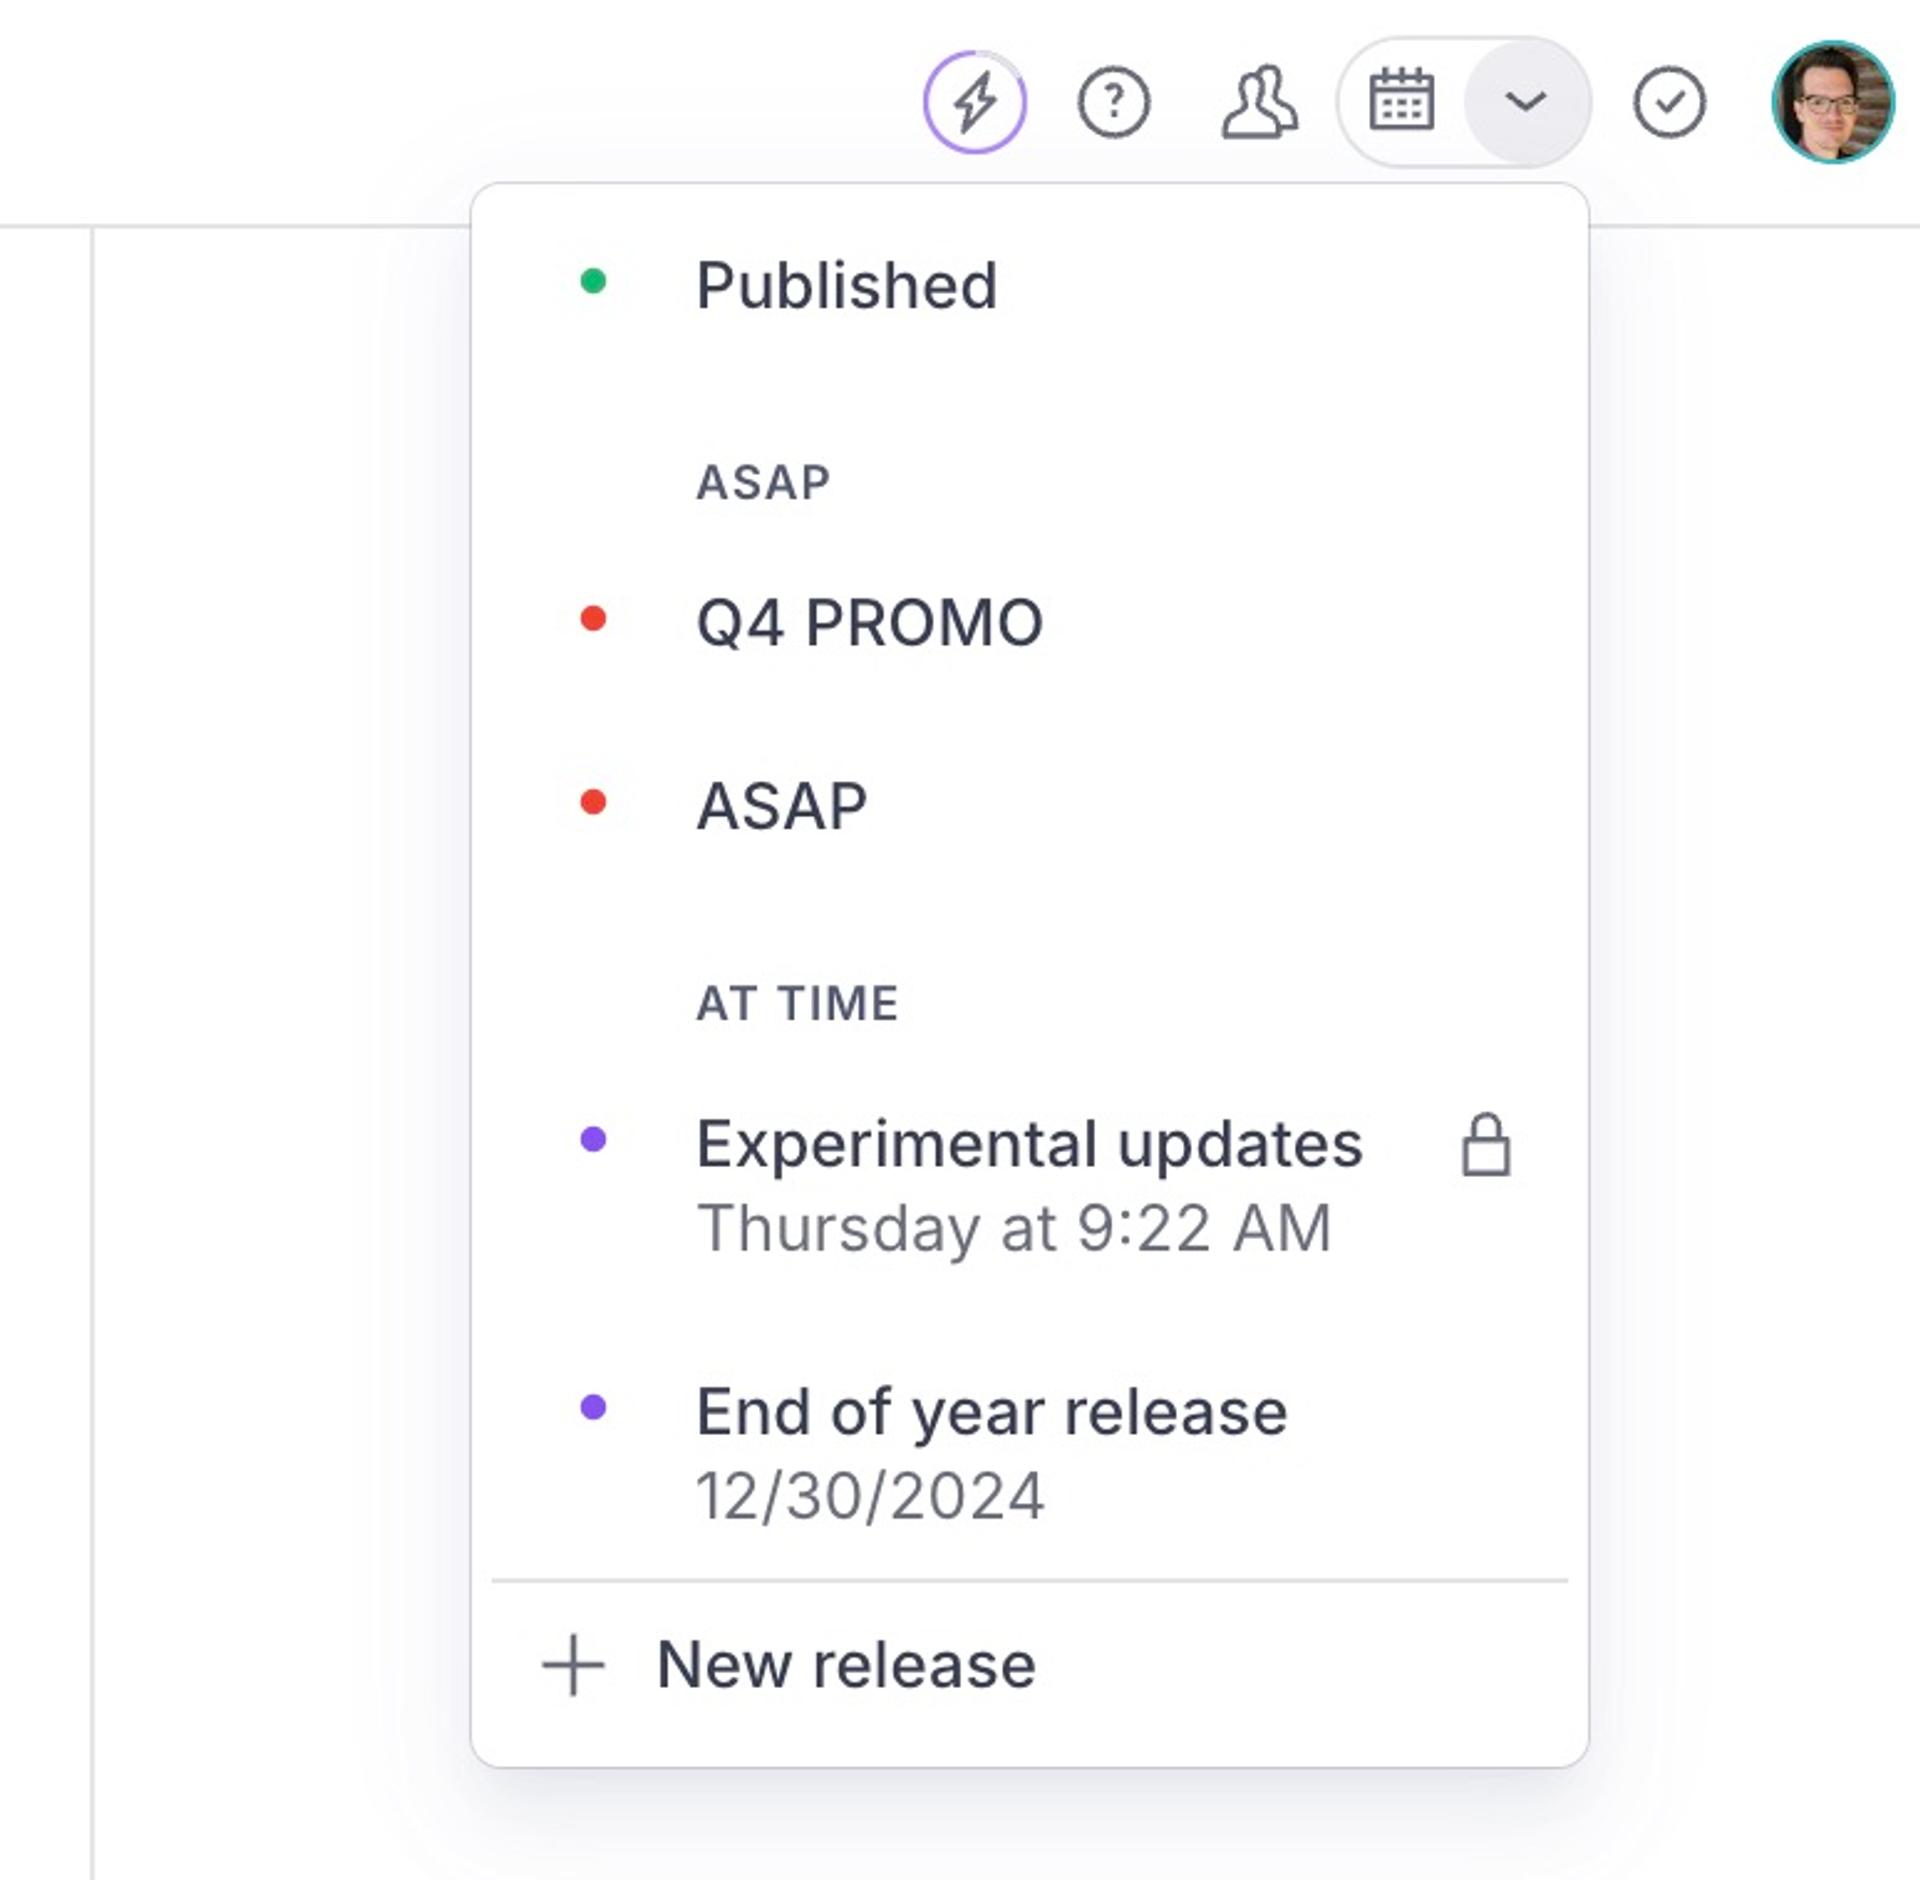
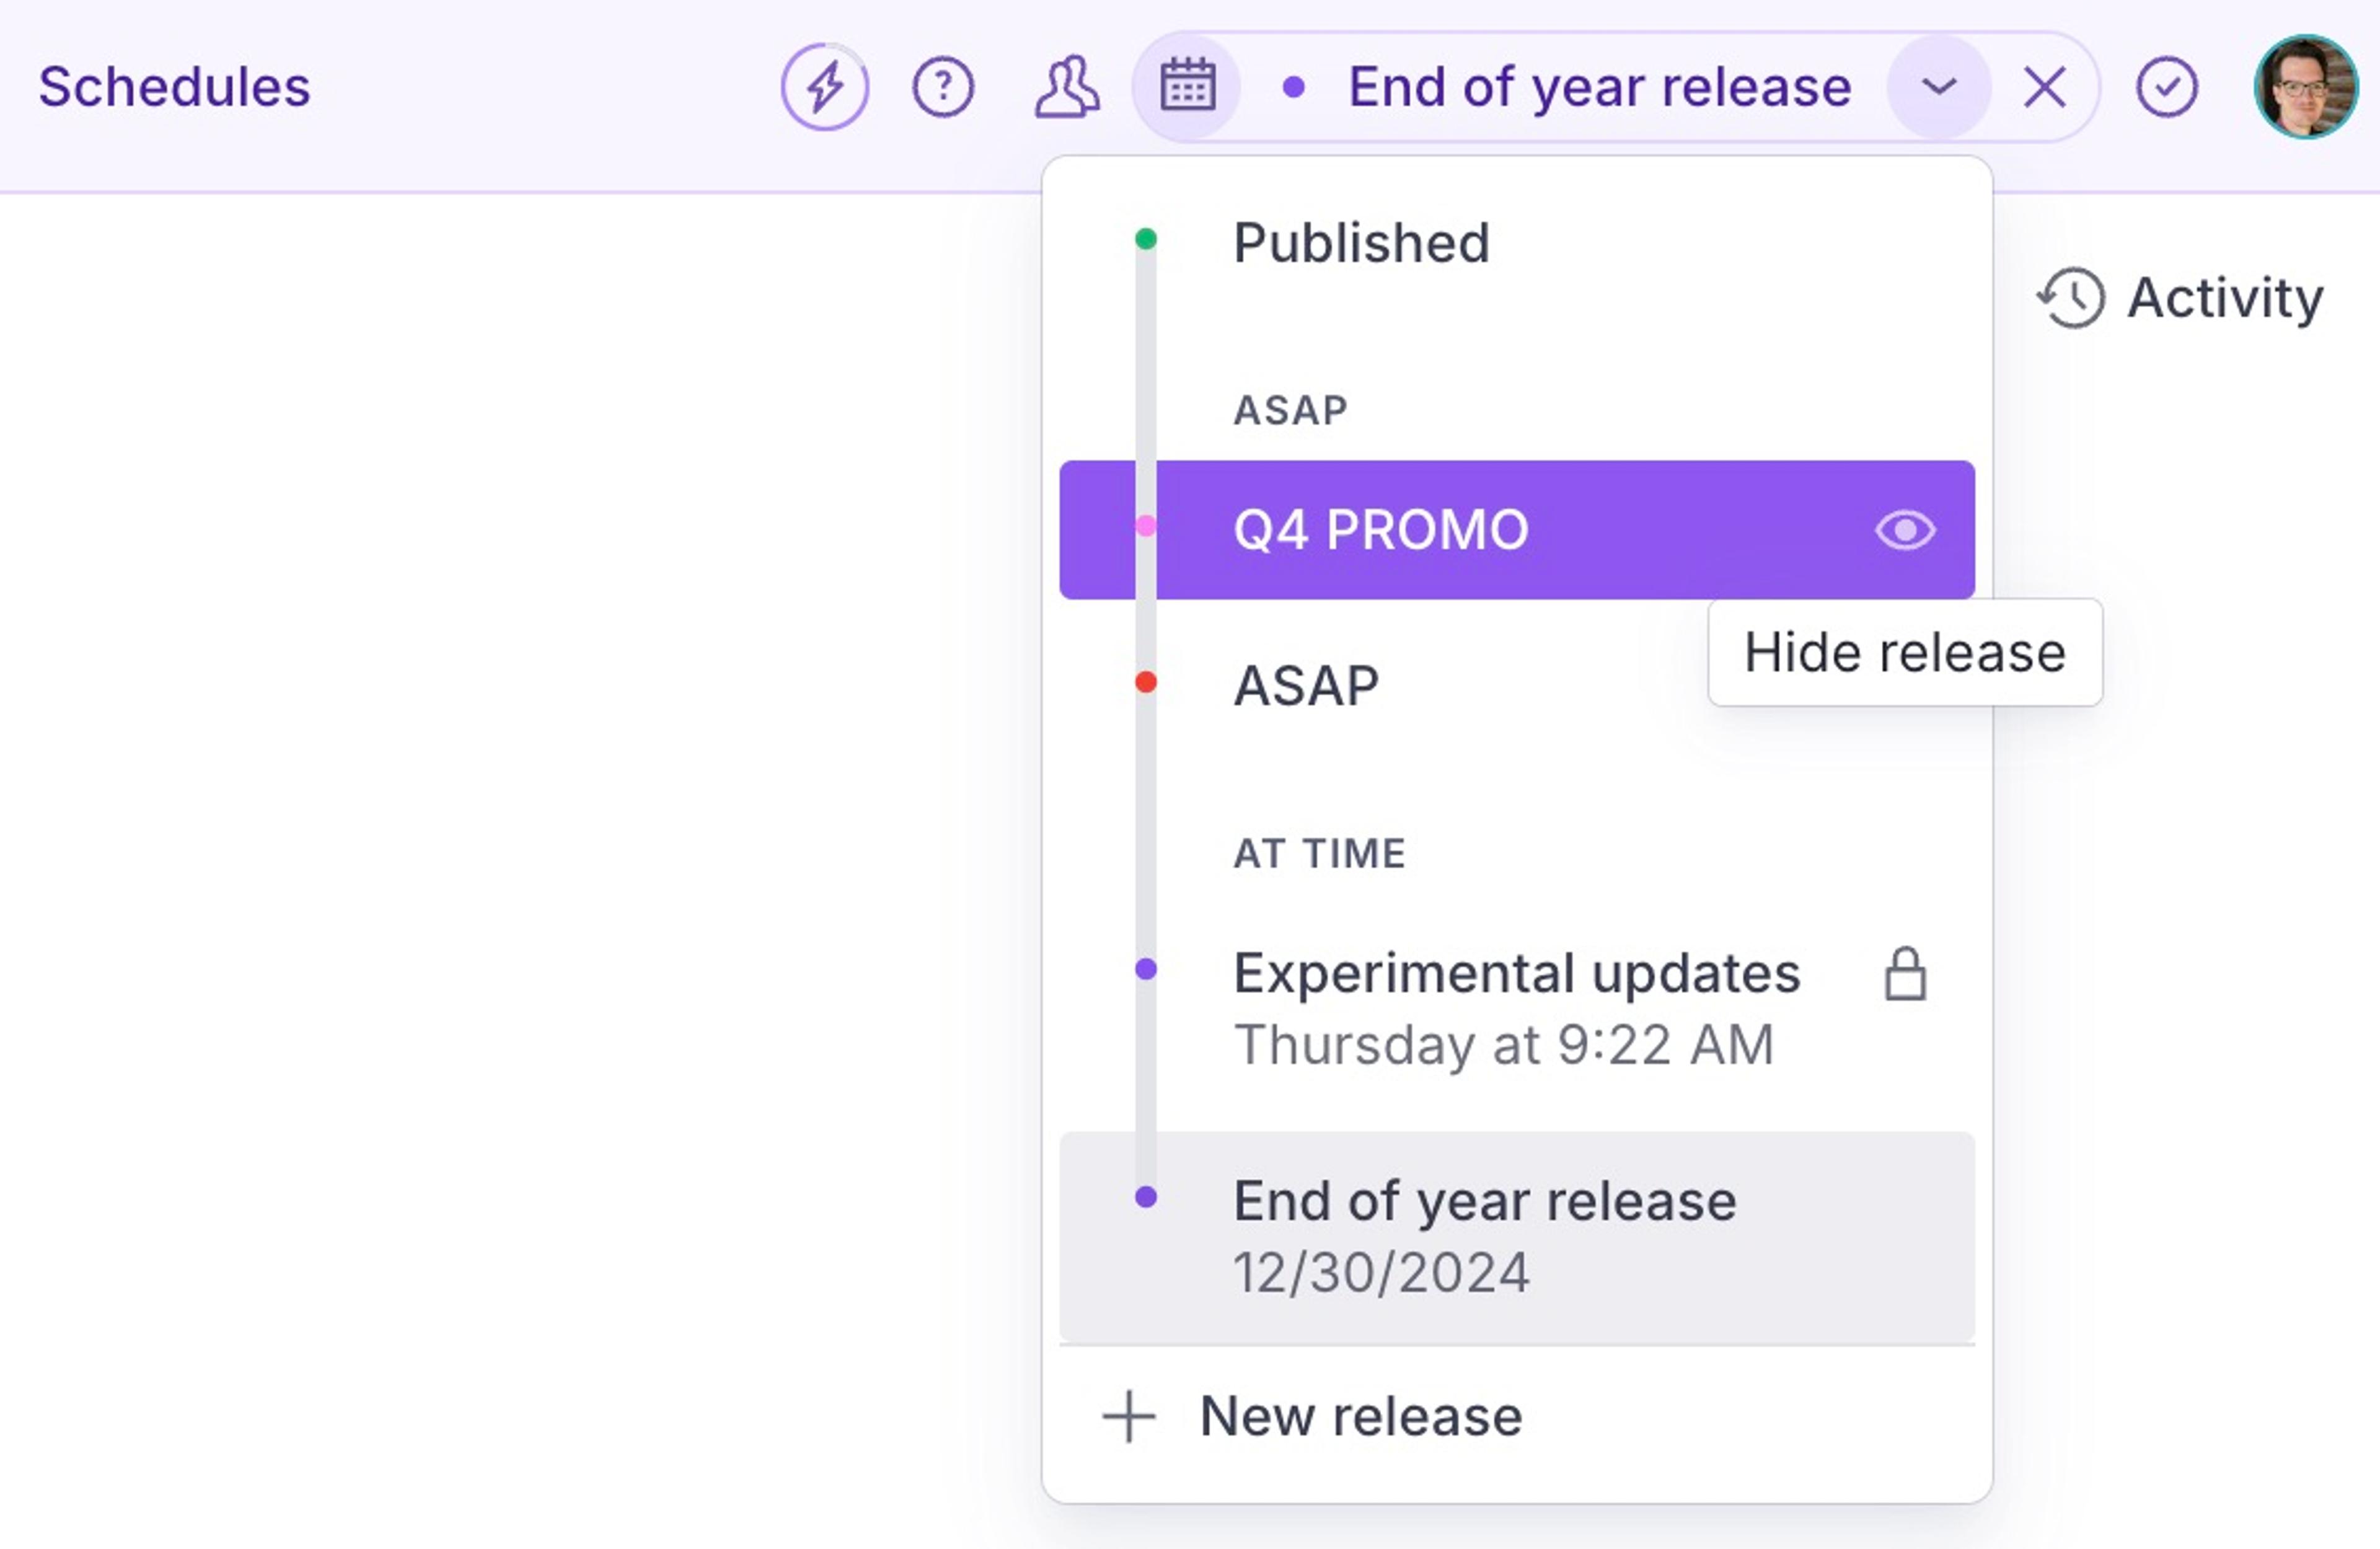
- Locate the calendar icon in the top right corner of the toolbar.
- Select the down arrow icon to reveal a list of releases.
- Select new release to create a new release.
- Select an approximate time of release.
- Enter a release title (optional).
- Enter a description for the release (optional).
You can change these values later by navigating to the release on the Releases screen.
Protip
You can also create a release from the Releases screen by selecting New release in the top right corner.
Add a document to a release
When a document is part of a release, it's no longer connected to changes in drafts or the published document. It's like a snapshot in time that has it's own future. Keep this in mind when interacting with different versions of the same document.
There are multiple ways to add a document to an existing release.
On the main releases screen
- Navigate to the releases screen by selecting the calendar icon in the top right of Studio.
- Select the release name to navigate to its detail screen.
- At the bottom of the list of documents, select Add document.
- Search for and select a document.
On the document screen
- Ensure you are in a release perspective by pinning a release. You'll know you've pinned a release if the release name is next to the calendar icon in the toolbar.
- In a document's editor view, select the Add to release button in the top bar. This button and bar should match the color scheme associated with the release perspective.
Alternatively, you can "right click" on a release label at the top of a document and select "copy version to..." to copy the selected document version to a release.
Adding a document to a release uses the published version
When adding a document to a release, unless you are using the "copy version to" method, the published version will be used as the basis for the new version.
To use a draft or different release version, use the "copy version to" method.
Once a document is part of a release, you'll be able to edit the release version by ensuring the release is selected at the top of the document.
Remove a document from a release
Removing a document from a release discards any changes unique to that version. This action won't remove the document from other releases.
There are three ways to remove a document from a release.
On the main releases screen
- Select the release name to navigate to its details screen.
- Identify the document you wish to remove and select the "..." icon to reveal additional options.
- Select Discard version and confirm the selection when prompted.
On the document screen
- Confirm you are in the perspective for the desired release. You should see the release name next to the calendar icon in the toolbar, as well as the highlighted release name at the top of the document.
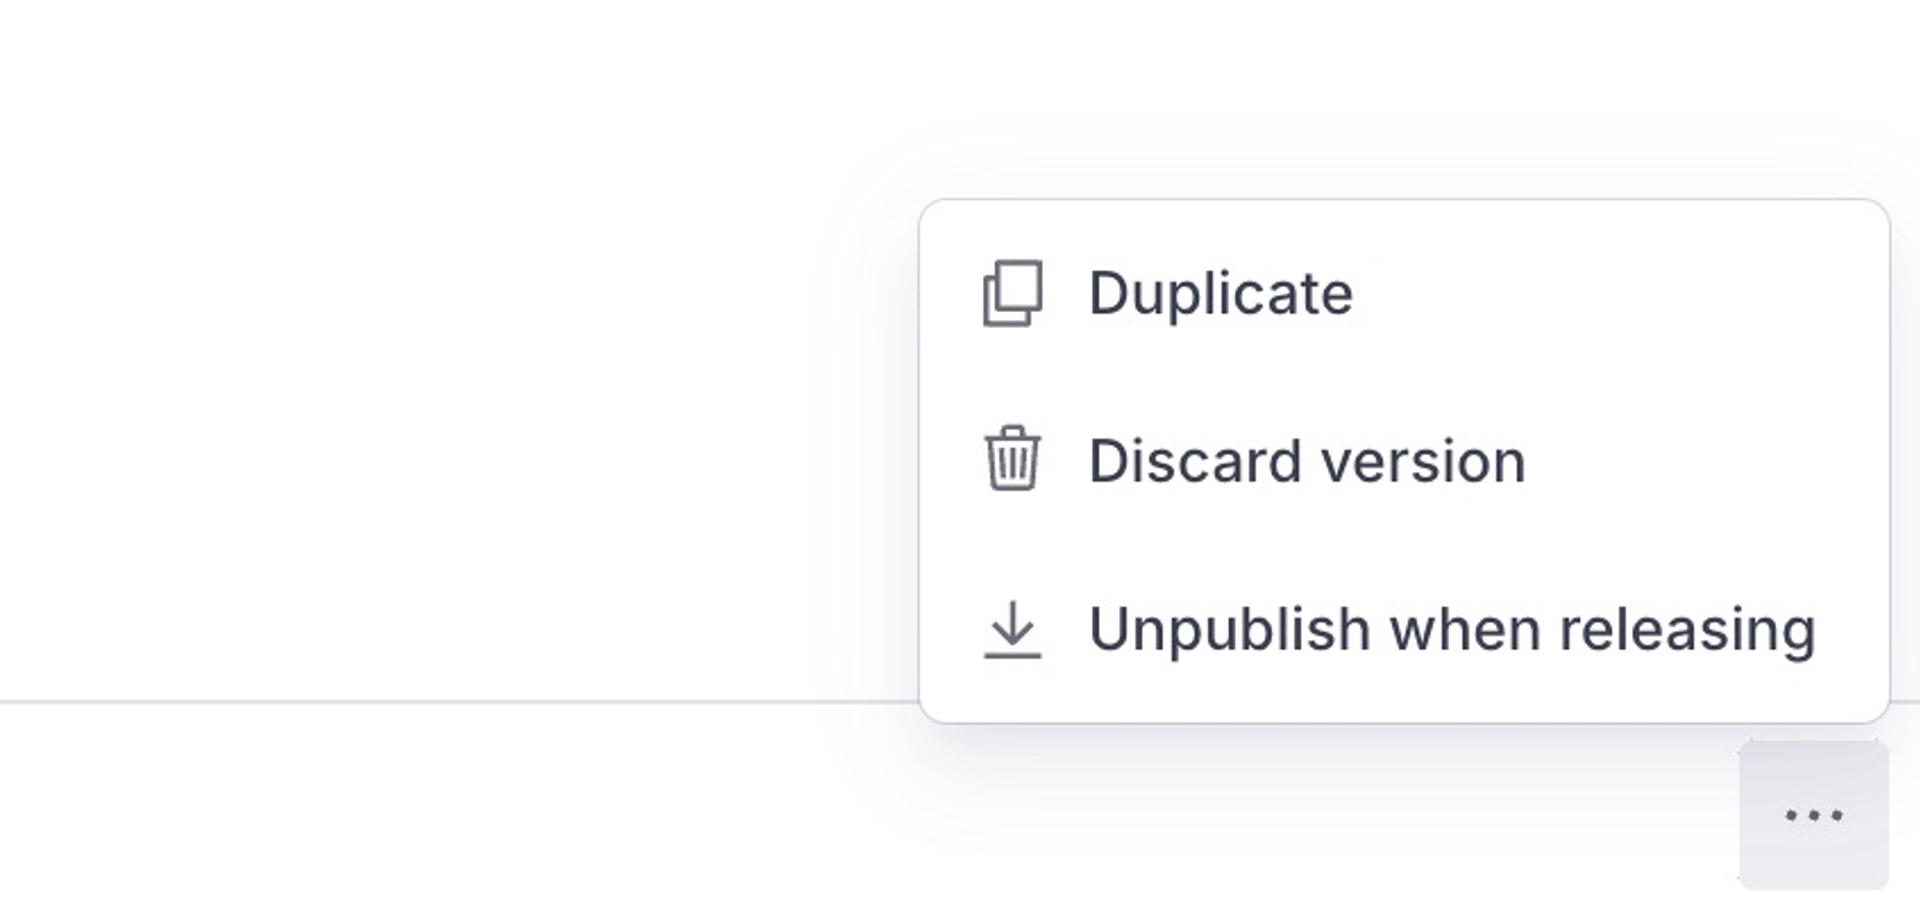
- At the bottom right of the document screen, select the "..." icon.
- Select Discard version and confirm the selection when prompted.
or
- On the document header, find the chip with the version you wish to discard.
- Right click the chip, a context menu will open.
- Select Discard version and confirm the selection when prompted.
Copy a document from one release to another
You can copy a document version to a different release from the document view.
- Navigate to the document you want to copy.
- Right click the release name you want to copy from.
- Hover over "Copy version to".
- In the popover menu, select the destination release.
Unpublish a document as part of a release
Sometimes you want a release to unpublish, or remove a live document. This converts a published document back to a draft once the release is published.
- Add the document to a release.
- In the bottom right corner of the document screen, select the "..." icon.
- Select Unpublish when releasing and confirm the selection when prompted.
When unpublishing a document, the contents of the published document are used to create a new draft document associated with the published ID.
If a draft document with the same published ID as the version document already exists, it will remain and the unpublished contents will be lost.
All strong references will be converted to weak references on unpublish. If the draft document is subsequently re-published, those references will be converted back to strong references.
Discard a draft version
To discard a document version, follow the steps listed in Remove a document from a release.
To discard changes from the Draft version, select the "..." icon at the bottom right of the document screen and select Discard changes.
Publish a release
After creating a release, you can choose to publish it on-demand or schedule a publish.
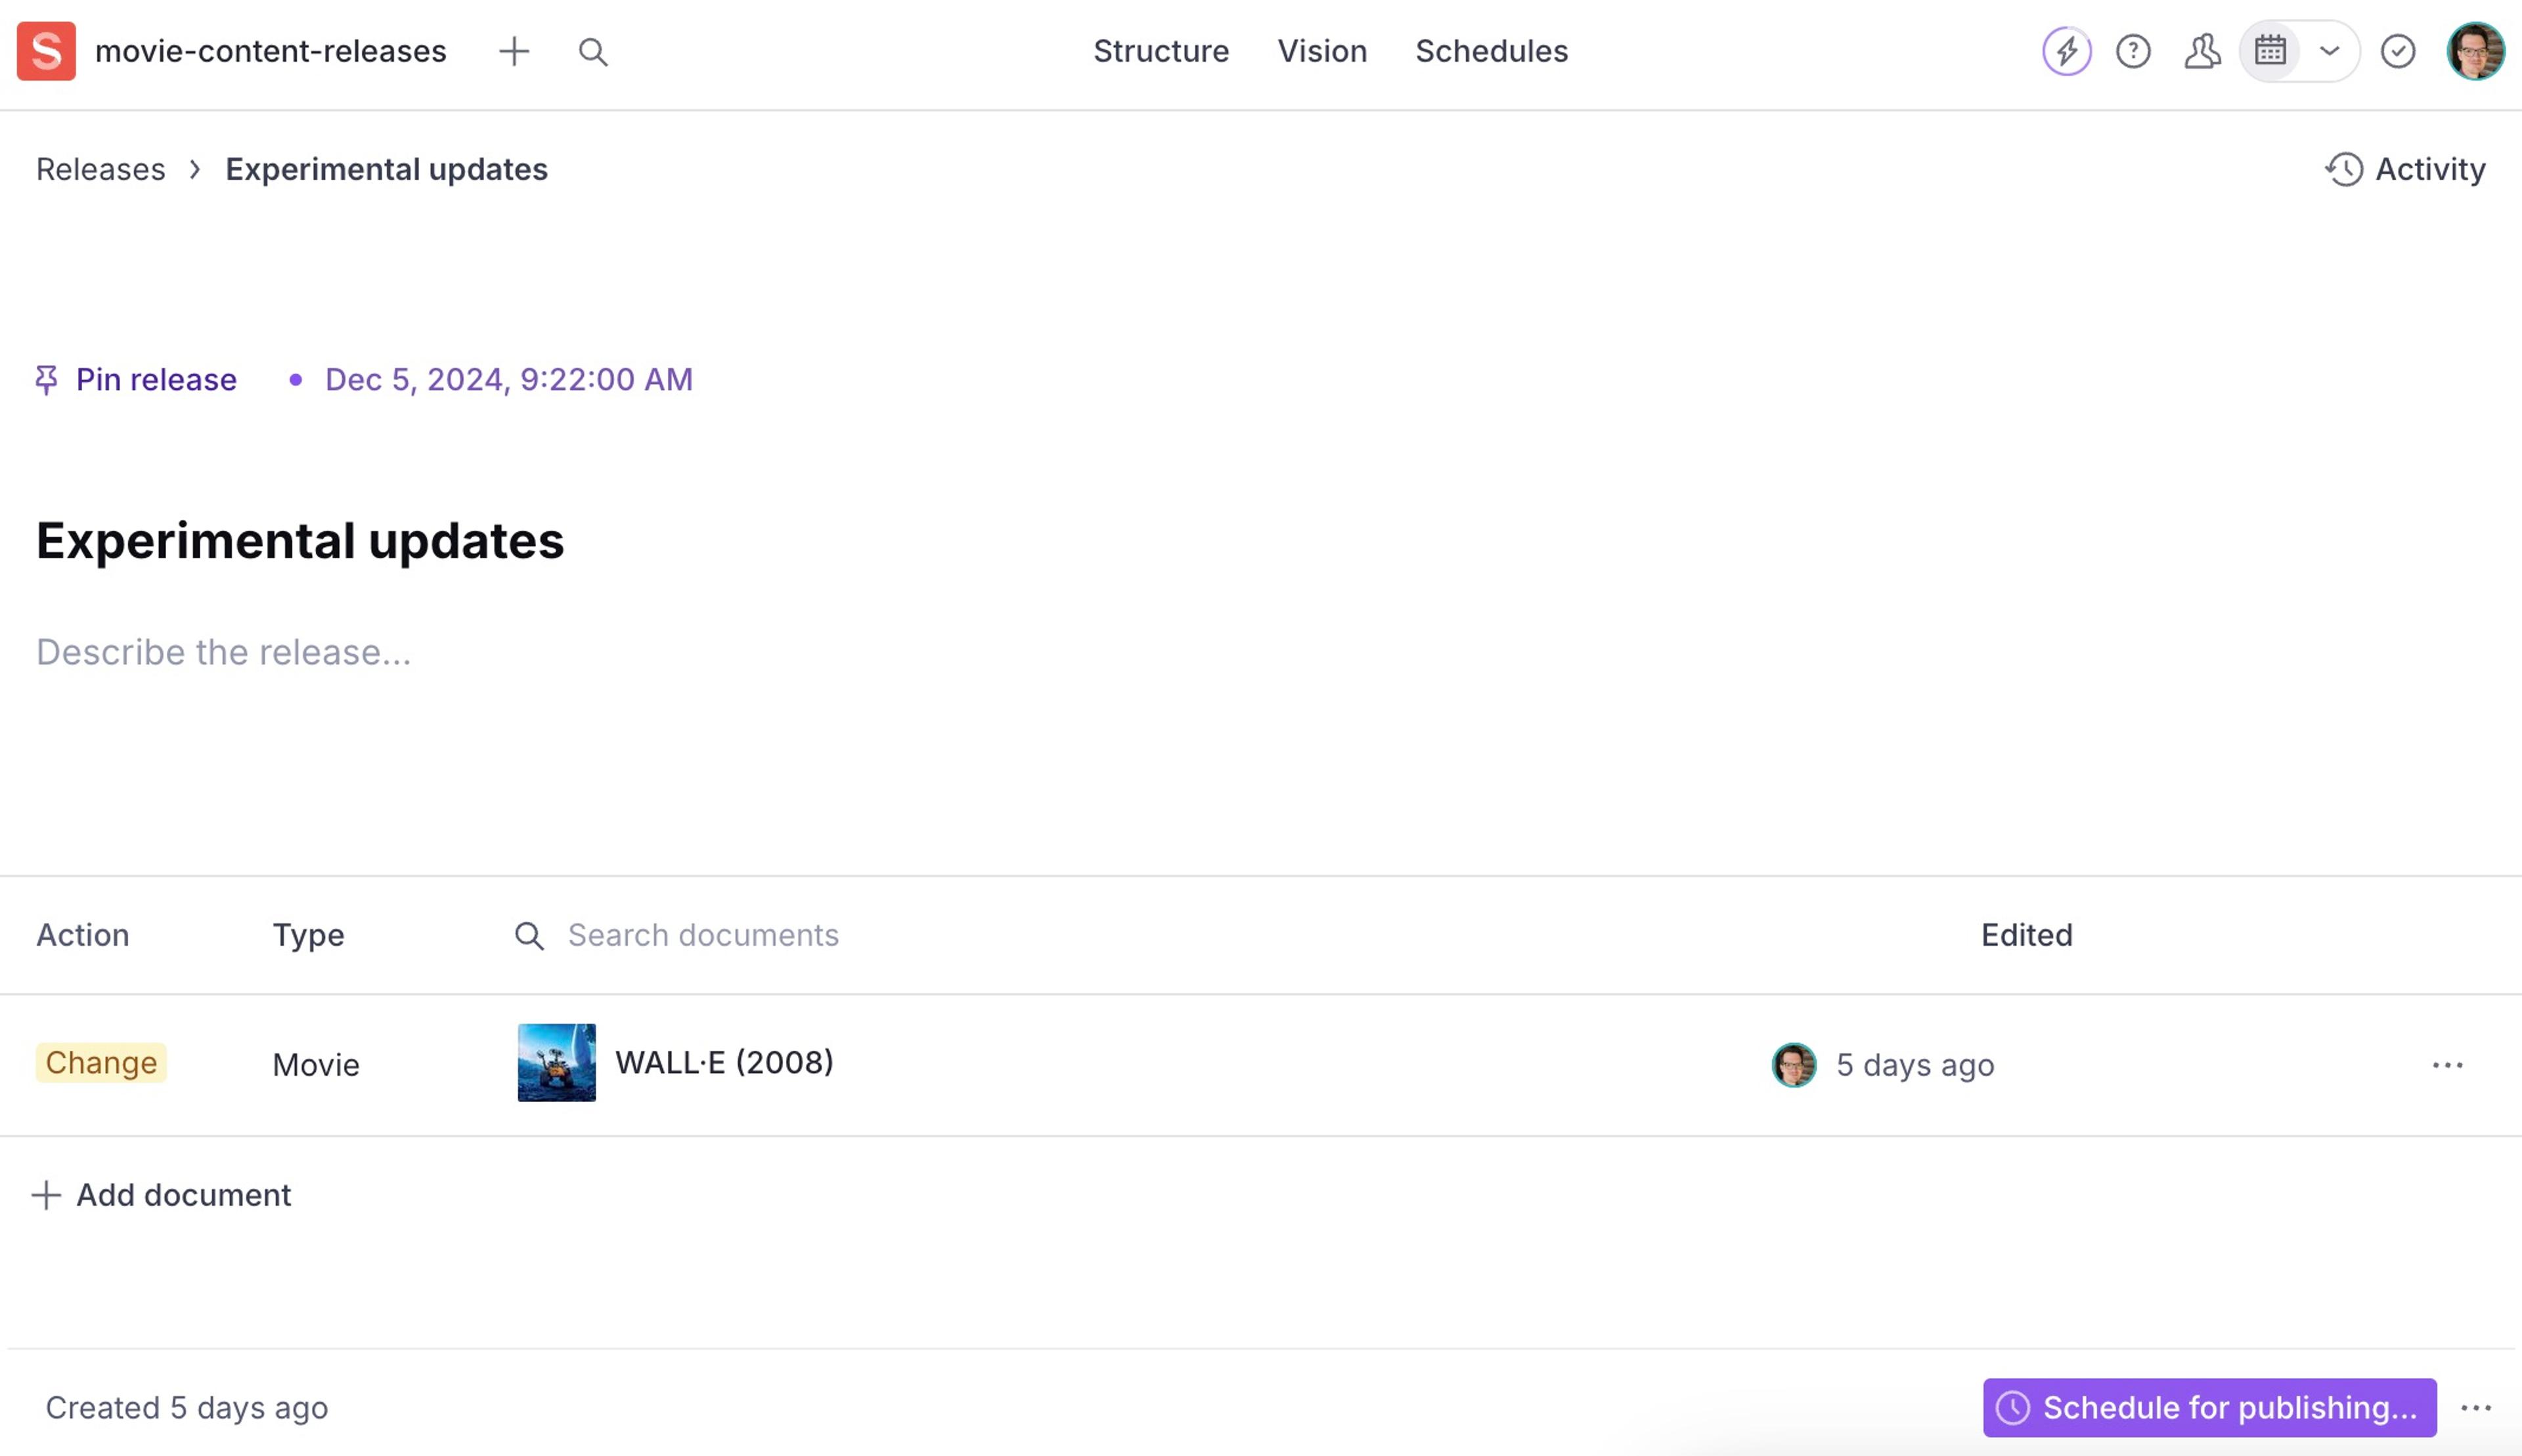
- Navigate to the release screen for the release you want to publish.
- Select Publish all documents.
Schedule a release
To schedule a release, first set a release time and date. You can do this when creating a release, or by selecting the release time label and selecting At time from the release screen. You can adjust this time later if needed.
Next, select Schedule for publishing in the bottom left of the release screen.
Confirm the release time and date, then select Yes, schedule for publishing.
Gotcha
Setting a release time alone does not schedule the release. You must set a time, and schedule the release using the Schedule for publishing button.
Unschedule a release
To unschedule a release, select the Unschedule button in the bottom right of the release screen.
Archive a release
Archived releases are releases that were published, but you can also archive unpublished releases to preserve them for future reference.
Gotcha
You cannot archive a scheduled release. First, unschedule it. Then follow the steps below to archive the release.
There are two ways to manually archive a release.
On the main releases screen
- Select the "..." icon for the release you want to archive.
- Select Archive release.
On the individual release screen
- In the bottom right, next to the Publish / Schedule button, select the "..." icon.
- Select Archive release.
Unarchive a release
You may unarchive an archived, unpublished release. Published releases cannot be unarchived.
There are two ways to manually unarchive a release.
On the main releases screen
- Select the "..." icon for the release you want to unarchive.
- Select Unarchive release.
On the individual release screen
- In the bottom right select the "..." icon.
- Select Unarchive release.
Change the release type
Release order is determined by when the release will be live, with exceptions for ASAP and Undecided. This is the release type.
- ASAP releases come first, in order of creation.
- Dated releases come next, ordered by date.
- Undecided releases come last, ordered by creation.
To change the order of a release, change the date and time associated with it.
Pin a release (global perspective)
Pinning a release sets the global perspective in Studio. This is indicated by the color change in the toolbar, as well as the highlighted release name throughout Studio.
You can only pin one release at a time.
There are three ways to pin a release.
Anywhere in Studio
- In the top toolbar, select the dropdown arrow next to the calendar icon. If a release is currently pinned, the arrow will display next to the pinned release.
- Select the release name for the release.
On the main releases screen
- Locate the release to pin.
- Select the pin icon to the left of the release name.
On the Release detail screen
- Navigate to the release that you wish to pin.
- Select the pin icon on the top left, above the release name
View Release history
You can view past releases, including unpublished ones, from the Archived tab on the main releases screen.
Edit properties of an existing release
You can edit the name, estimated release time, or description directly on the release screen.
To change the title or description, select the field and begin typing.
To change the estimated publish time, select the release time label and choose a new time.
Gotcha
You can edit the name and description of scheduled releases, but in order to change the schedule date or time you first need to unschedule the release.
Hide releases from the global perspective view
When viewing a future release, you can choose to hide earlier releases from the global perspective view. This lets you hide document changes made by specific releases, while still previewing a subset of changes across releases.
- To hide versions from a specific release, first set your global perspective.
- In the release dropdown view, select the open eye icon next to any release you wish to hide.
- To reveal a hidden release, select the closed eye icon.
Preview releases in Presentation
If your team has enabled Presentation, you can preview a release by pinning it and then selecting the Presentation tool in Studio. You'll know it's been pinned if the name displays alongside the calendar icon instead of "Drafts".
Keep the release layering concept in mind, and use the hide release feature to customize your preview perspective.
Revert a release
This is a paid feature
This feature is available as an addon for certain Enterprise plans. Talk to sales to learn more.
You can return to the state prior to when a release was published by reverting the release. When reverting you'll be presented with the option to either Immediately revert the release, or create a new release – which you can then review and schedule to your liking .
- Navigate to the releases screen by selecting the "Calendar" icon from the perspective picker in the top bar.
- Select Archived to view published and archived releases.
- Select the release you want to revert to navigate to the release.
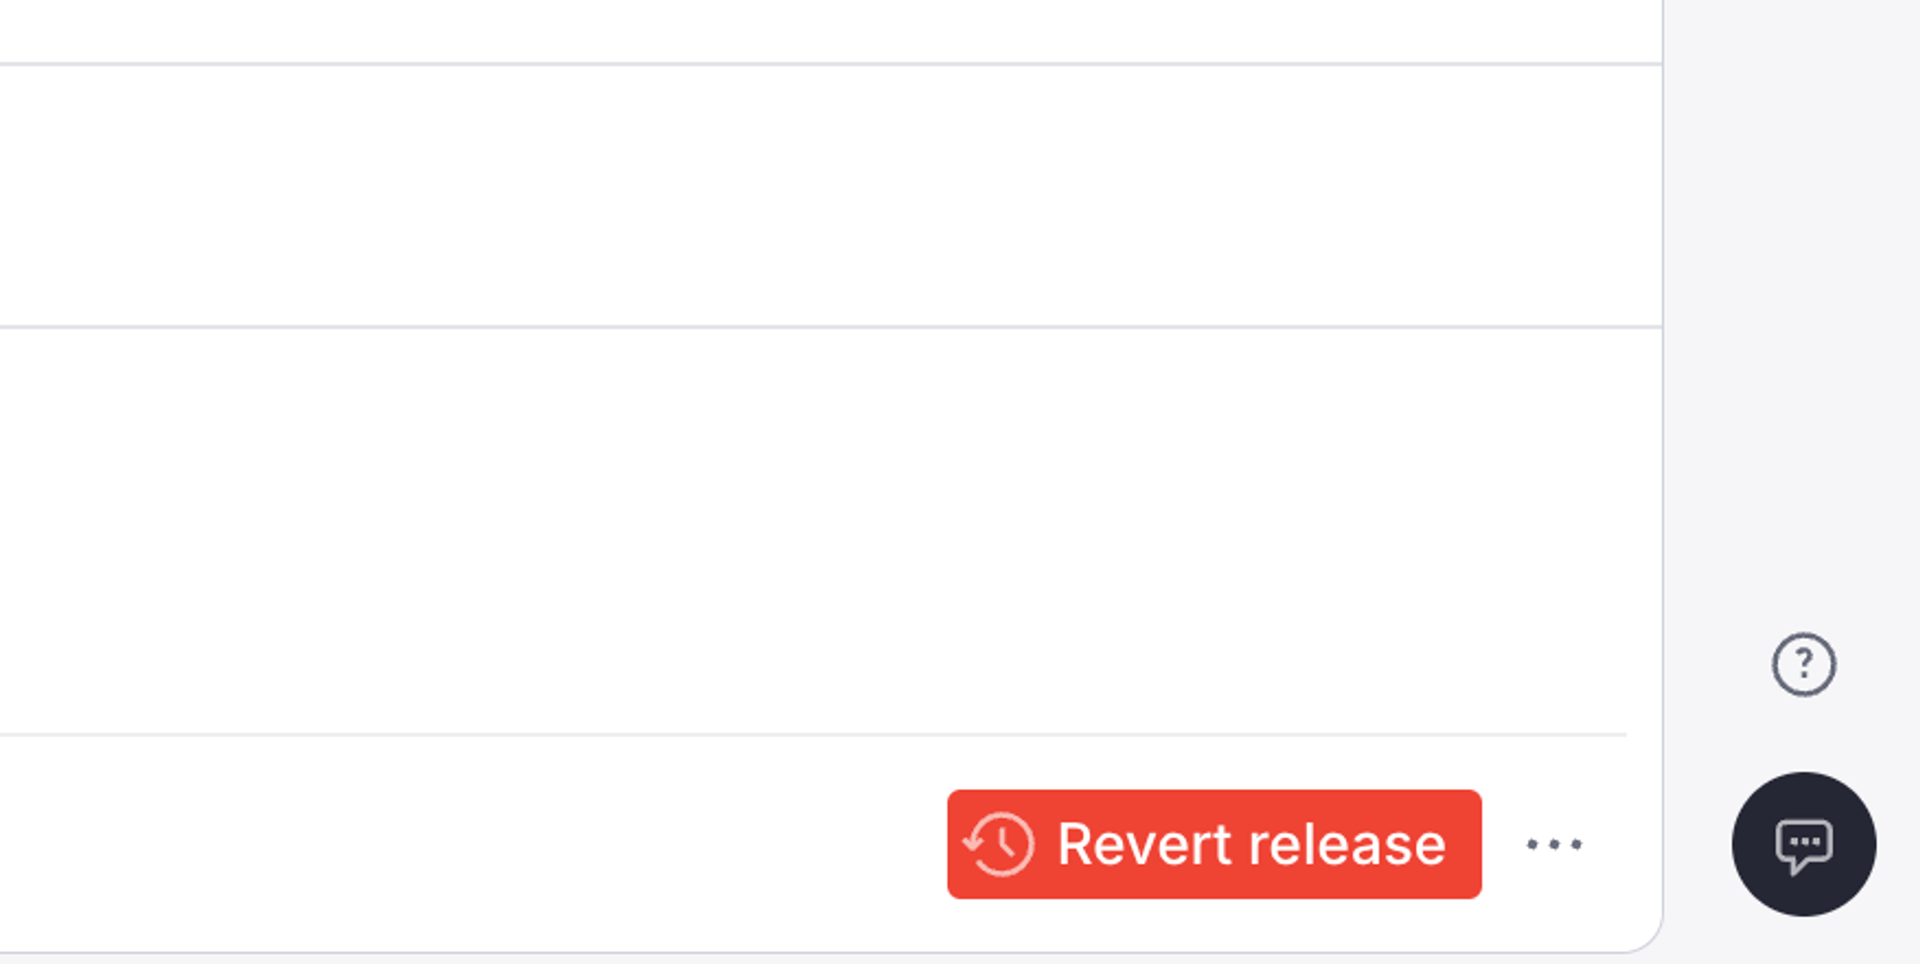
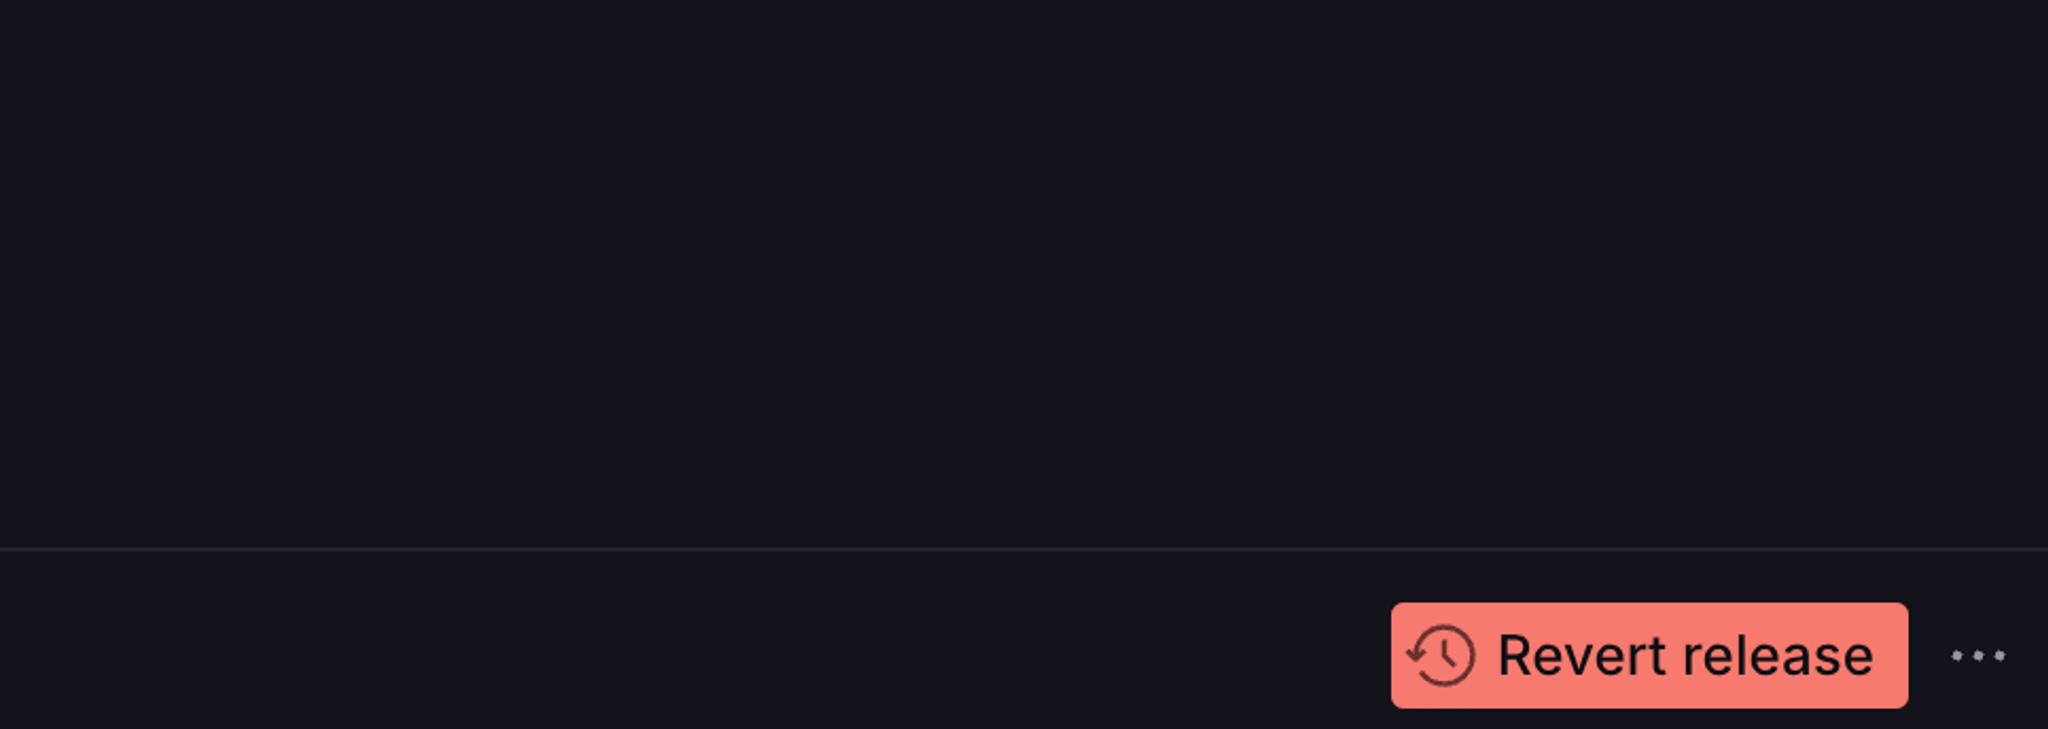
- In the lower right, select the Revert release button.
When you revert a release, any new documents that didn't exist outside of the release will be reverted to drafts in your dataset.
Duplicate a release
This is a paid feature
This feature is available as an addon for certain Enterprise plans. Talk to sales to learn more.
You can build off of an existing release by duplicating it. This is useful in scenarios where you want to work beyond a current release, but want any scheduled changes to carry over. There are two ways to duplicate a release.
On the main releases screen
- Select the "..." icon for the release you want to duplicate.
- Select Duplicate release.
On the individual release screen
- In the bottom right, next to the Publish / Schedule button, select the "..." icon.
- Select Duplicate release.
Advanced: Release layering
Release layering is the concept of displaying documents based on where a release falls in the release timeline and which perspective is active.
This allows editors to preview document changes across multiple releases. You can see a simplified version of this in how drafts override published documents in Presentation.
In Studio, release layering works on a timeline. The type and time of release indicates where a release falls on the timeline. You already know published and draft, but there are also as soon as possible (ASAP), timed, and undecided.
The layer follows this order, starting at 1 and adding changes.
- Published
- Draft
- As soon as possible (ASAP)
- Timed (A planned time in the future)
- Undecided
When viewing a release with an undecided release time, you will see all changes in other documents from drafts, ASAP releases, and timed releases stacked atop published documents—plus any changes on the undecided release(s). These views of your content in Studio are the global perspective.
Documents display based on release order
The global view and document list will show changes across releases based on the layering order, but when viewing a version of a document, you'll only see that version's changes. References to other documents will display their content in relation to where their release, and your active release, sit in the layering order.
This only applies to other documents. Your selected document will always show the contents of the selected release or perspective (if drafts or published is selected).