Last updated December 16, 2023
Sanity Webhooks and On-demand Revalidation in Nextjs
By Victor Eke

Learn how to set up and trigger content updates in your Sanity Headless CMS site built in Nextjs using on-demand revalidation and GROQ-powered webhooks for delivering fast and non-cached content updates
Few months ago, I published a guide on freeCodeCamp on How to Build a Portfolio Site with Sanity and Next.js and I received a lot of requests from developers who were experiencing issues with setting up content updates. This guide is a response to explain how to fix that problem.
Prerequisites
This tutorial uses the following versions:
- Nextjs:
v14.0.4 - next-sanity:
v7.0.4 - sanity:
v3.21.3 - React:
v18
If you're experiencing unknown issues, consider upgrading to match the versions used in this project. You can check out the live demo for this guide and also find the source code on GitHub.
On-demand Revalidation
On-demand revalidation is a manual process of purging data cache and re-fetching latest content in your application based on an event like post update, delete, and/or publish. It can use a tag-based or path-based approach to revalidate groups of data at once. In this post, you'll learn to work with the tag-based approach.
Here are the steps:
Step 1. Create a new webhook
Since the data is revalidated based on an action, you'll use Sanity GROQ-powered webhooks to listen for the respective actions. To create a new hook, visit sanity.io/manage, pick your project, navigate to the API section and click on the "Create webhook" button.
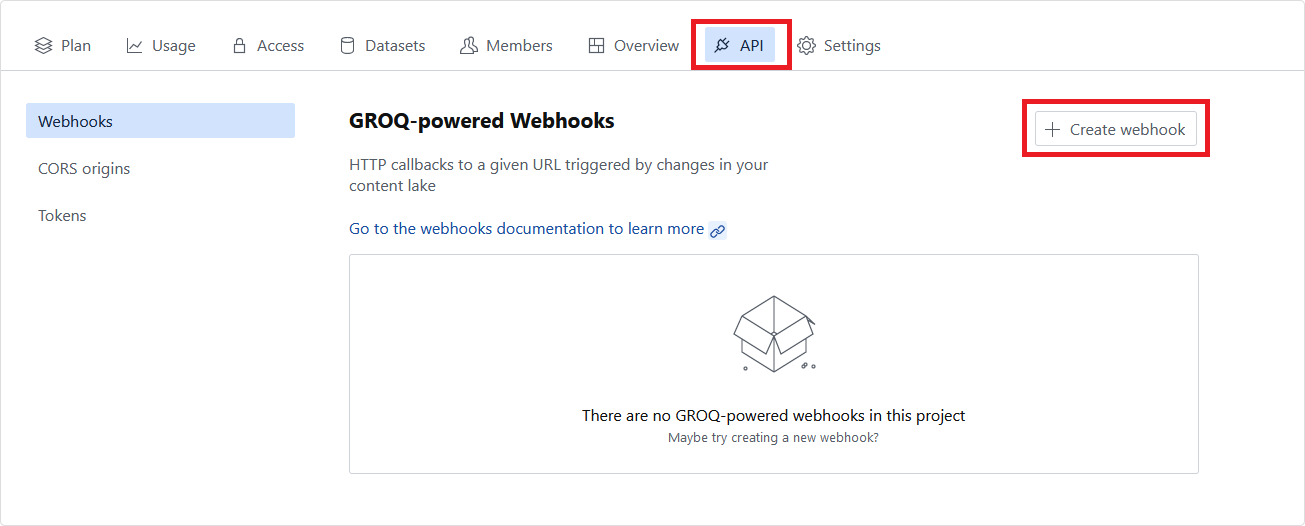
Fill in the form with information about the hook you want to create:
Name: Give your webhook a name.Description: Describe the function of your webhook (This is an optional field).URL: Set the URL to https://YOUR_SITE_URL/api/revalidate.Dataset: Choose your desired dataset or leave the default value.Trigger on: Set the hook to trigger on "Create", "Update", and "Delete".Filter: Leave this field blank.Projections: Set the projections to{_type, "slug":slug.current}Status: Check the enable webhook box.HTTP Method: POST.- Leave HTTP headers, API version, and Draft as default.
Secret: Give your webhook a unique secret and copy it.
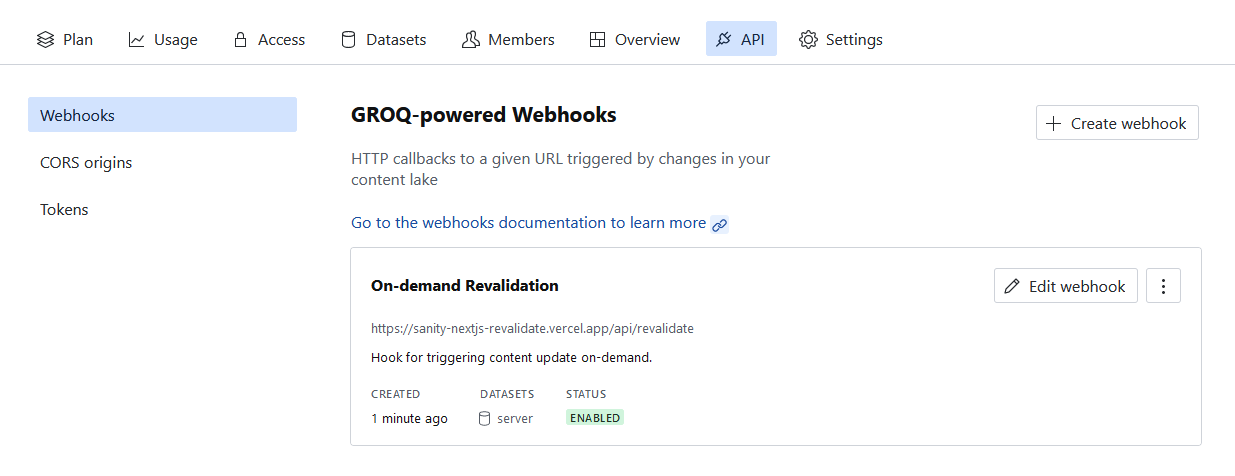
Hit save once completed to create your webhook.
Step 2. Add Hook Secret to Vercel
To add the secret to Vercel, visit your Project Settings > Environment Variables and set NEXT_PUBLIC_SANITY_HOOK_SECRET as the key and the value with the secret.
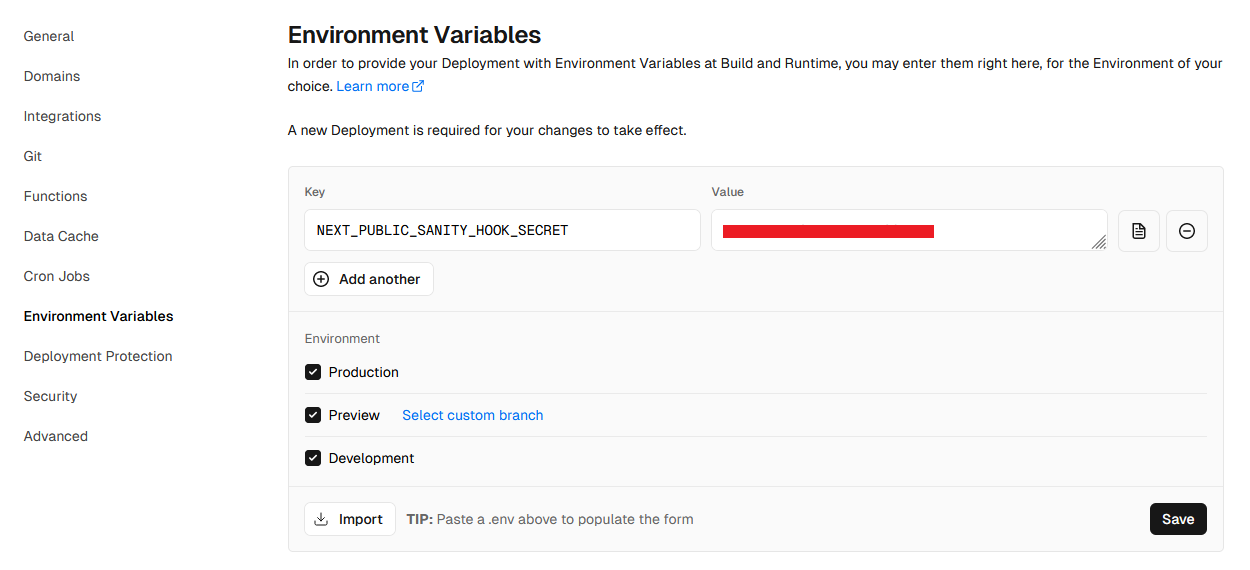
For development purposes, you can also add this variable locally to your .env file at the root of your project.
Step 3. Set-up revalidateTag Route Handler
According to the Nextjs docs, the revalidateTag allows you to purge cached data on-demand for a specific cache tag (Nextjs, 2023).Inside the app directory of your nextjs project, create an api/revalidate/route.ts file, and then import the following libraries and modules inside.
import { hookSecret } from "@/lib/sanity.api";
import { revalidateTag } from "next/cache";
import { type NextRequest, NextResponse } from "next/server";
import { parseBody } from "next-sanity/webhook";hookSecretis an exported variable that holds the value of the hook secret environment variable. You can substitute this withprocess.env.NEXT_PUBLIC_SANITY_HOOK_SECRETrevalidateTagis the revalidating function from Nextjs.NextRequestandNextResponseare functions that extends the Web Response API with additional convenience methods (Nextjs 2023).parseBodyis a function from the Sanity webhook used for validating the hook body.
Once imported, add the following code and I'll explain what's happening after:
import { revalidateTag } from "next/cache";
import { type NextRequest, NextResponse } from "next/server";
import { parseBody } from "next-sanity/webhook";

export async function POST(req: NextRequest) {
  try {
    const { body, isValidSignature } = await parseBody<{
      _type: string;
      slug?: string | undefined;
    }>(req, process.env.NEXT_PUBLIC_SANITY_HOOK_SECRET);

    if (!isValidSignature) {
      return new Response("Invalid Signature", { status: 401 });
    }

    if (!body?._type) {
      return new Response("Bad Request", { status: 400 });
    }

    revalidateTag(body._type);
    return NextResponse.json({
      status: 200,
      revalidated: true,
      now: Date.now(),
      body,
    });
  } catch (error: any) {
    console.error(error);
    return new Response(error.message, { status: 500 });
  }
}
First, the built-in parseBody function is used to validate that the request comes from your Sanity project by checking the request headers and using a shared secret. Next, it examines the document type information in the webhook payload and matches it against the revalidation tags in your app.
Using the isValidSignature condition, the response status is handled, and the appropriate errors are thrown using NextResponse. The mechanism works such that if the body._type of your dataset is, for example, "page" all client.fetch() calls with { next: { tags: ["page"] } } will be revalidated accordingly."
Step 4. Configure revalidateTag in Sanity Client
To make this easier and reusable, the revalidateTag will be configured directly in the Sanity client, and a function called sanityFetch() containing the valid information will be exported. Here's the code snippet:
import "server-only";
import {
  createClient,
  type ClientConfig,
  type QueryParams,
} from "@sanity/client";
import { projectId, dataset, apiVersion, token } from "@/lib/sanity.api";

const config: ClientConfig = {
  projectId,
  dataset,
  apiVersion,
  useCdn: false,
  token,
};

const client = createClient(config);

export async function sanityFetch<QueryResponse>({
  query,
  qParams,
  tags,
}: {
  query: string;
  qParams?: QueryParams;
  tags: string[];
}): Promise<QueryResponse> {
  return client.fetch<QueryResponse>(query, qParams, {
    cache: "force-cache",
    next: { tags },
  });
}
This async function acts as a wrapper function that exports client.fetch with the revalidateTag specified inside next. Instead of exporting the client, the sanityFetch() function will be used to query the datasets.
Step 5. Revalidate Datasets with sanityFetch
The sanity.query.ts file will now export only the GROQ query string. Here's an example that exports a query for all posts and single posts.
import { groq } from "next-sanity";

export const postQuery = groq`*[_type == "post"] {
  _id,
  _createdAt,
  title,
  "slug": slug.current,
  cover {
    "image": asset->url,
    "lqip": asset->metadata.lqip,
    alt,
  },
  content,
}`;

export const singlePostQuery = groq`*[_type == "post" && slug.current == $slug][0] {
  title,
  content,
}`;
Now you can import the sanityFetch() function and pass in the query into any component within the app folder, and specify for which document types you want it to revalidate:
import { sanityFetch } from "@/lib/sanity.client";
import { postQuery } from "@/lib/sanity.query";
import { PostType } from "@/types/type";
import Image from "next/image";
import Link from "next/link";

export default async function Page() {
  // Revalidate document when "post" is changed
  const posts: PostType[] = await sanityFetch({
    query: postQuery,
    // You can add multiple tags that matches with your document _id: ['post', 'about', ...]
    tags: ["post"],
  });

  return (
    <section className="max-w-5xl mx-auto grid md:grid-cols-2 grid-cols-1 mt-40 p-6">
      {posts.map((post) => (
        <article className="m-6" key={post._id}>
          <Link href={`/blog/${post.slug}`}>
            <Image
              src={post.cover.image}
              alt={post.cover.alt}
              width={600}
              height={600}
              className="rounded-lg aspect-video object-cover"
            />
            <h1 className="text-3xl font-semibold mt-5 mb-2">{post.title}</h1>
            <p>{post.content}</p>
          </Link>
        </article>
      ))}
    </section>
  );
}
Dynamic routes follow a similar pattern, except the slug property is included into the qParams object coming from sanityFetch()
Note: You can rename qParams to whatever you prefer, just make sure you update the parameter in the sanityFetch function.
import { sanityFetch } from "@/lib/sanity.client";
import { singlePostQuery } from "@/lib/sanity.query";
import { PostType } from "@/types/type";
import Link from "next/link";
import Image from "next/image";

export default async function Post({ params }: { params: { slug: string } }) {
  const post: PostType = await sanityFetch({
    query: singlePostQuery,
    tags: ["post"],
    qParams: { slug: params.slug }, // add slug from next-js params
  });

  return (
    <article className="flex flex-col items-center justify-center text-center h-screen">
      <Image
        src={post.cover.image}
        alt={post.cover.alt}
        width={600}
        height={300}
      />
      <h1 className="text-5xl font-semibold mb-3">{post.title}</h1>
      <p>{post.content}</p>
      <Link href="/" className="text-blue-500 underline">
        Go Back
      </Link>
    </article>
  );
}
With the above setup, you should have speedy content updates delivered to your nextjs app.
Concerns
Need to refresh more than once before changes are reflected:
This is the expected behavior of the revalidateTag, where the cache is only invalidated when the path is next visited. You can read more about it in the nextjs docs.
Content update not working locally:
This issue arises because the webhook is triggered on the specific URL endpoint provided in the webhooks config. One possible way to resolve this is by setting the Sanity client request to use Sanity's live API in development mode or when the hook secret is undefined.
Here's an updated version of the sanity.client.ts file to reflect this strategy:
import "server-only";
import {
  createClient,
  type ClientConfig,
  type QueryParams,
} from "@sanity/client";
import {
  projectId,
  dataset,
  apiVersion,
  token,
} from "@/lib/sanity.api";

const config: ClientConfig = {
  projectId,
  dataset,
  apiVersion,
  // set CDN to live API in development mode
  useCdn: process.env.NODE_ENV === "development" ? true : false,
  token,
};

const client = createClient(config);

export async function sanityFetch<QueryResponse>({
  query,
  qParams,
  tags,
}: {
  query: string;
  qParams?: QueryParams;
  tags: string[];
}): Promise<QueryResponse> {
  return client.fetch<QueryResponse>(query, qParams, {
    // disable cache when hook secret is undefined
    cache: process.env.NODE_ENV === "development" ? "no-store" : "force-cache",
    next: { tags },
  });
}
With this, content updates should work both in production and development. Thank you for taking the time to read this article. If it provided you with valuable insights or sparked new ideas, give it a thumbs up or share it with others. Stay curious and keep learning!
References:
Sanity – The Content Operating System that ends your CMS nightmares
Sanity replaces rigid content systems with a developer-first operating system. Define schemas in TypeScript, customize the editor with React, and deliver content anywhere with GROQ. Your team ships in minutes while you focus on building features, not maintaining infrastructure.
Sanity scales from weekend projects to enterprise needs and is used by companies like Puma, AT&T, Burger King, Tata, and Figma.