Last updated July 20, 2023
Form validation with Yup
By Joseph Udonsak & Joe Holmes

The primary aim of this article is to show you how to manage and validate forms in React using Formik and Yup. You can see the form we will build here. In addition to this, you will also learn how to set up and manage a CRM using Sanity as well as reading and writing data to a Sanity hosted CRM using GROQ. The code for the complete project is available on Github should you get stuck at any point.
Forms are a key medium of collecting data from people interacting with your application. This data could prove crucial in future activities such as sending notifications or even transferring money to saved accounts. As such it is important to reduce the possibility of invalid data being supplied to the barest minimum. The first step to doing that is via form validation.
Simply put, form validation is the process of ensuring that appropriate data is supplied in a form. Via this process, an application is not only able to ensure that required information is provided at all times but that all data is provided in an appropriate format.
In React, there are many options for managing forms - Formik, Unform, React Hook Form, and Redux Form to name a few. However, Formik has proven itself to be a popular choice as it combines efficiency, ease of use, and a small library footprint to provide a smooth developer experience. Another positive for using Formik is its seamless integration with Yup.
When it comes to validation in JavaScript, no library comes to mind faster than Yup by JQuense. With Yup, the developer can define a schema (or structure) of the expected data specifying its data type and whether it is required or not. With Yup, you are also able to determine the structure of data in the yup schema including input length, or even validate the supplied data against a regular expression (regex validation).
In this article, we will build a small application that allows customers to leave product reviews for an e-commerce website. We will build the web application with React while the content (and back end) will be hosted on Sanity. Communication between the web application and back end will be via Graph-Relational Object Queries (GROQ).
Prerequisites
To keep up with the concepts that will be introduced in this article, you will need a fair grasp of ES6. You will also need to have an understanding of some basic React concepts like hooks and functional components.
You will also need to have the following installed on your workstation:
- Node Package Manager (NPM)
- Sanity CLI
- A code editor of your choice
Form validation
Create a new folder called product-review-site to hold the code for the front-end and back-end.
mkdir product-review-site

cd product-review-site
In the product-review-site folder create a new React application named front-end.
npx create-react-app front-end
Create a new directory called components in the front-end/src directory.
mkdir front-end/src/componentsFor this tutorial, we will use Bulma CSS to style our application. Use the following command to add Bulma CSS to your application
npm install bulmaTo import the Bulma CSS into the project, create a file named style.css in the src directory and add the following:
@import 'bulma/css/bulma.css'You can delete theApp.cssandindex.cssfiles we’ll be relying on Bulma for our styling.
Import style.css in the src/index.js file as follows:
import './style.css';
In this tutorial, we will use Formik to manage our forms while using Yup for validation. Install both packages using the command below:
npm install formik yup
Building the reviews component
In the components directory, create a file called ReviewForm.jsx. This component will be responsible for managing the form displayed for a customer to review a product. For now, the form will return a React Fragment.
import React from "react";

const ProductReviewForm = () => <></>;

export default ProductReviewForm;
A product review will have the following inputs:
- The product being reviewed. This field is required and must be from the list of products currently available.
- The name of the customer. This field is also required.
- The customer’s email address. This field is required. Additionally, the email address must be valid.
- The title of the review. This field is essentially the review in less than 10 words. This is required.
- A more detailed review. This field is required.
- A rating of the product with 1 as the lowest and 10 as the highest. This field is required.
- The date the review was given. This will be generated automatically.
- Whether the customer would recommend the product to someone else. This is optional and by default should be false.
We will use a Formik component as the root component of our ReviewForm. This component will have three props - a set of initial values, a validation schema, and a callback function to be triggered when the form is submitted.
import React from "react";
import * as Yup from "yup";

const ProductReviewForm = () => {
  const products = ["Product 1", "Product 2", "Product 3", "Product 4"];

  const validationSchema = Yup.object({
    product: Yup.string().required("Please select a product").oneOf(products),
    name: Yup.string().required(),
    email: Yup.string().email().required(),
    title: Yup.string().required(),
    review: Yup.string().required(),
    rating: Yup.number().min(1).max(10).required(),
    date: Yup.date().default(() => new Date()),
    wouldRecommend: Yup.boolean().default(false),
  });

  const initialValues = {
    name: "",
    email: "",
    title: "",
    review: "",
    rating: "",
    date: new Date(),
    wouldRecommend: false,
    product: "",
  };

  const onSubmit = (values) => {
    alert(JSON.stringify(values, null, 2));
  };

  return <></>;
};

export default ProductReviewForm;
We are using a dummy array of products for now. We will update theproductsarray andonSubmitcallback after setting up the API.
In addition to the Formik component, Formik provides the Form, Field and ErrorMessage components which all work together to handle form state, events, validation (based on the object schema provided by Yup) and display of validation errors. This allows us to focus on the structure of the form and the submission process.
Before returning the JSX for the ProductReviewForm, we'll declare a constant called productOptions which is an array of options for the dropdown of products. We'll also declare a function called renderError which will be passed as a prop to the ErrorMessage component and used to display a properly styled error message.
//other import statements
import { Formik, Form, Field, ErrorMessage } from "formik";

const ProductReviewForm = () => {
  //declaration of products
  //declaration of validationSchema
  //declaration of initialValues
  //declaration of onSubmit callback

  const productOptions = products.map((product, key) => (
    <option value={product} key={key}>
      {product}
    </option>
  ));

  const renderError = (message) => <p className="help is-danger">{message}</p>;

  return (
    <Formik
      initialValues={initialValues}
      validationSchema={validationSchema}
      onSubmit={async (values, { resetForm }) => {
        await onSubmit(values);
        resetForm();
      }}
    >
      <Form>
        <div
          className="container"
          style={{
            width: "60%",
          }}
        >
          <div className="field">
            <label className="label" htmlFor="name">
              Full name
            </label>
            <div className="control">
              <Field
                name="name"
                type="text"
                className="input"
                placeholder="Full name"
              />
              <ErrorMessage name="name" render={renderError} />
            </div>
          </div>
          <div className="field">
            <label className="label" htmlFor="email">
              Email address
            </label>
            <div className="control">
              <Field
                name="email"
                type="text"
                className="input"
                placeholder="Email address"
              />
              <ErrorMessage name="email" render={renderError} />
            </div>
          </div>
          <div className="field">
            <label className="label" htmlFor="product">
              Product
            </label>
            <div className="control">
              <Field name="product" as="select" className="select is-fullwidth">
                <option value={""}>Select a product</option>
                {productOptions}
              </Field>
              <ErrorMessage name="product" render={renderError} />
            </div>
          </div>
          <div className="field">
            <label className="label" htmlFor="title">
              Title
            </label>
            <div className="control">
              <Field
                name="title"
                type="text"
                className="input"
                placeholder="Title"
              />
              <ErrorMessage name="title" render={renderError} />
            </div>
          </div>
          <div className="field">
            <label className="label" htmlFor="review">
              Review
            </label>
            <div className="control">
              <Field
                name="review"
                as="textarea"
                className="textarea"
                placeholder="Review"
              />
              <ErrorMessage name="review" render={renderError} />
            </div>
          </div>
          <div className="field">
            <label className="label" htmlFor="rating">
              Rating
            </label>
            <div className="control">
              <Field
                name="rating"
                type="number"
                className="input"
                placeholder="Rating"
              />
              <ErrorMessage name="rating" render={renderError} />
            </div>
          </div>
          <div className="field">
            <div className="control">
              <label className="checkbox label" htmlFor="wouldRecommend">
                <Field
                  name="wouldRecommend"
                  type="checkbox"
                  className="checkbox"
                />
                Would recommend
              </label>
            </div>
          </div>
          <button type="submit" className="button is-primary">
            Submit
          </button>
        </div>
      </Form>
    </Formik>
  );
};
export default ProductReviewForm;
To see the form in action, edit the src/App.js file to render the ProductReviewForm.
import ProductReviewForm from "./components/ReviewForm";

const App = () => <ProductReviewForm />;

export default App;
Run your application. By default, your application will be available on http://localhost:3000/.
npm start
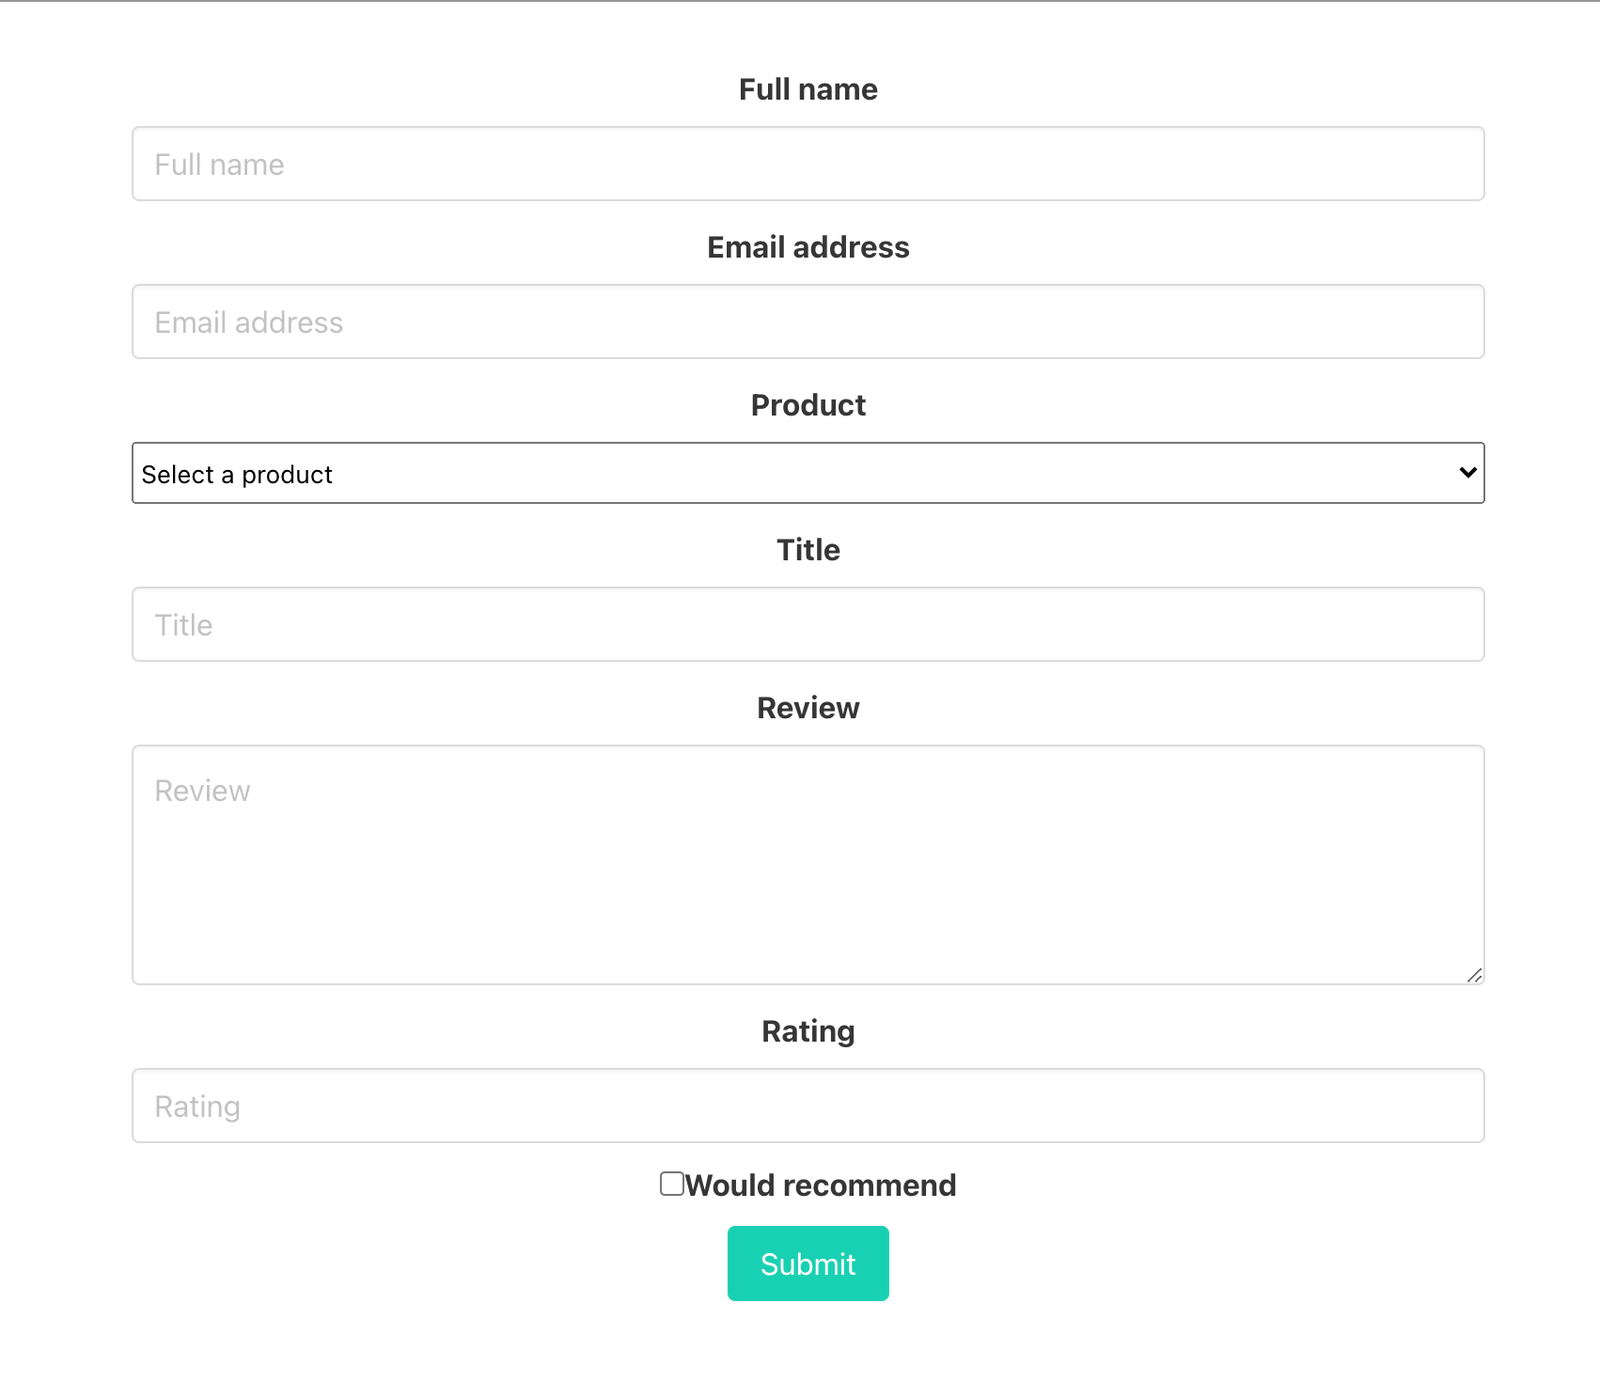
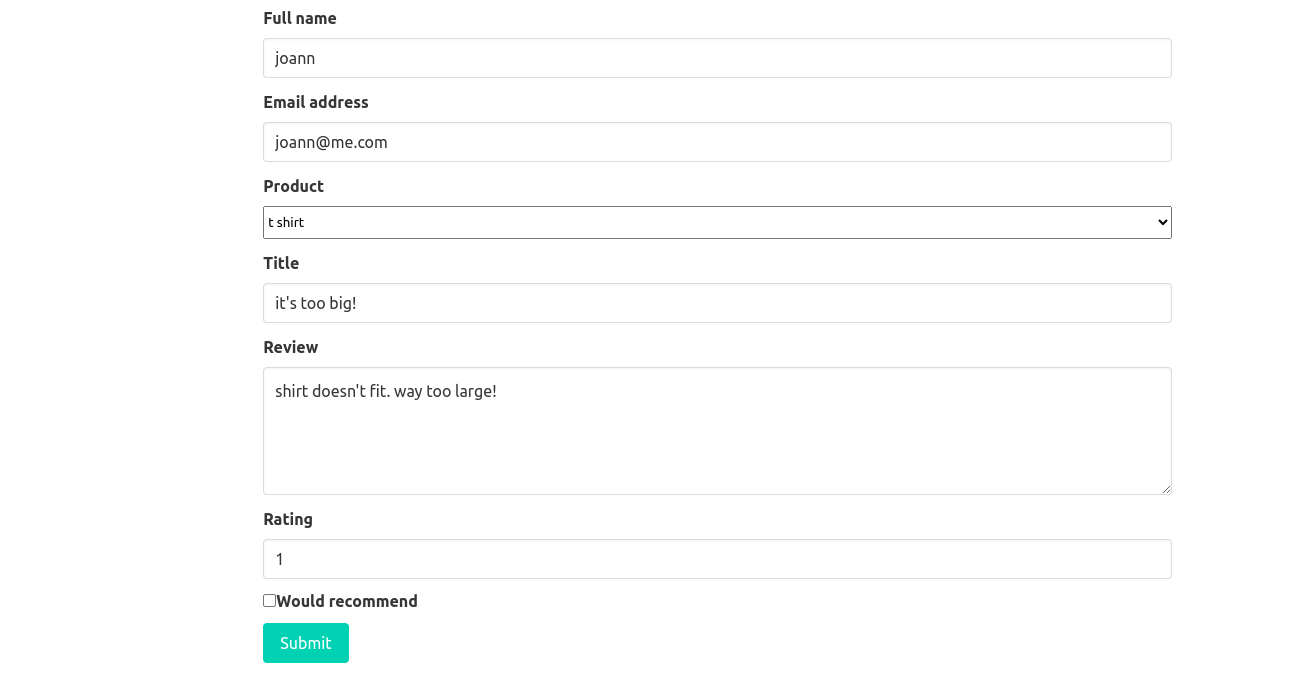
Your application should look like this at the moment
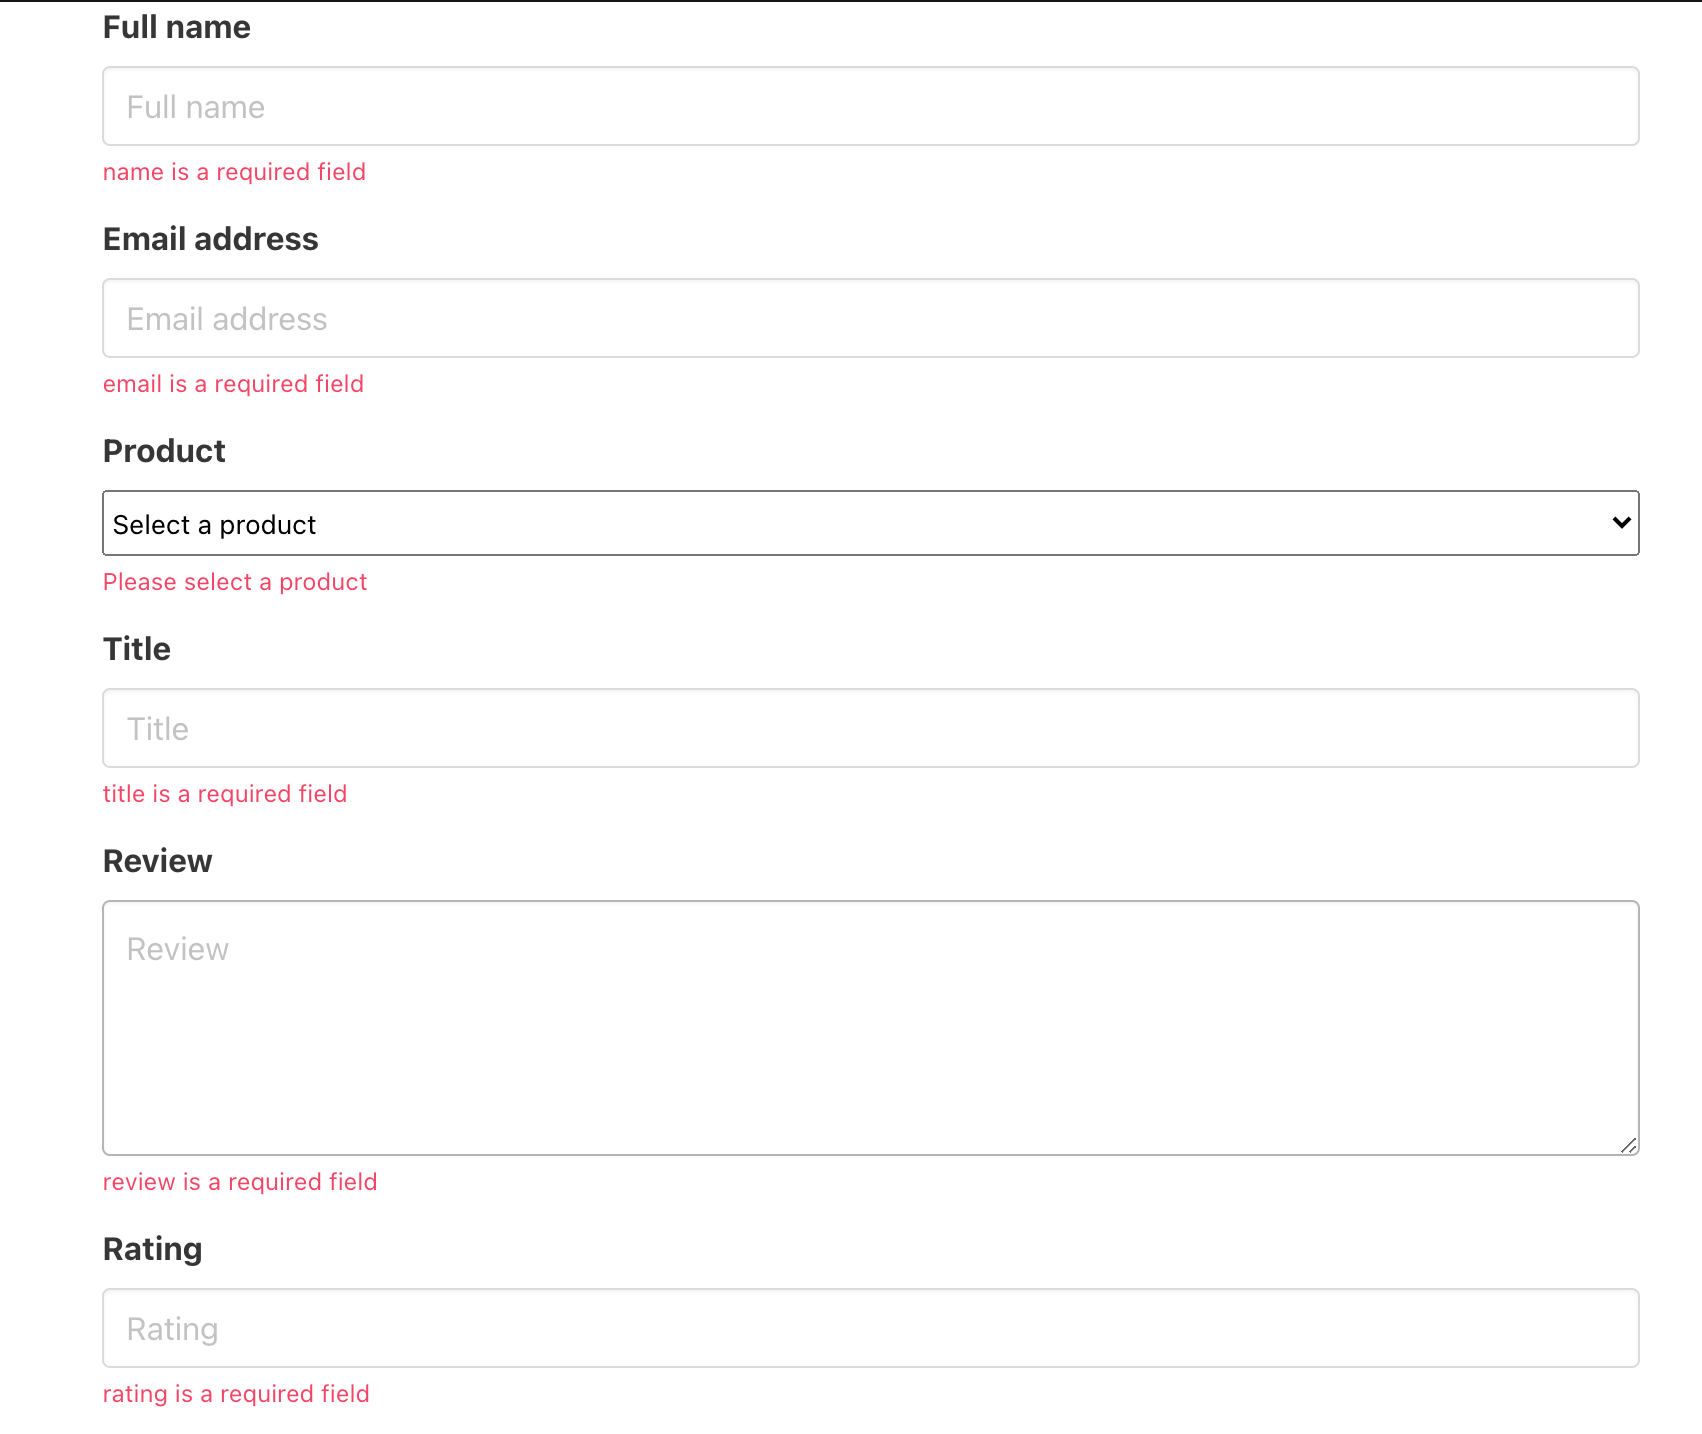
Click the submit button and see the error messages pop up.
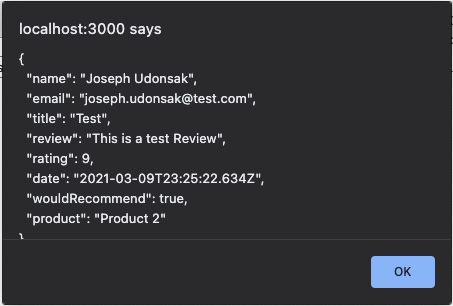
When filled properly and submitted, we see the following:
Creating the API
We will use Sanity to build our API. Initialize a new Sanity project named back-end in the product-review-site folder.
cd ../
npm create sanity@latest
You will be prompted to provide some information. Make sure you have an account registered with Sanity, then proceed as follows:
- Select the
Create new projectoption - Name the project
back-end - Use the default dataset configuration (press
Y) - Select the project output path (by default it would be the
product-review-sitefolder) - Select the clean option with no preconfigured schemas.
- Do you want to use TypeScript? (n)
- Select package manager (npm)
You may encounter an error in your schemas/index.js file in which it says it's unable to find @babel/preset-env. Fix it by first creating a .babelrc file in the root of the project (ie, in the folder containing front-end and back-end). In that file, paste this:
{
  "presets": ["next/babel"],
  "plugins": []
}
Then, create another file in the root directory called .eslintrc and paste this:
{
  "extends": ["next/babel"]
}
The Sanity CLI will bootstrap a clean schema with no configuration. We'll use this to mock up some e-commerce product reviews.
Before we run our backend, let us define a schema for our product reviews. In the back-end/schemas directory, create a file named product.js and a file named productReview.js. Then declare the following schemas, using Sanity v3's defineField and defineType helper functions to enable easier autocomplete:
//product.js
import { defineType, defineField } from "sanity";

export const product = defineType({
  name: 'product',
  title: 'Product',
  type: 'document',
  fields: [
defineField({
      name: 'title',
      type: 'string',
      description: 'The name of the product',
    }),
    defineField({
      name: 'productImage',
      type: 'image',
      description: 'Image of the product',
    }),

    defineField({
      name: 'description',
      type: 'string',
      title: 'Description',
    )},
    defineField({
      name: 'cost',
      type: 'number',
      description: 'Cost in dollars.',
    }),
  ],
})
Now add the productReview.js schema in the same folder. Note we're also using the defineType and defineField helpers here:
import {defineType, defineField} from 'sanity'
export const productReview = defineType({
  name: 'productReview',
  title: 'Product Review',
  type: 'document',
  fields: [
    defineField({
      name: 'product',
      type: 'reference',
      to: {type: 'product'},
    }),
    defineField({
      name: 'title',
      type: 'string',
      description: 'Your review in less than 10 words',
    }),
    defineField({
      name: 'name',
      type: 'string',
      title: 'Full name',
    }),
    defineField({
      name: 'email',
      type: 'string',
      title: 'Email address',
    }),
    defineField({
      name: 'rating',
      type: 'number',
      description: 'Rate the product out of 10',
    }),
    defineField({
      name: 'date',
      type: 'datetime',
    }),
    defineField({
      name: 'review',
      type: 'text',
      description: 'Your review in as many words as you can come up with',
    }),
    defineField({
      name: 'wouldRecommend',
      title: 'Would recommend to a friend',
      type: 'boolean',
    }),
  ],
})
Next, open the schema.js file (in the back-end/schemas directory) and include the newly created schema:
import product from './product'
import productReview from './productReview'const
export const schemaTypes = [product, productReview]
Run your Studio with the command npm run dev. By default, the studio runs at http://localhost:3333.
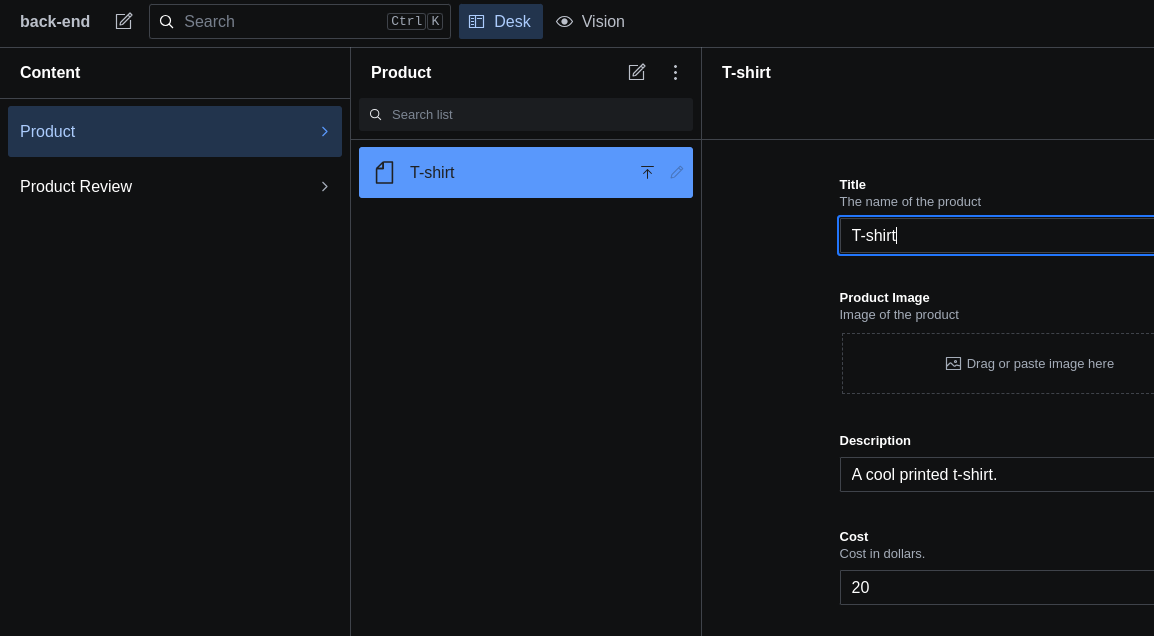
Using the Studio we can add new products and reviews for products by clicking the compose icon. Make an example Product in the Studio before moving on. It should look like this:
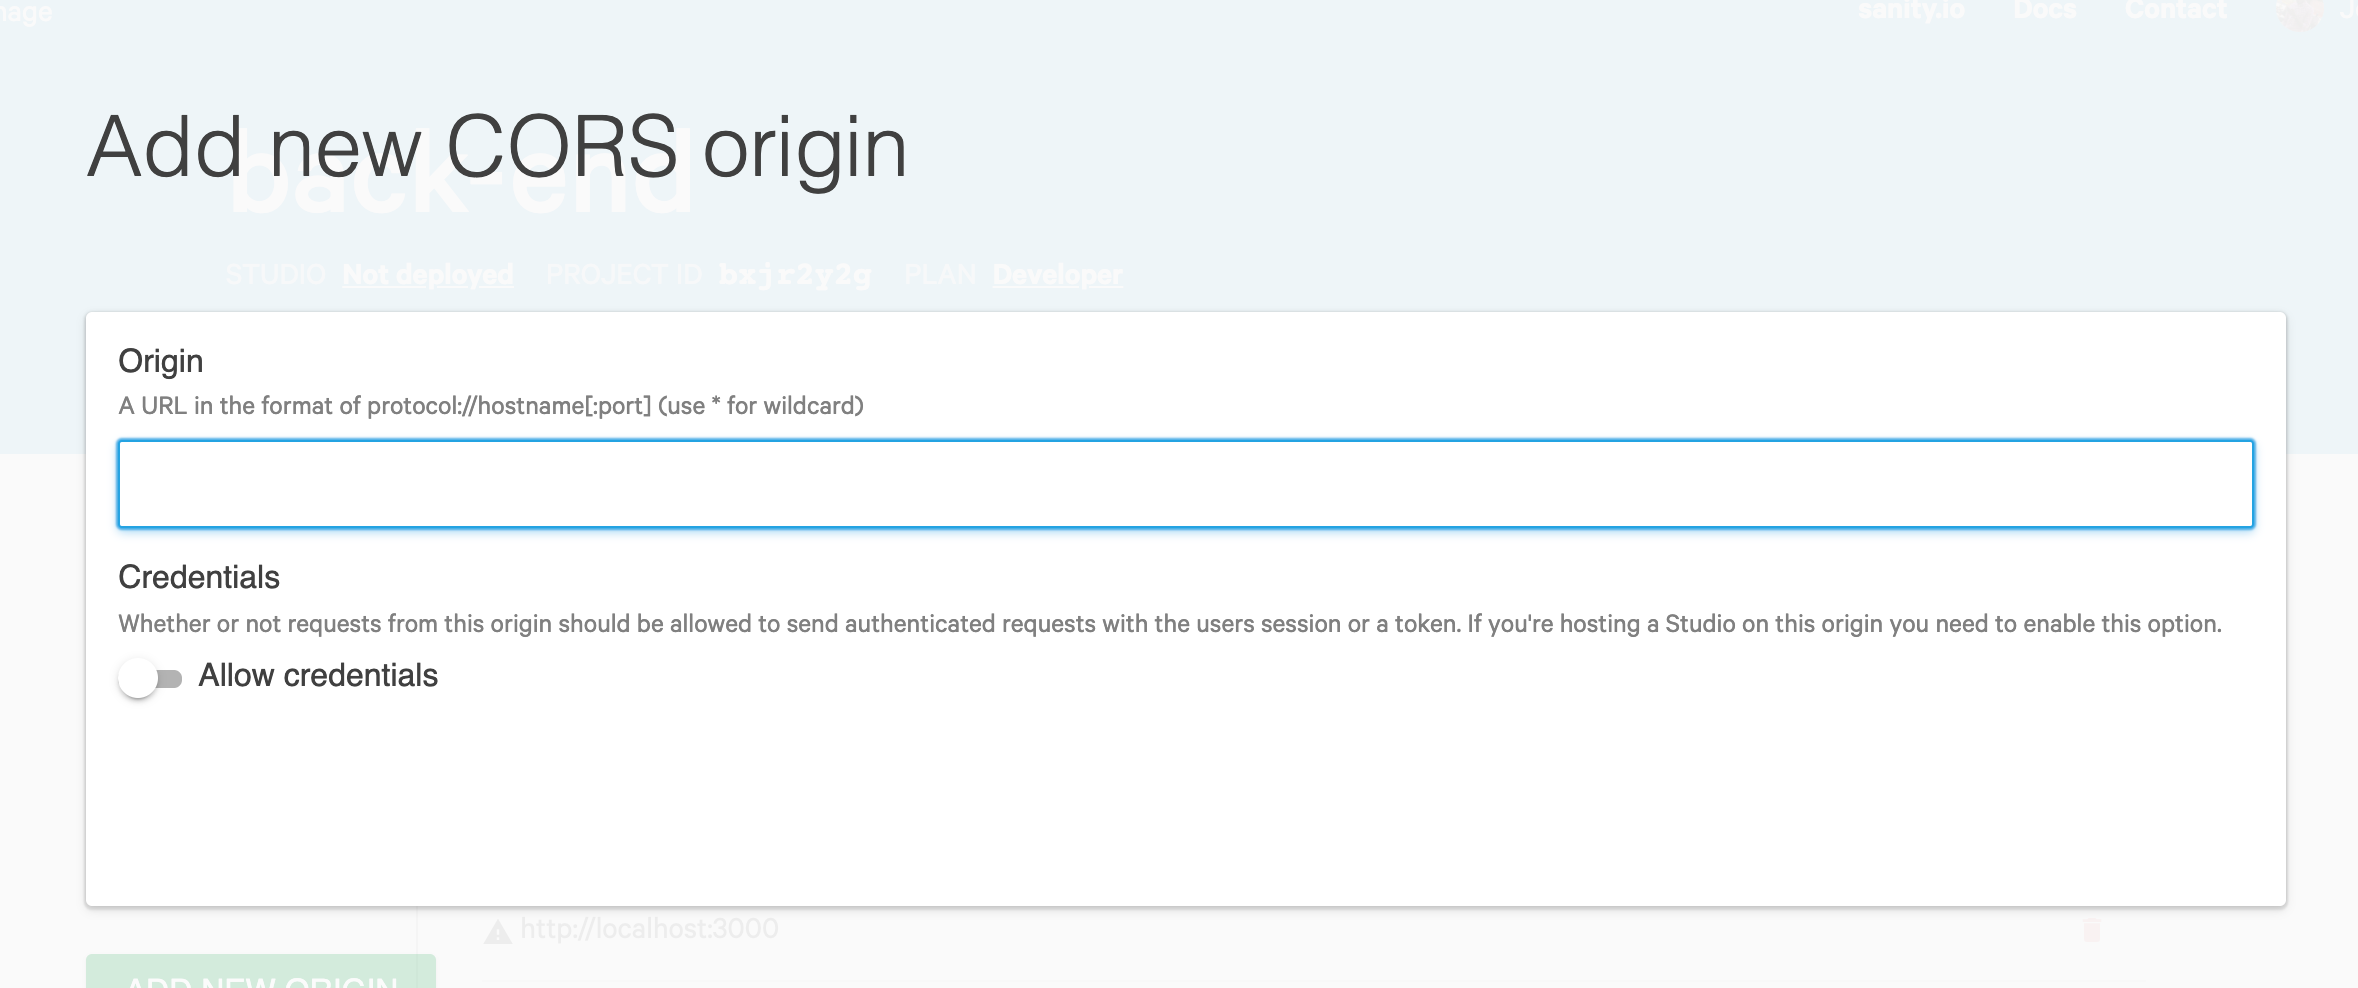
Enable CORS on the API
By default, the only host that can connect to the project API is the sanity studio (http://localhost:3333).
Before we can make requests to the API, we need to add the host for our React application (http://localhost:3000/) to the permitted origins. To do this open your Studio's settings by clicking on your avatar in the top right corner, then "Manage project." Select the project we are working on (back-end) and click on the Settings tab. Click on the API menu option.
In the CORS Origins section, click the Add new origin button. In the form that is displayed, type http://localhost:3000 as the origin and enable the Allow credentials option.
We will need the credentials so that we can make authenticated requests to our API when posting product reviews. Click the Add CORS origin button to save the changes made.
Because we will be making write requests to the API, we need a token that is authenticated by the API. To create one, click Add new token in the Tokens section. As a label, you can provide anything memorable.
This time we’ll use Front-End as the label. Make sure you check the Editor option in the Rights section. Click Add API token to view the newly generated token.
Paste your token key somewhere safe; we'll return to it in a moment.
One last thing to note before we return our attention to the review form is the project ID. We will need this when we link the review form to the backend. In the root directory of the backend project, open the sanity.config.js file and look for the projectId key. Also take note of the dataset (unless you changed it, it should be called "production.")
With these in hand, we can link our front-end to the API. This will allow us to get the list of products as well as save and retrieve product reviews.
Linking the React application to Sanity
To make our product review form fully functional, we need to pull the list of products from the backend- so that the customer can select the product to be reviewed. We also need to post the review to the API when the user submits the form (with valid input). We will use the Sanity Client package to handle interactions with the API.
Add the @sanity/client dependency to your front-end project.
npm install @sanity/client
In the src directory, create a file called client.js. In it, add the following:
import { createClient } from "@sanity/client";
const client = createClient({
  projectId: "INSERT_YOUR_PROJECT_ID_HERE",
  dataset: "production",
  // authenticated requests can't be cached so we have to set useCdn to false
  useCdn: false,
  token: "INSERT_YOUR_TOKEN_HERE"
});
export default clientBack in our ProductReviewForm, remove the products declaration. We will take advantage of the useState and useEffect React hooks to make a fetch request to the API and save the response to the products array.
// other import statements
import client from "../client";
import { useEffect, useState } from "react";

const ProductReviewForm = () => {

  const [products, setProducts] = useState([]);

  useEffect(() => {
    client
      .fetch(`*[_type == "product"]{_id, title}`)
      .then((products) => {
        setProducts(products);
      })
      .catch(console.error);
  }, []);

// other declarations
// return statement
};

export default ProductReviewForm;
Using our configured Sanity client, we get the products by making a fetch request with a GROQ statement. The statement is broken down as follows:
*fetches all documents[_type == "product"]filters all the documents and returns only the documents of the typeproduct.{_id, title}selects only the id and title from each document. We need the id to let the backend know which product the review is referencing. We need the title for the dropdown of product options.
We also need to update our validation schema. Previously, we were only validating to check that the selected product was in the array of products.
Now that we have a list of product objects, we need to ensure that whatever value is provided to the schema matches the id of a product in our array of products. Replace the validationSchema declaration with the following:
const validProductValues = products.map(({ _id }) => _id);

  const validationSchema = Yup.object({
    product: Yup.string()
      .required("Please select a product")
      .oneOf(validProductValues),
    name: Yup.string().required(),
    email: Yup.string().email().required(),
    title: Yup.string().required(),
    review: Yup.string().required(),
    rating: Yup.number().min(1).max(10).required(),
    date: Yup.date().default(() => new Date()),
    wouldRecommend: Yup.boolean().default(false),
  });
We also need to update the productOptions constant. Replace the productOptions declaration with the following:
const productOptions = products.map(({ _id, title }, key) => (
      <option value={_id} key={key}>
        {title}
      </option>
    ));
To save the reviews on the back-end, we need to update the onSubmit function.
const onSubmit = (values) => {
    const { product } = values;
    const request = {
      ...values,
      product: { _ref: product },
      _type: "productReview",
    };
    client.create(request).then(() => {
      alert(`Review submitted successfully`);
    });
};Building the rest of the front-end
In addition to the review form we just created, let’s make it possible for customers to see all the available products and reviews. To do this we’ll build the following:
- A component to view all products
- A component to view all product reviews
Image handling
Because we will also be loading product images on our pages, let’s add the Sanity Image-URL dependency to our project:
npm install @sanity/image-url
In the src folder create a file named imageHelper.js and add the following code:
import imageUrlBuilder from "@sanity/image-url";
import sanityClient from "./client";

const getImageUrl = (source) => {
  const builder = imageUrlBuilder(sanityClient);
  return builder.image(source);
};

export default getImageUrl;
In the components directory, create a file called Products.jsx. In it, add the following code.
import React, { useEffect, useState } from "react";
import client from "../client";
import getImageUrl from "../imageHelper";

const Products = () => {
  const [products, setProducts] = useState(null);

  useEffect(() => {
    client
      .fetch(
        `*[_type == "product"]{
          title,
          description,
          productImage,
          cost
      }`
      )
      .then((products) => {
        setProducts(products);
      })
      .catch(console.error);
  }, []);
  return (
    <div className="container">
      <div className="columns is-multiline">
        {products &&
          products.map((product, index) => (
            <div className="column is-3" key={index}>
              <div className="card">
                <div className="card-image">
                  <figure className="image is-4by3">
                    <img
                      src={
                        product.productImage
                          ? getImageUrl(product?.productImage).url()
                          : ""
                      }
                      alt={product.title}
                    />
                  </figure>
                </div>
                <div className="card-content">
                  <div className="media">
                    <div className="media-content">
                      <p className="title is-4">{product.title}</p>
                      <p className="subtitle is-6">${product?.cost}</p>
                    </div>
                  </div>
                  <div className="content">
                    {product.description}
                    <br />
                  </div>
                </div>
              </div>
            </div>
          ))}
      </div>
    </div>
  );
};

export default Products;
Building the Reviews component
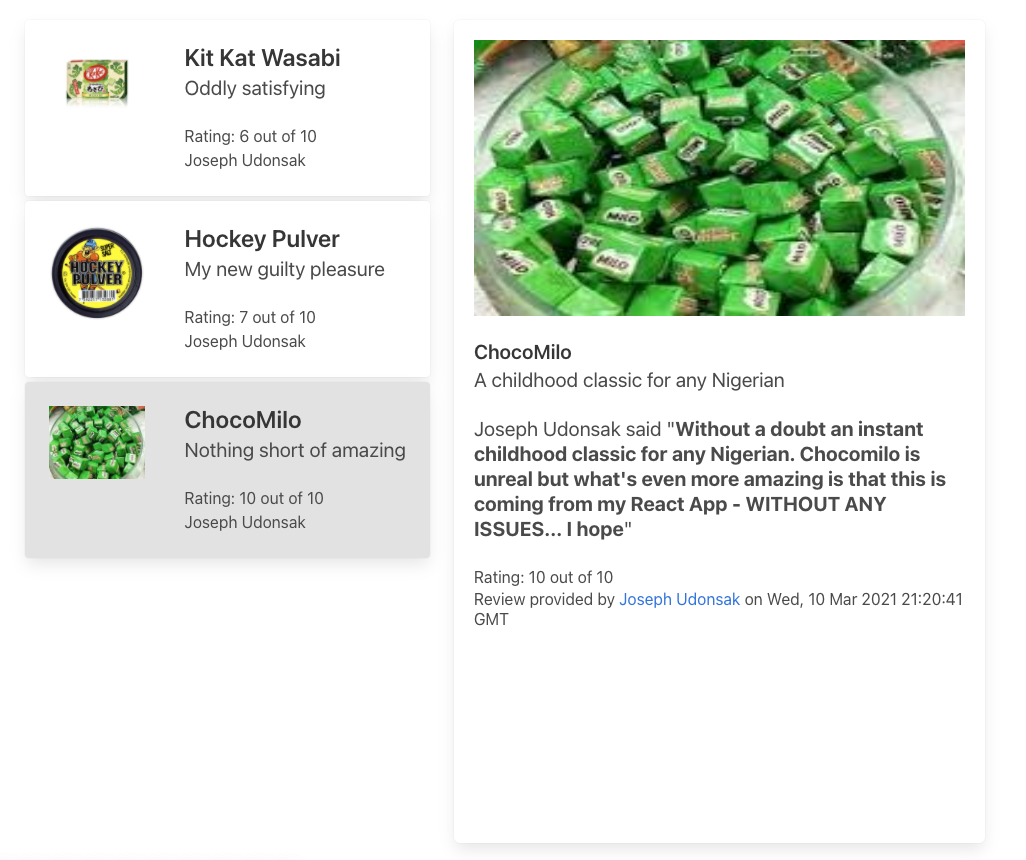
For the product reviews interface, we’ll use a master-detail layout as shown in the image below:
To do this we’ll need 3 components:
- A component to display the list of reviews
- A component to display the selected review
- A component to display the list and details of the selected review side by side
In the components directory, create a new directory called reviews. In the reviews directory add the following files:
ReviewCard.jsxReviewDetails.jsxReviews.jsx
In the ReviewCard.jsx file add the following:
import React from "react";
import getImageUrl from "../../imageHelper";

const ReviewCard = ({ review, index, onClick, isSelected }) => {
  const { rating, name, title, product } = review;

  return (
    <div
      className="card"
      key={index}
      onClick={onClick}
      style={{
        backgroundColor: isSelected ? "#e2e2e2" : "white",
        marginBottom: "5px",
      }}
    >
      <div className="card-content">
        <div className="columns">
          <div className="column is-narrow">
            <div className="media-left">
              <figure className="image is-96x96">
                <img
                  src={getImageUrl(product.productImage).url()}
                  alt={product.title}
                />
              </figure>
            </div>
          </div>
          <div className="column">
            <div className="media-content">
              <p className="title is-4">{product.title}</p>
              <p className="subtitle is-5">{title}</p>
              <p className="is-6">Rating: {rating} out of 10</p>
              <p className="is-6">{name}</p>
            </div>
          </div>
        </div>
      </div>
    </div>
  );
};

export default ReviewCard;
In the ReviewDetails.jsx file add the following:
import React from "react";
import getImageUrl from "../../imageHelper";

const ReviewDetails = ({ selectedReview }) => {
  if (!selectedReview) {
    return <p className="title is-5">Click on a card to get started</p>;
  }

  const { product, name, rating, email, date, review } = selectedReview;

  return (
    <>
      <figure className="image is-16by9" style={{ marginBottom: "5%" }}>
        <img
          src={getImageUrl(product.productImage).url()}
          alt={product.title}
        />
      </figure>
      <p className="title is-5">{product.title}</p>
      <p className="subtitle">{product.description}</p>
      <p className="subtitle">
        {name} said "<b>{review}</b>"
      </p>
      <p className="is-6">Rating: {rating} out of 10</p>
      <p className="subtitle is-6">
        Review provided by <a href={`mailto:${email}`}>{name}</a> on{" "}
        {new Date(date).toUTCString()}
      </p>
    </>
  );
};

export default ReviewDetails;
In the Reviews.jsx file, add the following:
import React, { useEffect, useState } from "react";
import client from "../../client";
import ReviewCard from "./ReviewCard";
import ReviewDetails from "./ReviewDetails";

const ProductReviews = () => {
  const [reviews, setReviews] = useState(null);
  const [selectedReview, setSelectedReview] = useState(null);
  const [selectedReviewIndex, setSelectedReviewIndex] = useState(null);

  useEffect(() => {
    client
      .fetch(
        `*[_type == "productReview"]{
        name,
        email,
        title,
        rating,
        date,
        review,
        wouldRecommend,
        product ->{
          title,
          productImage,
          description,
          price
        }
      }`
      )
      .then((reviews) => {
        setReviews(reviews);
      })
      .catch(console.error);
  }, []);

  const isSelected = (index) => selectedReviewIndex === index;

  return (
    <div className="container">
      <div className="columns">
        <div className="column is-narrow">
          {reviews &&
            reviews.map((review, index) => (
              <ReviewCard
                key={review._id}
                review={review}
                index={index}
                onClick={() => {
                  setSelectedReview(review);
                  setSelectedReviewIndex(index);
                }}
                isSelected={isSelected(index)}
              />
            ))}
        </div>
        <div className="column">
          <div className="box" style={{ minHeight: "85vh" }}>
            <ReviewDetails selectedReview={selectedReview} />
          </div>
        </div>
      </div>
    </div>
  );
};

export default ProductReviews;
Notice the following snippet in the GROQ statement we use to fetch all the reviews:
product ->{
          title,
          productImage,
          description,
          price
        }
Because we save a reference to the product when creating a review, we can destructure the referenced item using the → operator and access the fields enclosed in the curly brackets.
Navigation
For ease of navigation, we’ll create a simple menu to link all the components we created. We’ll use React Router to handle routing between components so let’s add that to our project.
npm install react-router-dom
In the components folder, create a file called Menu.jsx and add the following to it:
import React from "react";
import { Link } from "react-router-dom";

const Menu = () => (
    <div className="container" style={{ marginTop: "2%" }}>
      <nav className="navbar" role="navigation" aria-label="main navigation">
        <div className="navbar-brand">
          <Link className="button is-primary" to={"/"}>
            Home
          </Link>
        </div>
        <div className="navbar-menu">
          <div className="navbar-end">
            <Link className="navbar-item" to="/products">
              Products
            </Link>
            <div className="navbar-item has-dropdown is-hoverable">
              <a className="navbar-link">Reviews</a>
              <div className="navbar-dropdown">
                <Link className="navbar-item" to="/review">
                  Add review
                </Link>
                <Link className="navbar-item" to="/">
                  View all
                </Link>
              </div>
            </div>
          </div>
        </div>
      </nav>
    </div>
  );

export default Menu;
Update the App.js to include a BrowserRouter, our menu, and Routes.
import Products from "./components/Products";
import ProductReviewForm from "./components/ReviewForm";
import ProductReviews from "./components/reviews/Reviews";
import { BrowserRouter as Router, Routes, Route } from "react-router-dom";
import Menu from "./components/Menu";
const App = () => (
<Router>
<Menu />
<div
style={{
padding: "2%",
}}
>
<Routes>
<Route path="/" element={<ProductReviews />} />
<Route path="/products" element={<Products />} />
<Route path="/review" element={<ProductReviewForm />} />
</Routes>
</div>
</Router>
);
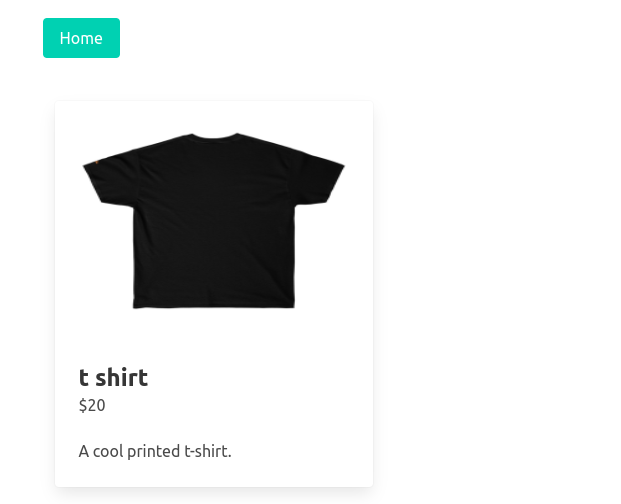
export default App;On the products page, we can see products created in Sanity Studio:
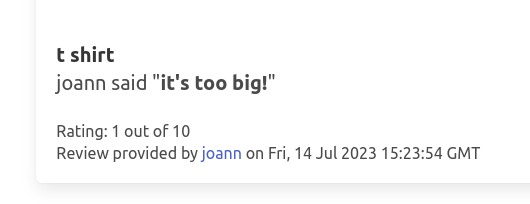
And we can look at reviews of them on Reviews → View all:
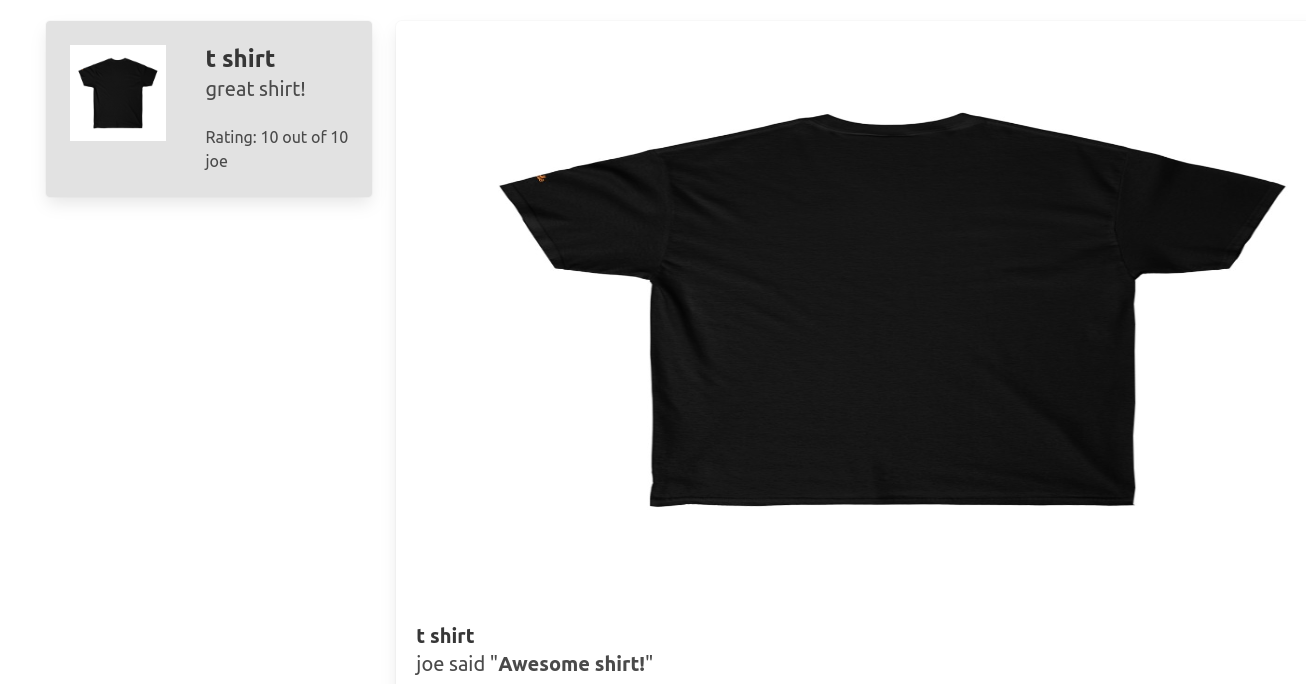
And reviews can be submitted from the front end web form directly into Sanity on the add review page…
…which are then sent to the Sanity back-end and can be immediately be seen on the reviews page after submission:
With that, our product review website is ready for launch. Congratulations!
Conclusion
Validating user input before saving it to the database is a practice that will improve data integrity in web applications.
In this article, we see the benefits of combining Formik and Yup for form validation. By taking advantage of Formik, we were able to manage and update the form state as the user triggered the onChange event.
Also, by integrating Yup with Formik, we saved ourselves the burden of building a validator. This allows us to build industry-standard forms more efficiently.
Sanity – The Content Operating System that ends your CMS nightmares
Sanity replaces rigid content systems with a developer-first operating system. Define schemas in TypeScript, customize the editor with React, and deliver content anywhere with GROQ. Your team ships in minutes while you focus on building features, not maintaining infrastructure.
Sanity scales from weekend projects to enterprise needs and is used by companies like Puma, AT&T, Burger King, Tata, and Figma.