Published May 03, 2019
Get started with the Next.js landing page website
By Knut Melvær

How to get started with the Next.js and Sanity.io powered landing page website
If you have followed the steps for the landing page template on sanity.io/create you should now have the project code on your account on GitHub, as well as a editing environment and a Next.js frontend deployed on Netlify. This tutorial will first introduce you to the stack, and walk you through how to customize this project to make it your own by demonstrating:
- How to download and start the project locally
- How to change fields
- How to deploy changes
Project overview
You can safely skip this section if you're already familiar with Sanity, Next.js and Netlify.
Next.js
Next.js is a React-framework that makes it easier to make a web application with server-rendering, code-splitting for faster page-loads, and client-side routing, while being highly customizeable and compatible with many setups.

Netlify
Netlify is a service that lets you easily build and deploy websites from Git. If you use a static site generator, Netlify can build the site before making it available on a global scaleable network. You can also host Single Page Applications on Netlify, like we do with Sanity Studio in this template.
Sanity.io
When you create a project with Sanity we give you an API endpoint. We store your content as structured, reusable data on our backend. The editing environment, The Sanity Studio, is a fully customizable React.js application. You’ll find the source code for it checked into your GitHub repo along with with the code for the front-end.
If you want to change your content types and the input fields this happens in this project. Just configure them with simple JavaScript objects, and optionally inject your own React components if you want to extend the Studio further. There’s more below on how to do this in practice.
Get the project up and running locally
The first thing you see when logged into your studio is the dashboard. There you will find links to more guides and tutorials, as well as shortcuts to edit your content. You will also have widgets to manually trigger deploys on Netlify and see the build status; and overviews over your project’s users, recent edits, and URL endpoints to your APIs and apps. You can customize this dashboard by adding, removing, and configuring widgets.
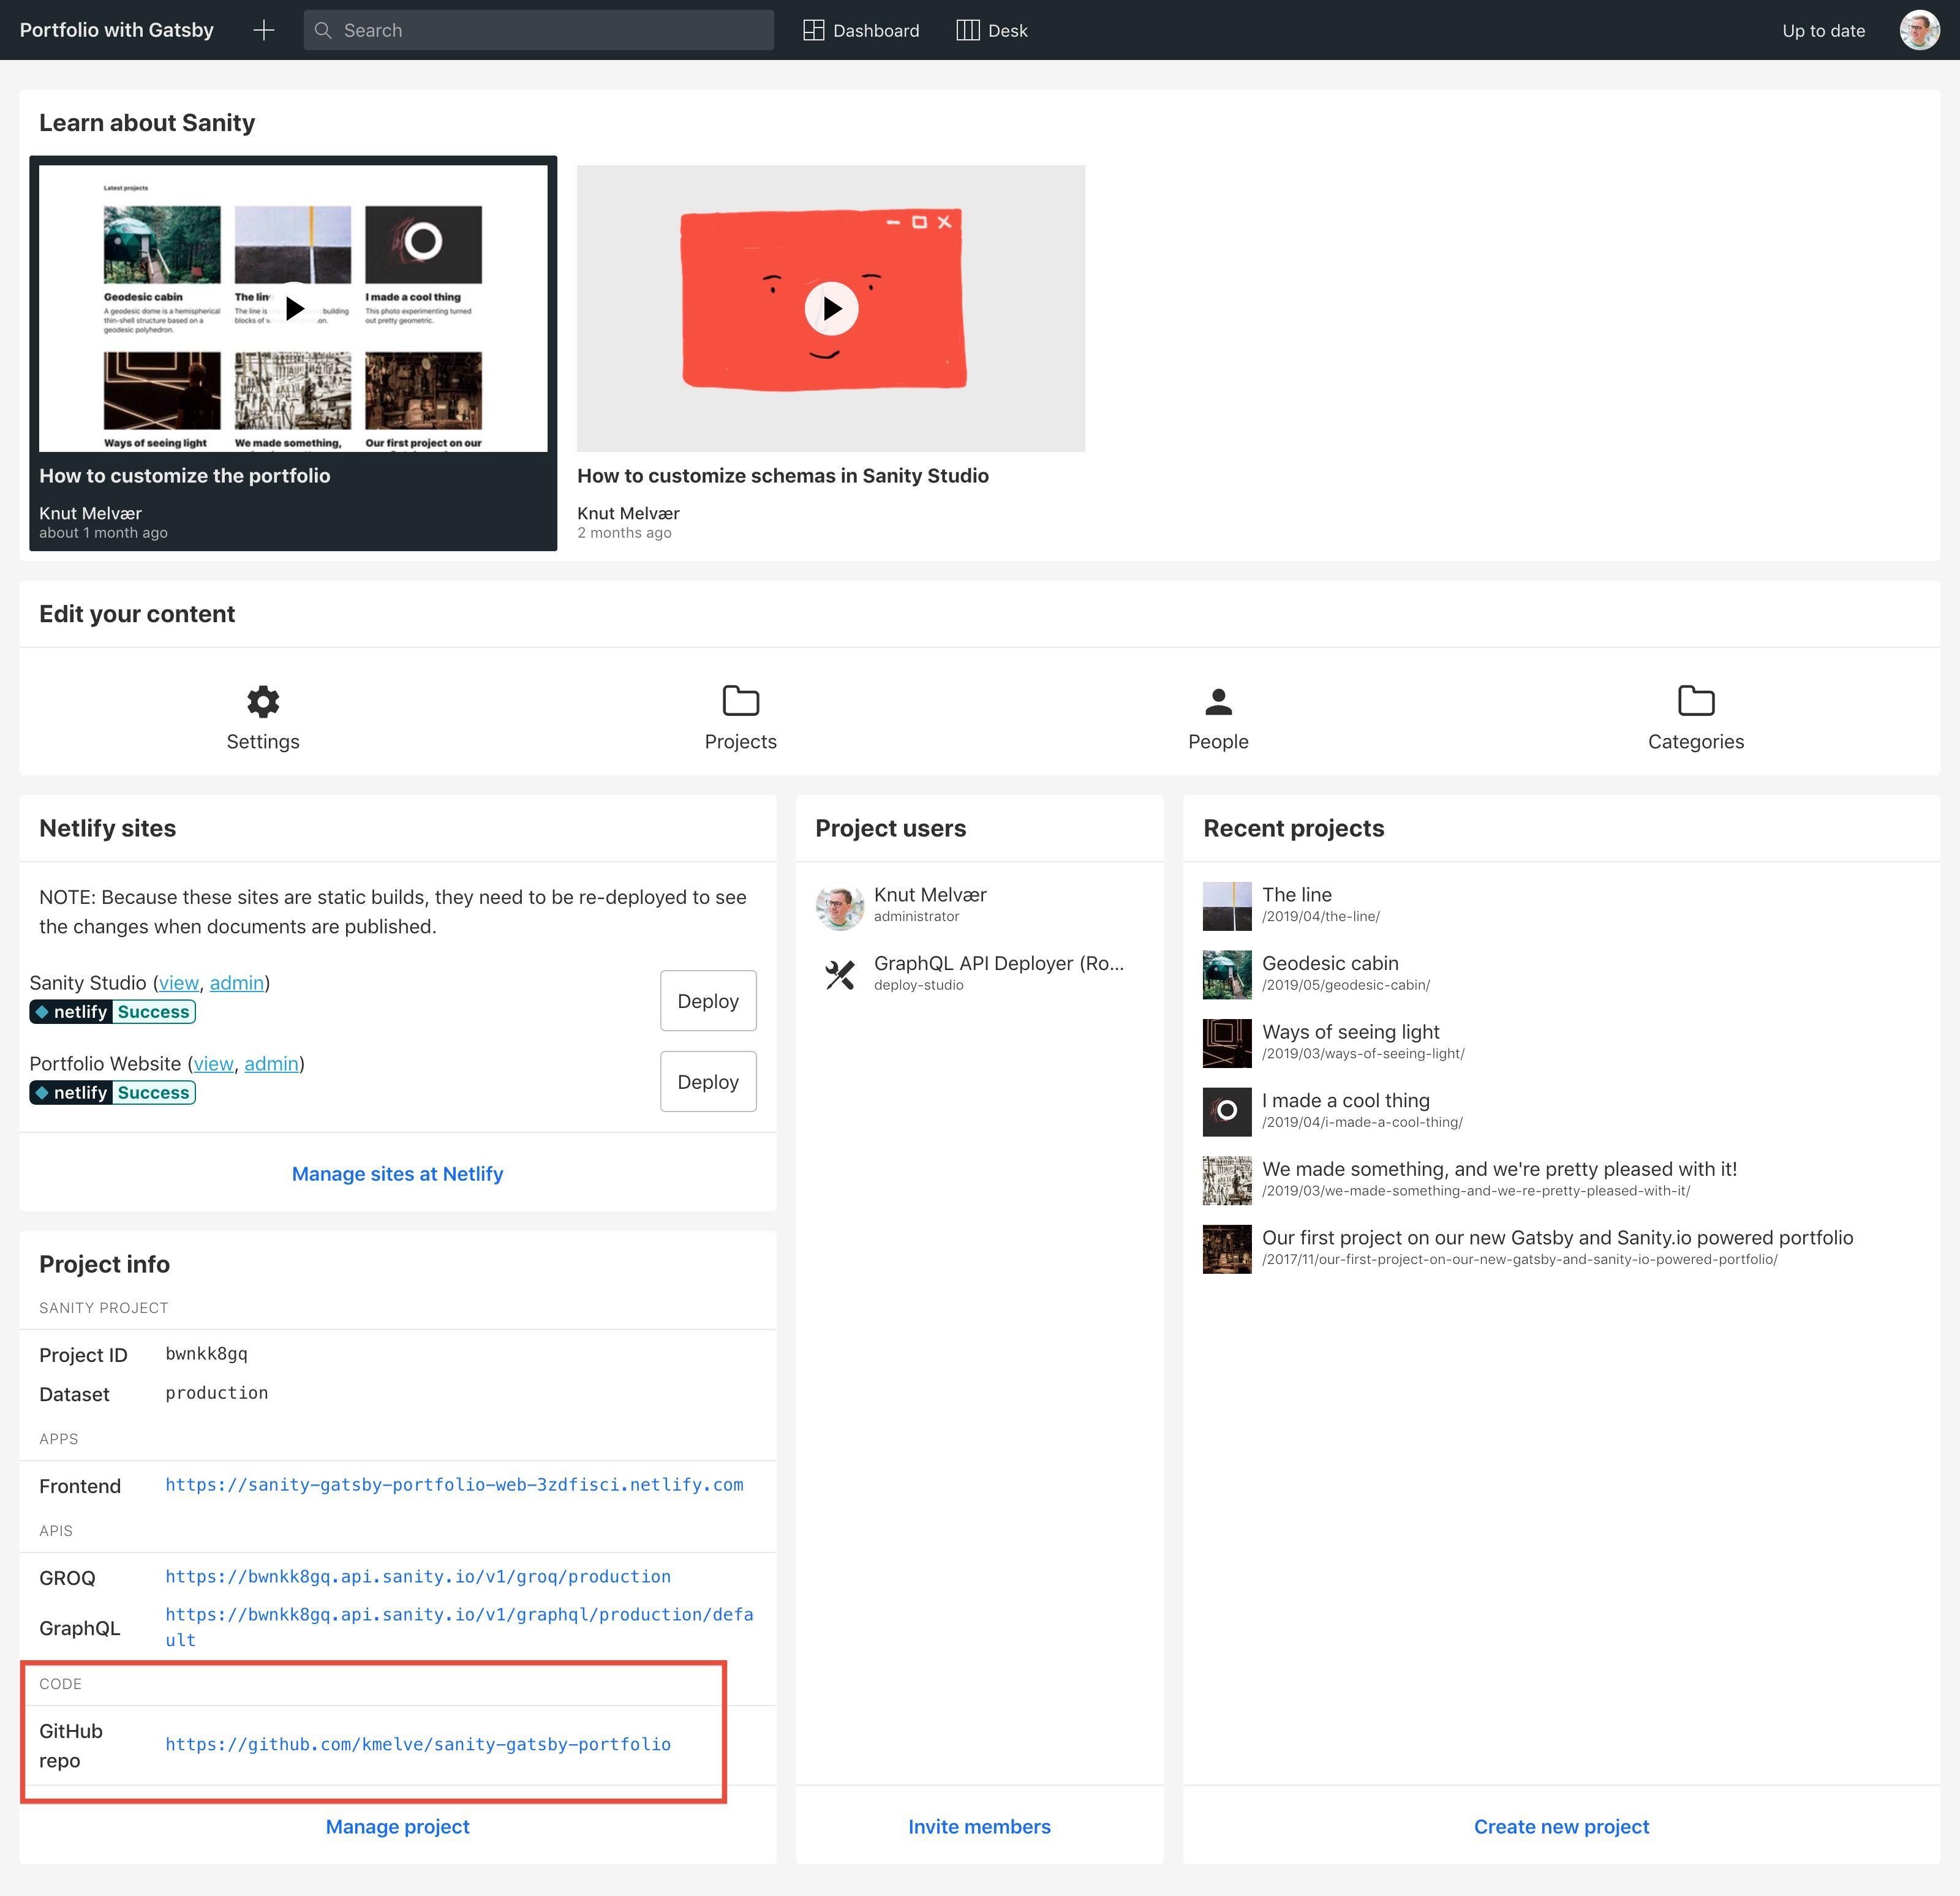
The code for the website, as well as Sanity Studio is added as a monorepo on the GitHub account you chose when creating the project. You can find links to this repository on your dashboard and email that we sent you. You should also be able to find it if you go to the repositories overview on your user page.
Use your prefered git tool to clone the repository to where you want to work with it locally.
When you have the code on your machine, open the project folder in the command line and install dependencies for the whole project:
~/sanity-nextjs-landing-page
> npm install
This will install dependencies for both the web frontend and the studio. You can also start the development servers for both in parallell by running the following in the project’s root folder:
~/sanity-nextjs-landing-page
> npm run dev
Both Next.js and the Sanity Studio use Hot Module Reloading when you make changes in the code for them. There are certain situations where you have to restart the development servers in order to load changes, for example if you add extra dependencies from npm.
Adding a new page section
Let's say you want to add a new page section for the landing pages, like a section for testimonials. What you would need to do is to first add the new type to Sanity Studio and implement it in the Next.js frontend. You can watch these videos if you want a general introduction to how to customize schemas in Sanity Studio.
Adding a new type for testimonials
You'll find the schema configuration for where you manage the site settings content by navigating to /studio/schemas/objects . Make a new file called testimonial.js and save it to this folder.
We're now going to make a testimonial that consists of a quote, the name of the person that gives the testimonial, as well as a photo of them. You can of course do add other fields, like social media links, or even a reference to a document type for persons if you want to – for this tutorial, however, we'll keep it pretty plain:
// testimonial.js
export default {
  name: 'testimonial',
  type: 'object',
  title: 'Testimonial',
  fields: [
    {
      name: 'name',
      type: 'string',
      title: 'Name',
      description: 'The name of the person that gives the testimonial'
    },
    {
      name: 'quote',
      type: 'text',
      title: 'Quote'
    },
    {
      name: 'photo',
      type: 'figure',
      title: 'Photo of the person'
    }
  ]
}
Now save import this file to /studio/schemas/schema.js and include it in the schemaTypes-array:
// schema.js
// ...

// Document types
// ...

// Object types
// ...
// Landing page sections
// ...
import testimonial from './objects/testimonial'

// Then we give our schema to the builder and provide the result to Sanity
export default createSchema({
  name: 'default',
  // Then proceed to concatenate our our document type
  // to the ones provided by any plugins that are installed
  types: schemaTypes.concat([
    // ... the other types,
    testimonial
  ])
})
Now we should be able to use this field by refering to type: 'testimonial' elsewhere in the schema. What we did now was to “hoist an object type”. This is required to be compatible with GraphQL.
To add this as a page section we need to add to the page-section array in /studio/schemas/page.js.
// page.js
export default {
name: 'page',
type: 'document',
title: 'Page',
fieldsets: [
{
title: 'SEO & metadata',
name: 'metadata',
},
],
fields: [
{
name: 'title',
type: 'string',
title: 'Title',
},
{
name: 'content',
type: 'array',
title: 'Page sections',
of: [
{ type: 'hero' },
{ type: 'imageSection' },
{ type: 'mailchimp' },
{ type: 'textSection' },
{ type: 'testimonial' },
],
},
{
name: 'description',
type: 'text',
title: 'Description',
description: 'This description populates meta-tags on the webpage',
fieldset: 'metadata',
},
{
name: 'openGraphImage',
type: 'image',
title: 'Open Graph Image',
description: 'Image for sharing previews on Facebook, Twitter etc.',
fieldset: 'metadata',
},
],
preview: {
select: {
title: 'title',
media: 'openGraphImage',
},
},
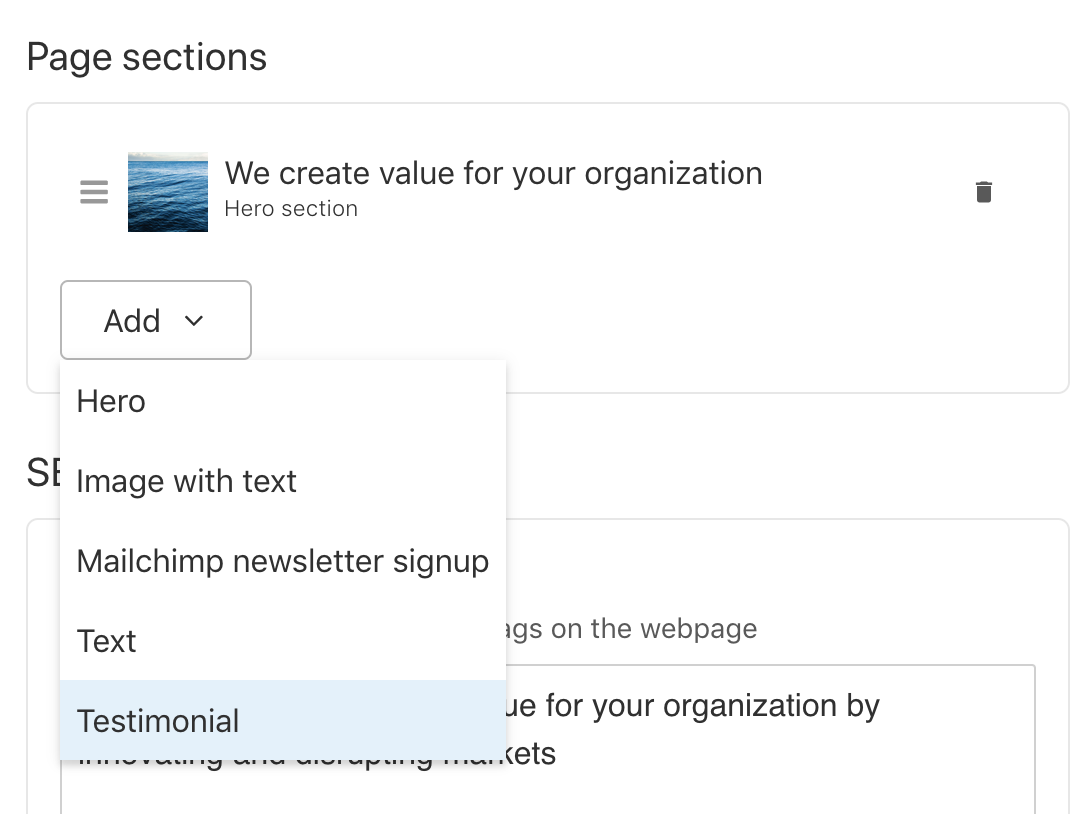
};Now, "Testimonial" should pop up in the Add-menu under Page Sections:
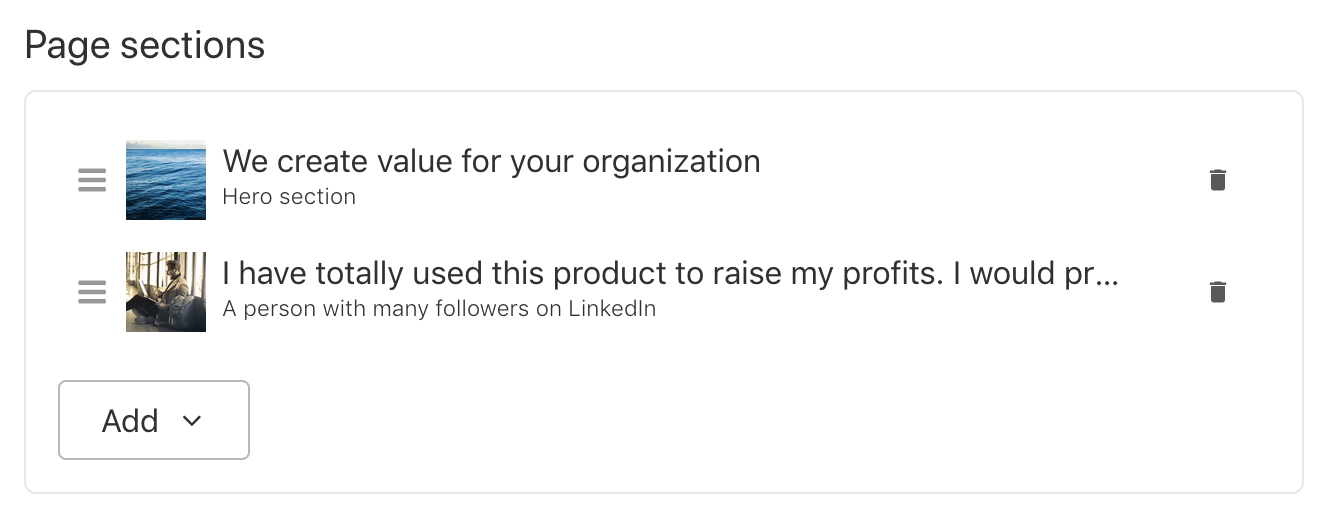
If you now add this section and put in some content in the all the fields, you will see that the preview only shows the name. We can improve it by adding a preview configuration to the testimonials.js file:
// testimonial.js
export default {
  name: 'testimonial',
  type: 'object',
  title: 'Testimonial',
  fields: [
    {
      name: 'name',
      type: 'string',
      title: 'Name',
      description: 'The name of the person that gives the testimonial'
    },
    {
      name: 'quote',
      type: 'text',
      title: 'Quote'
    },
    {
      name: 'photo',
      type: 'figure',
      title: 'Photo of the person'
    }
  ],
  preview: {
    select: {
      title: 'quote',
      subtitle: 'name',
      media: 'photo'
    }
  }
}
Now you should have a preview that looks like this:
Now that we have a content model and some content for the new testimonial section, we can implement it in the Next.js frontend.
Adding the testimonial to Next.js
The way the Next.js frontend is set up when it comes to rendering these page sections is that there's a function your-project-folder/web/components/RenderSections.js that looks at the _type in the page sections array and finds the corrensponding capitalized filename in your-project-folder/web/components/sections. In other words, to render our new testimonial block, we need to add a Testimonial.js file to the sections-folder.
You are free to code your own, but this should at least give you a head start:
// Testimonial.js
import React from 'react'
import imageUrlBuilder from '@sanity/image-url'
import client from '../../client'

const builder = imageUrlBuilder(client)

function Testimonial ({name, photo, quote}) {
  return (
    <div>
      <div>
        <figure>
          <img
            src={builder
              .image(photo)
              .auto('format')
              .width(200)
              .height(200)
              .url()}
            alt={photo.alt}
          />
        </figure>
        <blockquote>{quote}
          {name && <footer>
            <cite id='baseref'>{name}</cite>
          </footer>}
        </blockquote>
      </div>
    </div>
  )
}

export default Testimonial
Now you can add the section component to web/sections/index.js to make it available for SectionsRender.js:
// index.js
export {default as Hero} from './Hero'
export {default as Mailchimp} from './Mailchimp'
export {default as TextSection} from './TextSection'
export {default as ImageSection} from './ImageSection'
export {default as Testimonial} from './Testimonial'
Now the content should render, but since we haven't applied any styling, it doesn't look great:
We have used CSS modules in this example, you are of course free to replace that with whatever you prefer. In order to add some basic styling we can borrow from the other components and add some specific CSS to make it a bit nicer. We begin with creating a Testimonial.module.css in the same sections folder:
/* Testimonial.*/
.root {
  composes: center from "../../styles/shared.module.css";
  margin-bottom: 4rem;
  margin-top: 2rem;
}

.container {
  composes: narrow-container from "../../styles/shared.module.css";
  display: flex;
}

.figure {
  margin: 0;
}
.photo {
  width: 100px;
  border-radius: 50%;
}

.quote {
  margin: 0 0 0 1rem;
}
And then add the styling to Testimonial.js by importing the css-file, and add the approriate styles to the elements via className:
// Testimonial.js
import React from 'react'
import imageUrlBuilder from '@sanity/image-url'
import client from '../../client'
import styles from './Testimonial.module.css'
const builder = imageUrlBuilder(client)
function Testimonial ({name, photo, quote}) {
return (
<div className={styles.root}>
<div className={styles.container}>
<figure className={styles.figure}>
<img
src={builder
.image(photo)
.auto('format')
.width(200)
.height(200)
.url()}
className={styles.photo}
alt={photo.alt}
/>
</figure>
<blockquote className={styles.quote}>{quote}
{name && <footer>
<cite id='baseref'>{name}</cite>
</footer>}
</blockquote>
</div>
</div>
)
}
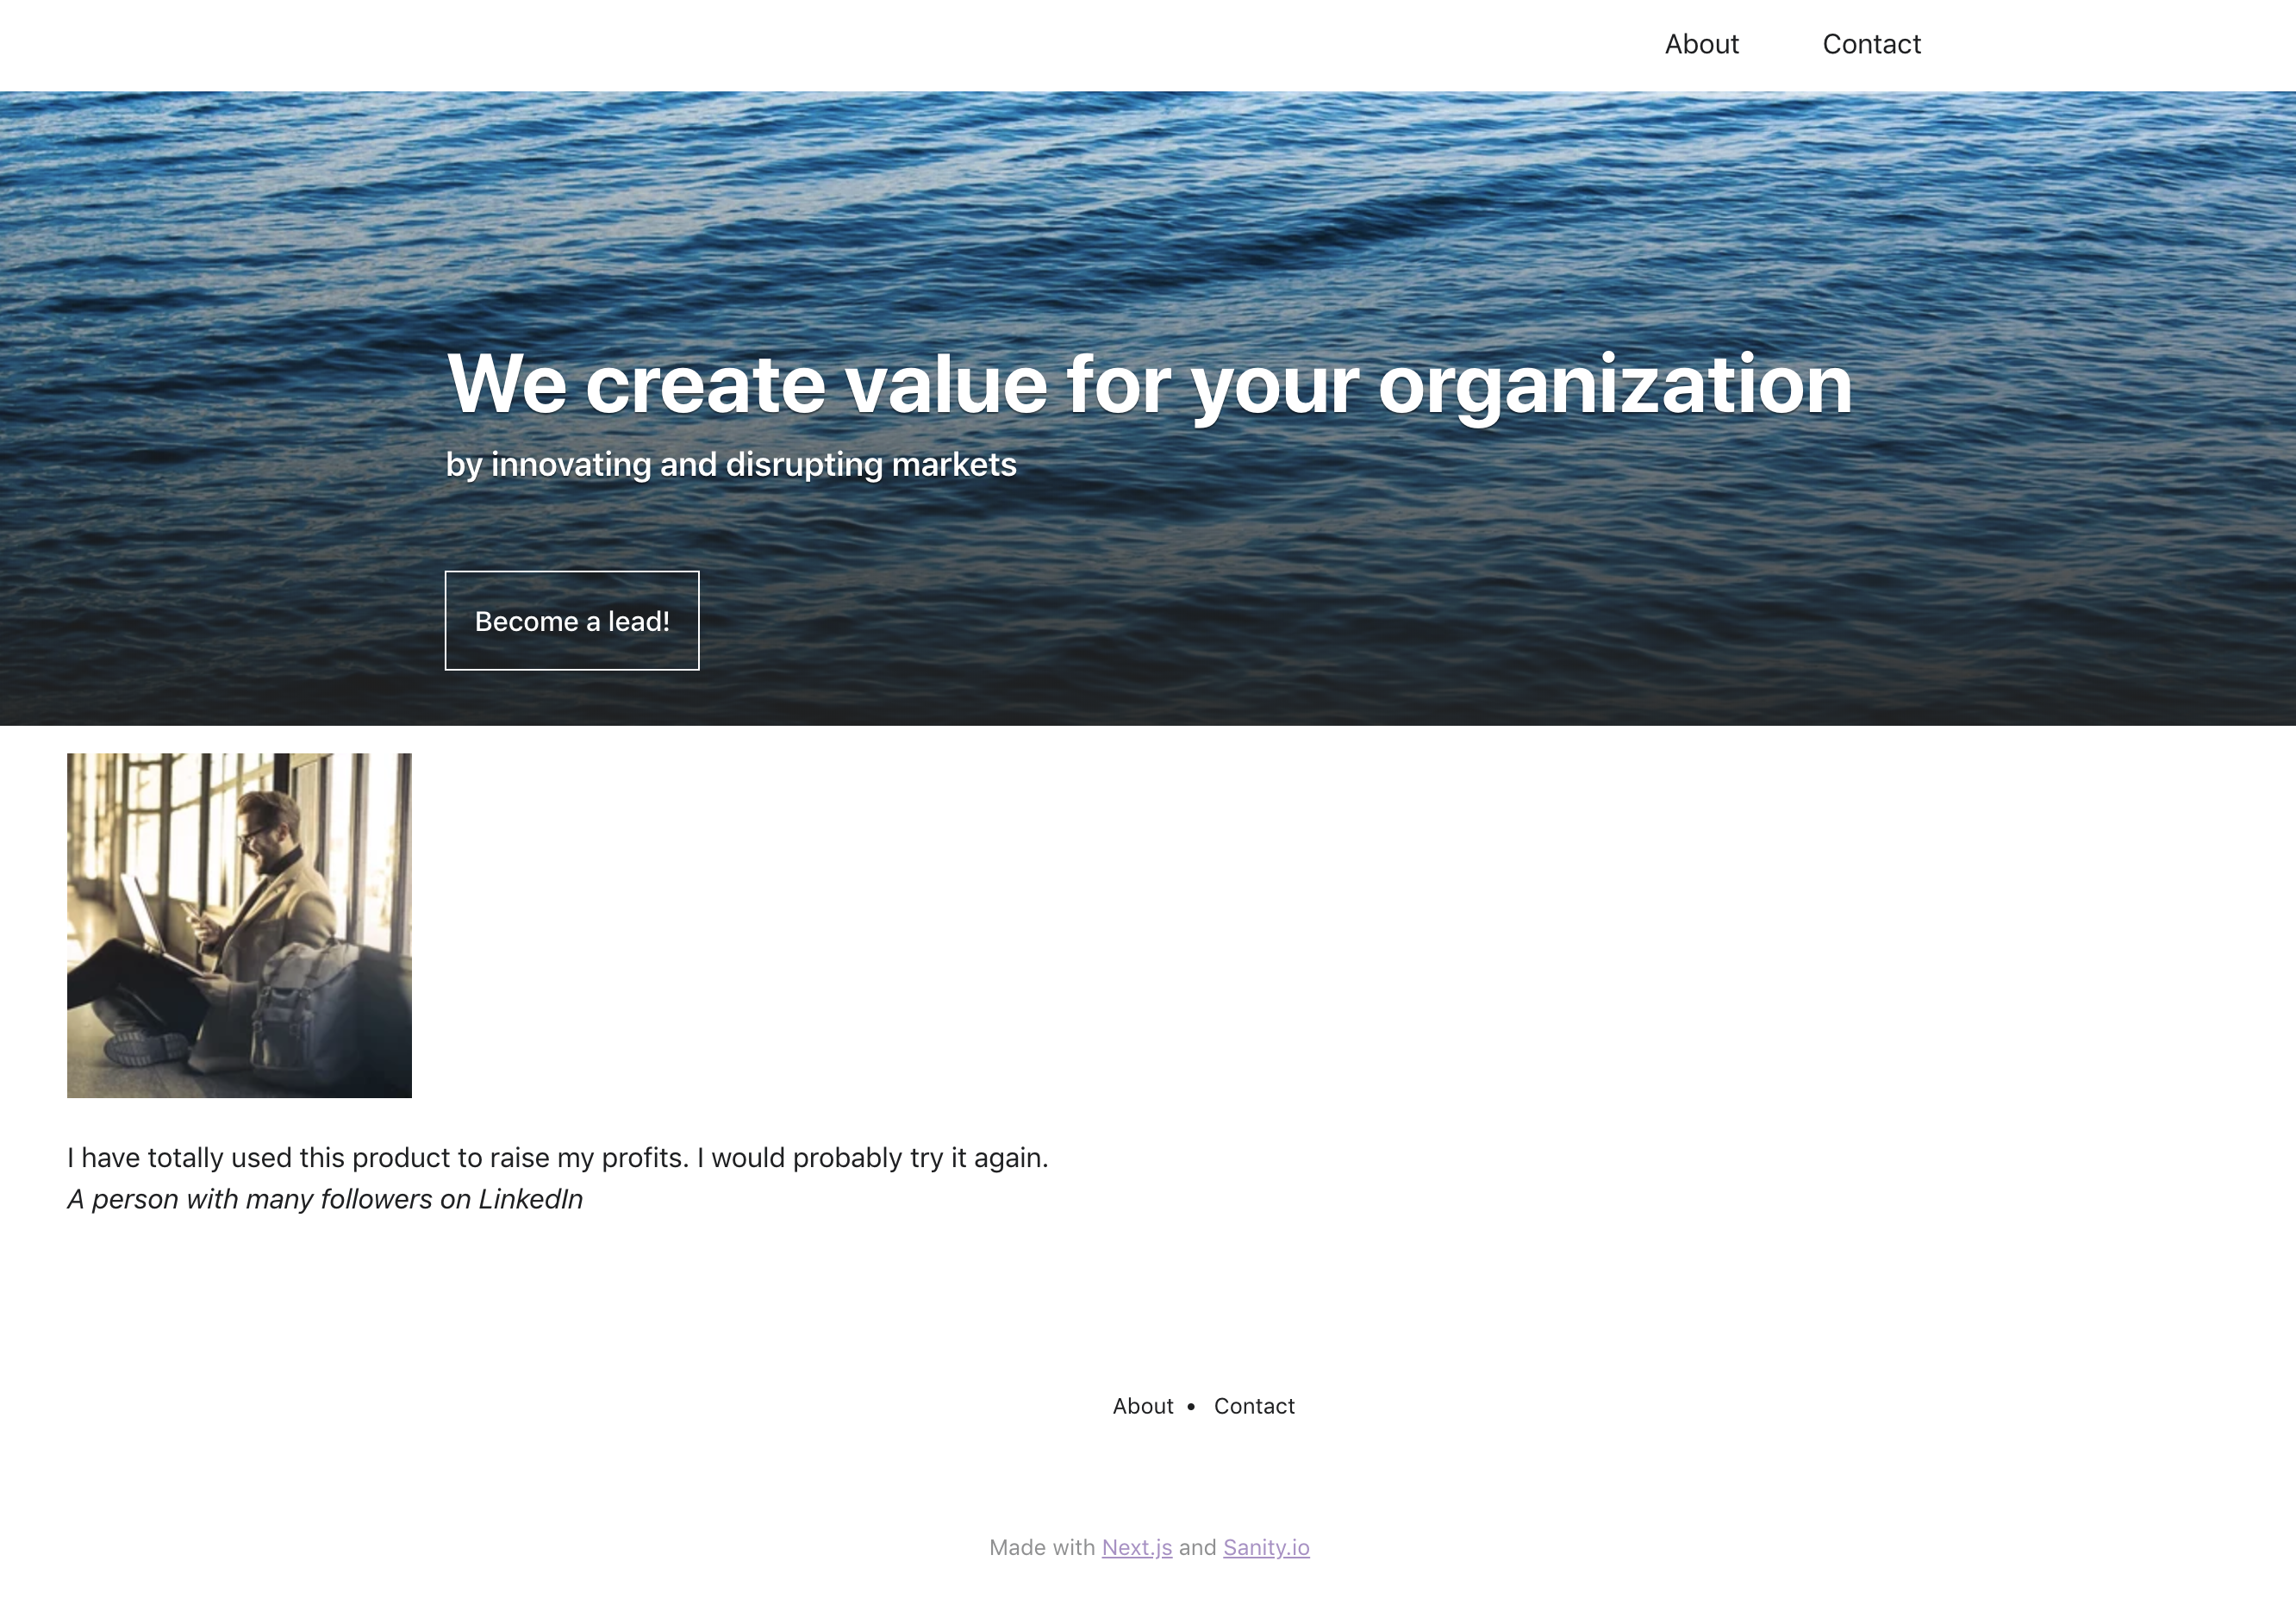
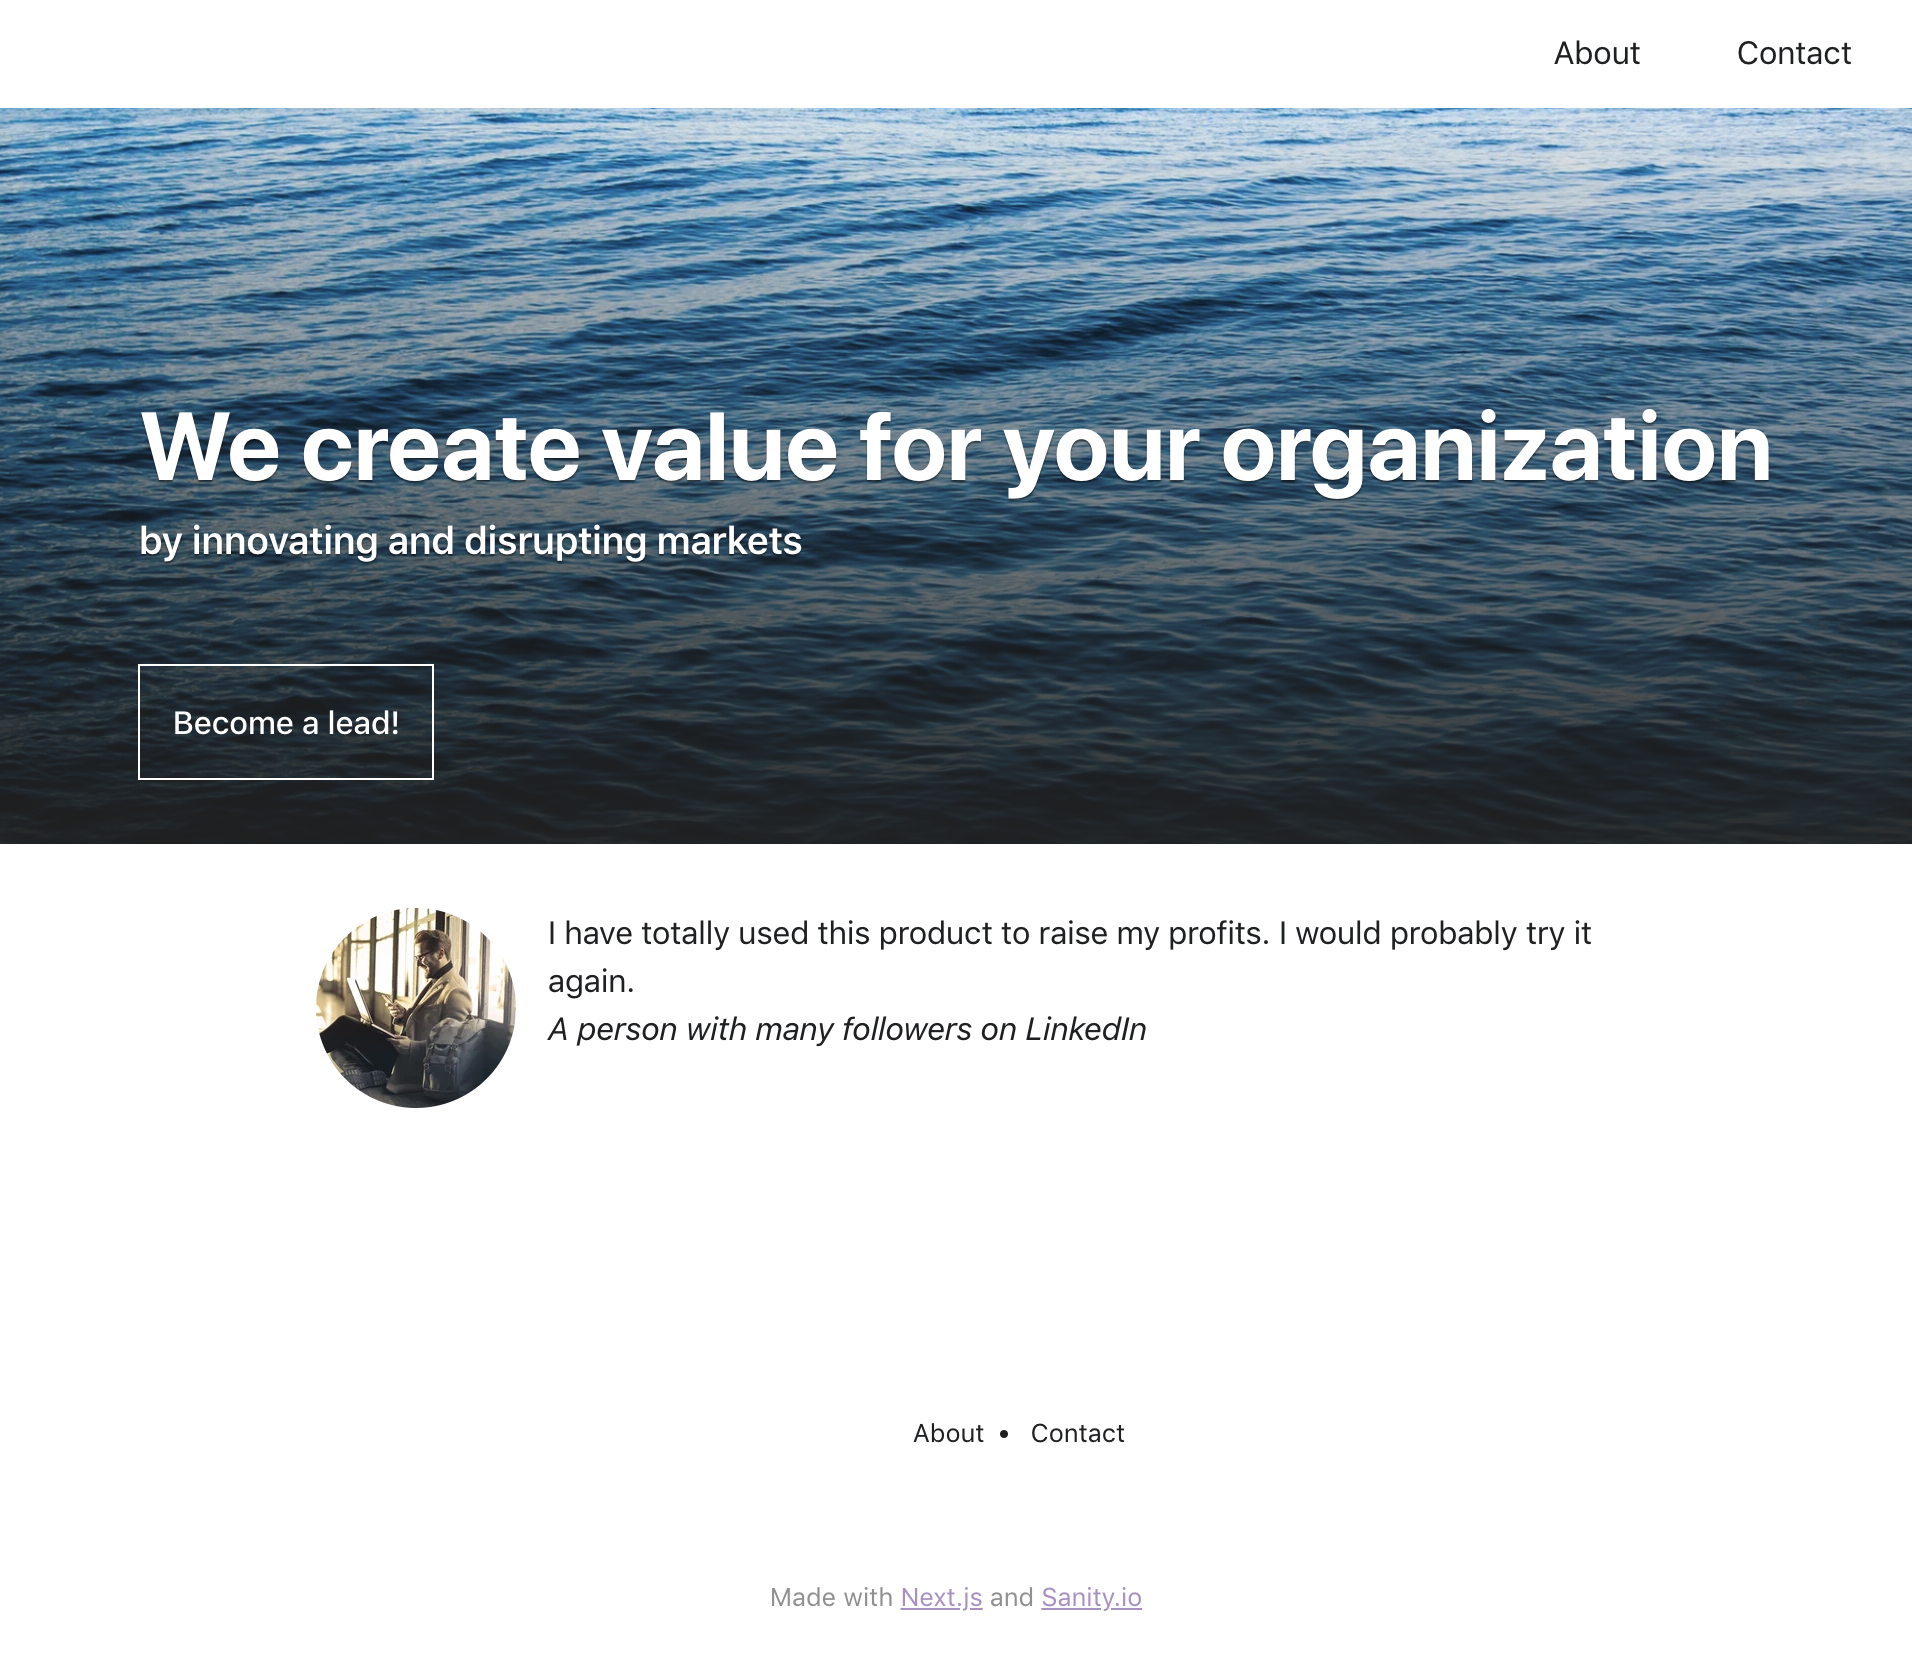
export default TestimonialNow the section should look like this:
Deploy the changes on Netlify
Now you should commit the changes to git and push them to the remote repository on Github (usually git push origin master). Netlify watches changes on master and will redeploy the studio and the landing page site. This usually takes a few minutes.
Next steps…
This is only the start of course! There's loads of things you can do to take this landing page website further. Check out our documentation and blog for more, and make sure to join our community on Slack to get help and see what other people are doing with Sanity.
Sanity – The Content Operating System that ends your CMS nightmares
Sanity replaces rigid content systems with a developer-first operating system. Define schemas in TypeScript, customize the editor with React, and deliver content anywhere with GROQ. Your team ships in minutes while you focus on building features, not maintaining infrastructure.
Sanity scales from weekend projects to enterprise needs and is used by companies like Puma, AT&T, Burger King, Tata, and Figma.