Published February 08, 2021
Make a Progressive Web App with React
By Rico Kahler

Learn how to create a PWA with Sanity and React.
This is a step-by-step tutorial to help you go from idea to deployment. First, we'll define what PWAs are and how Sanity can help you power one, and then… a full tutorial!
In this Guide
In this guide, we'll define what a PWA is and then we'll proceed to build one!
We'll go from definition to deployment using Create React App, Sanity, and Vercel. By the end, you'll be able to install the PWA on your phone and edit content for it on Sanity.
You can see the deployed app at https://fill-in-the-blank.vercel.app/ and see the final code here: https://github.com/ricokahler/fill-in-the-blank
Prerequisites:
- Use of the command line and a code editor.
- Basic understanding of JavaScript, JSON, and Web Development
What’s a PWA?
PWA stands for Progressive Web App and it defines a type of app that lives on the web but has enhanced capabilities to make it feel like any other native app on your phone, tablet, or computer.
Often, the term can be confusing because it's used in many different contexts and for many different reasons making the line between interactive website and PWA hard to define.
The truth about PWAs
The truth is that there are no concrete requirements that determine whether your web app is a progressive web app or a plain old website.
What powers the most distinct features of PWAs (for example, notifications) are sets of individual web APIs that are already built into the browser.
That's right, they're not part of some framework you have to download and install, they're APIs that come with your browser, ready for use by default.
Don't believe me? Open up the devtools and type this into the console:
Notification.requestPermission()
  .then(() => new Notification('Hey 👋'));
Cool right?
So to simplify and draw some lines, let's define a few “enhanced capabilities” we'll be implementing for our PWA, but know that these criteria aren’t the strict rule.
- Interactivity — This isn't necessarily a requirement exclusive to PWAs but rather to apps in general. For anything to be an app, you must be able to interact with it and do some sort of work inside it. In terms of PWAs, this typically means creating a JavaScript-powered site (for example, with React).
- Offline mode — Offline mode is PWAs claim to fame — simply put, the ability to use a website without the internet is kinda magical ✨.
- Push notifications — In this case, this is a key characteristic of native apps making an appearance on the web. Receiving a push notification through your device's native notification system blurs the line between native and web distinguishing your web app from others.
- Add it to the home screen — The same goes for this one. For mobile devices, the ability to add an app to the home screen of your phone really blurs the line between native and web. Additionally, when web apps are added to the home screen, both Android and iOS present your app in fullscreen without any browser bars.
So to me, if your site can do all these, then there's no question about it — it's definitely a progressive web app, and it's what we'll be making in this article.
What is Sanity?
Before we get into the tutorial, let’s first take a look at Sanity and why it’s useful in the context of PWAs.
Sanity is a structured content platform and a backend-as-a-service.
A structured content platform
Structured content is content with a known data shape. When you have a known data shape you can assume that certain properties are available and build your UI around them.
Sanity is a structured content platform* because it specializes in creating, editing, and distributing structured content. Sanity gives you a way to define the structure of your content…
// this is how you define schemas in sanity
export default {
  title: 'Blog Post',
  name: 'blogPost',
  type: 'document',
  fields: [
    {
      title: 'Title',
      name: 'name',
      type: 'string',
    },
    {
      title: 'Content',
      name: 'content',
      type: 'text',
    },
  ],
};
…and then creates a UI for you and your editing team to rapidly create structured content items.

Lastly, Sanity helps you distribute this structured content to any type of technology — including PWAs.
A backend-as-a-service
Sanity is also a backend-as-a-service meaning that it hosts a service for your frontend to call so that you can request content directly from Sanity without having to write any backend code.
In this tutorial, we’ll be using Sanity to populate the data inside of the app.
Without further adieu, let's create a PWA!
Fill in the Blank — a PWA driven by Sanity
Step 1: Create a new React app
In this tutorial, we’ll be leveraging create-react-app — the React recommended way to create single-page applications and its PWA template.
To get started, create a react app with the following line:
npx create-react-app fill-in-the-blank --template cra-template-pwa
Then open up the newly created project folder in your favorite editor, it should look like this.
Step 2: Create a new Sanity project
Next, we'll create a new Sanity project inside of this folder.
First, install the Sanity CLI:
npm i -g @sanity/cli
Then login with:
sanity login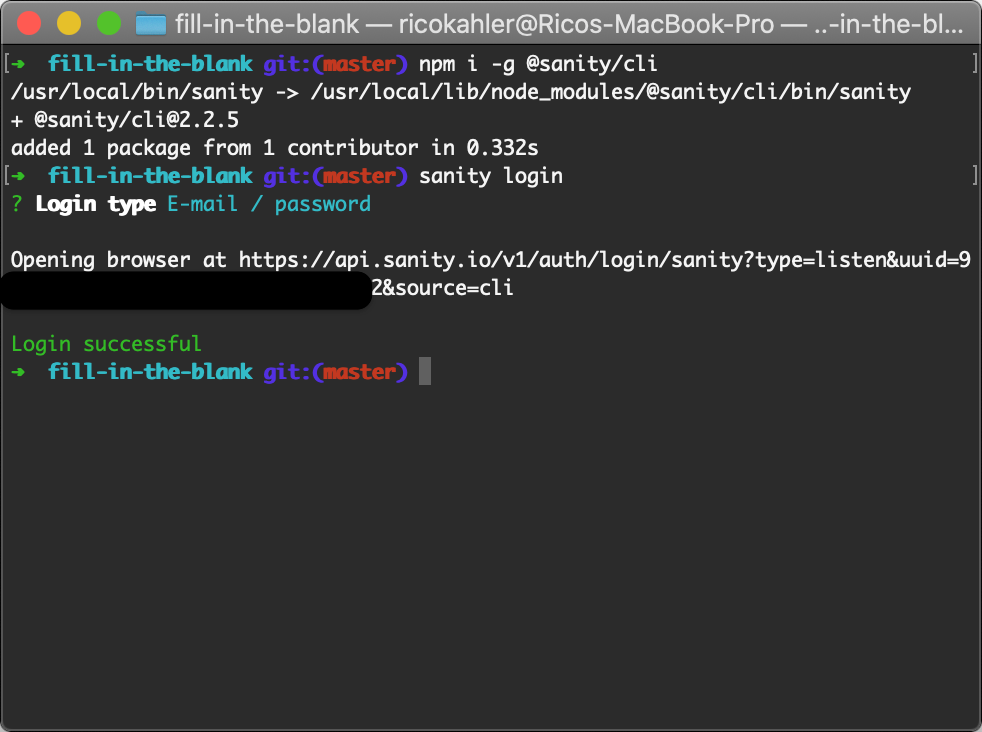
Then run:
sanity initThis will guide you on creating a new sanity project in the current folder.
For this, choose:
1. Create new project,
2. "Fill in Blank" for the project name,
3. The default dataset configuration (public, production),
4. Project output path ./sanity, and
5. Clean Project template
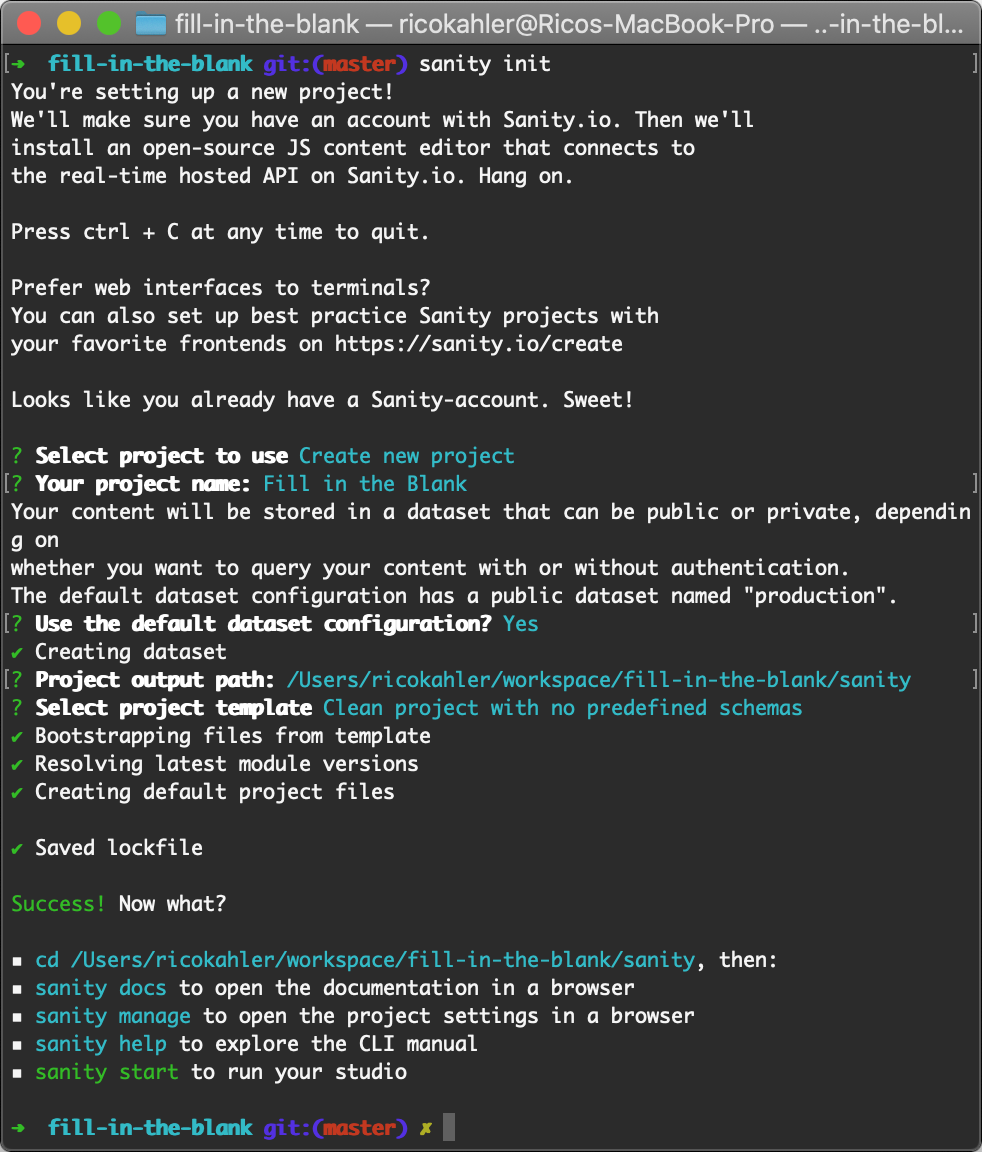
This should create a ./sanity folder in the current project folder.
Step 3: Create the mad lib schema
Up next we need to define the shape of our data. We'll do this by defining a schema in the /sanity/schemas folder.
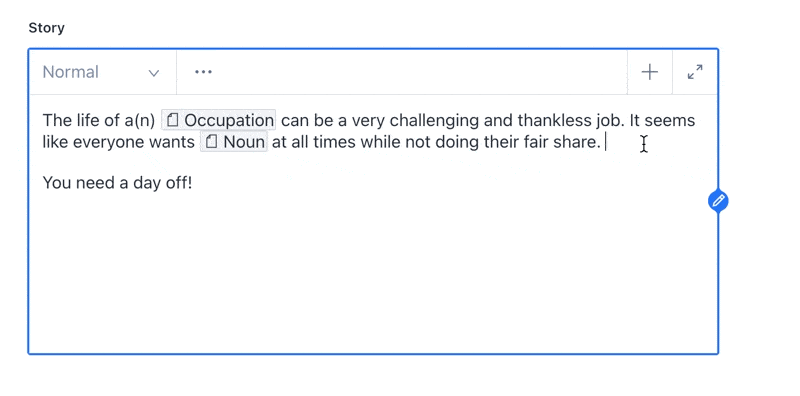
Create the file /sanity/madLib.js and paste in the following:
// /sanity/madLib.js
const madLib = {
  name: 'madLib',
  title: 'Mad Lib',
  type: 'document',
  fields: [
    {
      title: 'Title',
      name: 'title',
      type: 'string',
      validation: (Rule) => Rule.required(),
    },
    {
      name: 'slug',
      type: 'slug',
      options: { source: 'title' },
      validation: (Rule) => Rule.required(),
    },
    {
      title: 'Image',
      name: 'image',
      type: 'image',
      validation: (Rule) => Rule.required(),
    },
    {
      name: 'story',
      type: 'array',
      of: [
        {
          type: 'block',
          of: [
            // this defines is in an inline object that can be embedded within
            // each line of text in the story.
            // https://www.sanity.io/docs/block-type#of-d0f97ffa1dd9
            {
              title: 'Placeholder',
              name: 'placeholder',
              type: 'object',
              fields: [
                {
                  title: 'Type',
                  description:
                    'The type of placeholder. E.g. Adjective, Noun, Celebrity, Animal',
                  name: 'type',
                  type: 'string',
                },
              ],
            },
          ],
        },
      ],
      validation: (Rule) => Rule.required(),
    },
  ],
};

export default madLib;
This defines the shape of our data and allows Sanity to generate forms using this shape. The story field utilizes inline blocks to allow for placeholders for our mad libs.
To make Sanity aware of this shape, import it into /sanity/schema.js like so:
// /sanity/schema.js
import createSchema from 'part:@sanity/base/schema-creator';
import schemaTypes from 'all:part:@sanity/base/schema-type';
import madLib from './madLib';

export default createSchema({
  name: 'default',
  types: schemaTypes.concat([madLib]),
});
Step 4: Deploy the Studio, Enter some data
Now that we have a schema, we can deploy and populate our Sanity instance with data.
cd into the sanity folder and run sanity deploy, to deploy the current Sanity studio to the web.
cd ./sanity
sanity deploy
Feel free to pick any hostname you'd like.
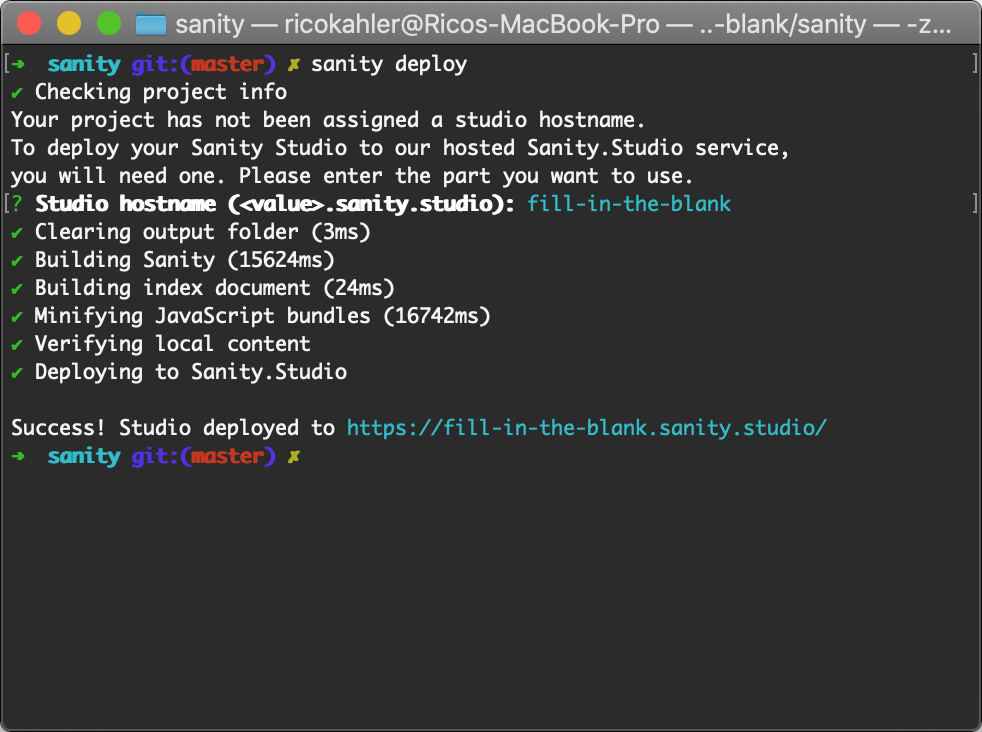
After it's done, you can go to that URL, log in, and see your very own Sanity Studio instance.
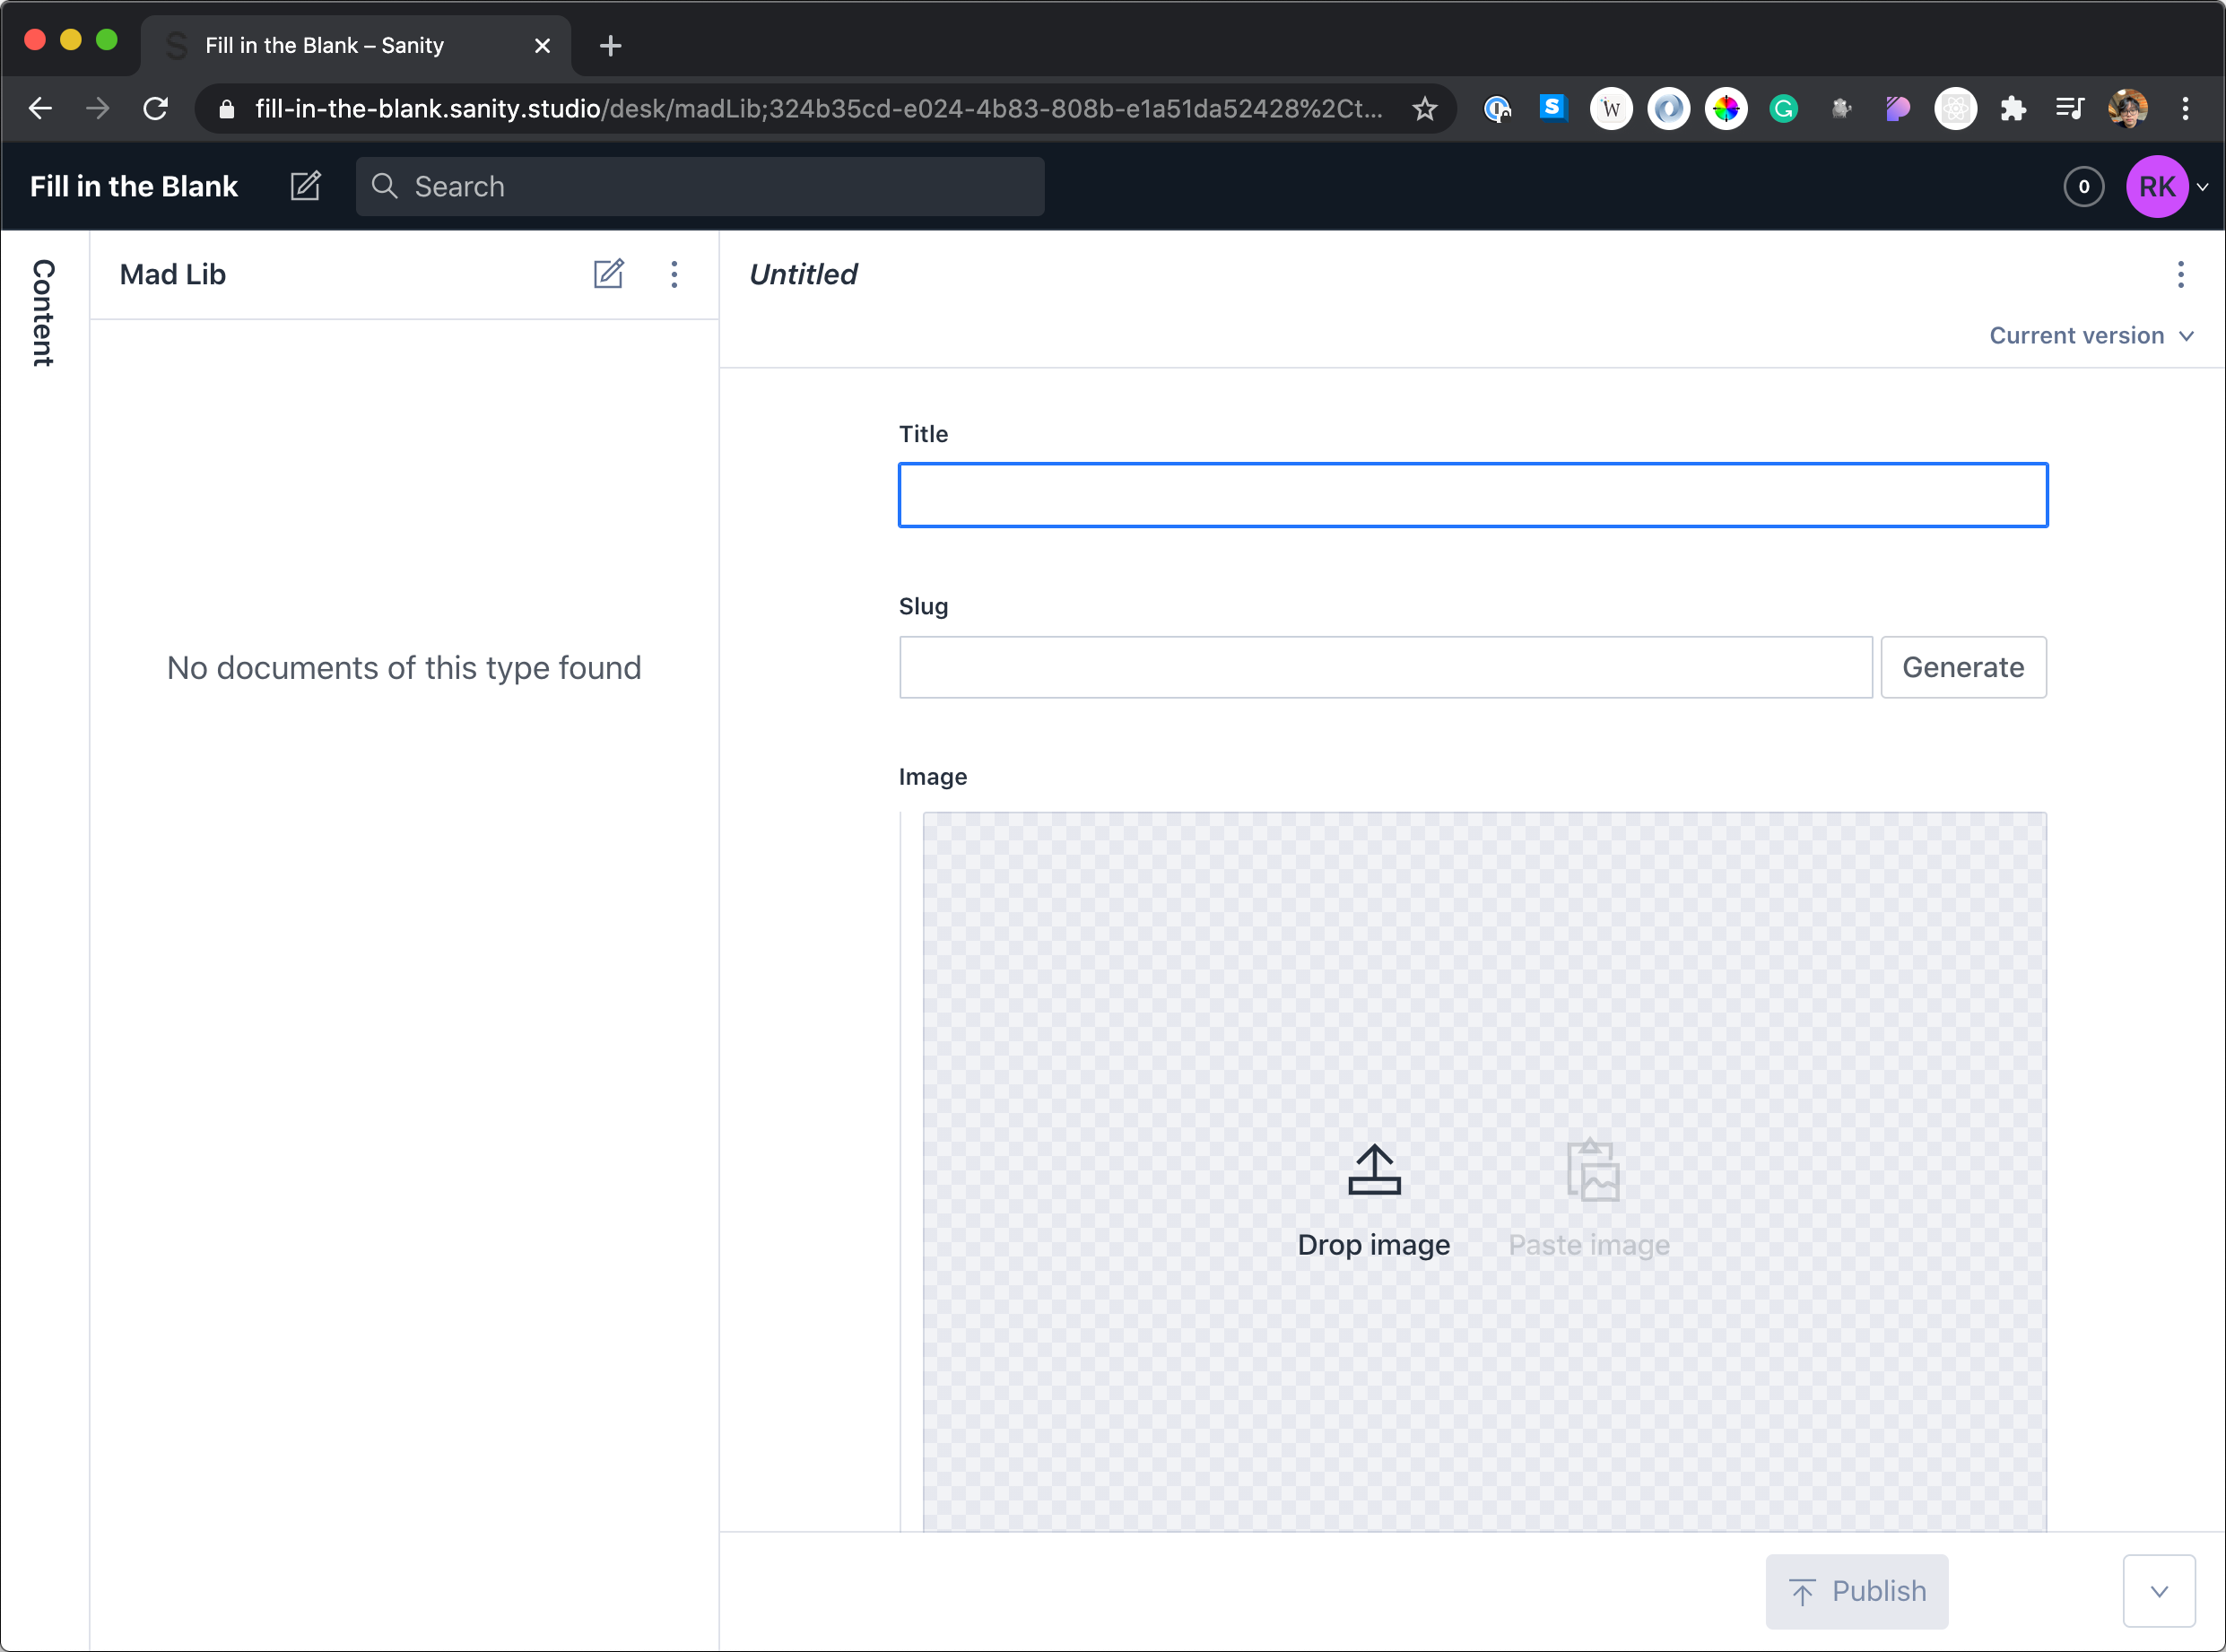
Go ahead and create a sample Mad Lib. We'll need it for the next section.
Step 5: Setting up our React app
Now we focus on building the app and utilizing the structured content Sanity provides.
In this project, we'll be using the following libraries:
1. @sanity/block-content-to-react — the lib used to render Sanity's block editor to React components.
2. @sanity/image-url — the lib used to generate image URLs.
3. @sanity/client — the client used to query data from the Sanity's backend.
4. react-query — a server state management library for asynchronous data fetches. Very useful when paired with the @sanity/client.
5. react-router-dom — a client-side routing library to allow us to navigate within our app.
To install these (and a few others), run the following command at the root of your project folder
yarn add @sanity/block-content-to-react @sanity/image-url @sanity/client react-query react-router-dom modern-css-reset
To finish the installation, update your index.js with the following:
// /src/index.js
import 'modern-css-reset';
import './index.css';
import React from 'react';
import ReactDOM from 'react-dom';
import { BrowserRouter } from 'react-router-dom';
import { QueryClient, QueryClientProvider } from 'react-query';
import { persistWithLocalStorage } from 'react-query/persist-localstorage-experimental';
import App from './App';
import * as serviceWorkerRegistration from './serviceWorkerRegistration';
import reportWebVitals from './reportWebVitals';

const queryClient = new QueryClient({
  defaultOptions: {
    queries: {
      cacheTime: 1000 * 60 * 60 * 24, // 24 hours
    },
  },
});

persistWithLocalStorage(queryClient);

ReactDOM.render(
  <React.StrictMode>
    <QueryClientProvider client={queryClient}>
      <BrowserRouter>
        <App />
      </BrowserRouter>
    </QueryClientProvider>
  </React.StrictMode>,
  document.getElementById('root'),
);

serviceWorkerRegistration.register();

reportWebVitals();
This will:
- include a simple CSS reset to help with styling
- register the create-react-app service worker to enable offline mode
- install/set up react-router
- install/set up react-query with the persist-localstorage plugin. This plugin pairs well with the create-react-app service worker for offline mode
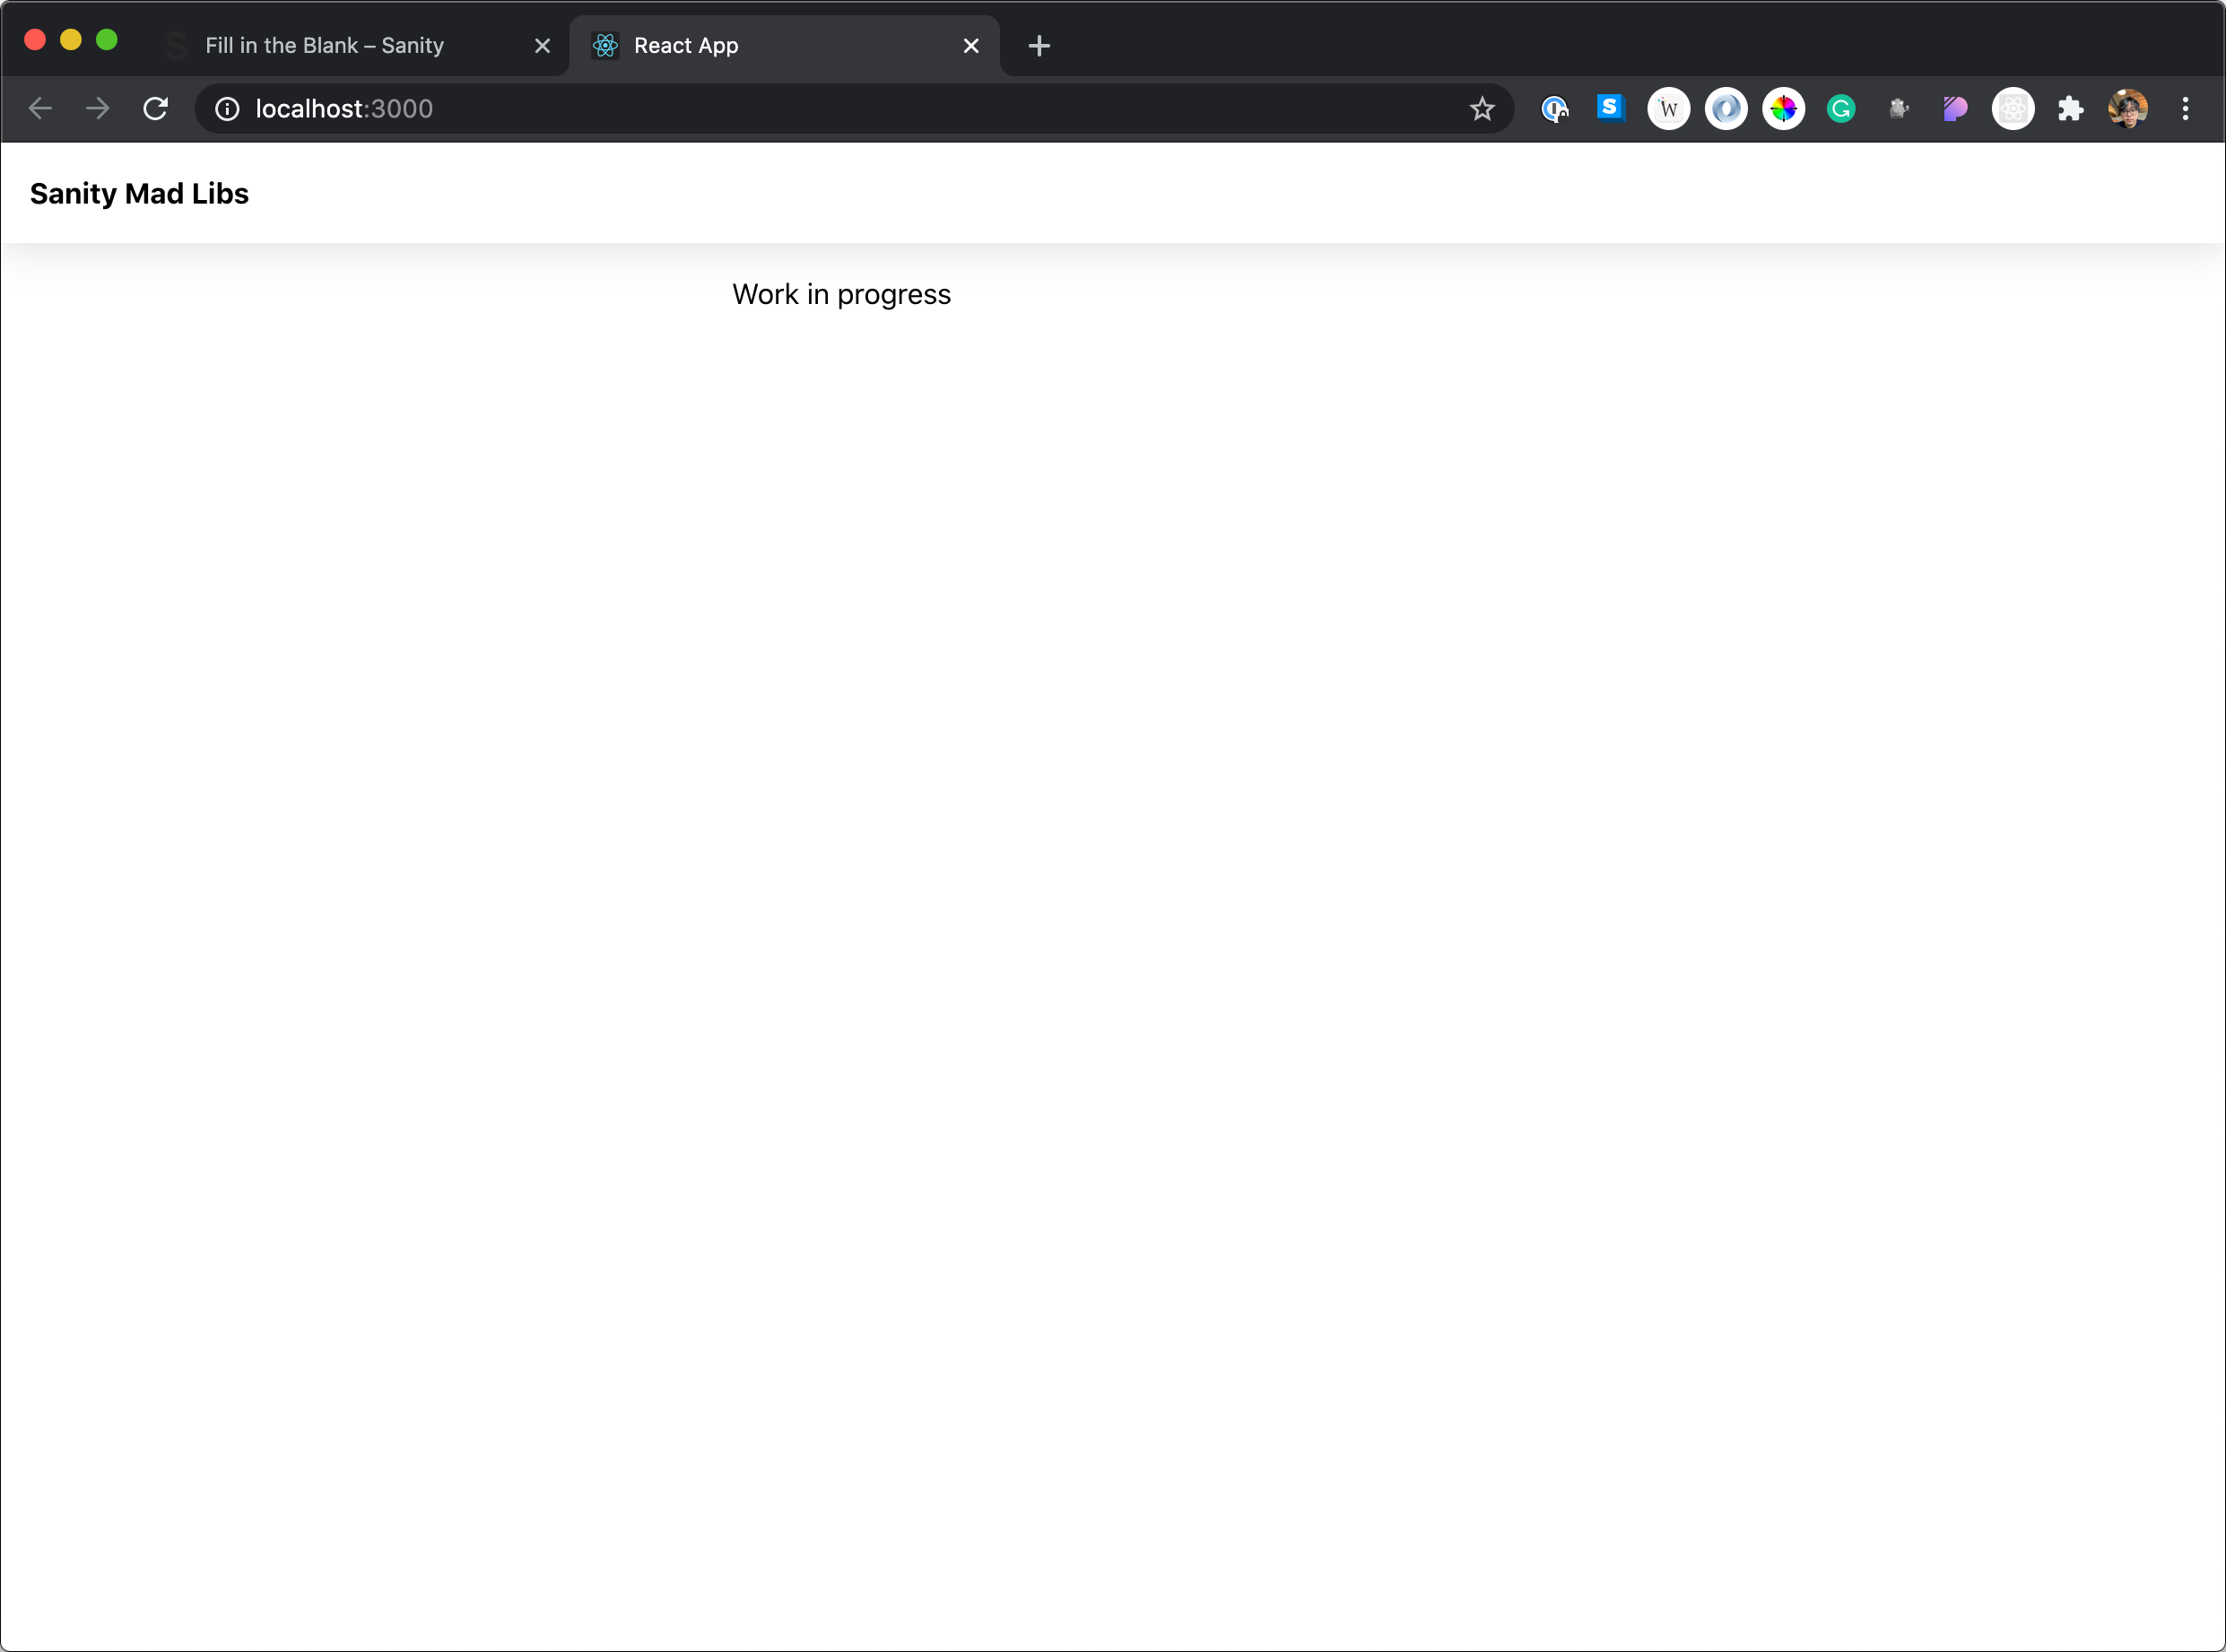
Now we can start the local server and see our changes live:
yarn start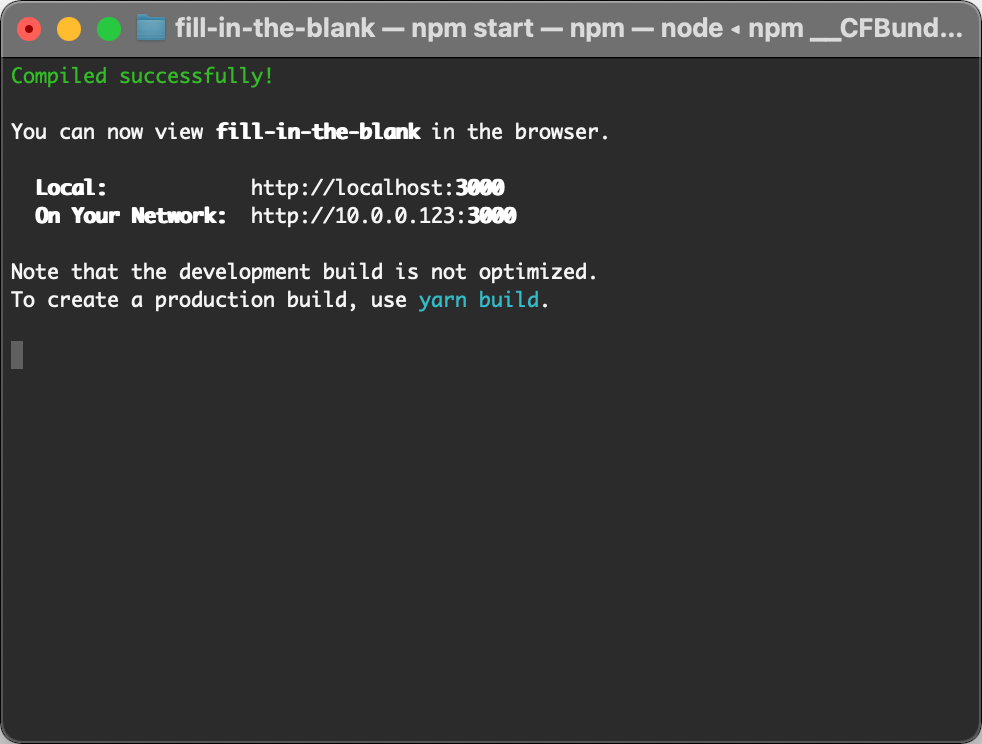
Step 6: Routing and component architecture
The next file, we'll be tackling is App.js. After index.js, this is the primary file that will hold our app's main structure.
In this app, we'll have 3 types of routes:
/— The main index that will list all of the available mad libs for our users to complete/mad-libs/:slug— The individual page containing one mad lib. This page will allow our users to fill in the blanks and will present the finished story once filled in.- A 404 page
We'll be implementing this using react-router and the Switch and Route components.
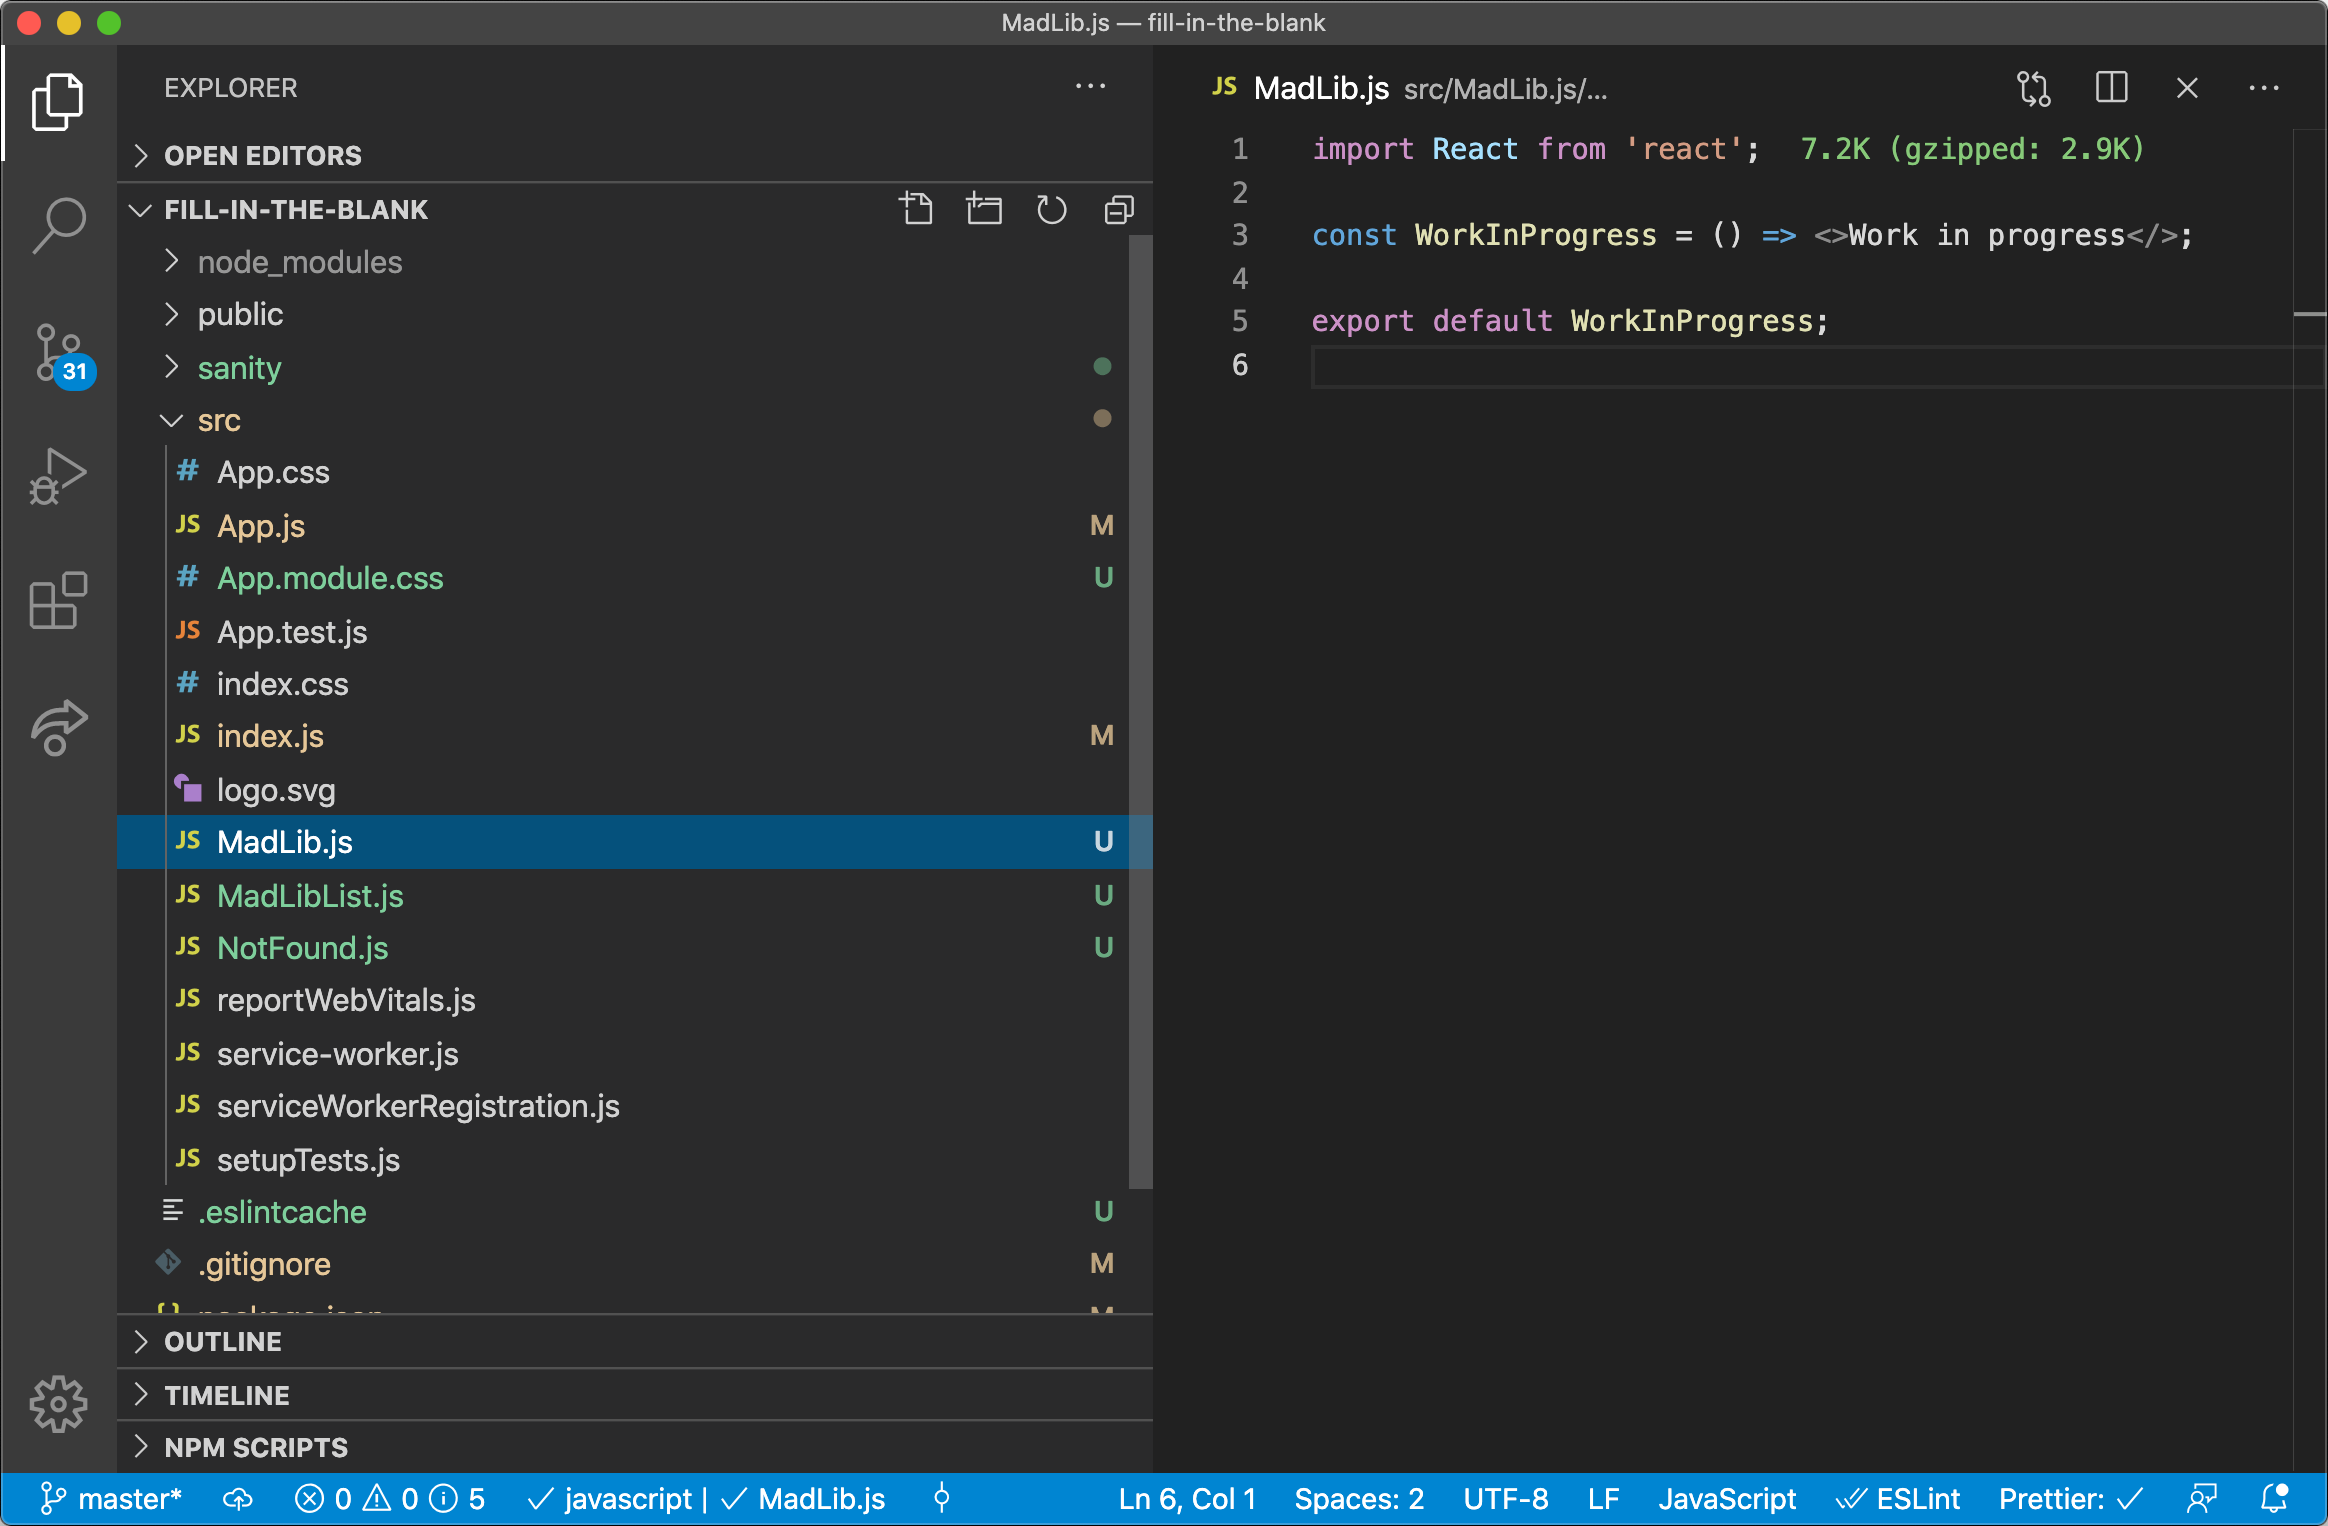
Create the following files:
/src/MadLibList.js/src/MabLib.js
And paste in this implementation for both for now. We'll fill it in later.
import React from 'react';

const WorkInProgress = () => <>Work in progress</>;

export default WorkInProgress;
Copy the following into /src/NotFound.js:
// /src/NotFound.js
function NotFound() {
  return (
    <div>
      <h1>We're Sorry</h1>
      <p>We couldn't find the page you were looking for.</p>
    </div>
  );
}

export default NotFound;
And lastly, copy the following in App.js and App.module.css
// /src/App.js
import { Route, Switch, Link } from 'react-router-dom';
import MadLibList from './MadLibList';
import MadLib from './MadLib';
import NotFound from './NotFound';
import styles from './App.module.css';

function App() {
  return (
    <>
      <header className={styles.header}>
        <Link className={styles.headerLink} to="/">
          Sanity Mad Libs
        </Link>
      </header>

      <main className={styles.main}>
        <div className={styles.container}>
          <Switch>
            <Route component={MadLibList} path="/" exact />
            <Route component={MadLib} path="/mad-libs/:slug" />
            <Route component={NotFound} />
          </Switch>
        </div>
      </main>
    </>
  );
}

export default App;
/* /src/App.module.css */
.header {
padding: 1rem;
box-shadow: 0 0 24px 0 rgba(0, 0, 0, 0.16);
font-weight: bold;
position: sticky;
background-color: white;
top: 0;
}
.headerLink {
color: black;
text-decoration: none;
}
.headerLink:hover {
text-decoration: underline;
}
.main {
padding: 1rem;
overflow: auto;
}
.container {
margin: 0 auto;
max-width: 100%;
width: 425px;
}Your project should look like this afterward:
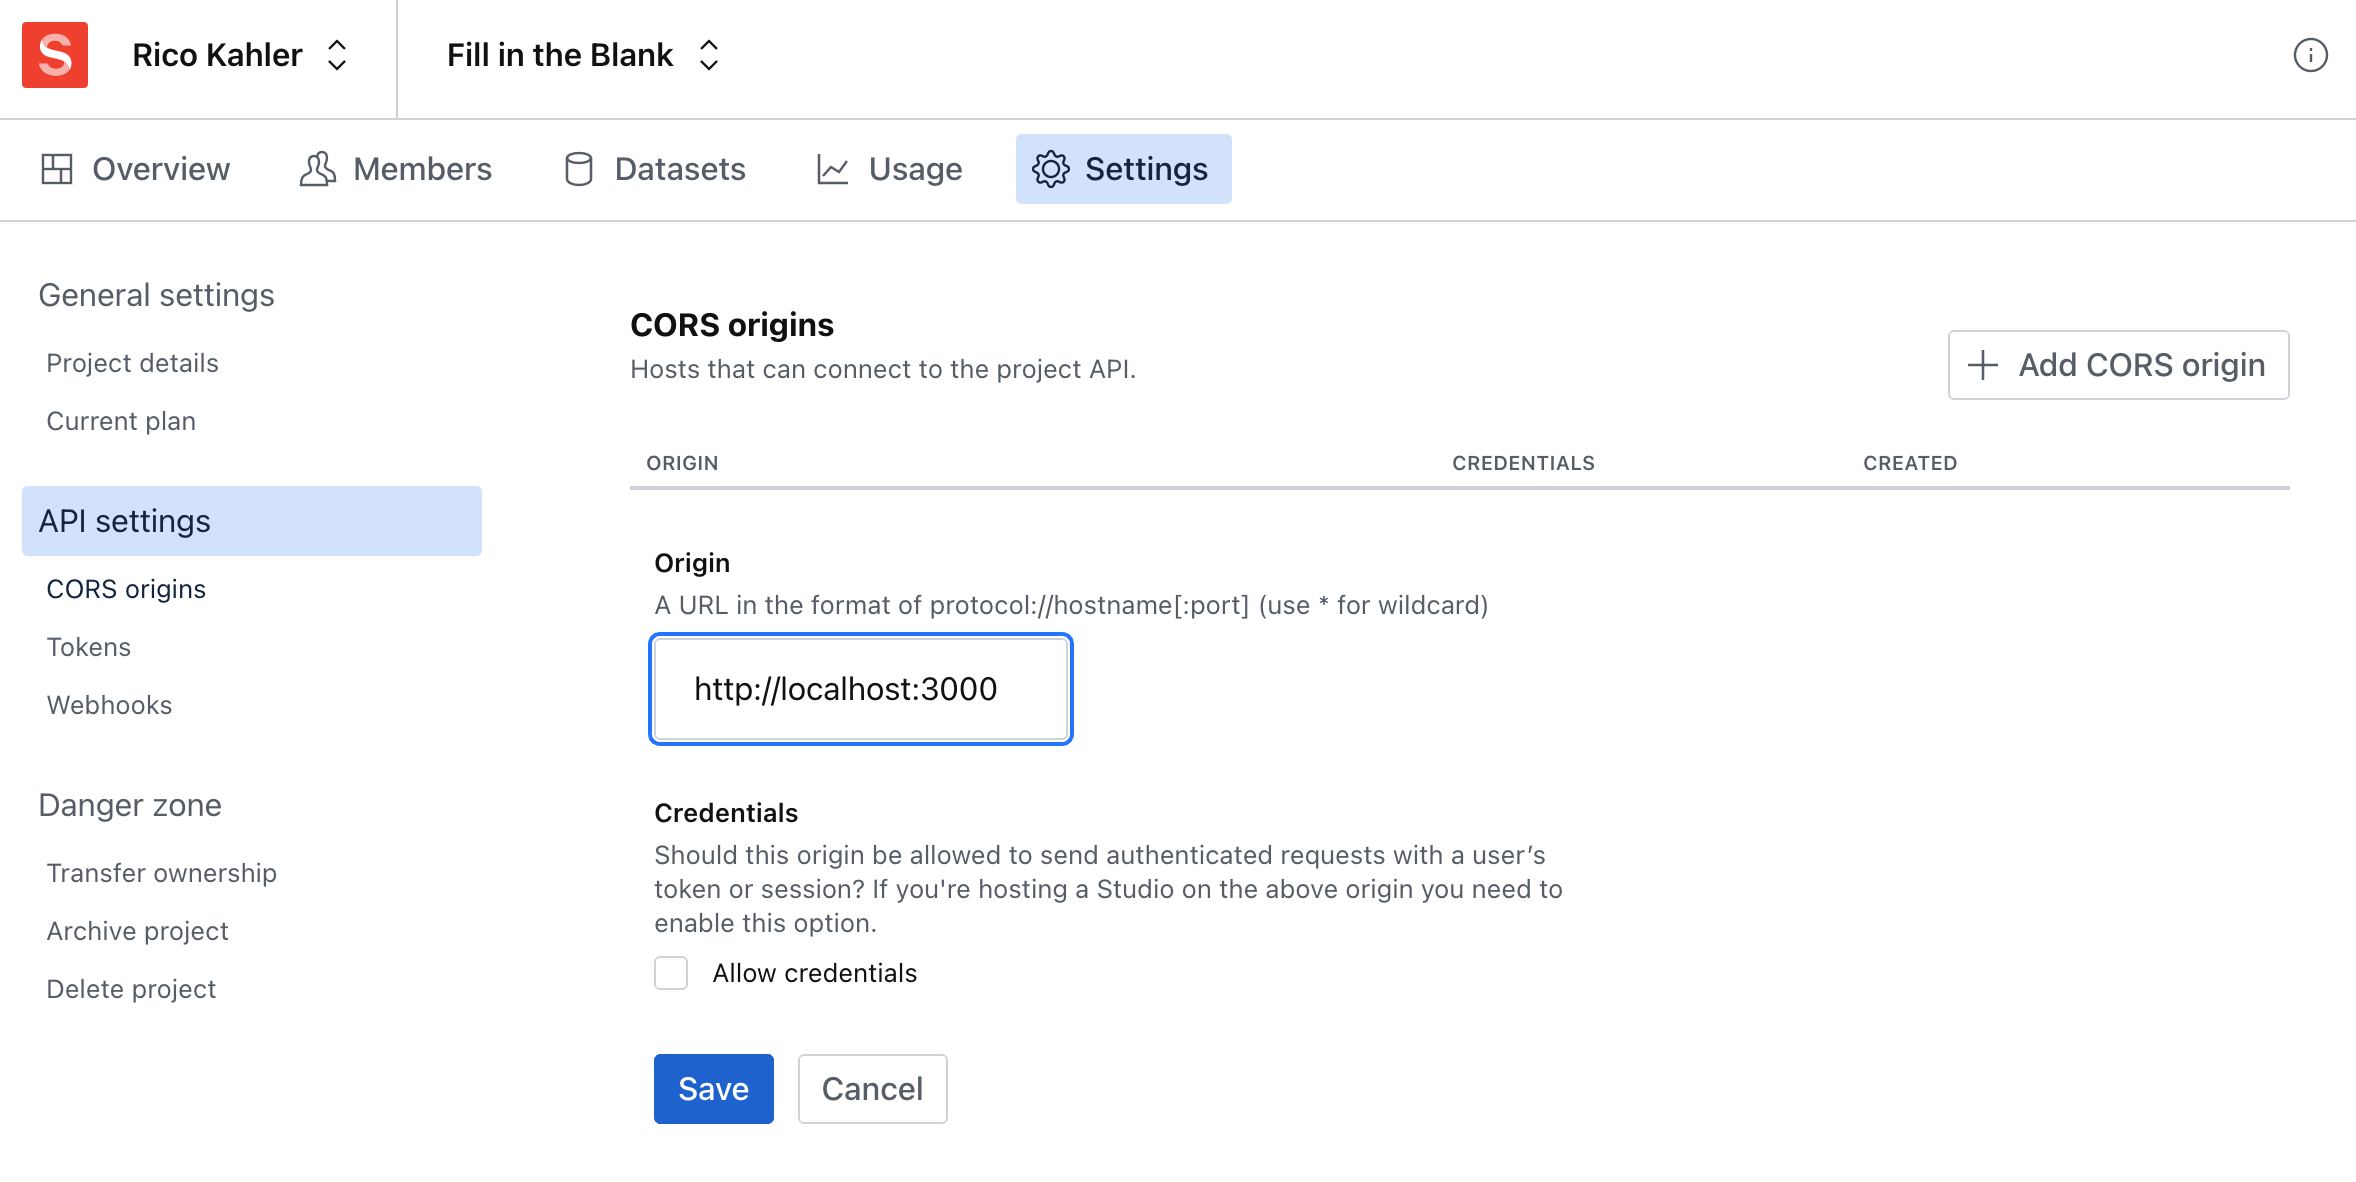
Step 7: Add a new CORS origin to Sanity and set up the sanity client
Before we start pulling data from Sanity, we need to tell Sanity that it's okay for our app to be accessing data from the origin http://localhost:3000.
If we don't do this, our network requests will fail with CORS errors.
Go to sanity.io/teams > "Fill in the Blank" > Settings > API > CORS Origins
From here add http://localhost:3000 to the allowed origins.
Now we can set up the sanity client to be used for queries in our app.
Create the sanity client and sanity image builder in /src/sanity.js
// /src/sanity.js
import SanityClient from '@sanity/client';
import ImageUrlBuilder from '@sanity/image-url';

export const sanity = SanityClient({
  projectId: 'your-project-id',
  dataset: 'production',
  // this option enables faster responses
  // but can return stale data at times.
  // recommended for client-side queries
  useCdn: true,
});

export const imageUrlBuilder = ImageUrlBuilder(sanity);
Be sure to replace the 'your-project-id' with your project ID found in /sanity/sanity.json.
Step 8: Query Sanity for a summarized list of items
Now we're finally ready to query some data from Sanity.
In this step, we'll be implementing a list of summarized data.
We'll be querying for all documents in our database, however, instead of requesting the whole document, we'll only be requesting the title, image, and slug fields. This makes it so that we're only querying for what we need on the page.
When we write the individual mab lib page, that's when we'll pull everything.
Paste the following into /src/MadLibList.js and /src/MadLibList.module.css
// /src/MadLibList.js
import { useQuery } from 'react-query';
import { Link } from 'react-router-dom';
import { sanity, imageUrlBuilder } from './sanity';
import styles from './MadLibList.module.css';

const query = `
  *[ _type == 'madLib' ] { title, image, slug }
`;

function MadLibList() {
  // in this one line, data is fetched from sanity via the sanity client and
  // stored into application state via react-query!
  const { data: madLibs } = useQuery('madLibsList', () => sanity.fetch(query));

  // if we don't have madLibs yet, then the data must be loading
  if (!madLibs) {
    return <h1>Loading…</h1>;
  }

  return (
    <>
      <h1>Mad Libs</h1>

      <ul className={styles.list}>
        {/* loop through all of the mabLib and show them in a list */}
        {madLibs.map(({ title, slug, image }) => (
          <li key={slug.current}>
            {/* ;ink comes from react-router and it powers navigation on the */}
            {/* site. here we use sanity slugs to create unique URLs. */}
            <Link className={styles.tile} to={`/mad-libs/${slug.current}`}>
              <img
                alt={title}
                // use the sanity `imageUrlBuilder` to
                // generate optimized images on the fly
                src={imageUrlBuilder.width(425).height(425).image(image).url()}
                width="425px"
                height="425px"
              />
              <h2 className={styles.tileTitle}>{title}</h2>
            </Link>
          </li>
        ))}
      </ul>
    </>
  );
}

export default MadLibList;
/* /src/MadLibList.module.css */
.list {
list-style-type: none;
padding: 0;
}
.list > *:not(:last-child) {
margin-bottom: 1rem;
}
.tile {
position: relative;
display: block;
}
.tile::after {
position: absolute;
top: 0;
bottom: 0;
right: 0;
left: 0;
content: ' ';
background: linear-gradient(transparent, black);
}
.tileTitle {
position: absolute;
bottom: 1rem;
left: 1rem;
z-index: 1;
color: white;
}
.tile:hover .tileTitle {
text-decoration: underline;
}There are a few things going on in this file:
- We're using
react-queryto manage the fetching and cache of data from Sanity. It utilizes the@sanity/clientto get the data then saves it in memory. When this process is finished, it populates themadLibsvariable. See thereact-querydocs for more info. - After the data is ready, we map over each item and return a clickable link. Each link renders an optimized image with the
imageUrlBuilder. - Links and navigation are powered by
react-router.react-router's<Link>accepts atoprop which we populate to match the route we created back in step 6. We utilize slugs in Sanity to create unique URLs.
When you're finished, your app should look like this:

Step 9: Create the full detail pages
Next, we'll create the detail pages by populating MabLib.js.
Paste the following into /src/MadLib.js and /src/MadLib.module.css:
// /src/MadLib.js
import { useQuery } from 'react-query';
import { useParams, Link } from 'react-router-dom';
import { useState, useEffect } from 'react';
import BlockContent from '@sanity/block-content-to-react';
import { sanity, imageUrlBuilder } from './sanity';
import styles from './MadLib.module.css';
const query = `
*[ _type == 'madLib' && slug.current == $slug ]
`;
function MadLib() {
// this variable is populated from `react-router` which pulls it from the URL
const { slug } = useParams();
// data is fetched from sanity via the sanity client and stored into
// application state via react-query. note that the slug is used as the
// "query key": https://react-query.tanstack.com/guides/query-keys
const { data = [] } = useQuery(slug, () => sanity.fetch(query, { slug }));
// we'll use destructuring assignment to return the first mab lib
const [madLib] = data;
// this will store the state of the answers of this mad lib
const [answers, setAnswers] = useState(
// if the items exist in localStorage, then
localStorage.getItem(slug)
? // then set the initial state to that value
JSON.parse(localStorage.getItem(slug))
: // otherwise, set the initial state to an empty object
{},
);
// this is a react "effect" hook: https://reactjs.org/docs/hooks-effect.html
// we use this to watch for changes in the `slug` or `answers` variables and
// update local storage when those change.
useEffect(() => {
localStorage.setItem(slug, JSON.stringify(answers));
}, [slug, answers]);
if (!madLib) {
return <h1>Loading…</h1>;
}
// once the mad lib is loaded, we can map through the structured content to
// find our placeholder shape. the end result is an array of these placeholders
const placeholders = madLib?.story
.map((block) => block.children.filter((n) => n._type === 'placeholder'))
.flat();
// using the above placeholders array, we calculate whether or not all the
// blanks are filled in by checking the whether every placeholder has a value
// in the `answers` state variable.
const allBlanksFilledIn = placeholders?.every(
(placeholder) => answers[placeholder._key],
);
return (
<>
<h2 className={styles.title}>{madLib.title}</h2>
<img
className={styles.img}
alt={madLib.title}
src={imageUrlBuilder.width(425).height(425).image(madLib.image).url()}
/>
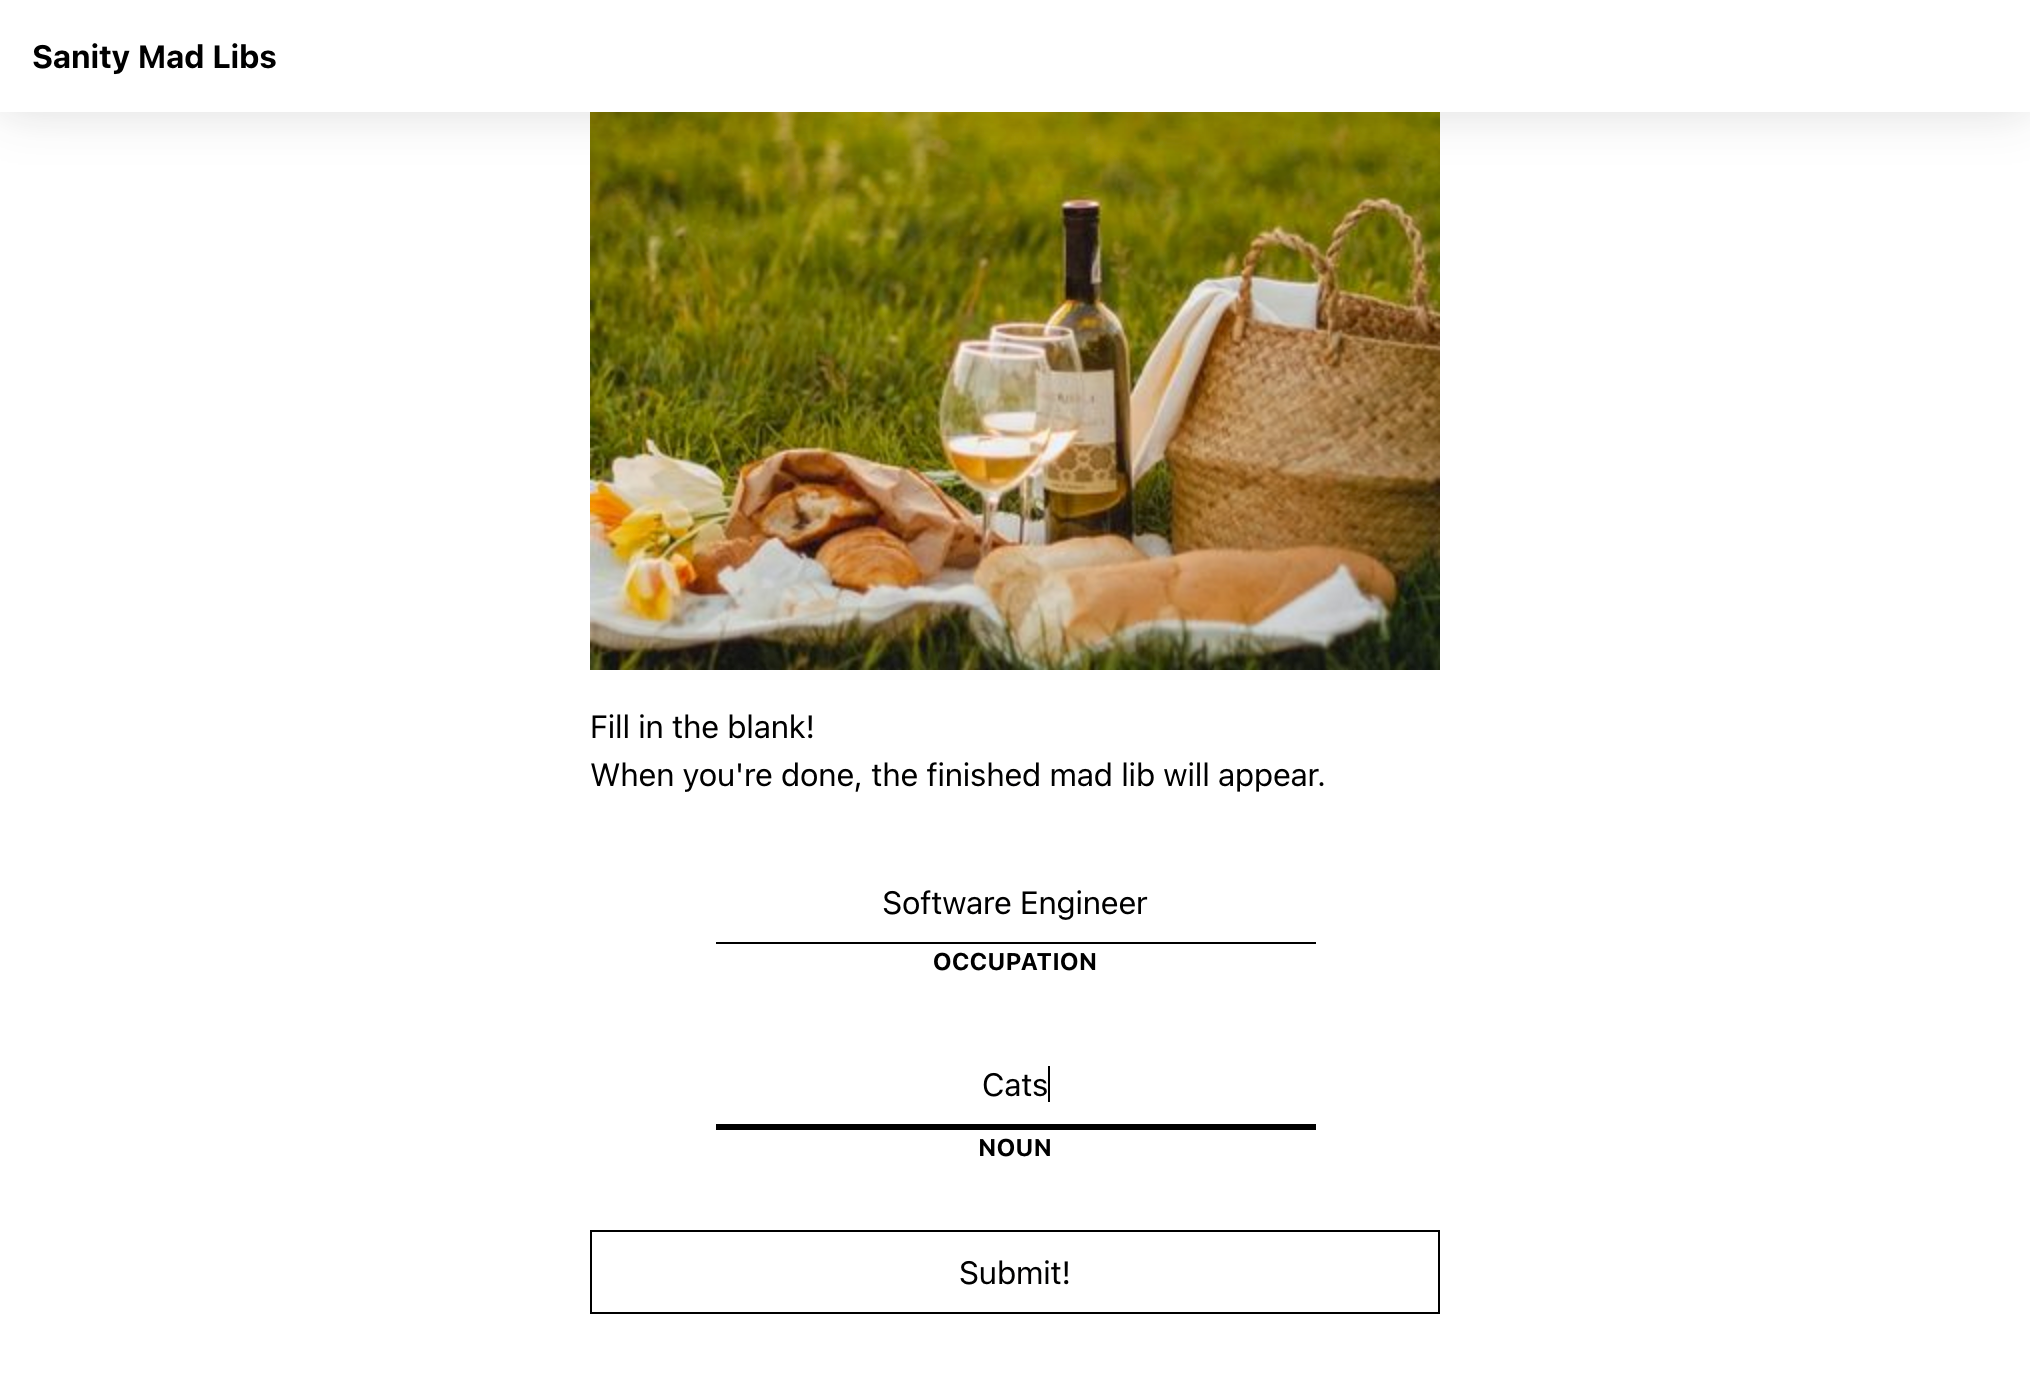
{!allBlanksFilledIn ? (
// if all the blanks are _not_ filled in, then we can show the form
<>
<p>Fill in the blank!</p>
<p>When you're done, the finished mad lib will appear.</p>
<form
// this `onSubmit` will fire when the user clicks the submit button
onSubmit={(e) => {
e.preventDefault();
const answerEntries = Array.from(
// find all the inputs
e.currentTarget.querySelectorAll('input'),
)
// then get the name and values in a tuple
.map((inputEl) => [inputEl.name, inputEl.value]);
// use `Object.fromEntries` to transform them back to an object
const nextAnswers = Object.fromEntries(answerEntries);
setAnswers(nextAnswers);
}}
>
<ul className={styles.list}>
{/* for each placeholder… */}
{placeholders.map(({ _key, type }) => (
<li className={styles.placeholder} key={_key}>
{/* …render an input an a label. */}
<input
// the `name` of the input will be the sanity `_key`:
// https://www.sanity.io/docs/array-type#why-the-key-92296c6c45ea
// this will enables us to match this input value with the
// correct placeholder
name={_key}
className={styles.input}
id={_key}
/>
<label className={styles.label} htmlFor={_key}>
{type}
</label>
</li>
))}
</ul>
<button className={styles.button}>Submit!</button>
</form>
</>
) : (
// if all the blanks are filled in, then we can show the rendered
// story with a custom serializer for the type `placeholder`
<>
<BlockContent
className={styles.blockContent}
blocks={madLib.story}
serializers={{
// see here: https://github.com/sanity-io/block-content-to-react
types: { placeholder: ({ node: { _key } }) => answers[_key] },
}}
/>
<button
className={styles.button}
onClick={() => {
// we reset the state on click after the users confirms it's okay.
if (window.confirm('Are you sure you want to reset?')) {
setAnswers({});
}
}}
>
Reset
</button>
{/* this is a simple link back to the main mab libs index */}
<Link className={styles.button} to="/">
← More Mad Libs
</Link>
</>
)}
</>
);
}
export default MadLib;/* /src/MadLib.module.css */
.list {
list-style-type: none;
padding: 0;
}
.title {
text-align: center;
}
.img {
margin-bottom: 1rem;
}
.placeholder {
padding: 1rem;
display: flex;
flex-direction: column;
align-items: center;
}
.input {
border: none;
border-bottom: 1px solid black;
outline: none;
padding: 0.5rem;
width: 300px;
max-width: 100%;
text-align: center;
}
.input:focus {
border-bottom: 3px solid black;
}
.label {
text-transform: uppercase;
font-size: 12px;
font-weight: bold;
}
.button {
appearance: none;
outline: none;
background: none;
padding: 0.5rem 1rem;
border: 1px solid black;
width: 100%;
cursor: pointer;
transition: all 250ms;
display: block;
margin-bottom: 1rem;
text-align: center;
text-decoration: none;
color: black;
}
.button:focus,
.button:hover {
background-color: #eee;
}
.button:active {
background-color: #ddd;
}
.blockContent > p {
margin-bottom: 1rem;
}This step is where many things come together and get fancy.
In this step we:
- Used
react-routerto get the slug from the URL via theuseParamshook. - Used
react-queryalong with the@sanity/clientto query for the full mad lib document matching the given slug. - This is paired with React's
useState hook, allowing us to react to work the user does on this page (like fill in blanks). - Lastly, we save the state into
localStoragefor offline use.
When you're done, the app should look like this:
Step 10: Adding notifications
As promised, let's add some notifications.
For this we'll be using the Notifications API we discussed earlier thats available natively in web browsers.
Copy the following code into setupNotifications.js:
// /src/setupNotifications.js
import { sanity } from './sanity';

async function setupNotifications() {
  // Check if the browser supports notifications
  if (!('Notification' in window)) {
    // early return if not
    return;
  }

  // Check if the user denied notifications
  if (Notification.permission === 'denied') {
    // early return if so
    return;
  }

  // Wait for the user to give notification permissions
  await new Promise(async (resolve) => {
    if (Notification.permission === 'granted') {
      resolve();
    }

    const result = await Notification.requestPermission();

    if (result === 'granted') {
      resolve();
    }
  });

  const getMabLibCount = async () =>
    sanity.fetch(`count(*[ _type == 'madLib' ])`);

  let previous = await getMabLibCount();
  // setup interval to poll for new mad libs every minute
  setInterval(async () => {
    const current = await getMabLibCount();
    // the the current count is greater than the previous, send a notification
    if (current > previous) {
      previous = current;
      new Notification("There's a new Mad Lib for you to try!");
    }
  }, 60 * 1000);
}

export default setupNotifications;
Then in index.js, import and call setupNotifications.js
// /src/index.js
import 'modern-css-reset';
import './index.css';
import React from 'react';
import ReactDOM from 'react-dom';
import { BrowserRouter } from 'react-router-dom';
import { QueryClient, QueryClientProvider } from 'react-query';
import { persistWithLocalStorage } from 'react-query/persist-localstorage-experimental';
import App from './App';
import * as serviceWorkerRegistration from './serviceWorkerRegistration';
import reportWebVitals from './reportWebVitals';
// NEW 👇👇👇
import setupNotifications from './setupNotifications';
//     👆👆👆

const queryClient = new QueryClient({
  defaultOptions: {
    queries: {
      cacheTime: 1000 * 60 * 60 * 24, // 24 hours
    },
  },
});

persistWithLocalStorage(queryClient);

ReactDOM.render(
  <React.StrictMode>
    <QueryClientProvider client={queryClient}>
      <BrowserRouter>
        <App />
      </BrowserRouter>
    </QueryClientProvider>
  </React.StrictMode>,
  document.getElementById('root'),
);

serviceWorkerRegistration.register();

reportWebVitals();

// NEW 👇👇👇
setupNotifications();
//     👆👆👆
This code will setup an interval to poll for new entries in the database and will show a notifications if the count of madLibs increases while the app is open.
Step 11: Updating default template and the manifest.json
This is the last bit of code we need update in order to finish our PWA 🎉.
All we need to do is update /public/index.html and /public/manifest.json. This is actually all we need to do to get the "Add it to the home screen" functionality working.
{
  "short_name": "Fill in the Blank",
  "name": "Fill in the Blank",
  "icons": [
    {
      "src": "favicon.ico",
      "sizes": "64x64 32x32 24x24 16x16",
      "type": "image/x-icon"
    },
    {
      "src": "logo192.png",
      "type": "image/png",
      "sizes": "192x192"
    },
    {
      "src": "logo512.png",
      "type": "image/png",
      "sizes": "512x512"
    }
  ],
  "start_url": ".",
  "display": "standalone",
  "theme_color": "#000000",
  "background_color": "#ffffff"
}
<!DOCTYPE html>
<html lang="en">
<head>
<meta charset="utf-8" />
<link rel="icon" href="%PUBLIC_URL%/favicon.ico" />
<meta name="viewport" content="width=device-width, initial-scale=1" />
<meta name="theme-color" content="#000000" />
<meta
name="description"
content="Web site created using create-react-app"
/>
<link rel="apple-touch-icon" href="%PUBLIC_URL%/logo192.png" />
<!--
manifest.json provides metadata used when your web app is installed on a
user's mobile device or desktop. See https://developers.google.com/web/fundamentals/web-app-manifest/
-->
<link rel="manifest" href="%PUBLIC_URL%/manifest.json" />
<!--
Notice the use of %PUBLIC_URL% in the tags above.
It will be replaced with the URL of the `public` folder during the build.
Only files inside the `public` folder can be referenced from the HTML.
Unlike "/favicon.ico" or "favicon.ico", "%PUBLIC_URL%/favicon.ico" will
work correctly both with client-side routing and a non-root public URL.
Learn how to configure a non-root public URL by running `npm run build`.
-->
<title>Fill in the Blank</title>
</head>
<body>
<noscript>You need to enable JavaScript to run this app.</noscript>
<div id="root"></div>
<!--
This HTML file is a template.
If you open it directly in the browser, you will see an empty page.
You can add webfonts, meta tags, or analytics to this file.
The build step will place the bundled scripts into the <body> tag.
To begin the development, run `npm start` or `yarn start`.
To create a production bundle, use `npm run build` or `yarn build`.
-->
</body>
</html>Step 12: Deploying to Vercel
Home-stretch, let's deploy this thing to the web!
In order to do that, we'll use the provider Vercel.
Vercel is a cloud platform for static web sites and cloud functions. It offers free and fast hosting for the kind of site we just made.
In order to deploy to Vercel, first, we'll commit all of the changes we've been making in our repo.
Run the following:
git checkout -b main # create a main branch
git add -A # stage all files for this commit
git commit -m "first commit" # commit the changes
Now we're ready to push our changes up to GitHub.
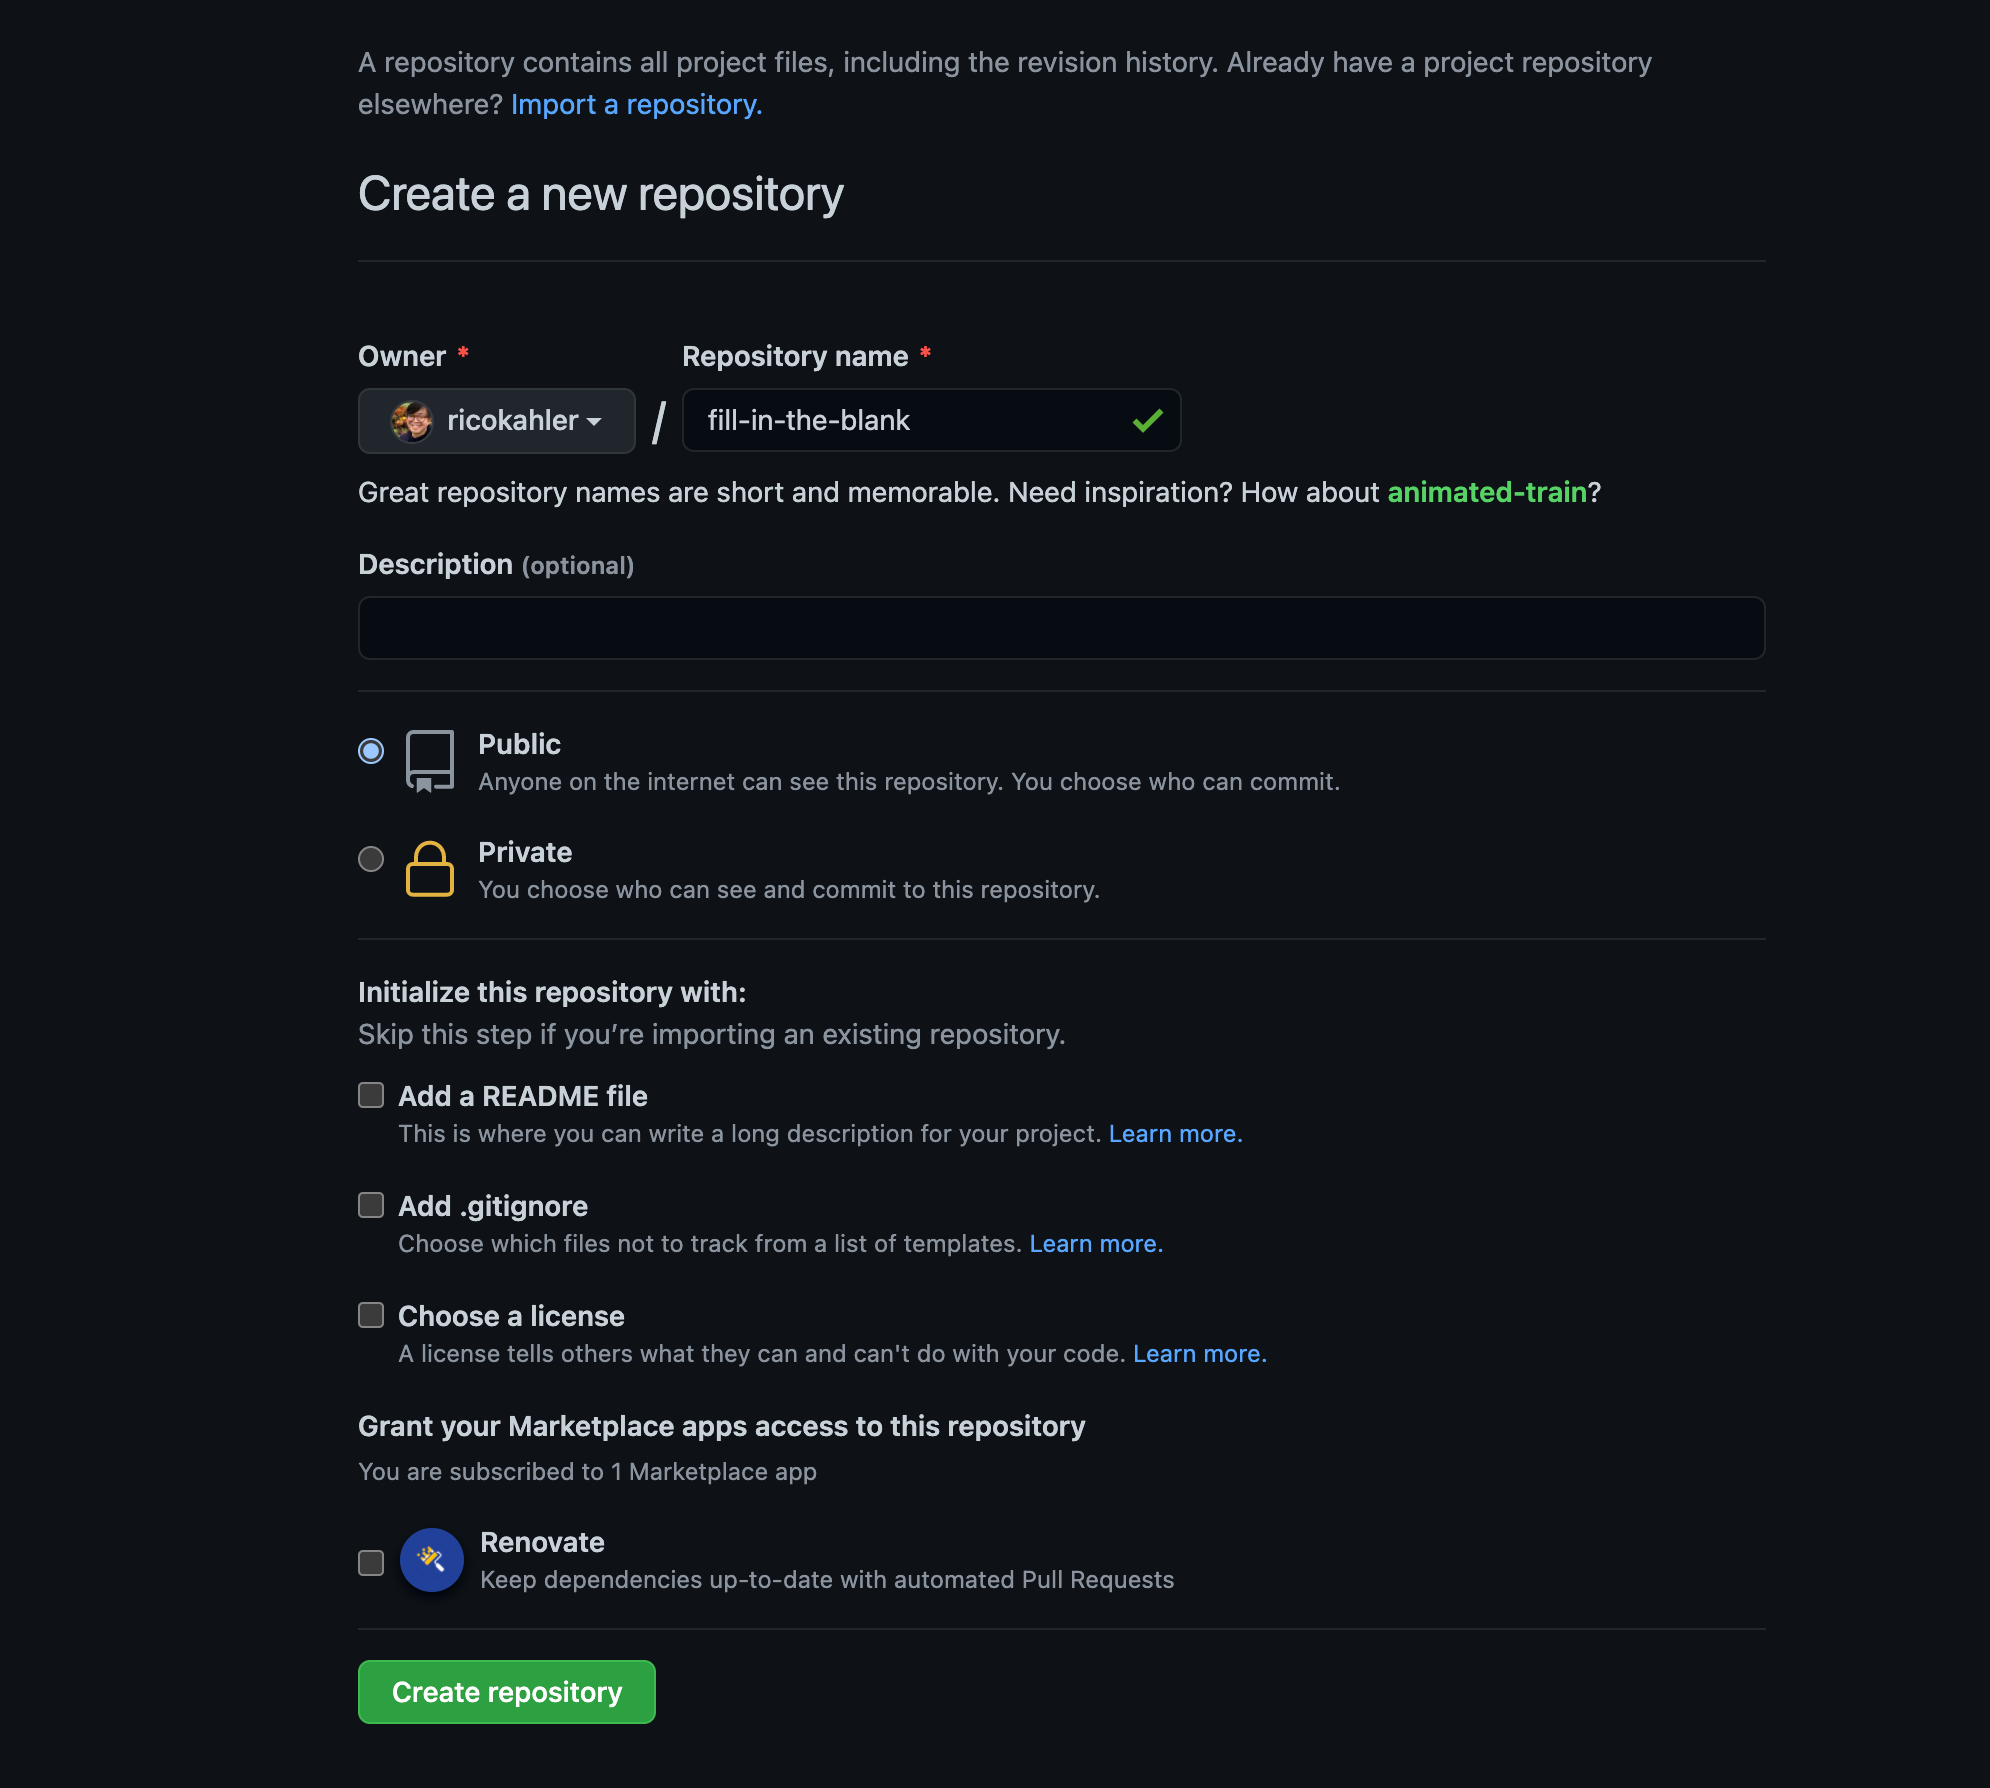
Login into GitHub and then create a New repository.
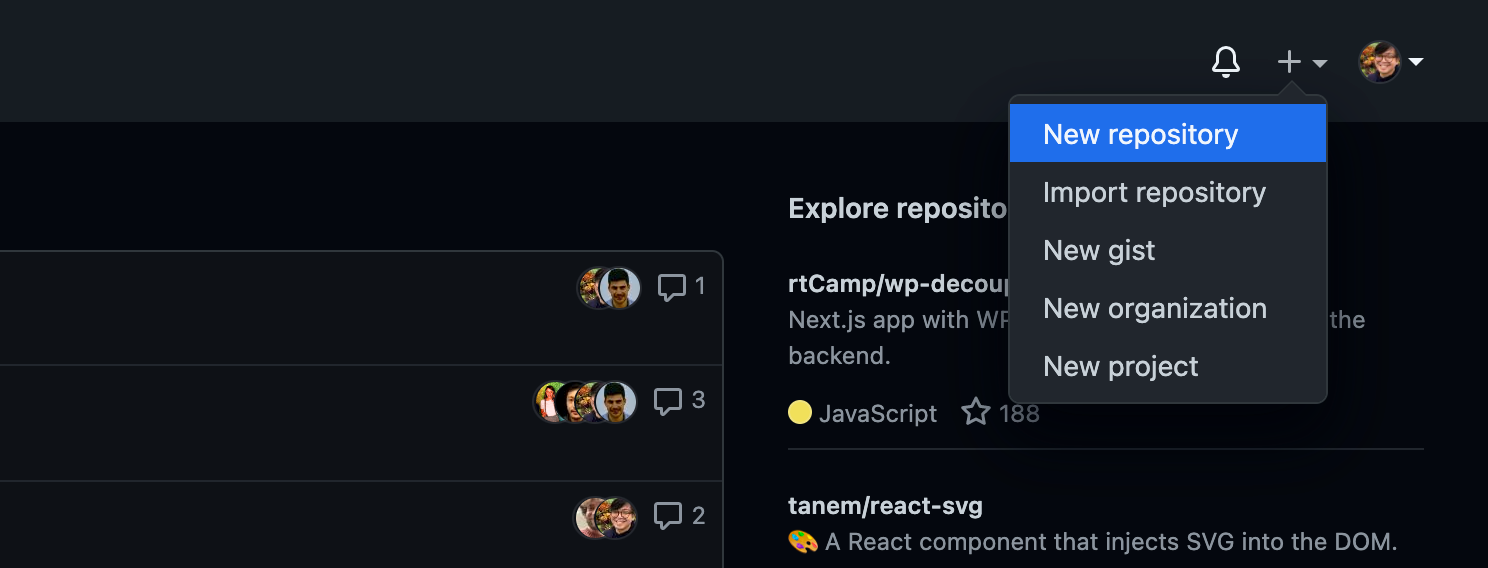
Then fill in the following:
Now we have a "remote" we can push to. Let's push our code up with the following command:
git remote add origin https://github.com/ricokahler/fill-in-the-blank.git
git branch -M main
git push -u origin main
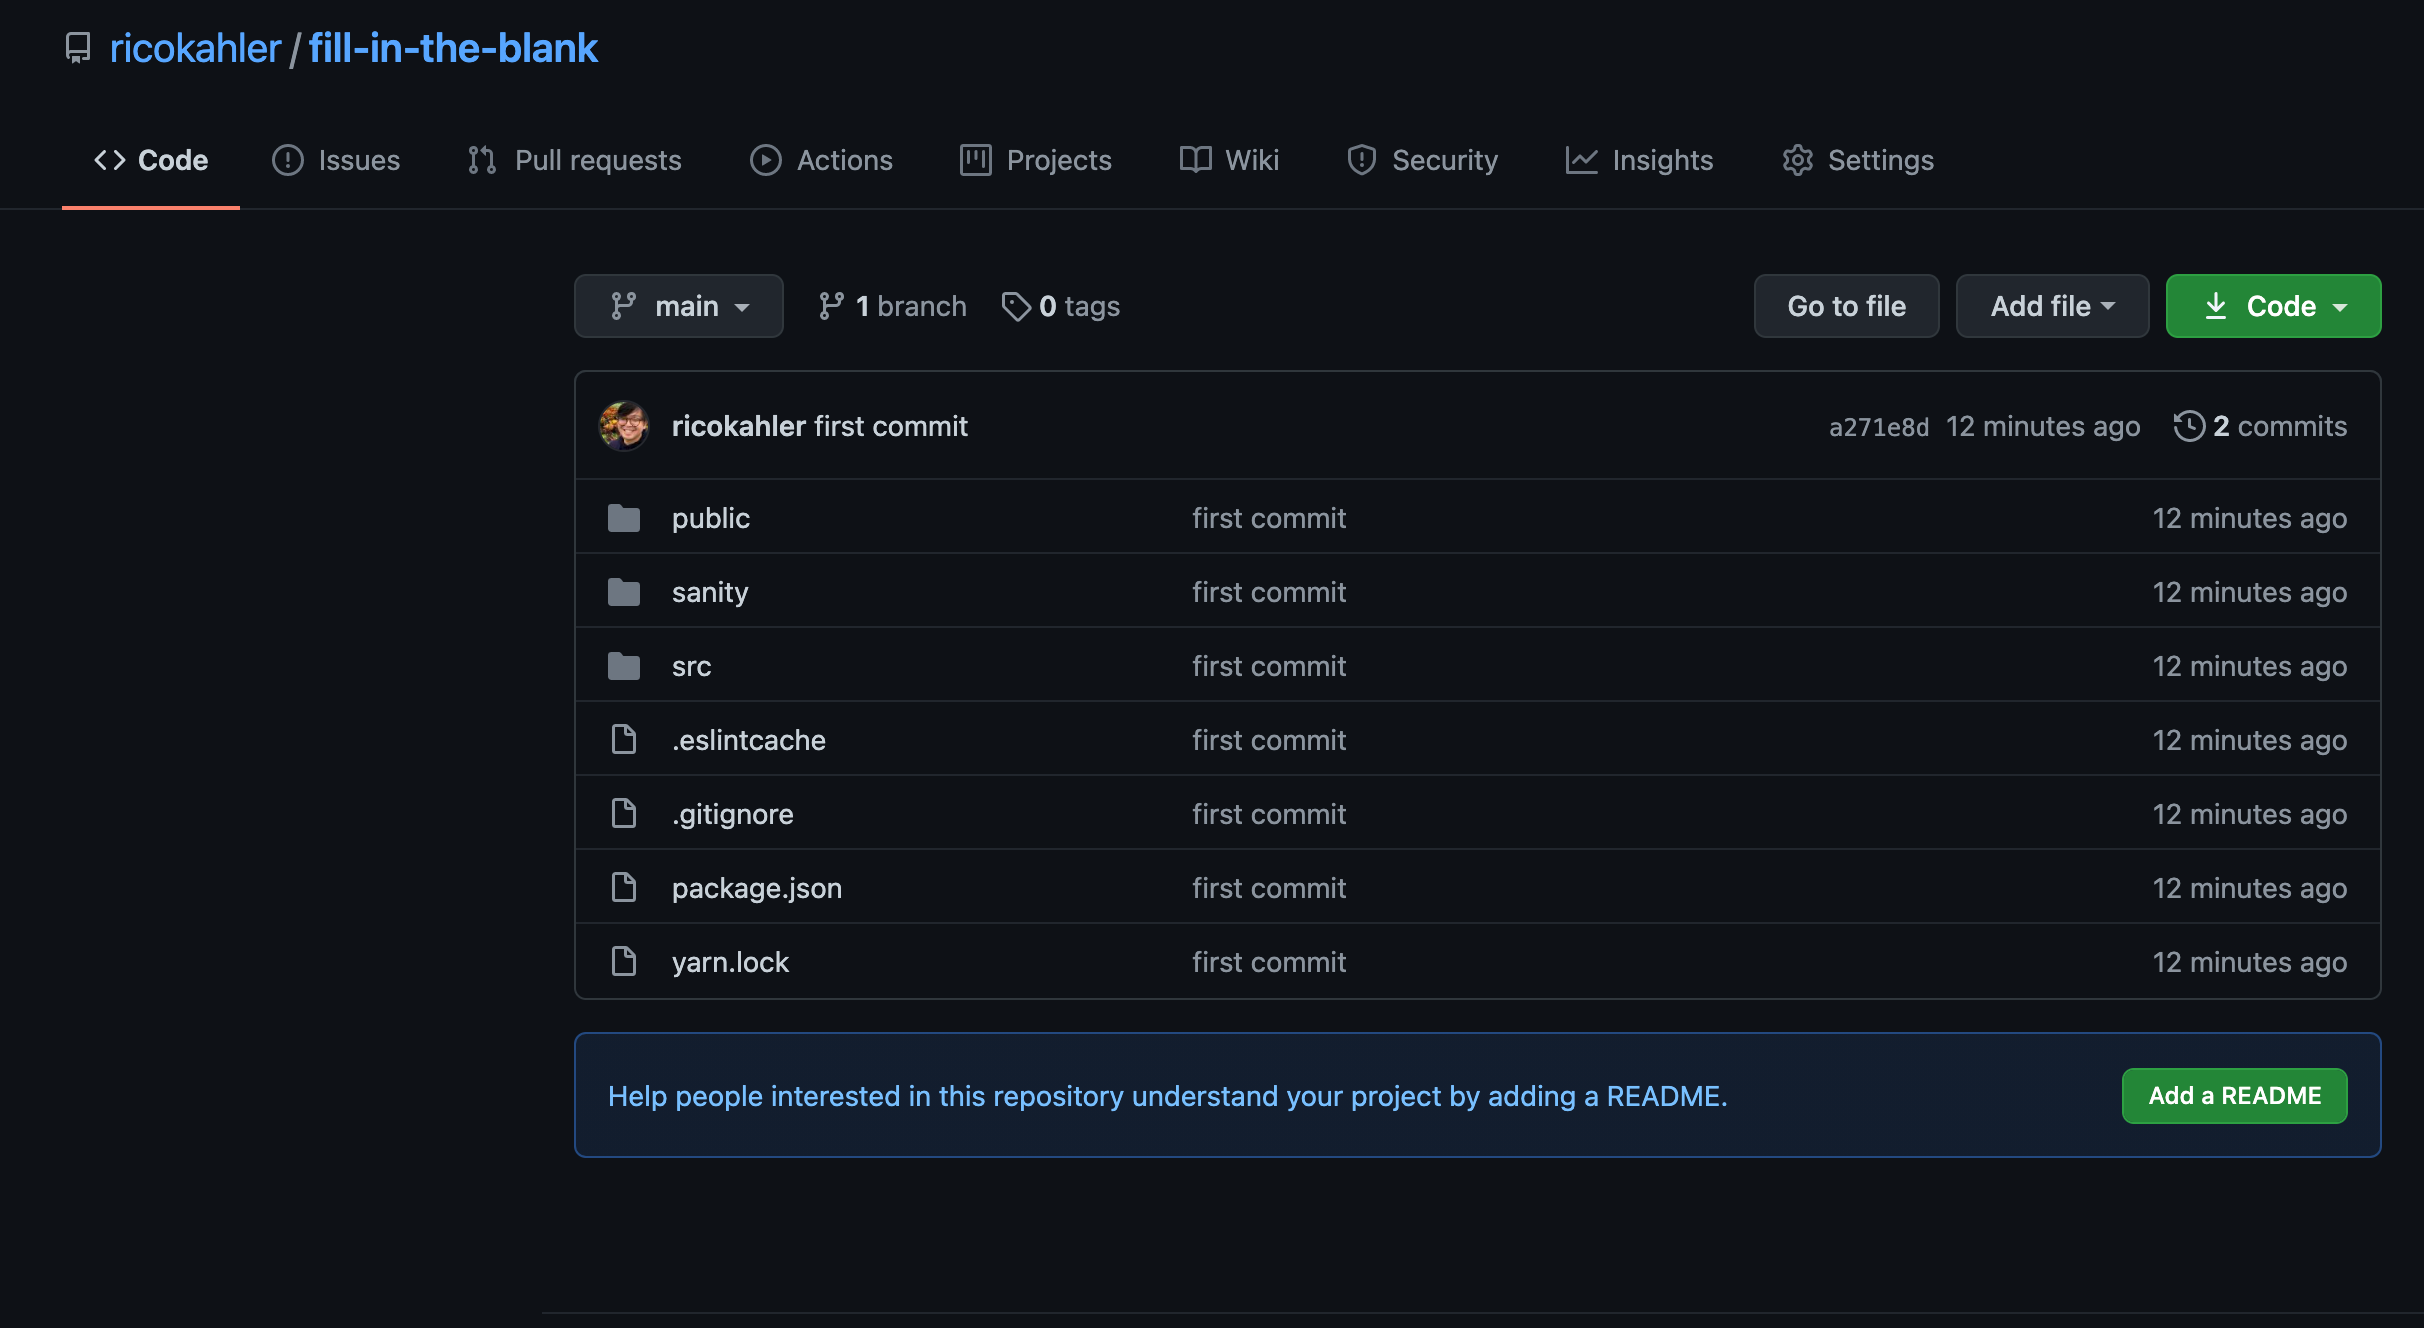
The code should now show up on GitHub!
Now we can log in to Vercel and deploy!
Go to vercel.com and click "Sign Up" and then "Continue with GitHub".
After a successful sign up, you should be taken to the New app page.
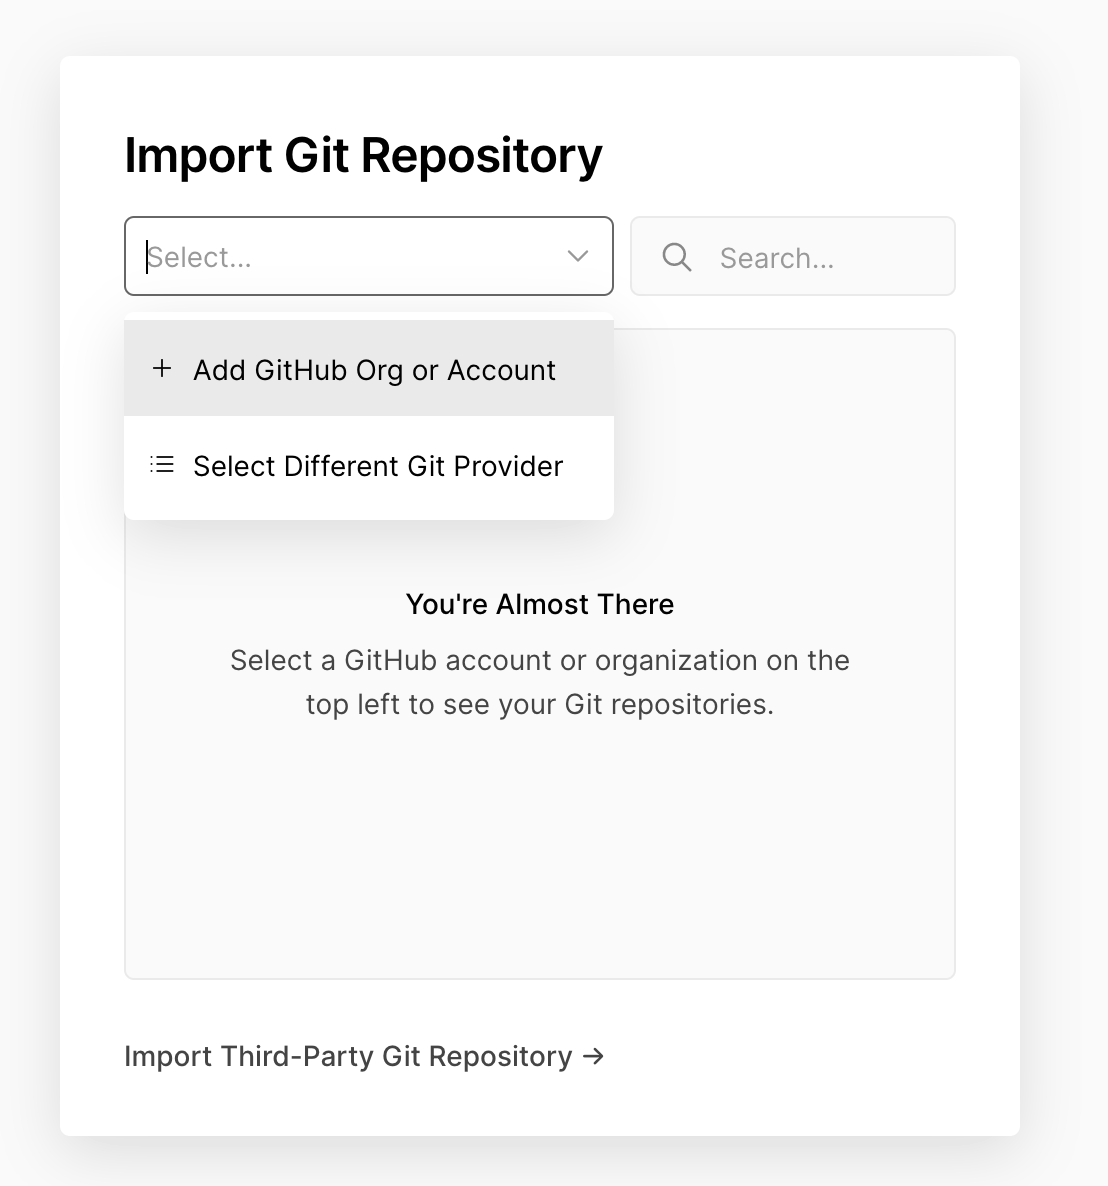
From here, click "Add GitHub Org or Account" and then allow Vercel access to your repositories.
After you've done that you can import the git repo we just created.
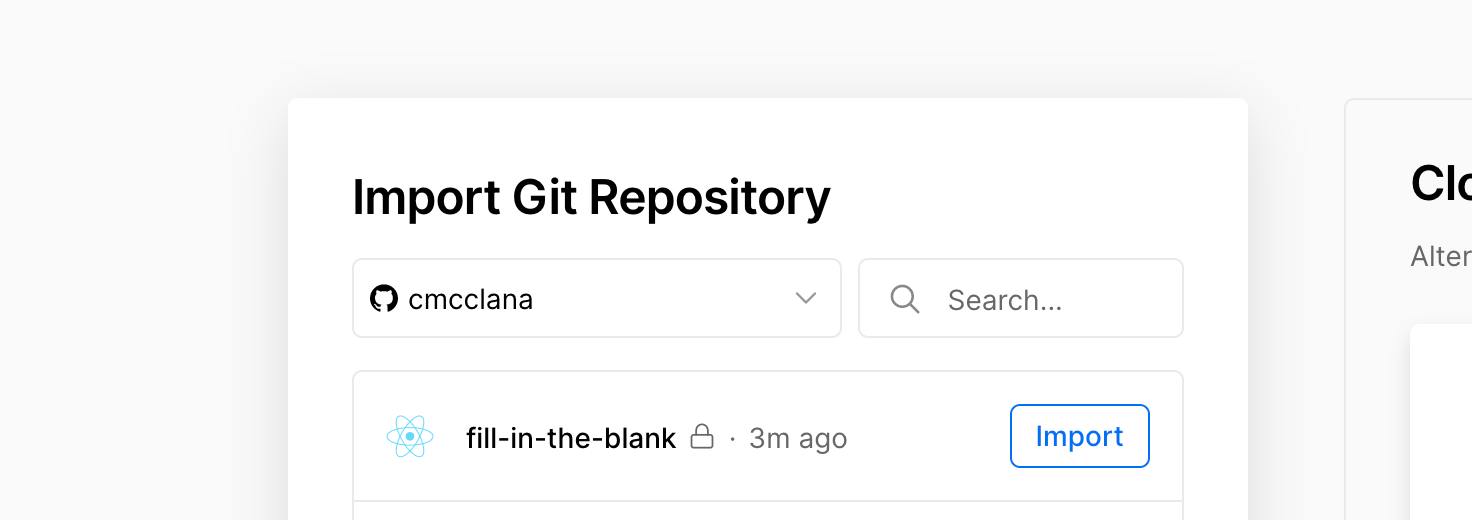
From here, select your personal account, and then, simply "Deploy"
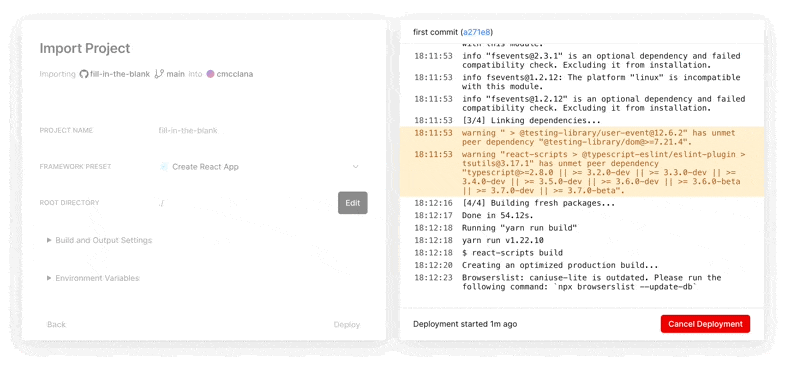
And that's all there is to the deployment!
There's one last thing to do.
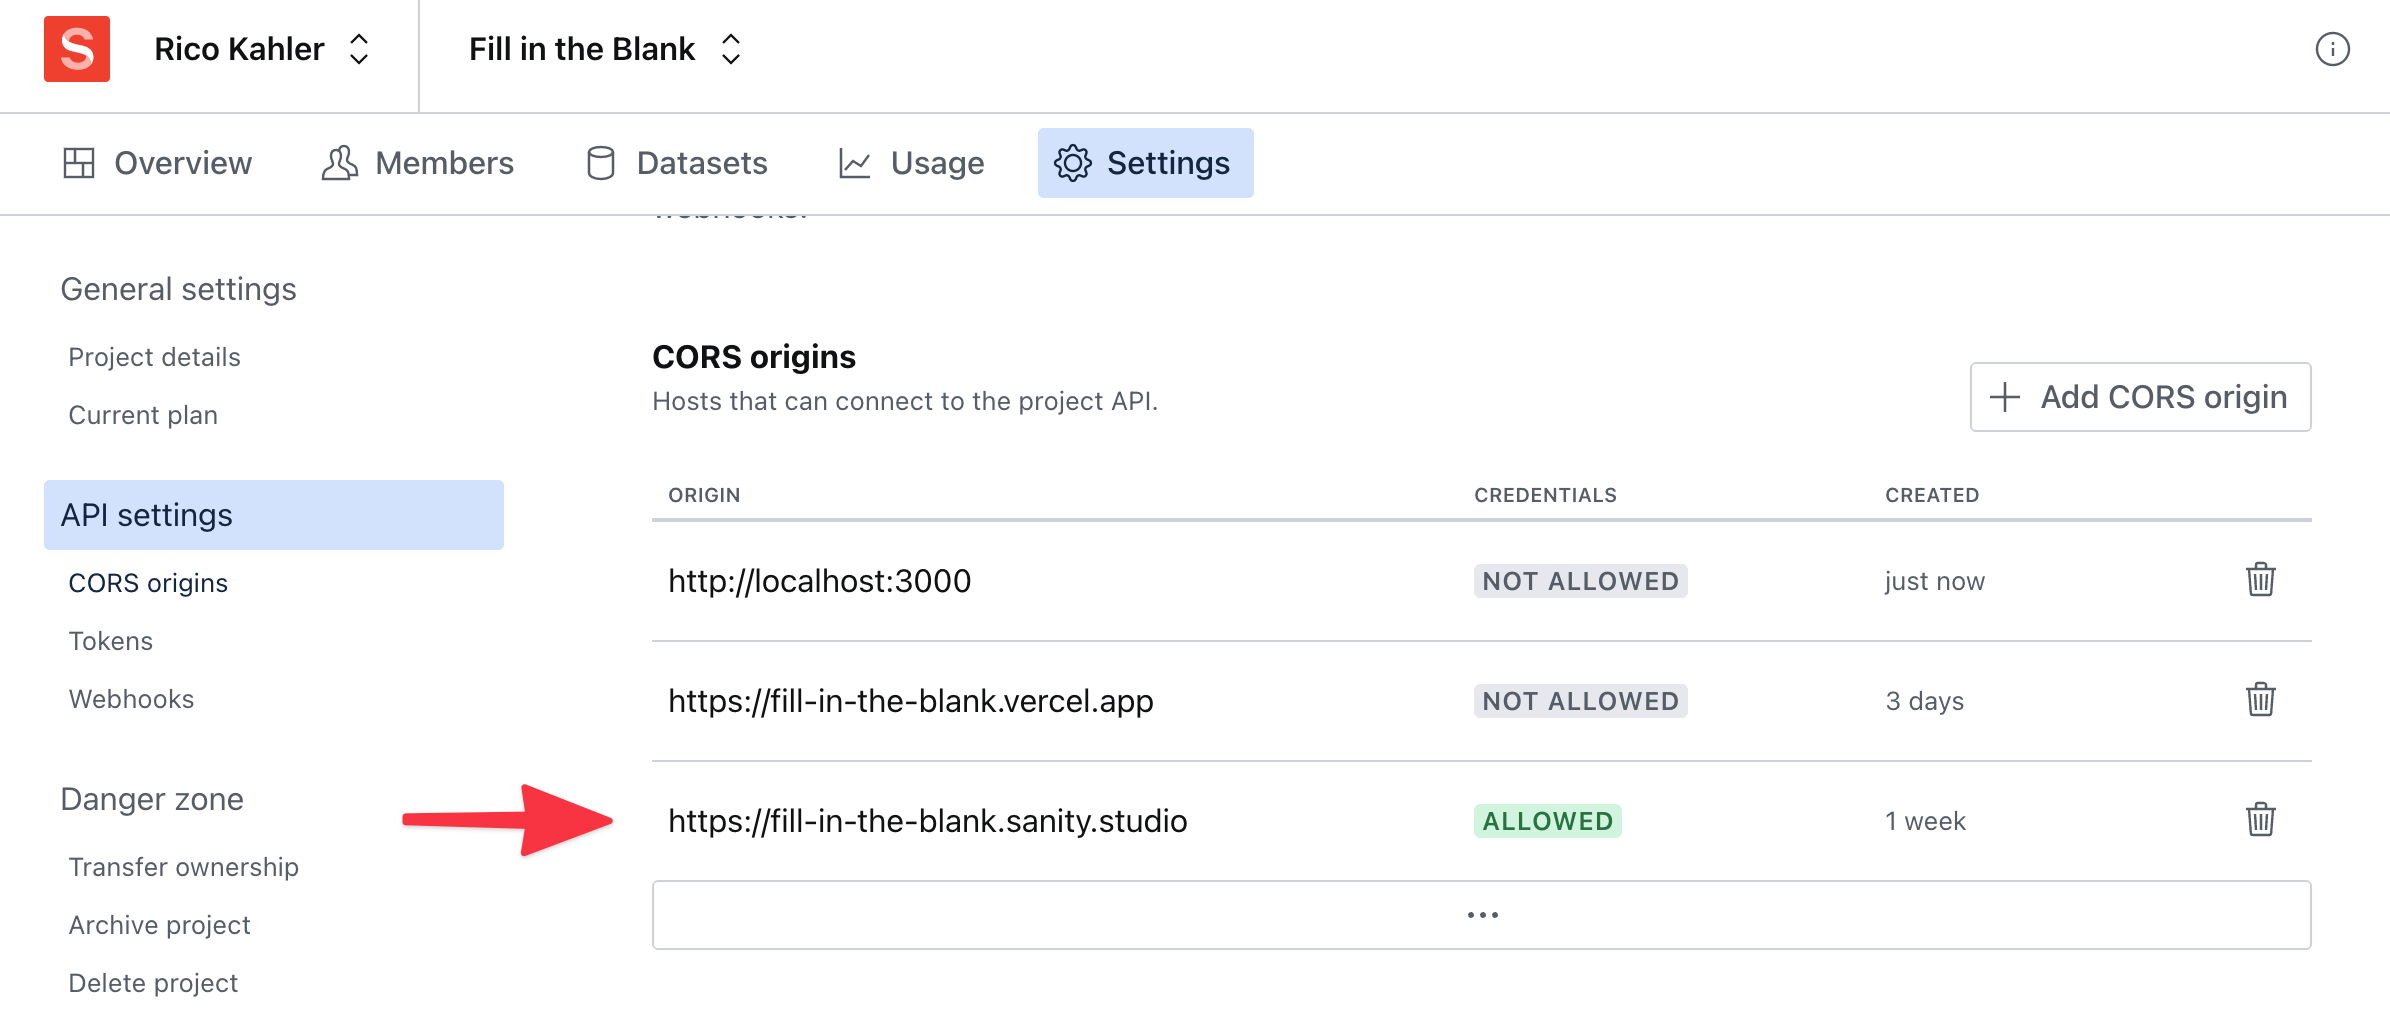
Visit the site, and then copy the URL. We'll need to add it to the allowed CORS origins like in Step 7.
Now the site should load correctly.
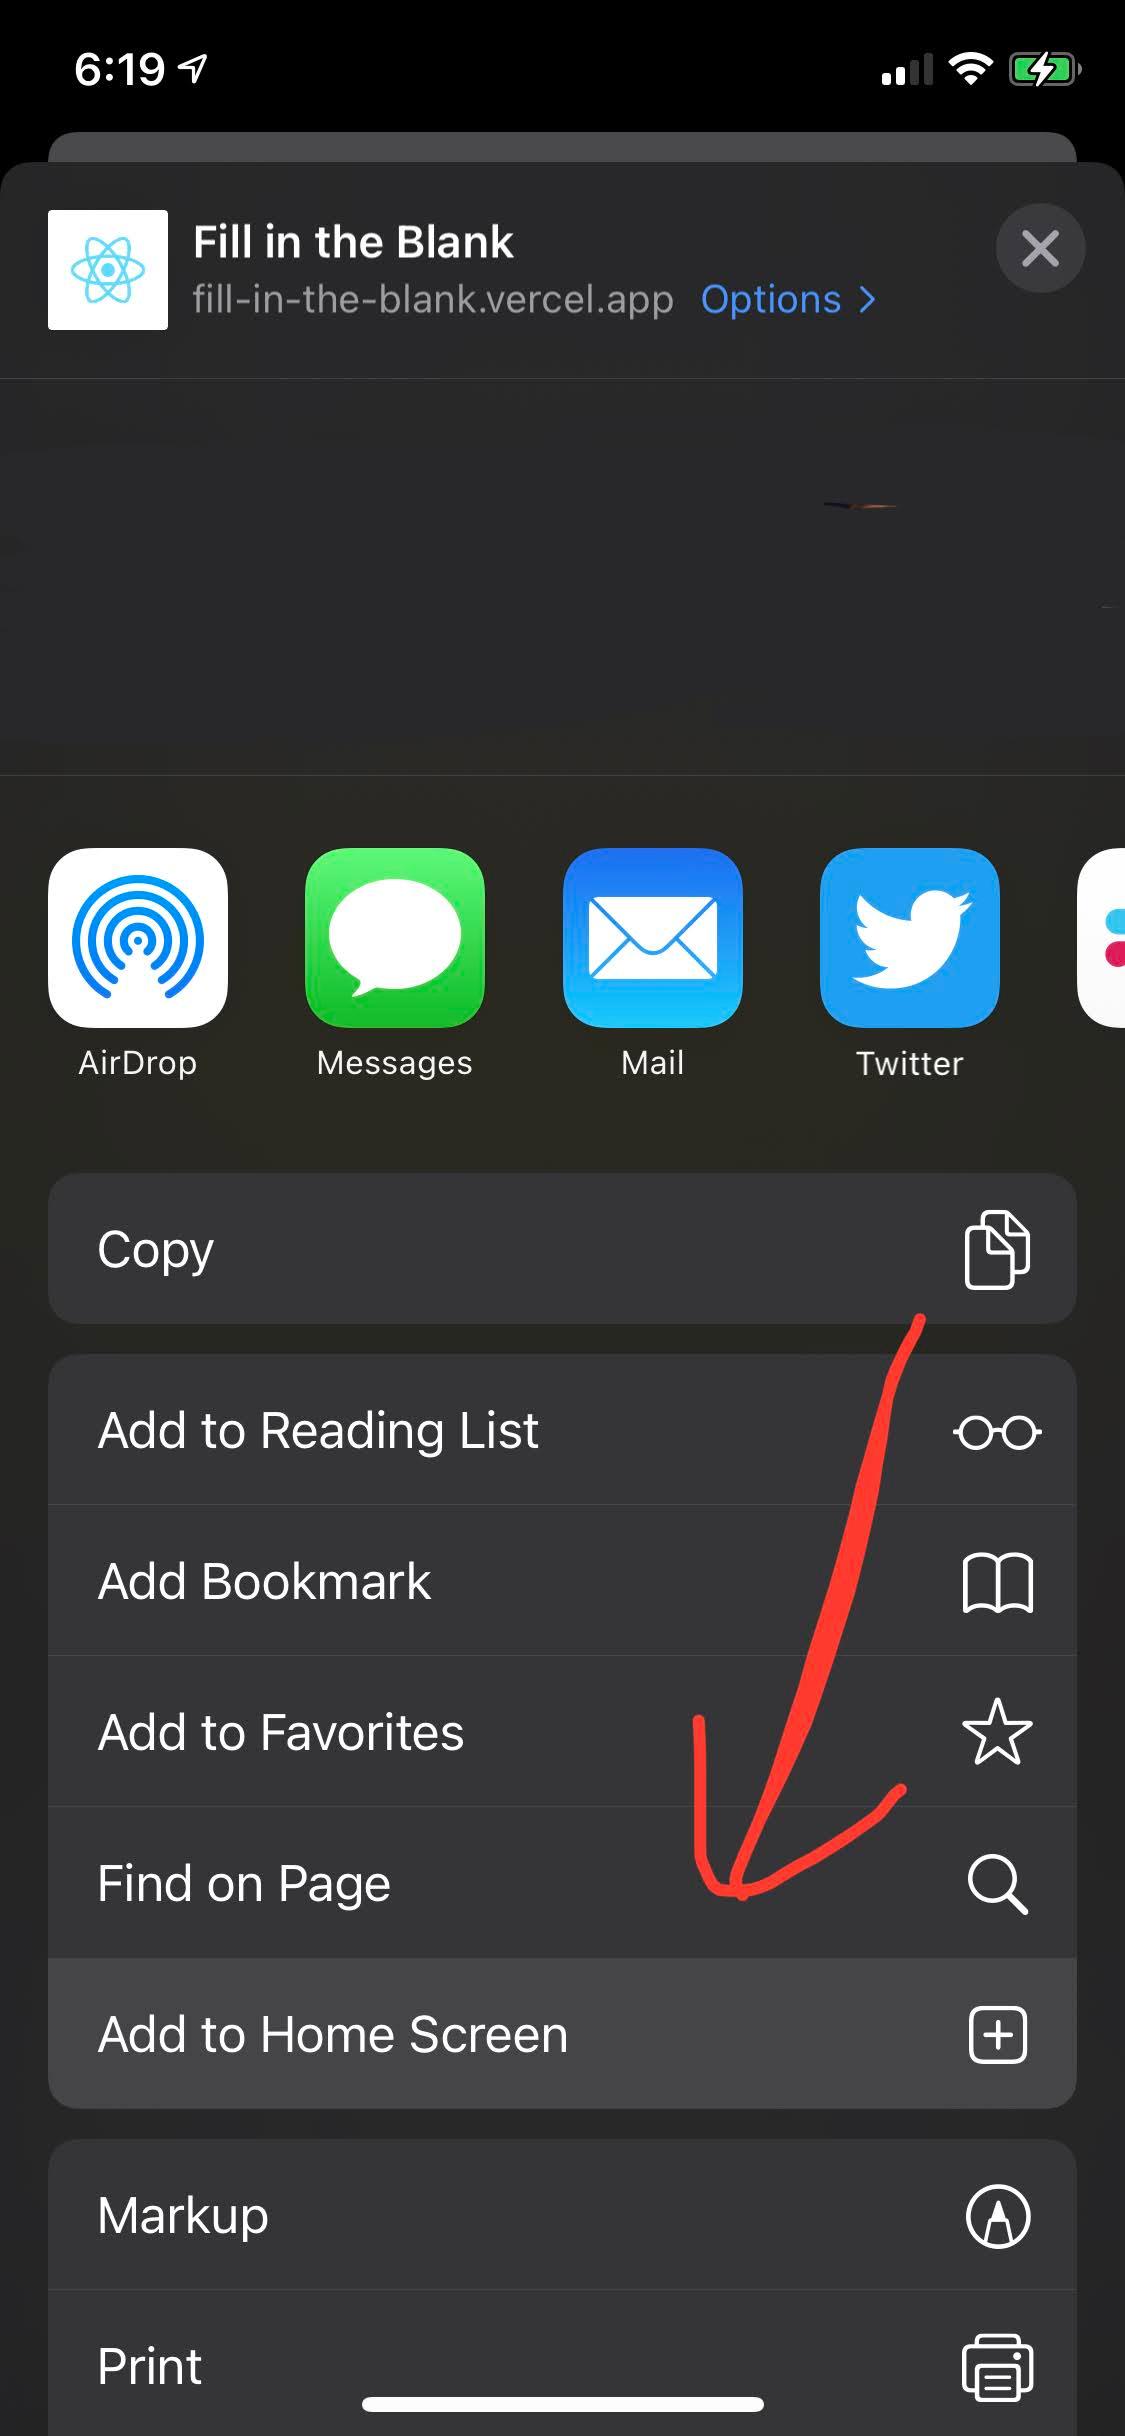
To test "add it to the home screen", go to the site on your phone.
On iPhone, click the share button, and then "Add to Home Screen".
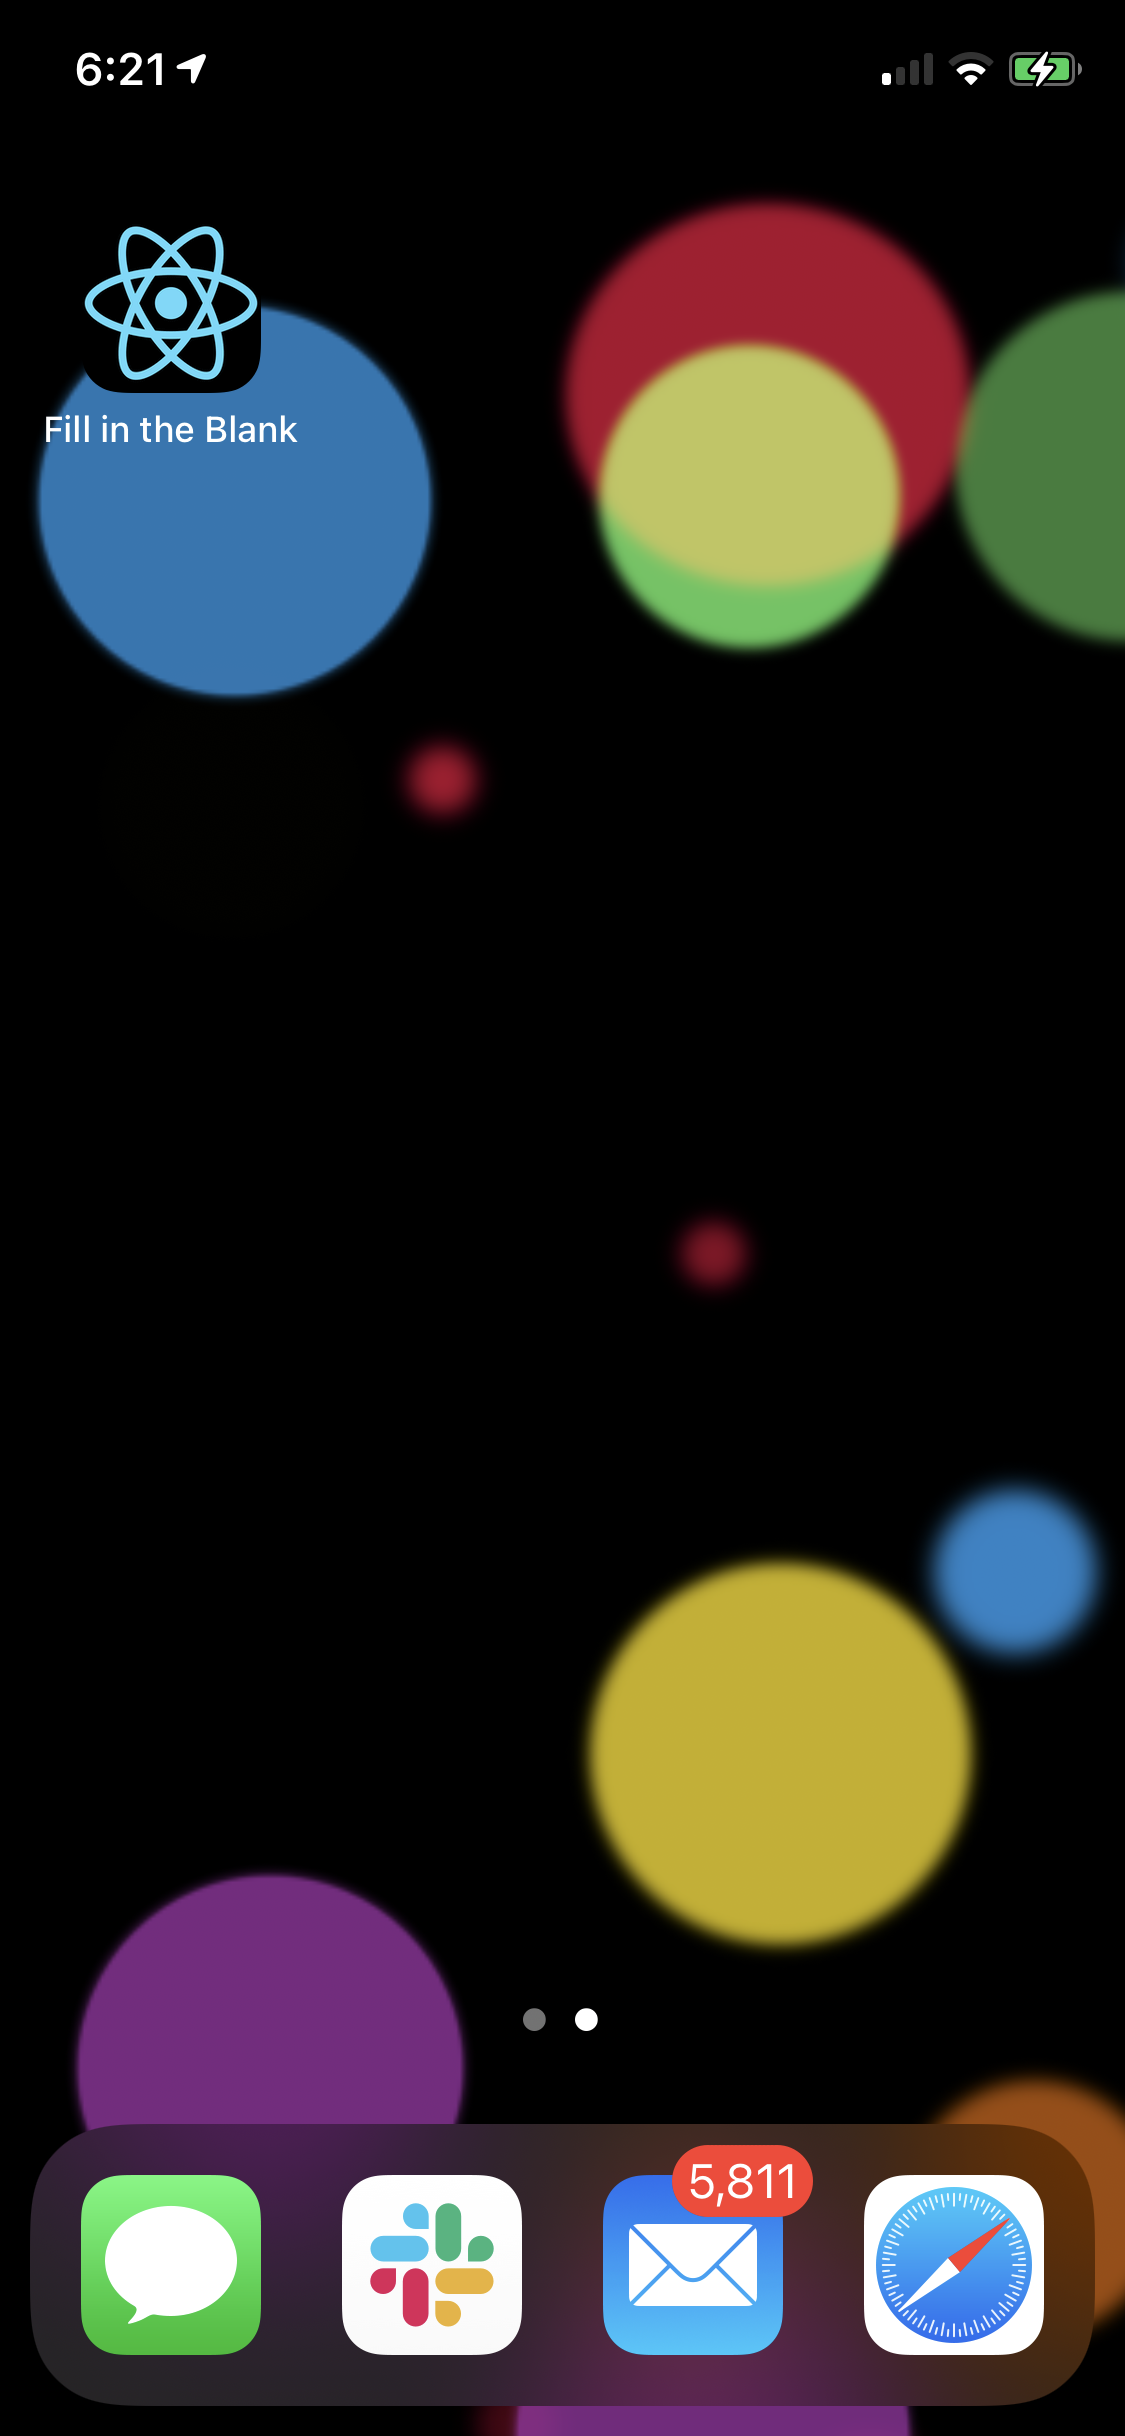
Notice that when you open this app from the home screen, it appears as a full screen app. Furthermore, this app also works offline after the initial load. Try it by going in airplane mode!

That's it! Congrats, you made your first PWA with React and Sanity.
Sanity – The Content Operating System that ends your CMS nightmares
Sanity replaces rigid content systems with a developer-first operating system. Define schemas in TypeScript, customize the editor with React, and deliver content anywhere with GROQ. Your team ships in minutes while you focus on building features, not maintaining infrastructure.
Sanity scales from weekend projects to enterprise needs and is used by companies like Puma, AT&T, Burger King, Tata, and Figma.