Published October 25, 2021
Add Alpine.js to your Node Application

In this tutorial, you will be introduced to Alpine.js and Sanity.io and how they can be used together with Alpine.js as the frontend and Sanity.io handling the backend and data.
Introduction to Alpine.js
Alpine.js is a modern, small and lightweight, CDN-first JavaScript framework for composing JavaScript behavior in your markup. It borrows its concepts from other frameworks like Vue, React, and jQuery. Think of it like Tailwind for JavaScript in the sense that it allows you to write most of your JavaScript inline in your HTML, making it easier to write declarative code.
Alpine.js is not designed to build SPAs, but rather to enhance your templates with a little bit of JavaScript. Alpine.js is designed to be used as a direct script include from a public CDN.
The main power of Alpine.js is its reactive nature. You use its directives to bind data and any changes made to it reverberate in the whole app regardless of the level of the emanation. Alpine.js is more like a UI interaction framework.
Alpine.js is also a DOM manipulation library. It makes it easy for us to interact with the DOM in a declarative way with lesser code.
Why choose Alpine.js
According to the creator, Caleb Porzio:
Alpine.js offers you the reactive and declarative nature of big frameworks like Vue or React at a much lower cost. You get to keep your DOM and sprinkle in behavior where it is needed.
Alpine.js works well when you need a small amount of JavaScript, e.g. a few drop-downs or tabs. This means you get a bunch of power at a crazy small size with no need to npm install.
So, here are some reasons why you should consider using Alpine.js:
- Size: In the introduction, I stated that Alpine.js is small and lightweight. It has the power of big frameworks yet has a small bundle size. Alpine.js comes in at 21.9kB minified and 7.1kB gzipped, compared to jQuery at 87.6kB minified and 30.4kB minified and gzipped. Only 23% the size!
- Installation and learning: Installing Alpine is pretty straightforward. You’ll just need to add a script tag linking the library. That’s it. Really. You don’t need to compile your JavaScript or structure your project in any specific way; this makes it the perfect candidate for integration with existing projects. You also have an npm package available if your project is already using npm.
Its learning curve is also very low. The concepts and syntax behind the framework are heavily inspired by Vue.js. If you’re coming from a Vue background, you’ll most likely feel at home working with Alpine.js.
Basic syntax
Alpine.js syntax is very much inspired by Vue. Like Vue, Alpine uses an x- prefix on all its directives. Unlike Vue, Alpine.js doesn’t use a virtual DOM, so we get to work with the actual DOM directly. Alpine.js currently has 15 directives and 6 magic properties that become building blocks for many user interface scenarios. These directives allow you to do most of the things you would do with a more robust framework like templating, view/model data binding, UI transitions, and simplified event handling, all in a tiny package and directly in your HTML.
Let's go over a few directives:
x-data
Example:
<div x-data="[JSON data object]"></div>
This directive declares a new component scope. It tells the framework to initialize a new component with the following data object. Think of it as the data property of a Vue component. Only children of an element can access the x-data value declared on the element. Sibling elements, adjacent elements cannot access it.
x-show
Example:
<div x-show="[expression]"></div>
This directive toggles the visibility of components. It works the manipulating the CSS display style property of the element. The directive takes an expression, and the expression must resolve to a boolean value(true/false). If true, the element is shown by setting its CSS display property to a value other than none. If false, the display property of the element is set to none.
x-bind
Example:
<div x-bind:[attribute]="[expression]" > ...<div>
This directive is used to set the value of an element's attribute. The expression is evaluated and the results of the evaluation become the value of the specified attribute.
x-text
Example:
<div x-text="[expression]" >...<div>
This directive is used to set the inner text node of an element. The directive uses the innerText DOM property on the element to achieve this.
x-if
Example:
<template x-if="[expression]"><div>...</div></template>
This directive conditionally renders elements based on the condition of their expression. If the condition is true, the element is visible. If the condition is false, the element is not visible. x-if does not use the display property for its conditional rendering, it removes or adds the elements to the DOM. Alpine.js says it is best to use the x-if directive in tags, this is because Alpine.js uses the real DOM, not a virtual DOM.
x-for
Example:
<template x-for="[data] in [data]"><div>...</div></template>
This directive is used to iterate over the items in an array and create new DOM nodes for each item. Just like x-if, x-for is used in the template tag.
x-on
Example:
<div x-on:[event]="[expression]"></div>
This directive attaches event listeners to the element it is set upon. When the event is emitted the JavaScript expression in the directive is run.
x-model
Example:
<div x-model="[data item]"></div>
This directive is used for two-way binding. Most especially used in the input elements. What is two-way binding? A bound variable in the HTML view can be changed from the script and also from the HTML view. From either side the change occurred, both the script side and HTML view bound-data are updated.
To learn more about Alpine.js directives and Alpine.js as a whole, check out the documentation. We will use it in building our components much later.
Setting up the sanity schema and studio
First of all, create a new project, you can either create a new project in your terminal by this command:
sanity initor from the official website https://sanity.io/get-started.
In this tutorial, we will be using the Sanity CLI. If you don’t have it installed already, you can set it up globally on your local machine.
npm install -g @sanity/cli
Proceed to create a new project, using:
sanity initTo create a new project, you need a Sanity.io account and you will be prompted to log in or create a new account, simply follow the instructions to set it up.
After successful authentication, you can then set a project name and use the default dataset configuration if you want to and confirm the project path.
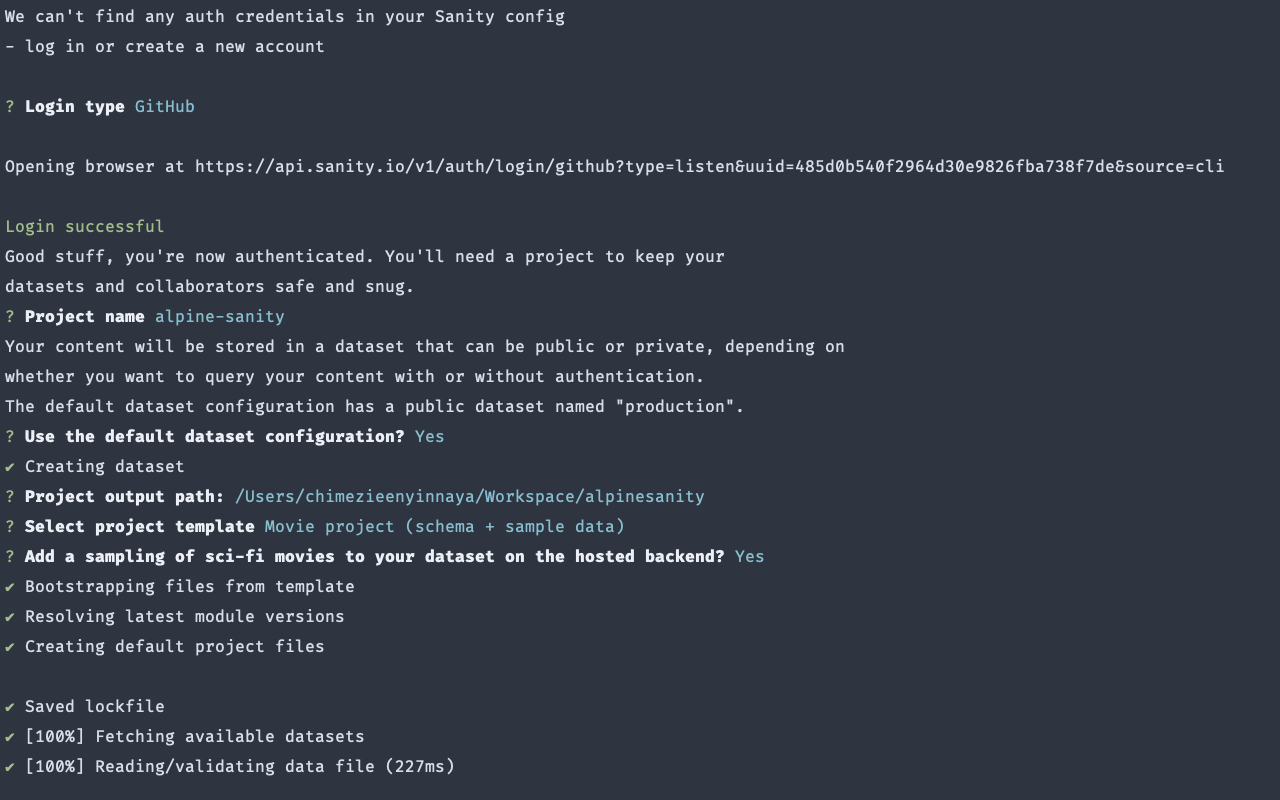
The next option is quite important, you decide to use a project template with schema and sample data or start a clean project with no predefined schema. Here, I will be choosing the movie project template so we can use the data that comes with it.
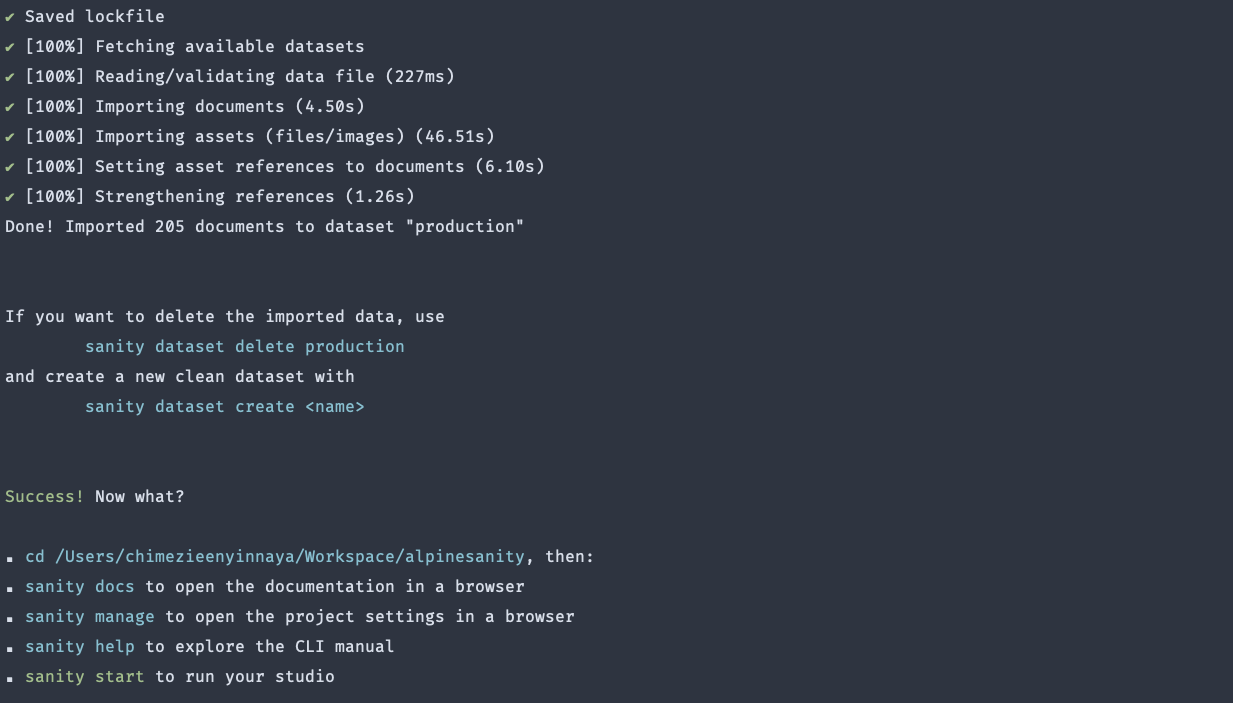
Once we get a success message, we can then proceed to work on our schema for the project. Open the folder in your code editor and run the sanity studio in your terminal:
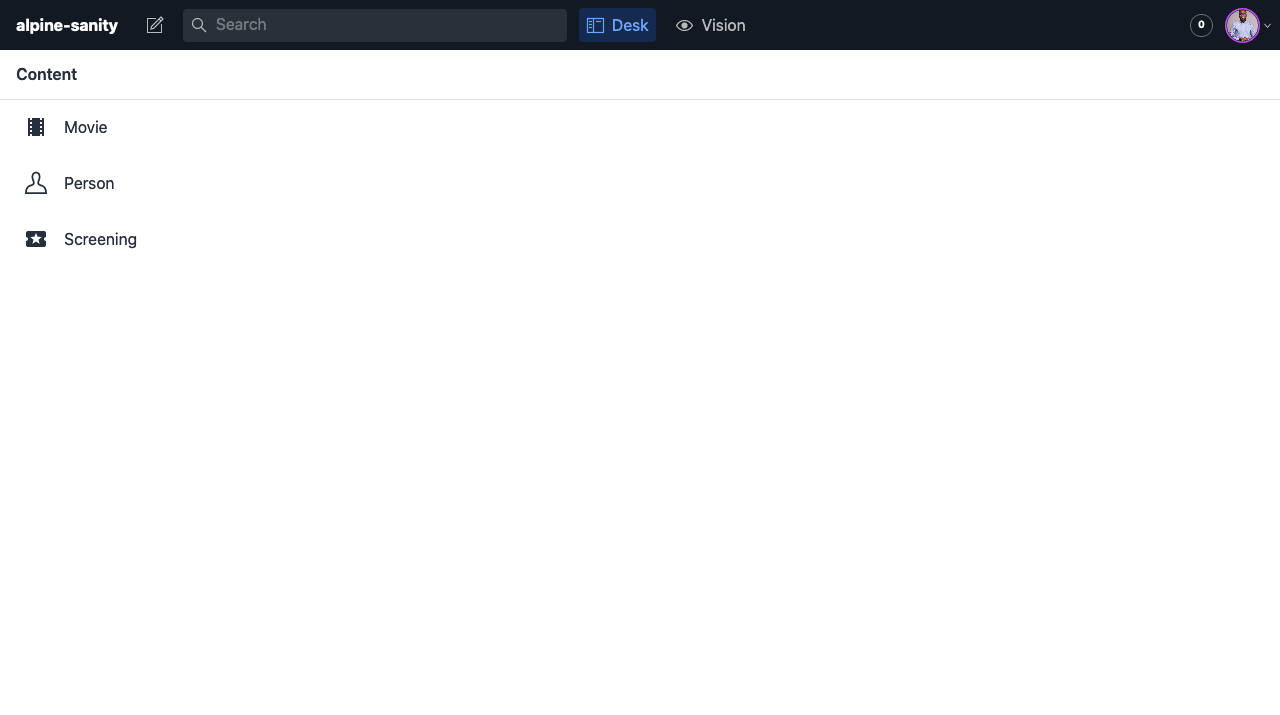
sanity startThis will open up the studio in our browser on http://localhost:3333. You will be required to log in again.
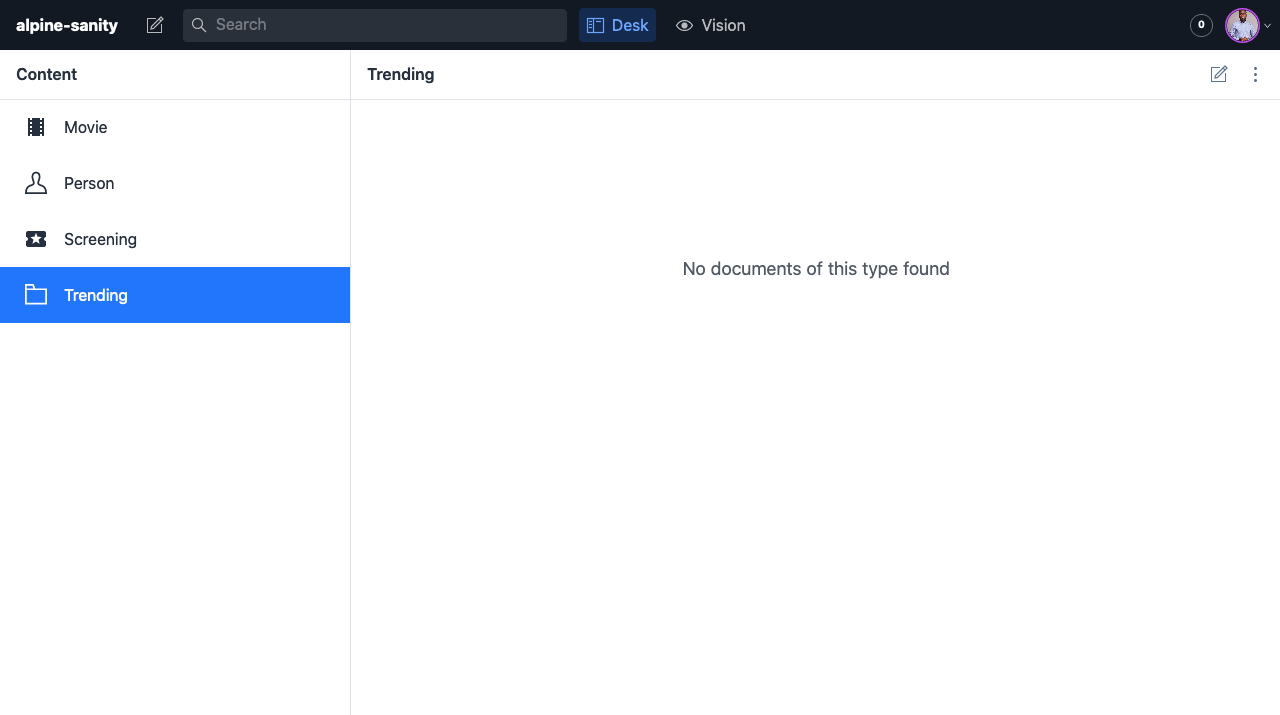
We now have data from the movie project we started with and it already has 3 schemas.
What if we started with a clean project without a schema? Let’s create a new schema so we can learn how it is done.
Open the schemas folder in our project folder and create a new file, let’s call it trending.js. This will hold trending movies.
In our new schema file, let’s export a default object and give it a name, title, and type:
// schemas/trending.js

export default {
  name: 'trending',
  title: 'Trending',
  type: 'document',
}
We can now add fields to our new schema, this schema is supposed to show trending videos so let's add a field array to reflect that
// schemas/trending.js

fields: [
  {
    name: 'title',
    title: 'Title',
    type: 'string',
  },
  {
    name: 'releaseDate',
    title: 'Release date',
    type: 'datetime',
  },
  {
    name: 'popularity',
    title: 'Popularity',
    type: 'number',
  },
  {
    name: 'poster',
    title: 'Poster Image',
    type: 'image',
    options: {
      hotspot: true,
    },
  },
]
After adding the fields, we need to let Sanity know that we have created a new schema. Head over to schema.js and import the new schema and add it to the schemaTypes array:
// schemas/schema.js

import trending from './trending'

export default createSchema({
  ...,
  types: schemaTypes.concat([
    ...,
    trending
  ]),
})
Now, if you go back to the studio running in the browser, the new schema is created.
That is how to create a schema in Sanity, though we won't actually be needing it for the rest of the tutorial.
So far, we have successfully set up Sanity schema and studio.
Adding Alpine.js
Remember I stated earlier that we will use Alpine.js for our frontend, let’s create components with Alpine.js that we need for this example. Create a frontend directory and inside it create an index.html file. To run the frontend, I'll be using VS Code's Live Server and the app will be ruining on http://127.0.0.1:5500/frontend. If you're not using VS Code, you might need to Google how to run a live server for your editor.
To add Alpine.js to a project, you can either make use of the CDN or through npm.
To use CDN, add the CDN link to the head section, It will initialize itself:
<script defer src="<https://unpkg.com/alpinejs@3.x.x/dist/cdn.min.js>"></script>
For production environments, To avoid unexpected behaviors and unexpected breakage from newer versions from Alpine.js, ensure you specify pin a specific version number in the CDN link. For example, to use version 3.4.2 (latest as at the time of this tutorial):
<script defer src="<https://unpkg.com/alpinejs@3.4.2/dist/cdn.min.js>"></script>
To use npm, run the command:
npm i alpinejsThen import it:
import 'alpinejs'For the project we'll be building in this tutorial, we'll be using the CDN by adding the script tag to your index.html page:
<!-- frontend/index.html -->

<!DOCTYPE html>
<html lang="en">
<head>
  <meta charset="UTF-8">
  <meta http-equiv="X-UA-Compatible" content="IE=edge">
  <meta name="viewport" content="width=device-width, initial-scale=1.0">
  <title>Alpine.js and Sanity.io</title>
  <script defer src="https://unpkg.com/alpinejs@3.4.2/dist/cdn.min.js"></script>
</head>
<body>

</body>
</html>
Exploring Alpine.js Components
First, let’s create a small toggle functionality to learn how Alpine.js works.
<!-- frontend/index.html -->

<!DOCTYPE html>
<html lang="en">
<head>
  <meta charset="UTF-8">
  <meta http-equiv="X-UA-Compatible" content="IE=edge">
  <meta name="viewport" content="width=device-width, initial-scale=1.0">
  <title>Alpine.js and Sanity.io</title>
  <script src="https://cdn.jsdelivr.net/gh/alpinejs/alpine@v2.8.2/
		dist/alpine.min.js" defer></script>
</head>
<body>
  <div>
    <h1>This is a toggle button</h1>

    <button>Toggle</button>

    <div>
      <h1>Tadah! I am Visible</h1>
    </div>
  </div>
</body>
</html>
From the code above, Alpine.js CDN was added to the head section and the body includes a div with a text and button, the second div contains the content we are going to toggle. Let's add some Alpine.js code to the code above.
<div x-data="{ isOpen: false }">
  <h1>This is a toggle button</h1>

  <button>Toggle</button>

  <div x-show="isOpen">
    <h1>Tadah! I am Visible</h1>
  </div>
</div>
So here, the x-data directive is used to give state to the entire component and displays the second div when the value of isOpen is true. The x-show simply shows the div when it's true. Let’s make the button togglable.
<div x-data="{ isOpen: false }">
  <h1>This is a toggle button</h1>

  <button x-on:click="isOpen = !isOpen">Toggle</button>

  <div x-show="isOpen">
	  <h1>Tadah! I am Visible</h1>
  </div>
</div>
And it works! Using the x-on, x-show, and x-data directives, we were able to create an interactive toggle.
Let’s try creating the other components before we work with our sanity data.
Performing interactions with Alpine.js
Let’s add a responsive navbar with more emphasis on applying interactions to its mobile view using Alpine.js. We will use Tailwind CSS for the styling. Tailwind CSS is a utility-first CSS framework packed with classes that can be composed to build any design, directly in your markup.
Like Alpine.js, it can also be added to a project using its CDN. Include it in the head section
<link href="<https://unpkg.com/tailwindcss@^2/dist/tailwind.min.css>" rel="stylesheet">
First, we start with a nav tag to contain all the code for the navigation bar.
<nav
	class="flex items-center justify-between flex-wrap p-6 fixed w-full z-10 top-0 bg-indigo-900"
	x-data="{ isOpen: false }"
	@keydown.escape="isOpen = false"
></nav>
Notice how x-data is used to set the default state of is open to false, this tells Alpine.js to keep the default state of the navbar closed. The @keydown.escape tells Alpine.js to set the navbar to close when there is a keydown press outside the navbar. Let’s add a button that will only be visible on mobile screens. Add the code snippet below inside <nav>:
<button
  @click="isOpen = !isOpen"
  type="button"
  class="block lg:hidden px-2 text-gray-500 hover:text-white focus:outline-none focus:text-white"
  :class="{ 'transition transform-180': isOpen }"
>
  <svg
    class="h-6 w-6 fill-current"
    xmlns="http://www.w3.org/2000/svg"
    viewBox="0 0 24 24"
  >
    <path
      x-show="isOpen"
      fill-rule="evenodd"
      clip-rule="evenodd"
      d="M18.278 16.864a1 1 0 0 1-1.414 1.414l-4.829-4.828-4.828 4.828a1 1 0 0 1-1.414-1.414l4.828-4.829-4.828-4.828a1 1 0 0 1 1.414-1.414l4.829 4.828 4.828-4.828a1 1 0 1 1 1.414 1.414l-4.828 4.829 4.828 4.828z"
    />
    <path
      x-show="!isOpen"
      fill-rule="evenodd"
      d="M4 5h16a1 1 0 0 1 0 2H4a1 1 0 1 1 0-2zm0 6h16a1 1 0 0 1 0 2H4a1 1 0 0 1 0-2zm0 6h16a1 1 0 0 1 0 2H4a1 1 0 0 1 0-2z"
    />
  </svg>
</button>
The button contains a hamburger toggle that opens and closes when the button is clicked. It also has a class that hides in large screens. Finally, let’s create the menu just after the button above:
<div
  class="w-full flex-grow lg:flex lg:items-center lg:w-auto"
  :class="{ 'block shadow-3xl': isOpen, 'hidden': !isOpen }"
  @click.away="isOpen = false"
	x-show="isOpen"
  x-transition
>
  <ul class="pt-6 lg:pt-0  lg:flex justify-end flex-1 items-center">
		<li class="mr-3">
		  <a
		    class="inline-block py-2 px-4 text-white"
		    href="#">Home</a>
		</li>
		<li class="mr-3">
		  <a
		    class="inline-block text-gray-300 hover:text-gray-200 py-2 px-4"
		    href="#">Movies</a>
		</li>
		<li class="mr-3">
		  <a
		    class="inline-block text-gray-300 hover:text-gray-200 py-2 px-4"
		    href="#">About</a>
		</li>
		<li class="mr-3">
		  <a
		    class="inline-block text-gray-300 hover:text-gray-200 py-2 px-4"
		    href="#">Contact</a>
		</li>
	</ul>
</div>
So we have been able to build a responsive navigation bar (you will need to resize your browser window to see the button) using Alpine.js and Tailwind CSS for styling.
Performing HTTP request
Let’s create the body component of our movie app.
To perform HTTP requests from sanity, we need to get an API from sanity studio. To do that, go back to http://localhost:3333. Just in case you have closed it, run the command again in your terminal.
sanity startClick on the Vision tab, the environment is divided into 3 sections, the query section for trying out search queries, and the result section displays results from the query search. The params sections are optional to use if you have specific parameters you want to add. Note that the query is based on the data you have in your dataset in Sanity. The default dataset is production, as we set it during the project creation but we can create another dataset.
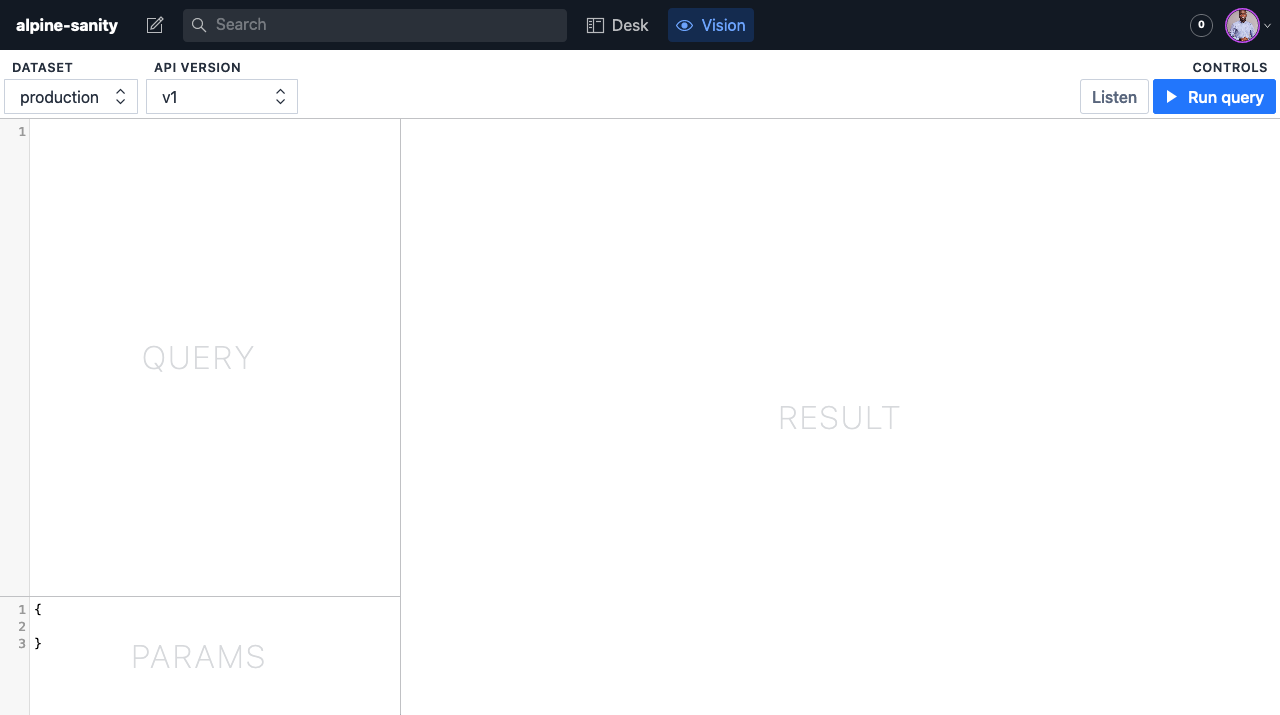
Sanity uses GROQ as its query language, you can read more about GROQ here. Let’s search for movies in the query section.
*[_type == 'movie']
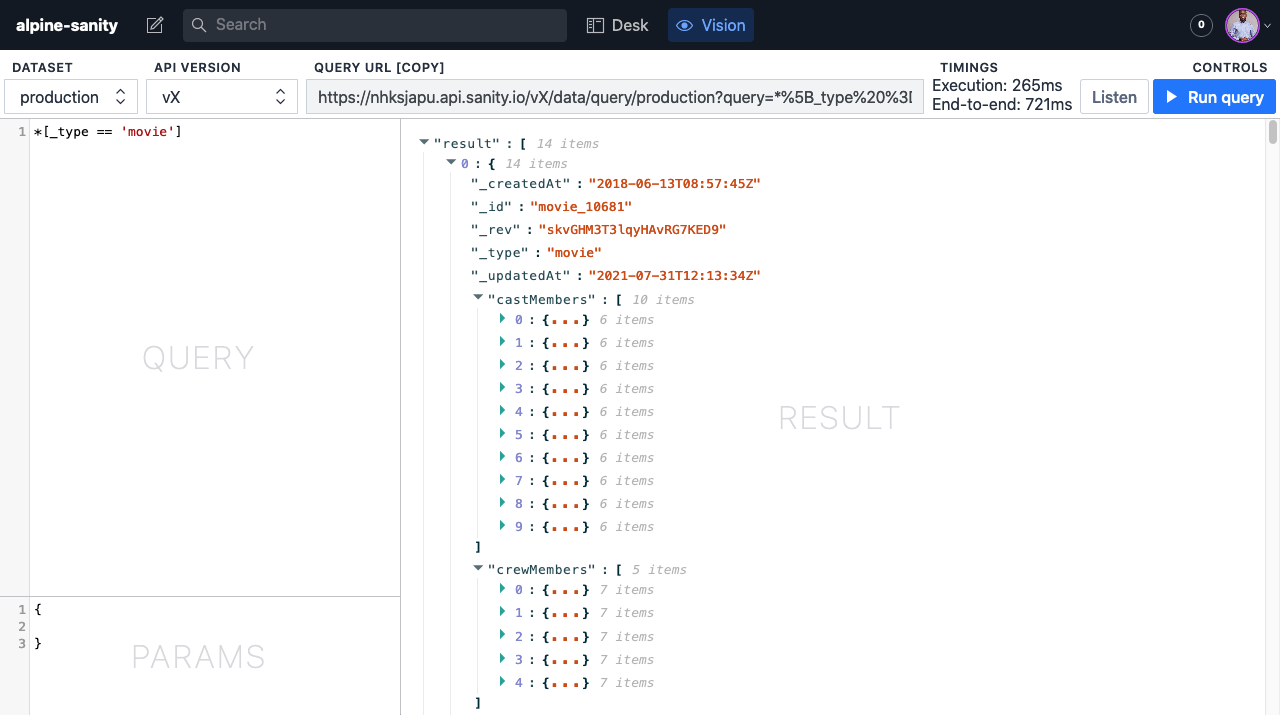
Upon running the query, a query URL was generated for us. This URL can be used to fetch data from sanity into our Alpine.js frontend.
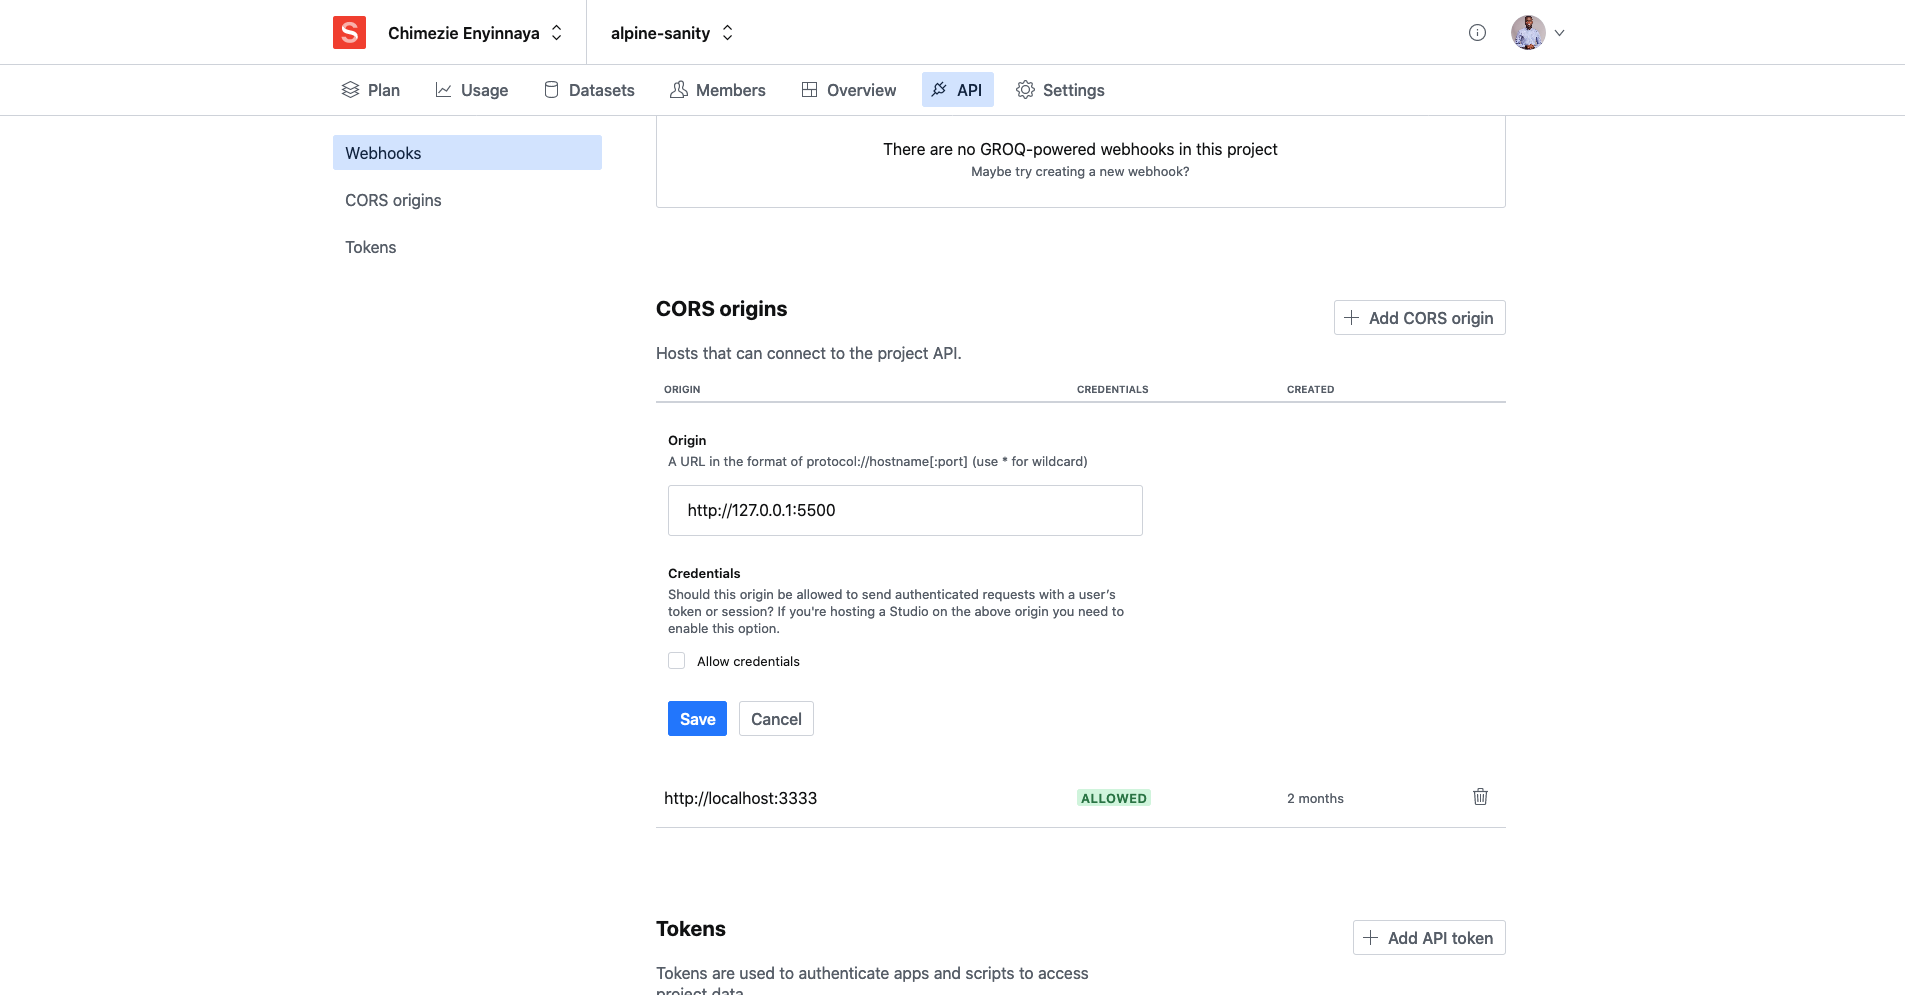
Enabling CORS
Before we can be able to fetch data from sanity into our Alpine.js frontend, we need to enable CORS. That is, we need to add the URL the frontend app is running on as part of the hosts that can connect to the project API. We can do that from the API tab on your project settings as shown below:
Back in the index.html file, create a main tag that will house the whole component, then create a container with an h2 tag with some text. This is optional. Afterward, create a div, this div will carry out the HTTP request using fetch, and we will wrap our fetch request in x-init so that it loads immediately after the page is loaded. Like a typical fetch request, the URL will be the query URL generated from the studio.
<main class="mt-32">
  <div class="container mx-auto px-8">
    <h2>Hello</h2>

    <div
      x-data="init()"
      x-init="fetch('https://nhksjapu.api.sanity.io/v2021-03-25/data/query/production?query=*%5B_type%20%3D%3D%20%22movie%22%5D%20%7B%20title%2C%20releaseDate%2C%20%22imageUrl%22%3A%20poster.asset-%3Eurl%20%7D')
		    .then(response => response.json())
		    .then(response => movies = response.result)"
	    class="p-5 flex flex-wrap justify-center"
    >
</main>
Here, we are running the following query:
*[_type == "movie"] {
	title,
	releaseDate,
	"imageUrl": poster.asset->url
}
Instead of returning everything from the query, we specify we only want the title, release date, and lastly the image URL. Since the image URL is nested inside poster then asset, so we simply assign it to a new variable (imageURL) for easy access.
The application state is set on the div tag by the x-data directive using a function called init(). This function will be created soon. The x-int fetches a list of movies from sanity and sets it as the value of the movie.
<div  class="grid grid-cols-1 gap-6 md:grid-cols-4">
  <template x-for="(movie, index) in movies" :key="index">
    <div>
      <img x-bind:src="movie.imageUrl" />
      <div class="mt-2">
        <h3 class="text-lg font-semibold" x-text="movie.title"></h3>
        <p class="text-sm text-gray-500" x-text="movie.releaseDate"></p>
      </div>
    </div>
  </template>
</div>
This piece of code displays the results of the query. We used the x-for directive to display the movies stored in the movies array. The template inside the x-for holds how each movie will be displayed. Also, we used x-text to set the innerText to display the movie title and year of each movie. We used x-bind:src to bind the src attribute of the image to the image URL of the movie, this makes the movie image to be rendered.
Let’s add a script tag just below the main tag, it will hold the function called by the x-data.
<script>
  function init() {
    return {
      movies: [],
    }
  }
</script>
The empty movie array stores all the data gotten from the query.
Let’s put everything together:
<!-- frontend/index.html -->

<!DOCTYPE html>
<html lang="en">
<head>
  <meta charset="UTF-8">
  <meta http-equiv="X-UA-Compatible" content="IE=edge">
  <meta name="viewport" content="width=device-width, initial-scale=1.0">
  <title>Alpine.js and Sanity.io</title>
  <link href="https://unpkg.com/tailwindcss@^2/dist/tailwind.min.css" rel="stylesheet">
  <script defer src="https://unpkg.com/alpinejs@3.4.2/dist/cdn.min.js"></script>
</head>
<body>
  <nav
		class="flex items-center justify-between flex-wrap p-6 fixed w-full z-10 top-0 bg-indigo-900"
	  x-data="{ isOpen: false }"
		@keydown.escape="isOpen = false"
	>

    <!--Logo -->
    <div class="flex items-center flex-shrink-0 text-white mr-6">
      <a class="text-white no-underline hover:text-white hover:no-underline" href="#">
        <span class="text-2xl pl-2"><i class="em em-grinning"></i> ecodata Movies</span>
      </a>
    </div>

    <!--Toggle button -->
    <button
			@click="isOpen = !isOpen"
			type="button"
      class="block lg:hidden px-2 text-gray-500 hover:text-white focus:outline-none focus:text-white"
      :class="{ 'transition transform-180': isOpen }"
		>
      <svg class="h-6 w-6 fill-current" xmlns="http://www.w3.org/2000/svg" viewBox="0 0 24 24">
        <path x-show="isOpen" fill-rule="evenodd" clip-rule="evenodd"
          d="M18.278 16.864a1 1 0 0 1-1.414 1.414l-4.829-4.828-4.828 4.828a1 1 0 0 1-1.414-1.414l4.828-4.829-4.828-4.828a1 1 0 0 1 1.414-1.414l4.829 4.828 4.828-4.828a1 1 0 1 1 1.414 1.414l-4.828 4.829 4.828 4.828z" />
        <path x-show="!isOpen" fill-rule="evenodd"
          d="M4 5h16a1 1 0 0 1 0 2H4a1 1 0 1 1 0-2zm0 6h16a1 1 0 0 1 0 2H4a1 1 0 0 1 0-2zm0 6h16a1 1 0 0 1 0 2H4a1 1 0 0 1 0-2z" />
      </svg>
    </button>

    <!-- Menu -->
    <div
			class="w-full flex-grow lg:flex lg:items-center lg:w-auto"
      :class="{ 'block shadow-3xl': isOpen, 'hidden': !isOpen }"
			@click.away="isOpen = false"
			x-show="isOpen"
			x-transition
		>
      <ul class="pt-6 lg:pt-0  lg:flex justify-end flex-1 items-center">
        <li class="mr-3">
          <a class="inline-block py-2 px-4 text-white" href="#">Home</a>
        </li>
        <li class="mr-3">
          <a class="inline-block text-gray-300 hover:text-gray-200 py-2 px-4" href="#">Movies</a>
        </li>
        <li class="mr-3">
          <a class="inline-block text-gray-300 hover:text-gray-200 py-2 px-4" href="#">About</a>
        </li>
        <li class="mr-3">
          <a class="inline-block text-gray-300 hover:text-gray-200 py-2 px-4" href="#">Contact</a>
        </li>
      </ul>
    </div>
  </nav>

  <main class="mt-32">
    <div class="container mx-auto px-8">
      <div
        x-data="init()"
        x-init="fetch('https://nhksjapu.api.sanity.io/v2021-03-25/data/query/production?query=*%5B_type%20%3D%3D%20%22movie%22%5D%20%7B%20title%2C%20releaseDate%2C%20%22imageUrl%22%3A%20poster.asset-%3Eurl%20%7D')
          .then(response => response.json())
          .then(response => movies = response.result)" class="p-5 flex flex-wrap justify-center">

          <div  class="grid grid-cols-1 gap-6 md:grid-cols-4">
            <template x-for="(movie, index) in movies" :key="index">
              <div>
                <img x-bind:src="movie.imageUrl" />
                <div class="mt-2">
                  <h3 class="text-lg font-semibold" x-text="movie.title"></h3>
                  <p class="text-sm text-gray-500" x-text="movie.releaseDate"></p>
                </div>
            </div>
          </template>
        </div>
      </div>
    </div>
  </main>

  <div x-data="{ isOpen: false }">
    <h1>This is a toggle button</h1>

    <button x-on:click="isOpen = !isOpen">Toggle</button>

    <div x-show="isOpen">
      <h1>Tadah! I am Visible</h1>
    </div>
  </div>

  <script>
    function init() {
      return {
        movies: [],
      }
    }
  </script>
</body>
</html>
And it’s a wrap, we have been able to use Alpine.js as the frontend of our movie app with Sanity as our back end. You can explore and add more components to make it look even better.
You can check the entire project on Github.
Conclusion
In this tutorial, we covered an introduction to Alpine.js and Sanity.io. We touched on schemas, the Sanity Studio, built a toggle component, a responsive navbar with Alpine.js, and a simple movie gallery component with the framework using Sanity as the backend. Although Alpine.js might not totally replace other frameworks, it can be used in combination with React or Vue to quickly prototype components without writing much JavaScript and Sanity is a wonderful tool to handle data without much hassle.
References
Sanity – The Content Operating System that ends your CMS nightmares
Sanity replaces rigid content systems with a developer-first operating system. Define schemas in TypeScript, customize the editor with React, and deliver content anywhere with GROQ. Your team ships in minutes while you focus on building features, not maintaining infrastructure.
Sanity scales from weekend projects to enterprise needs and is used by companies like Puma, AT&T, Burger King, Tata, and Figma.