How to add custom YouTube blocks to Portable Text
How to add a YouTube embed in the Studio, and render it on front ends
This developer guide was contributed by Knut Melvær (Head of Developer Community and Education).
This guide will take you through adding a custom YouTube block to the Portable Text Editor and show you how to render it in some common front end frameworks like React and Vue.
There are times when you want to embed a video in your block content. Usually, you would paste the HTML embed code into the editor and move along. With Portable Text, however, you want to ensure that your content is structured and that you don't embed too many assumptions about the presentation. Maybe you want to use this video in a native app or a specialized component in your front end(s).
In this tutorial, you will learn how to add a custom YouTube block into your schema and the Portable Text Editor, add a custom preview component, and serialize it in the front end.
Add a YouTube schema type
The main thing you are interested in for a YouTube embed is its ID. The ID is included in the video URL, so if you have this URL: https://www.youtube.com/watch?v=asENbq3s1m8&feature=youtu.be, the ID is asENbq3s1m8.
Now, you could ask our content creators to find this ID and only put that into Sanity, but that seems a bit too much to ask since it isn't always easy since YouTube URLs can contain a lot of parameters. You can assume you can work with a URL and find the ID programmatically wherever you want to show the video.
You will start by adding a simple schema type. An object type called youtube, with a field called url. You can extend this later if you want to specify a time stamp, a title, or other things.
import {defineType, defineField} from 'sanity'
import {PlayIcon} from '@sanity/icons'
import {YouTubePreview} from './YouTubePreview'

export const youtube = defineType({
  name: 'youtube',
  type: 'object',
  title: 'YouTube Embed',
  icon: PlayIcon,
  fields: [
    defineField({
      name: 'url',
      type: 'url',
      title: 'YouTube video URL',
    }),
  ]
})
The next step is to import the file into the schema/index.ts to make it available as a type: 'youtube'. Your setup might be slightly different, so the point here is that it should end up in the array of schema types that you specify in sanity.config.ts.
// ...all other imports
import {youTubeType} from './youTubeType'

export const schemaTypes = [
  // ...all other schema types
  youTubeType
]
Now, you can add this field as a type in any array field which also includes a block type to render the Portable Text editor, like the example below.
import {defineType, defineArrayMember} from 'sanity'
export const blockContentType = defineType({
name: 'blockContent',
type: 'array',
title: 'Body',
of: [
defineArrayMember({
type: 'block'
}),
defineArrayMember({
type: 'youTube'
})
]
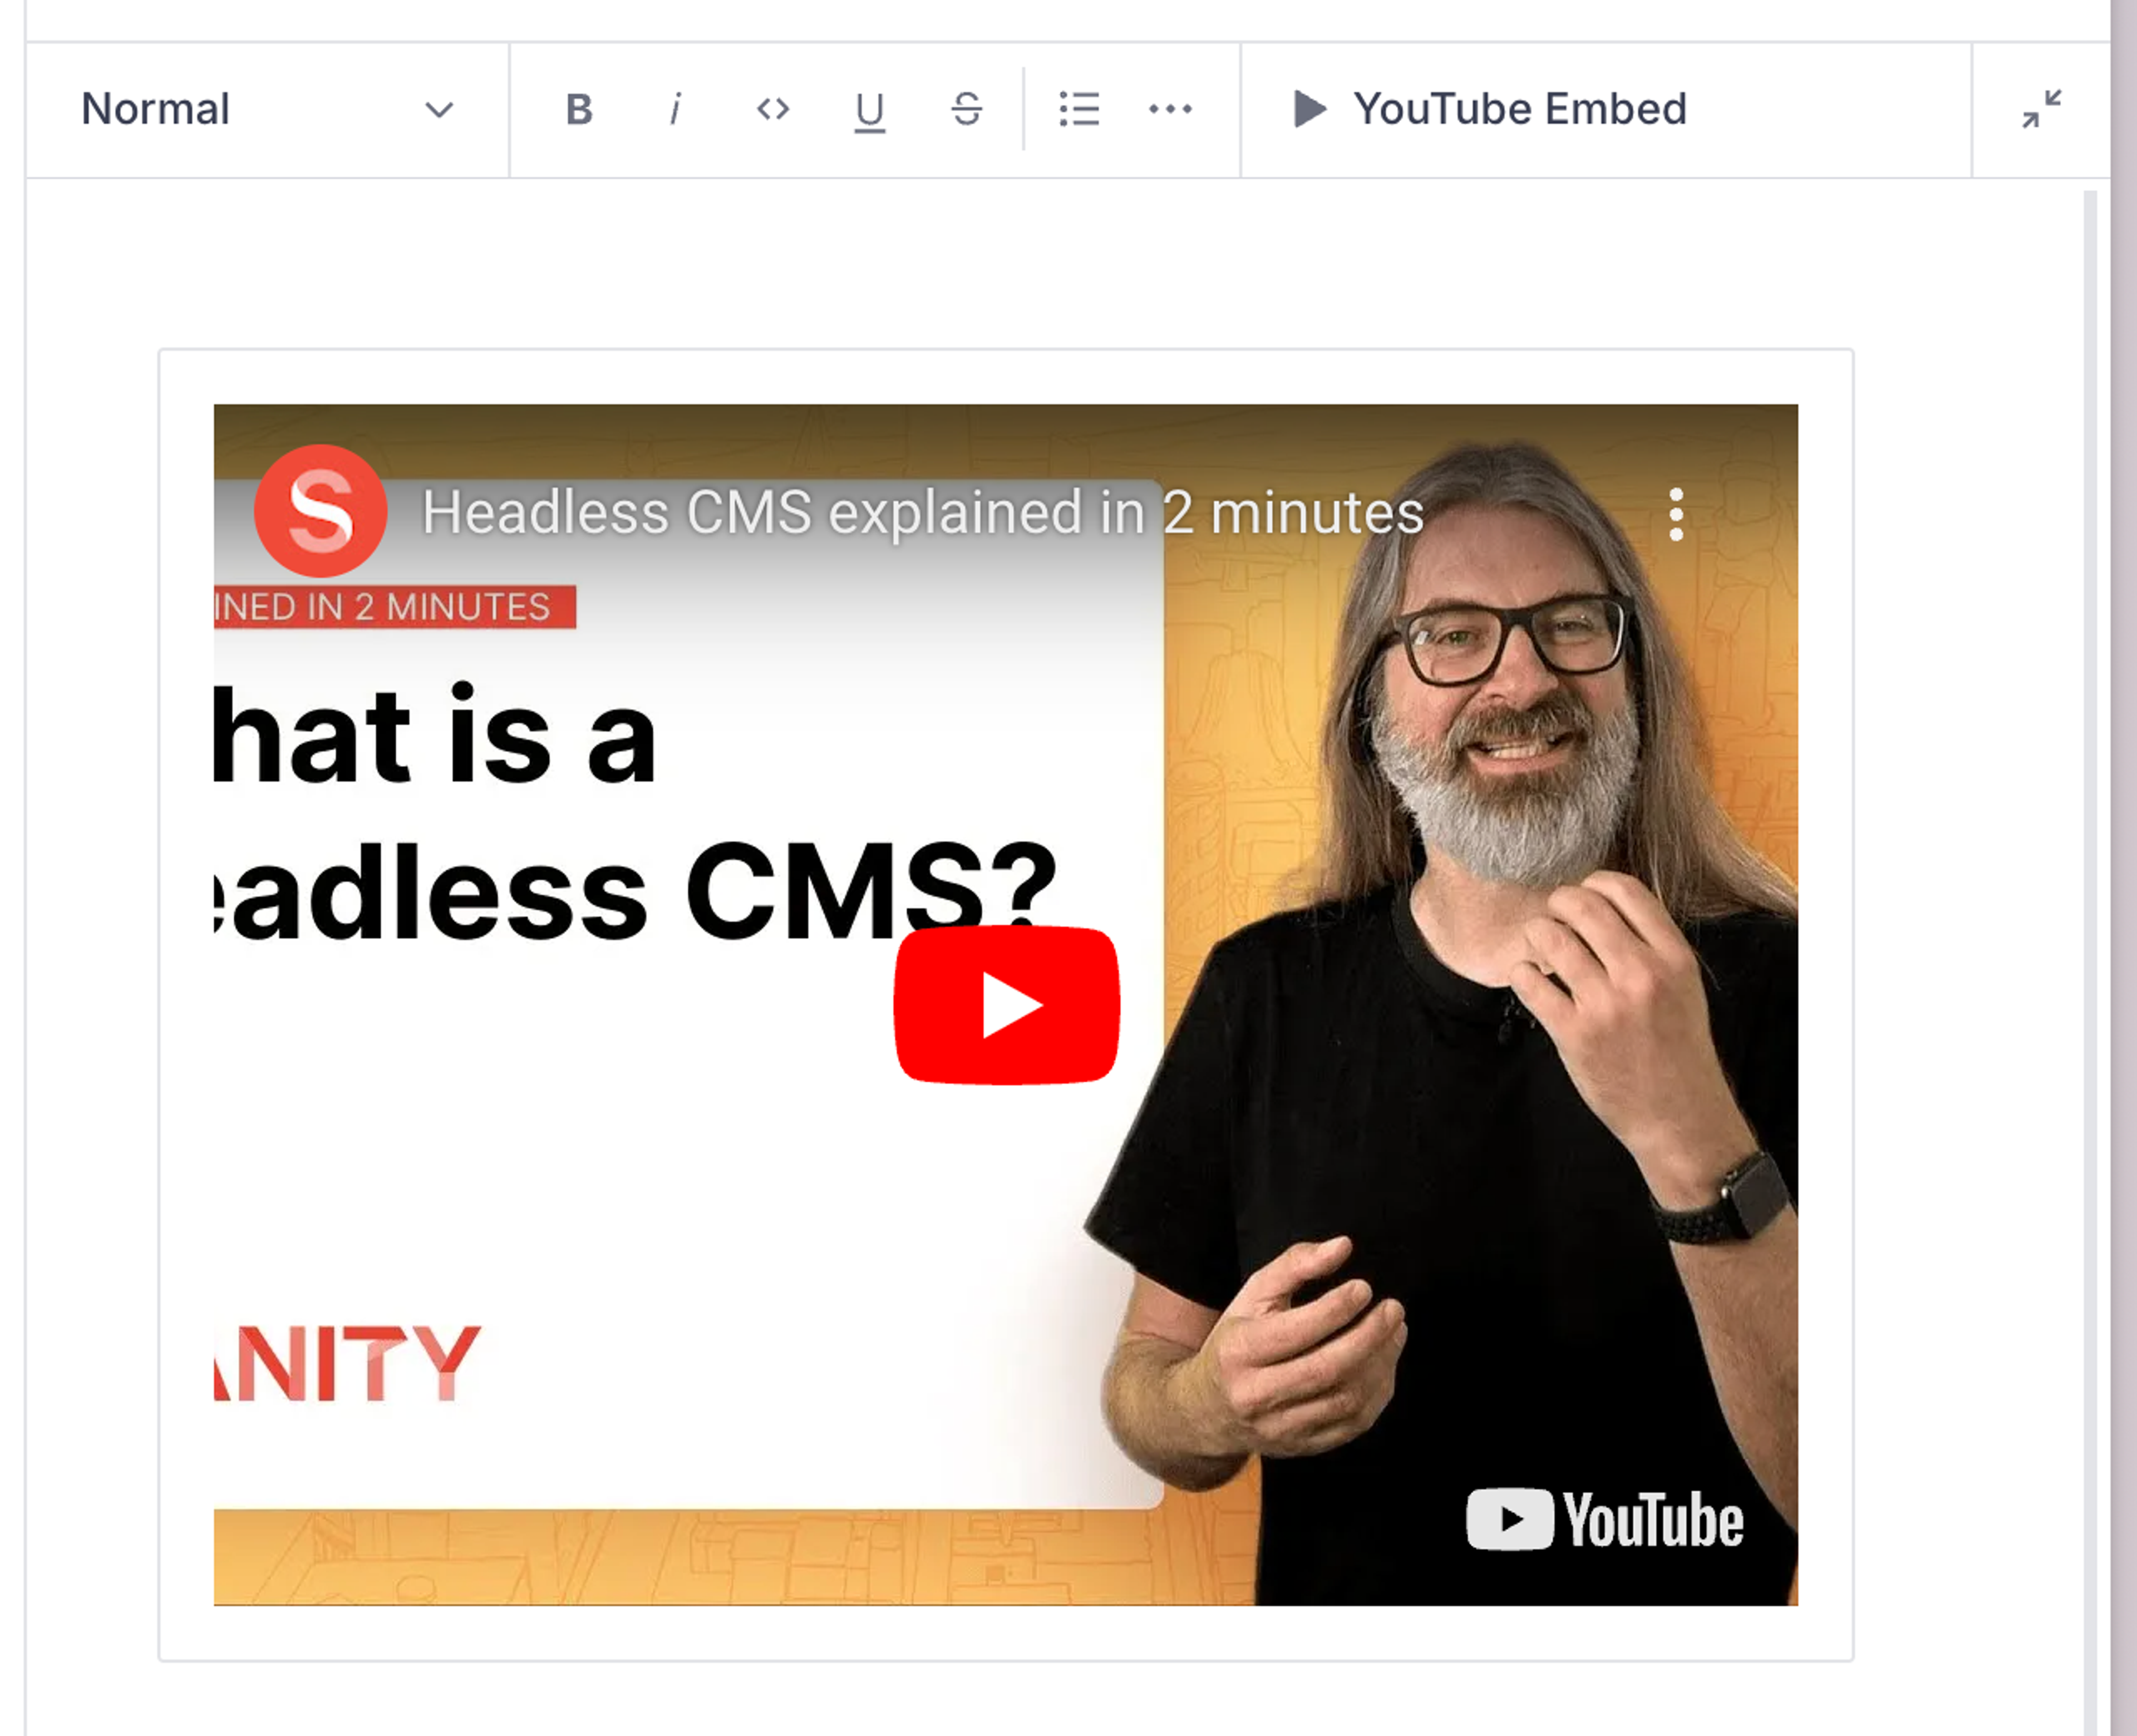
})The new YouTube field should appear in the Portable Text Editor’s toolbar, where you can paste in a YouTube URL. However, getting an actual preview of the video you want to embed would be nice. So, let’s add that.
Add a block preview
You may be familiar with how to configure previews with Sanity. First, you select the fields you want to get content from. You can assign them to variables like title, subtitle, and media and let the Studio figure out the rest. Or you can return a prepare function if you want more control over what goes into the slots.
However, you can also pass a React component and gain full control over what’s rendered. It still gets the variables that you define in the select object as props. You will use a pre-built component called React Player for the YouTube preview. It can take a YouTube URL (and other video streaming services) and automatically render the embedded video player. We will also install Sanity UI and use its components to make sure the UI is nice.
Start by installing the dependencies in your Sanity project folder:
npm install react-player @sanity/ui
pnpm add react-player @sanity/ui
yarn add react-player @sanity/ui
bun add react-player @sanity/ui
Then, make a new file called YouTubePreview.tsx:
import type {PreviewProps} from 'sanity'
import {Flex, Text} from '@sanity/ui'
import ReactPlayer from 'react-player'

export function YouTubePreview(props: PreviewProps) {
  const {title: url} = props

  return (
    <Flex padding={3} align="center" justify="center">
      {typeof url === 'string'
        ? <ReactPlayer src={url} />
        : <Text>Add a YouTube URL</Text>}
    </Flex>
  )
}
Go back to the youTubeType schema file with your YouTube schema type, and add the preview configuration, as well as the custom component:
import {defineType, defineField} from 'sanity'
import {PlayIcon} from '@sanity/icons'
import {YouTubePreview} from './YouTubePreview'

export const youTubeType = defineType({
  name: 'youTube',
  type: 'object',
  title: 'YouTube Embed',
  icon: PlayIcon,
  fields: [
    defineField({
      name: 'url',
      type: 'url',
      title: 'YouTube video URL',
    }),
  ],
  preview: {
    select: {title: 'url'},
  },
  components: {
    preview: YouTubePreview,
  },
})
You should now see a preview embed of the YouTube video blocks when they are previewed in the Portable Text editor.
This also mirrors what you would do in a React front end. And speaking of front ends, let's take a closer look at how this data should be implemented.
Render the YouTube embed in a front end
When you insert a YouTube embed in the Portable Text Editor, it will be added as a custom block in the Portable Text array. If you are unfamiliar with Portable Text, you can learn more in this introduction. You can also tag along with this tutorial and follow the code examples if you just want to get a feel for it.
React
To render custom blocks, as the YouTube embed is, you have to add a serializer to the Portable Text package for React (currently called @portabletext/react). If you don't have this in your project from before, you'll have to install it by running npm install @portabletext/react in your command line.
Next up is installing a component to show the YouTube video. In this case, you can install the same React Player dependency we used for the preview:
npm install react-playerpnpm add react-playeryarn add react-playerbun add react-playerAnd where you want to be able to output this YouTube embed, do the following:
import {PortableText} from '@portabletext/react'
import ReactPlayer from 'react-player'

const components = {
  types: {
    youTube: ({value}) => {
      const {url} = value
      return <ReactPlayer src={url} />
    }
  }
}

export default function Body({blocks}) {
  return (
    <PortableText value={blocks} components={components} />
  )
}
This is a minimal example, so you might need to make some adjustments to make it render nicely within your design system. You should probably also extract it into its own component instead of having it inline as here.
Vue
To render custom blocks, as the YouTube embed is, you have to add a serializer to the Portable Text package for Vue. If you don't have this in your project from before, you'll have to install it first. We also need a performant YouTube embed component like vue-lite-youtube-embed:
npm install @portabletext/vue vue-lite-youtube-embed
pnpm add @portabletext/vue vue-lite-youtube-embed
yarn add @portabletext/vue vue-lite-youtube-embed
bun add @portabletext/vue vue-lite-youtube-embed
Then create a new YouTube.vue file for our component. This component uses vue-lite-youtube-embed which provides a fast, privacy-friendly YouTube embed, and extracts the video ID from the URL:
<template>
  <youtube :video-id="videoId"></youtube>
</template>
<script>
import { getIdFromUrl } from 'vue-youtube'
export default {
  data() {
    return {
      videoId: getIdFromUrl(this.url)
    };
  },
  props: {
    url: {
      type: String,
      default: () => ""
    }
  }
};
</script>
In our component for Portable Text, you can now import YouTube.vue and add it to our components object, like this:
<script setup>
import {PortableText} from '@portabletext/vue'
import YouTube from './YouTube.vue'
defineProps({
  value: {
    type: Array,
    default: () => []
  }
})
const components = {
  types: {
    youTube: YouTube
  }
}
</script>
<template>
  <PortableText :value="value" :components="components" />
</template>
That's it! Now, the data under value in the custom YouTube block in our Portable Text array will be passed on as props to the YouTube.vue component.
Not using React or Vue? No problem!
Head over to Portable Text on GitHub for libraries for other popular frameworks like Svelte, Astro, and so on. They all work on the same principles as above while following the conventions of the framework.