Published April 20, 2021
Build an e-commerce site with the Stripe API
By Joe Holmes

In this tutorial, we'll make a no-frills "merch store" for a personal blog using the Stripe API, Next.js, and Sanity. We'll leverage Stripe's fantastic checkout platform to redirect our customers to Stripe's servers for the checkout process, using Next.js's serverless API and Sanity's flexible content models for a smooth, enjoyable development experience.
As a new developer, building your first e-commerce site can be intimidating. There's a lot to worry about when dealing with other people's money: security, authentication, validation... if you're still beginning your coding journey, it's enough to make your head spin. But fear not! Modern development tools—especially the wondrous Stripe API—make accepting online payments simpler and safer than ever before.
Stripe describes itself as "the payments infrastructure of the internet," and is generally recognized as the gold standard of commerce platforms online. Next.js is a fast, popular framework for ReactJS. Sanity, our cutting-edge content platform, is designed to integrate seamlessly with tools like these.
By outsourcing the most sensitive and difficult aspects of ecommerce to Stripe, we'll only have to create our frontend code and a very small API. As a result, this approach is ideal for a beginner looking to code their first ecommerce store.
Requirements
- NodeJS installed
- Sanity CLI installed
- Beginner's familiarity with ReactJS
- Beginner's familiarity with API routes and POST requests
Get your Stripe API keys
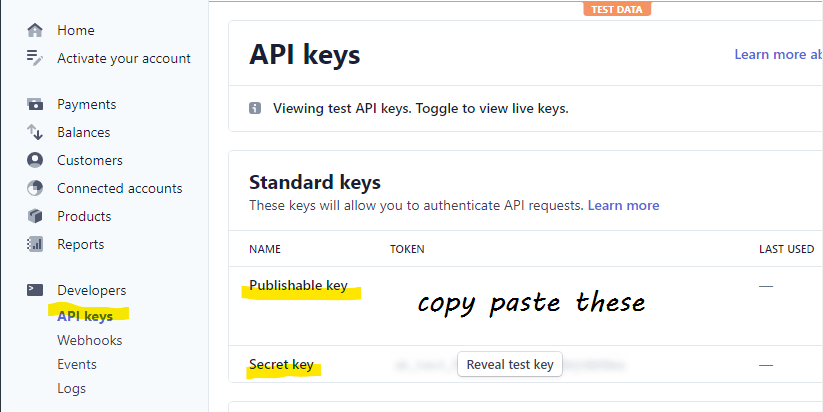
Before we dive into the code, let's get our Stripe keys. Head over to stripe.com and register. Under "API keys" in the "Developers" tab you should see your publishable key and secret key in test mode.
Clone our starter repo
We'll begin with an absolutely bare-bones starter for a Next.js-Sanity blog. From the command line run:
git clone https://github.com/bathrobe/sanity-next-stripe-starterBefore we forget, let's install our Node dependencies with cd sanity-next-stripe-starter/web and npm install.
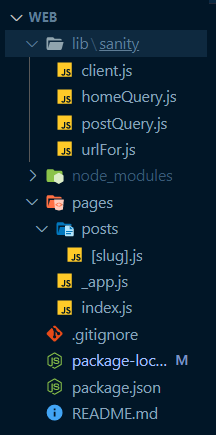
When that's done, open the folder in your IDE. I'd recommend looking around the files if you're new to Next.js or Sanity and want to wrap your mind around how they interact.
In the root of the web folder, create a .env.local file and add your Stripe keys.
// web/.env.local

NEXT_PUBLIC_STRIPE_PUBLISHABLE_KEY=pk_test_your_public_key
STRIPE_SECRET_KEY=sk_test_your_secret_key
Integrate Stripe with Next.js
Now that we've got our keys, let's begin our Stripe integration. In our web folder, install the store's dependencies:
npm i stripe @stripe/stripe-js swr use-shopping-cart@2 --save
We'll be using Vercel's SWR library for fetching, as well as the excellent Use-Shopping-Cart React integration.
Make a new folder named /lib/stripe and create getStripe.js.
// web/lib/stripe/getStripe.js
import { loadStripe } from "@stripe/stripe-js";
let stripePromise;
const getStripe = () => {
if (!stripePromise) {
stripePromise = loadStripe(process.env.NEXT_PUBLIC_STRIPE_PUBLISHABLE_KEY);
}
return stripePromise;
};
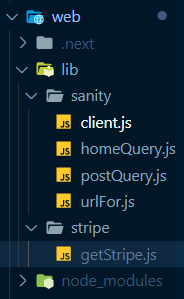
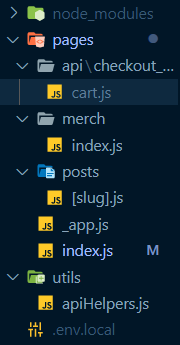
export default getStripe;Your lib folder should now look like this:
Making the cart component for the merch page
Make folder components in web and first add Cart.js:
// web/components/Cart.js

import { CartProvider } from "use-shopping-cart";
import getStripe from "../lib/stripe/getStripe";

export default function Cart({ children }) {
  return (
    <CartProvider mode="checkout-session" stripe={getStripe()} currency={"usd"}>
      {children}
    </CartProvider>
  );
}
For security reasons, CartProvider should wrap every page that involves your store. You can also wrap CartProvider around the Component in _app.js. Note that we're hardcoding U.S. dollars as our currency to keep it simple.
Making the product display component
Then make components/Products.js:
// web/components/Products.js

import { useShoppingCart, formatCurrencyString } from "use-shopping-cart";
import urlFor from "../lib/sanity/urlFor";
const Products = ({ products }) => {
  const { addItem, removeItem } = useShoppingCart();
  return (
    <section>
      {products.map((product) => (
        <div key={product.id}>
          <img src={urlFor(product.image).width(200)} alt={product.name} />
          <h2>{product.name}</h2>
          <p>
            {formatCurrencyString({
              value: product.price,
              currency: "usd",
            })}
          </p>
          <button onClick={() => addItem(product)}>Add to cart</button>
          <button onClick={() => removeItem(product.id)}>Remove</button>
        </div>
      ))}
    </section>
  );
};

export default Products;
Initialize your Sanity Studio
Next, let's create our Sanity project. In this tutorial, we're going to build a "monorepo" where our Sanity Studio and Next.js frontend will exist side-by-side. They'll be in the studio and web folders, respectively.
//our folder structure will look like this:
sanity-next-stripe-starter
|- web //contains all our Next.js code
|- studio //contains all our Sanity code
From your command line, make sure you're in sanity-next-stripe-starter (not in /web) and run sanity init to boot up a new Sanity project. Sanity will ask you a list of questions to initialize your project. When asked for the project output path, make it your-file-path/sanity-next-stripe-starter/studio. That way, your frontend and Sanity studio will live side by side in the web and studio folders, respectively. When asked if you'd like a starting schema, choose the blog schema.
Check out your new blog with cd studio and sanity start. If you head over to http://localhost:3333 you'll see your new studio in all its splendor.
We'll need some sample data to work with, so add a few blog posts before we go further. (I've included Sanity's lovely image helper in the repo, so upload some pictures too! We'll use images in our merch store as well).
Add your Sanity project ID to the .env.local file.
// web/.env.local

NEXT_PUBLIC_STRIPE_PUBLISHABLE_KEY=pk_test_your_public_key
STRIPE_SECRET_KEY=sk_test_your_secret_key
NEXT_PUBLIC_SANITY_ID=your_project_id_here
You can find your project id as projectId in studio/sanity.json.
With our sample posts created, cd web and npm run dev to check out the blog.
Create products schema in Sanity
Now let's create a schema for our products. In /studio/schemas/merch.js:
///studio/schemas/merch.js

export default {
  name: "merch",
  title: "Merch",
  type: "document",
  fields: [
    {
      name: "name",
      title: "Name",
      type: "string",
    },
    {
      name: "description",
      title: "Description",
      type: "text",
    },
    {
      name: "price",
      title: "Price",
      description: "For now, add cents as zeroes, ie 500 = $5",
      type: "number",
    },
		{
      name: "currency",
      title: "Currency",
      description: "Keep this 'usd' for the purposes of this tutorial",
      type: "string",
    },
    {
      name: "image",
      title: "Image",
      type: "image",
      options: {
        hotspot: true,
      },
    },
  ],
	initialValue: {
    currency: "usd",
  },
};
Then import merch into schema.js:
///studio/schemas/schema.js

import merch from "./merch"

exports //...
//...
merch,
//...
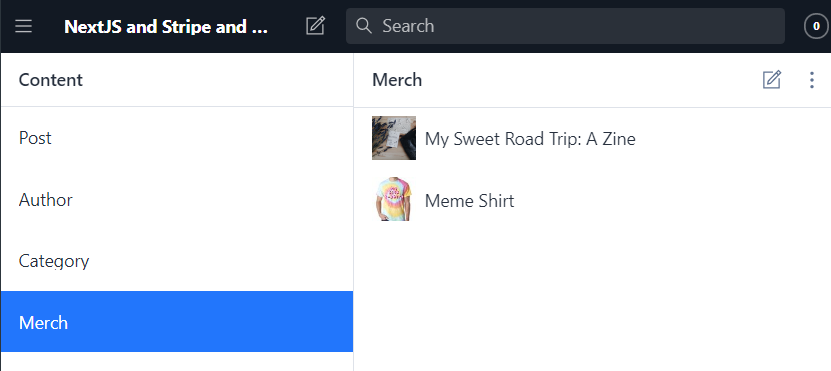
Fire up sanity start and add some products.
Create a GROQ query for Sanity
Now we have a Products component that will render our merch data. We need a way to pull in our products from Sanity and display them in the frontend. In lib/sanity create merchQuery.js:
// web/lib/sanity/merchQuery.js

//protip: we install sanity's groq package
//for syntax highlighting and the ability to run
//groq queries within VScode
//read more at https://www.npmjs.com/package/groq
import groq from "groq";

export const merchQuery = groq`
*[_type=="merch"]{
    name,
    description,
    price,
    "id": _id,
    "image": image.asset->url,
    currency
  }`;
Create merch page
With our query ready, we can use getStaticProps to pull in our Sanity data with very few lines of code. In pages, create a folder merch and within it add an index.js.
Why create a folder with an index file, instead of just creating pages/merch.js? With this folder structure, in the future it will take less time to create single product pages using Next's dynamic routing. You can see an example of this approach in the post folder's [slug].js file.
Let's create the page that will list our products. In pages/merch/index.js:
// pages/merch/index.js
import Link from "next/link";
import Cart from "../../components/Cart";
// import CartSummary from "../../components/CartSummary";
import Products from "../../components/Products";
import { client } from "../../lib/sanity/client";
import { merchQuery } from "../../lib/sanity/merchQuery";
const Merch = ({ products }) => {
return (
<main>
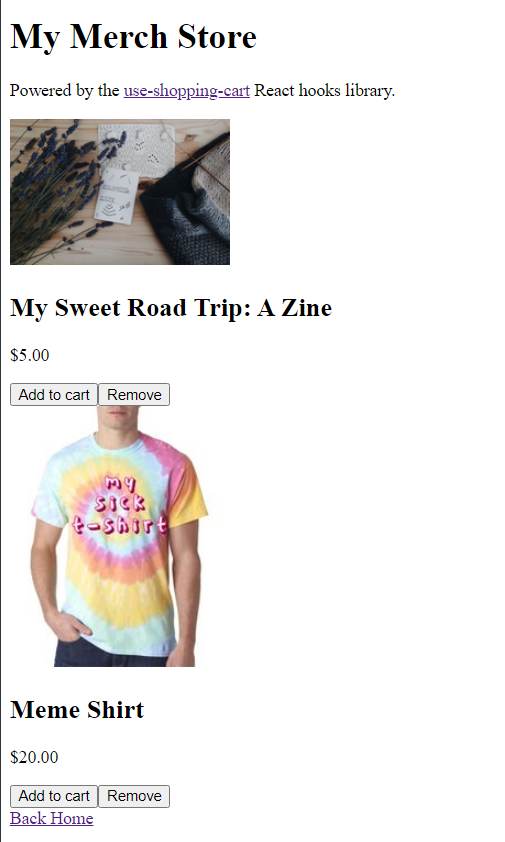
<h1>My Merch Store</h1>
<p>
Powered by the{" "}
<a href="https://useshoppingcart.com">use-shopping-cart</a> React hooks
library.
</p>
<Cart>
<Products products={products} />
{/* <CartSummary /> */}
</Cart>
<Link href="/">
<a>Back Home</a>
</Link>
</main>
);
};
export default Merch;
export async function getStaticProps({ params }) {
const products = await client.fetch(merchQuery);
return {
props: {
products,
},
};
}We're keeping the CartSummary component commented out for now and will return to it in the next section. Link to your merch store from your home page and we'll be ready to take a look:
// pages/index.js
//...
export default function Home({ posts }) {
return (
<div>
<main>
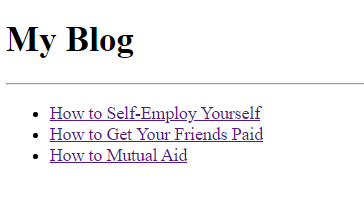
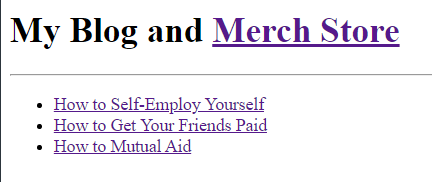
<h1>My Blog and <Link href="/merch"><a>Merch Store</a></Link></h1>
<hr />
//...Run npm run dev and check it out!
Preparing to write our API
Congratulations! We're now ready to add our checkout functionality. Stripe will handle the processing of our customer's bank account and credit card so we can focus on our site.
We'll begin by abstracting away some helpers for our API in a utilities folder. Create /web/utils/apiHelpers.js and in it add the following functions to simplify our API calls.
// web/utils/apiHelpers.js

export async function fetchGetJSON(url) {
  try {
    const data = await fetch(url).then((res) => res.json());
    return data;
  } catch (err) {
    throw new Error(err.message);
  }
}

export async function fetchPostJSON(url, data) {
  try {
    // Default options are marked with *
    const response = await fetch(url, {
      method: "POST", // *GET, POST, PUT, DELETE, etc.
      mode: "cors", // no-cors, *cors, same-origin
      cache: "no-cache", // *default, no-cache, reload, force-cache, only-if-cached
      credentials: "same-origin", // include, *same-origin, omit
      headers: {
        "Content-Type": "application/json",
        // 'Content-Type': 'application/x-www-form-urlencoded',
      },
      redirect: "follow", // manual, *follow, error
      referrerPolicy: "no-referrer", // no-referrer, *client
      body: JSON.stringify(data || {}), // body data type must match "Content-Type" header
    });
    return await response.json(); // parses JSON response into native JavaScript objects
  } catch (err) {
    throw new Error(err.message);
  }
}
Creating the checkout page component
Let's make our frontend display our shopping cart and checkout button. Create components/CartSummary.js:
// components/CartSummary.js

import { useState, useEffect } from "react";
import { useShoppingCart } from "use-shopping-cart";
import { fetchPostJSON } from "../utils/apiHelpers";

export default function CartSummary() {
  //setting up some React states for our cart
  const [loading, setLoading] = useState(false);
  const [cartEmpty, setCartEmpty] = useState(true);
  // destructuring all the building blocks we get from use-shopping-cart
  const {
    formattedTotalPrice,
    cartCount,
    clearCart,
    cartDetails,
    redirectToCheckout,
  } = useShoppingCart();

  //sets our cartEmpty state with cart data
  useEffect(() => setCartEmpty(!cartCount), [cartCount]);

  const handleCheckout = async (event) => {
    event.preventDefault();
    setLoading(true);
  //send the cart data to our serverless API
    const response = await fetchPostJSON(
      "/api/checkout_sessions/cart",
      cartDetails
    );

    if (response.statusCode === 500) {
      console.error(response.message);
      return;
    }
  //if nothing went wrong, sends user to Stripe checkout
    redirectToCheckout({ sessionId: response.id });
  };

  return (
    <form onSubmit={handleCheckout}>
      <h2>Cart summary</h2>
      {/* This is where we'll render our cart;
			The item count changes quickly and may
			be mismatched between client and server.
			To avoid annoying error messages,
			we use 'supressHydrationWarning'.
			https://reactjs.org/docs/dom-elements.html#suppresshydrationwarning*/}
      <p suppressHydrationWarning>
        <strong>Number of Items:</strong> {cartCount}
      </p>
      <p suppressHydrationWarning>
        <strong>Total:</strong> {formattedTotalPrice}
      </p>

			<p>Use 4242 4242 4242 4242 as the card number.</p>
      <button
        className="cart-style-background"
        type="submit"
        disabled={cartEmpty || loading}
      >
        Checkout{" "}
        <div className="card-number">

        </div>
      </button>
      <button
        className="cart-style-background"
        type="button"
        onClick={clearCart}
      >
        Clear Cart
      </button>
    </form>
  );
}
Nice work! In the code above, you'll notice we send API requests to api/checkout_sessions/cart in the fetchPostJSON(). This is the serverless API that will manage our interactions with Stripe. Let's make it.
Building our serverless API
Ready to write an API? In pages create api/checkout_sessions/cart.js. This endpoint will send the POST request to Stripe's servers.
In pages/api/checkout_sessions/cart.js we will write our post route.
// pages/api/checkout_sessions/cart.js
import { validateCartItems } from "use-shopping-cart/src/serverUtil";
import Stripe from "stripe";
import { client } from "../../../lib/sanity/client";
import { merchQuery } from "../../../lib/sanity/merchQuery";
const stripe = new Stripe(process.env.STRIPE_SECRET_KEY, {
// https://github.com/stripe/stripe-node#configuration
apiVersion: "2020-03-02",
});
export default async function handler(req, res) {
if (req.method === "POST") {
try {
// Validate the cart details that were sent from the client.
const cartItems = req.body;
//Sanity client performs merchQuery
let sanityData = await client.fetch(merchQuery);
// The POST request is then validated against the data from Sanity.
const line_items = validateCartItems(sanityData, cartItems);
// Create Checkout Sessions from body params.
const params = {
submit_type: "pay",
mode: "payment",
payment_method_types: ["card"],
billing_address_collection: "auto",
shipping_address_collection: {
allowed_countries: ["US", "CA"],
},
//The validated cart items are inserted.
line_items,
success_url: `${req.headers.origin}/result?session_id={CHECKOUT_SESSION_ID}`,
cancel_url: `${req.headers.origin}`,
};
const checkoutSession = await stripe.checkout.sessions.create(params);
res.status(200).json(checkoutSession);
} catch (err) {
res.status(500).json({ statusCode: 500, message: err.message });
}
} else {
res.setHeader("Allow", "POST");
res.status(405).end("Method Not Allowed");
}
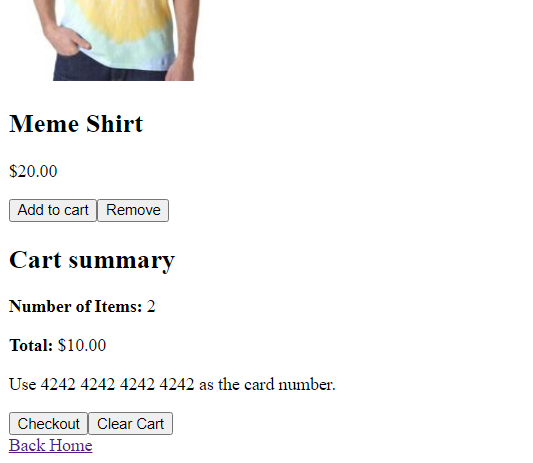
}Head back to our pages/merch/index.js file and uncomment the import of CartSummary and the instance <CartSummary/> inside the page component itself.
//uncomment these in pages/merch/index.js
//...
import CartSummary from "../../components/CartSummary";
//...
<CartSummary />
Run npm run dev again and the buttons should work. Woohoo! From here we can be redirected to Stripe's checkout service.
If you click Checkout, you should see your products displayed in Stripe's payment form.
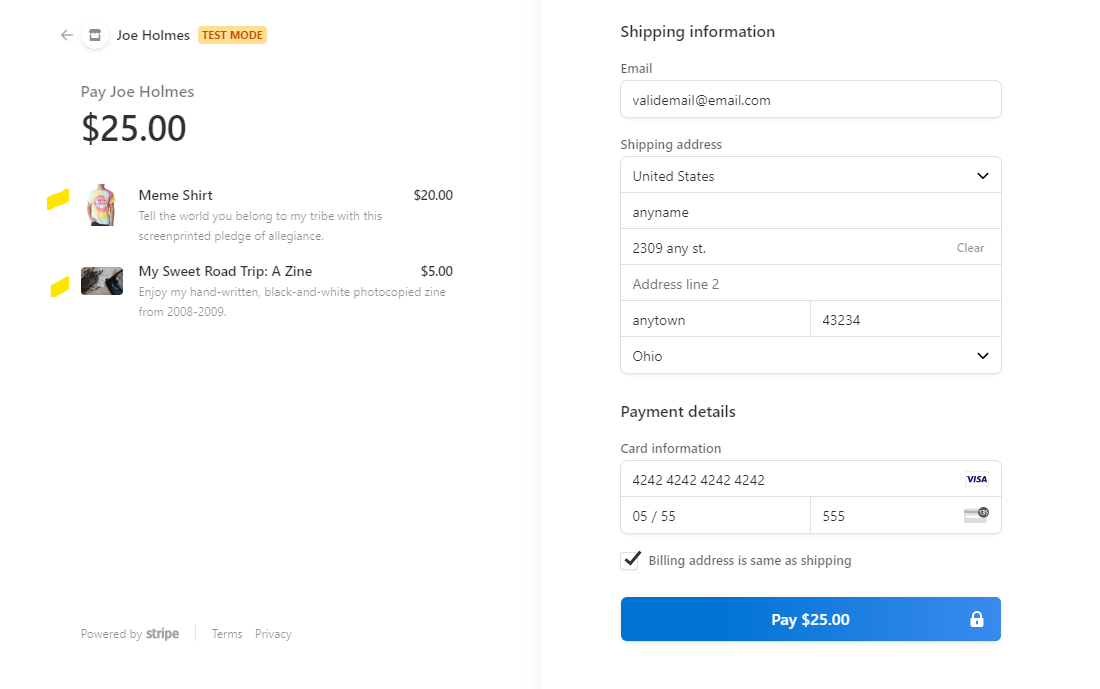
Beautiful! Stripe accepts the Sanity products without us needing to configure anything on the Stripe dashboard. Our blog content can live with our merch content.
Be sure to use the test debit card number 4242 4242 4242 4242 in the card details. The rest of the card information can be anything.
If you click the payment button, you should be redirected to a result page that 404s. Take a look at the URL of that page: http://localhost:3000/result?session_id=cs_test_a-long-string. This indicates Next is looking for a page named result in our pages directory, which it queries with our "checkout_session" information. Let's add that page, so we can display information about our customer's new order.
Displaying order confirmation from Stripe
Make result.js in pages, and PrintObject.js in components. Our result page will pull in the response from the Stripe API and display it onscreen. We will use PrintObject to show the entire JSON body, so you can pick and choose what data you'd like to display.
// web/pages/result.js
import { useRouter } from "next/router";
import Link from "next/link";
import useSWR from "swr";
import PrintObject from "../components/PrintObject";
import { fetchGetJSON } from "../utils/apiHelpers";
const ResultPage = () => {
const router = useRouter();
// Fetch CheckoutSession from static page via
// https://nextjs.org/docs/basic-features/data-fetching#static-generation
const { data, error } = useSWR(
router.query.session_id
? `/api/checkout_sessions/${router.query.session_id}`
: null,
fetchGetJSON
);
if (error) {
return <div>failed to load</div>;
}
return (
<div className="page-container">
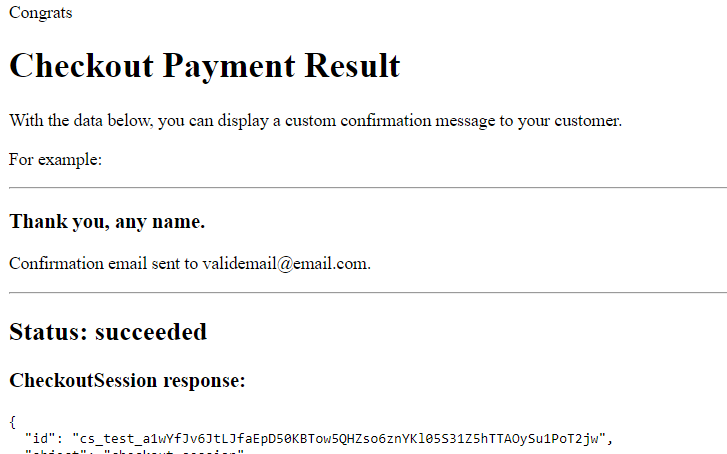
Congrats
<h1>Checkout Payment Result</h1>
<p>
With the data below, you can display a custom confirmation message to
your customer.
</p>
<p>For example:</p>
<hr />
<h3>
Thank you, {data?.payment_intent.charges.data[0].billing_details.name}.
</h3>
<p>
Confirmation email sent to{" "}
{data?.payment_intent.charges.data[0].billing_details.email}.
</p>
<hr />
<h2>Status: {data?.payment_intent?.status ?? "loading..."}</h2>
<h3>CheckoutSession response:</h3>
<PrintObject content={data ?? "loading..."} />
<Link href="/">
<a>Back home</a>
</Link>
</div>
);
};
export default ResultPage;And in the components folder:
// web/components/PrintObject.js

//this is just a helpful little component that displays
//all the data from our customer's session
const PrintObject = ({ content }) => {
  const formattedContent = JSON.stringify(content, null, 2);
  return <pre>{formattedContent}</pre>;
};

export default PrintObject;
One final step! Notice this snippet in the result.js code:
// web/pages/result.js

//...
const { data, error } = useSWR(
    router.query.session_id
      ? `/api/checkout_sessions/${router.query.session_id}`
      : null,
    fetchGetJSON
  );
//...
SWR is expecting a route for a session ID that it then takes us to when the result is displayed. This means that if we make this file, we can use dynamic routes within the API to return the details of a given Stripe session.
Make pages/api/checkout_sessions/[id].js.
// pages/api/checkout_sessions/[id].js

import Stripe from "stripe";
const stripe = new Stripe(process.env.STRIPE_SECRET_KEY, {
  // https://github.com/stripe/stripe-node#configuration
  apiVersion: "2020-03-02",
});

export default async function handler(req, res) {
  const id = req.query.id;
  try {
    if (!id.startsWith("cs_")) {
      throw Error("Incorrect CheckoutSession ID.");
    }
    const checkout_session = await stripe.checkout.sessions.retrieve(id, {
      expand: ["payment_intent"],
    });

    res.status(200).json(checkout_session);
  } catch (err) {
    res.status(500).json({ statusCode: 500, message: err.message });
  }
}
With that, we should be able to redirect the customer to a confirmation message when their order is successfully sent.
Congratulations! If you've made it this far, you've just built your very own ecommerce store. Great job!
Confirming the order on the Stripe dashboard
If we head back to Stripe, we can confirm that the order was successfully sent. Here you will be able to receive payouts from your card payments. The new order should appear in the "Payments" tab.
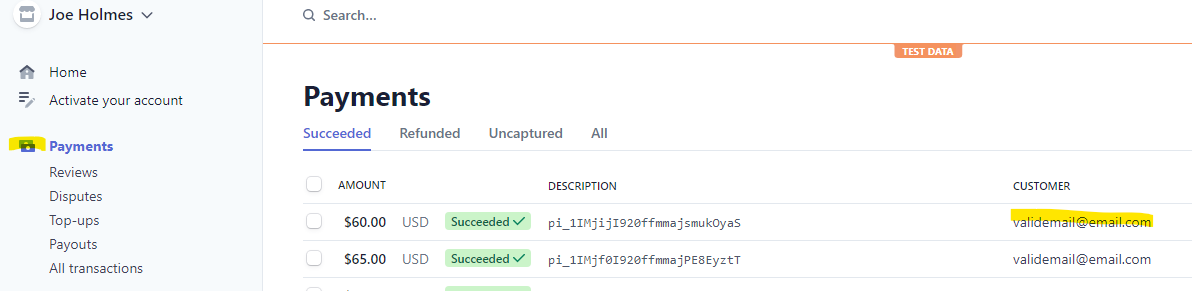
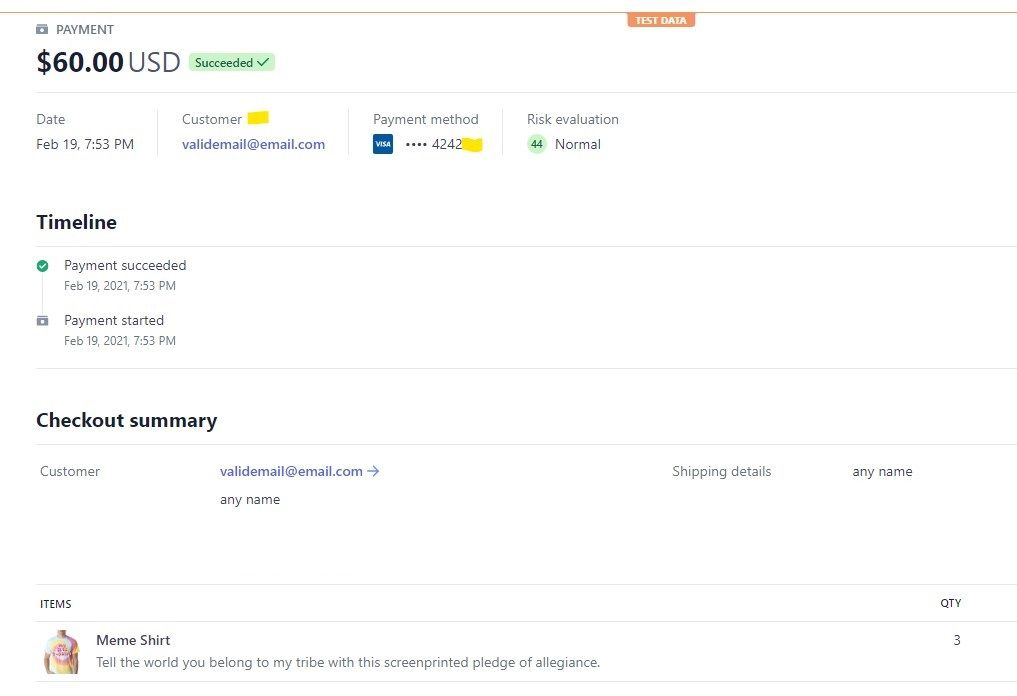
Clicking on the new payment, we'll see all its information displayed in Stripe—even the images and descriptions were passed along. Sanity manages all the content for our merch by itself, which is awesome.
Next steps
First of all, high-fives for making it through the whole tutorial. This was a challenge, and I hope you're proud! If you want to make this project a live store, there are a few more things you'll need to do:
- Deploy your Sanity studio by navigating to the studio folder and running
sanity deploy - Push your test products live by clicking "Activate your account" on the Stripe dashboard
- Deploy your Next.js site to production and add your live environment variables (I recommend Vercel or Netlify)
And if you'd like to take this project further, here are a few ideas:
- Use the Stripe Elements of
react-stripe-jsto display all checkout UI within your own frontend - Try styling your site with Sanity's totally underrated UI kit
- Automatically send a confirmation email from the
result.jspage using a service like Mailgun
Happy coding! If you have a question or want to show off what you've made, feel free to reach out on Twitter.
Sanity – The Content Operating System that ends your CMS nightmares
Sanity replaces rigid content systems with a developer-first operating system. Define schemas in TypeScript, customize the editor with React, and deliver content anywhere with GROQ. Your team ships in minutes while you focus on building features, not maintaining infrastructure.
Sanity scales from weekend projects to enterprise needs and is used by companies like Puma, AT&T, Burger King, Tata, and Figma.