Last updated February 12, 2024
How to build a Remix website with Sanity and Visual Editing

To give your content creators the best possible experience, let them see what their content looks like before they press publish. In this guide, you'll setup Presentation in the Studio to get interactive live previews of your Remix front end.
Notes on this guide
Following this guide, you'll create a new Remix application and a new Sanity project with a preconfigured Sanity Studio. You may be able to follow along with an existing project to add this functionality.
- The final code created in this Guide is available as a repository on GitHub.
- Want a fresh start? See the official Remix + Sanity clean template that implements the same patterns.
- Looking for a complete example project? This complete Remix and Sanity template can be installed from the command line and is fully configured with an embedded Sanity Studio.
- TypeScript is optional. All the code examples here are authored in TypeScript, but using it is not necessary for this functionality. You can still use JavaScript but may need to remove the typings from the example code.
Assumptions
- You already have an account with Sanity
- You’re somewhat familiar with Sanity Studio and Remix
- You’re comfortable JavaScript, React, and the command line.
Create a new Remix application
Using the below command, initialize a new Remix application from the command line and follow the prompts.
This command will install Remix in a new directory named remix-live-preview. With a template that is just plain Remix with Typescript and Tailwind CSS already configured, and will immediately install dependencies.
# from the command line
npx create-remix@latest remix-live-preview --template SimeonGriggs/remix-tailwind-typography --install

# enter the Remix application's directory
cd remix-live-preview

# run the development server
npm run dev
If you’re stuck with the installation process, see the Remix documentation for further instructions on how to get started.
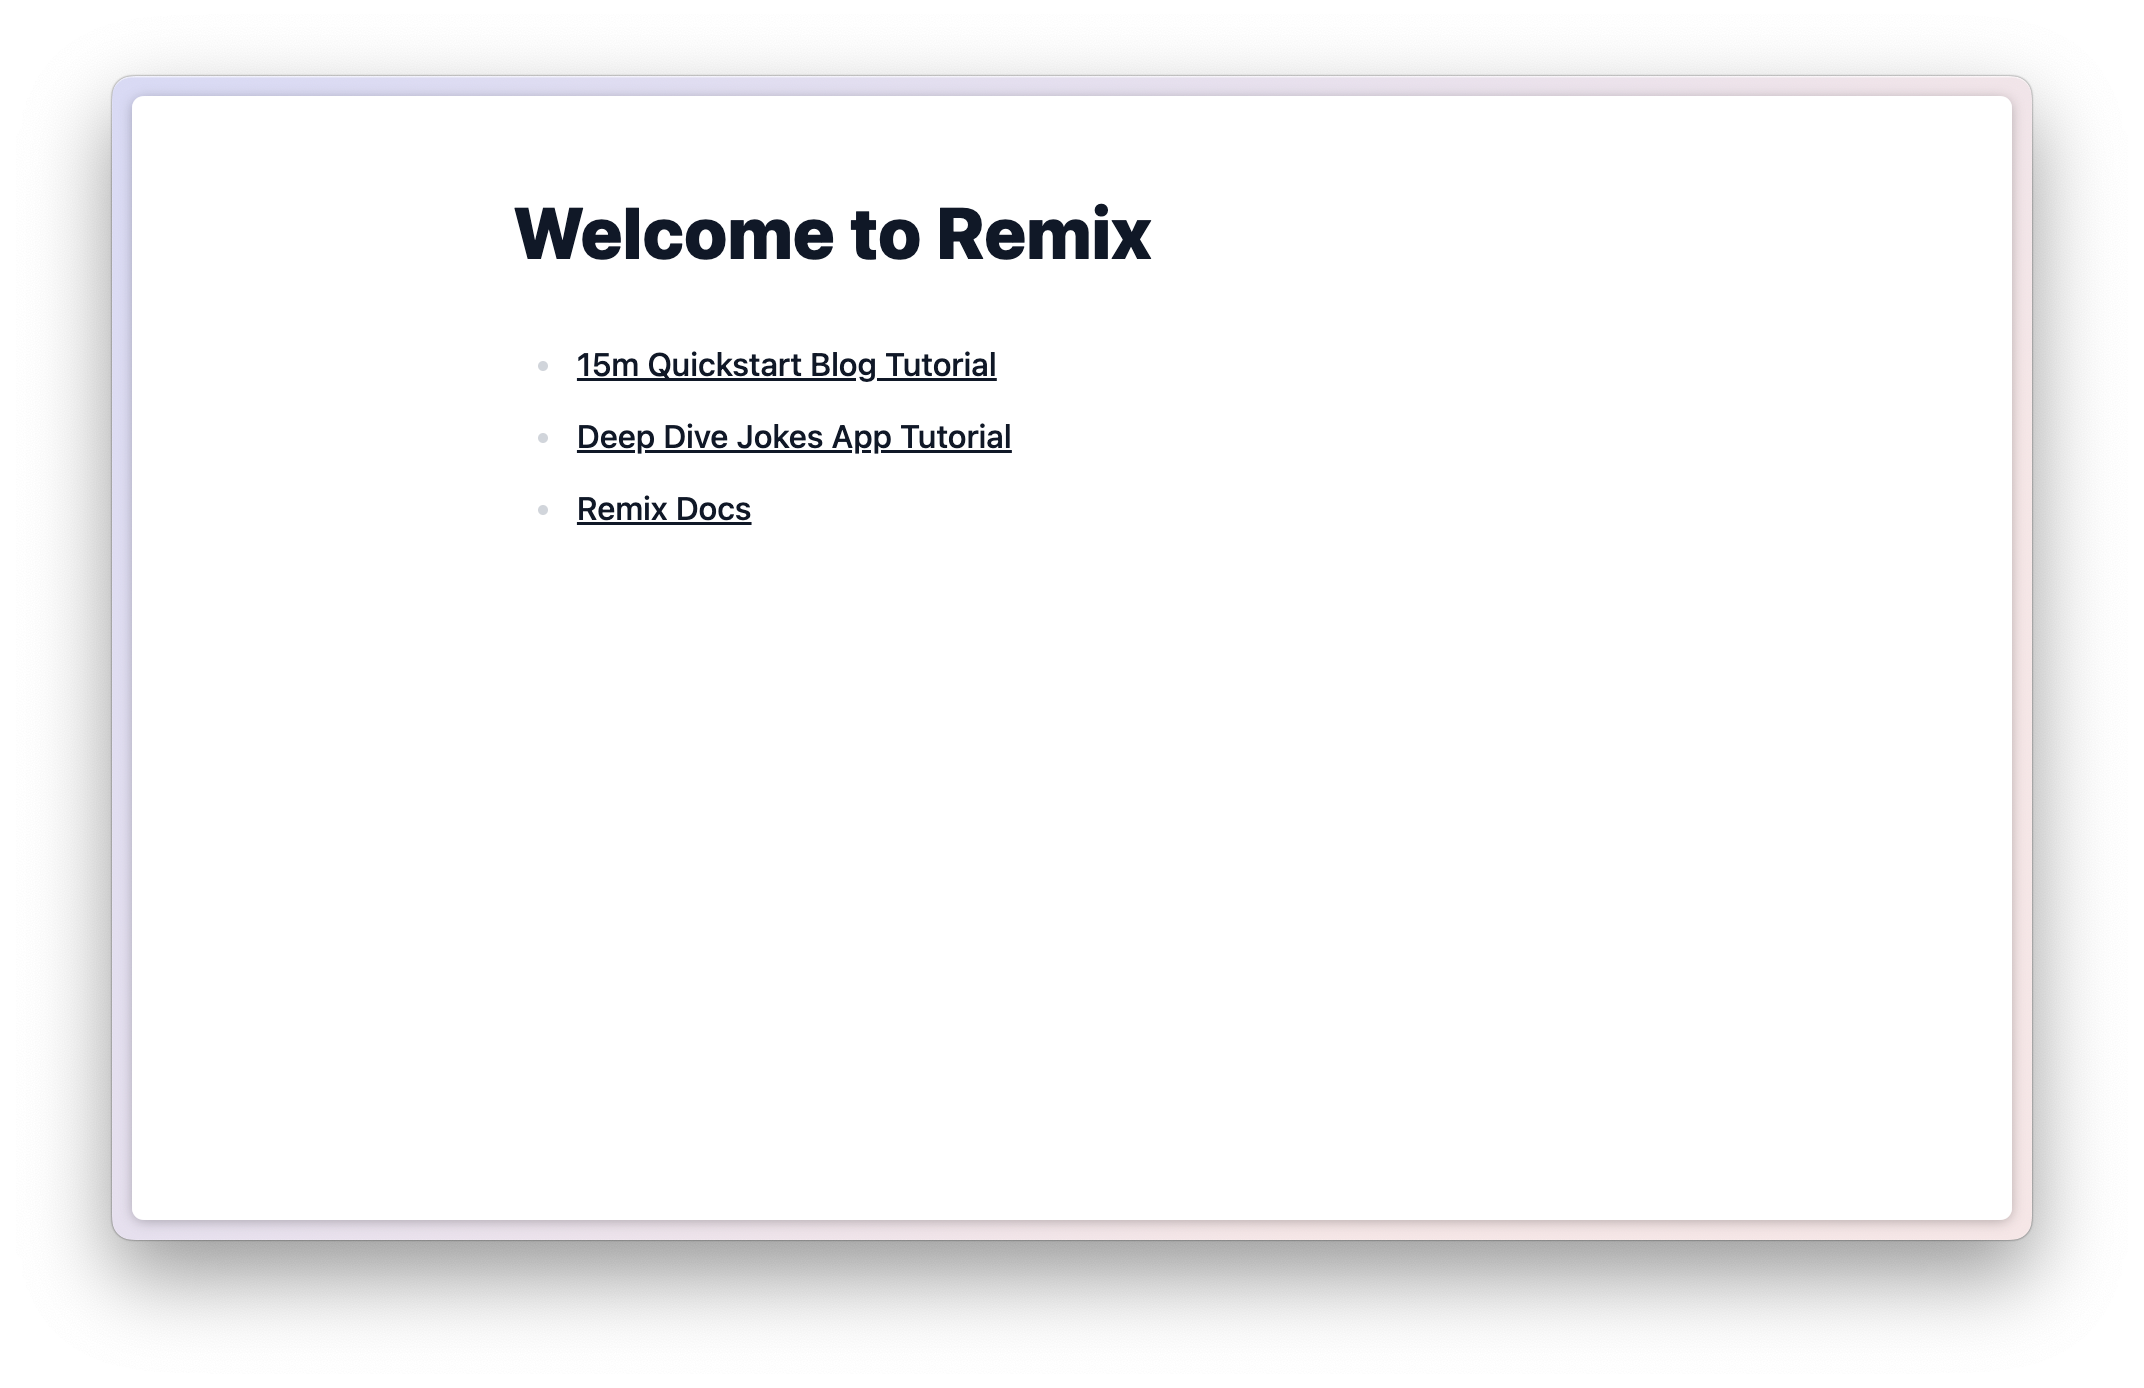
Visit http://localhost:3000 in your web browser, and you should see this landing screen to show it’s been installed correctly.
Create a new Sanity Studio project
Next, you’ll create a new Sanity Studio for a new Sanity project in its own folder. Using the preconfigured schema from the blog template.
# from the command line
npm create sanity@latest -- --template blog --create-project "Sanity Live Preview" --dataset production

# follow prompts during install
# this tutorial uses TypeScript

# enter the new project's directory
cd sanity-live-preview

# run the development server
npm run dev
For more complete instructions and troubleshooting, our documentation covers how to create a Sanity project.
Open http://localhost:3333 in your browser, and you should see a new Studio with the Blog template schema already created.
There are currently no documents!
Create and publish a few new post type documents.
Before we go further…
You should now have two folders:
/remix-live-preview  -> contains our Remix application
/sanity-live-preview -> contains our Sanity Studio
From which you can separately run both application’s development servers:
- http://localhost:3000 for the Remix application
- http://localhost:3333 for the Sanity Studio
Loading Sanity content in Remix
Work inside the remix-live-preview directory for this section
To query and display Sanity content inside the Remix application, you must install a few packages first.
# in /remix-live-preview
npm install @sanity/client@latest @sanity/react-loader@latest @sanity/overlays@latest @sanity/image-url @portabletext/react groq
This command installs:
@sanity/client: A package to simplify interacting with the Content Lake@sanity/react-loader: Functions that simplify querying and live-reloading data from Sanity@sanity/overlays: Functions for rendering clickable links when in preview mode to enable visual editing@sanity/image-url: Functions to create complete image URLs from just the ID of a Sanity image asset.@portabletext/react: A component to render block content from a Portable Text field with configuration options.groqprovides syntax highlighting in your code editor for GROQ queries
To orchestrate these together, you'll need to create a few files.
Create a file for your environment variables. None of these are secrets that must be protected, but it will help you to customize them whenever you deploy your app.
# .env
SANITY_STUDIO_PROJECT_ID="79w8op0f"
SANITY_STUDIO_DATASET="production"
SANITY_STUDIO_URL="http://localhost:3333"

# Do not set to true in production environments
# This will load a larger version of Sanity Client
SANITY_STUDIO_STEGA_ENABLED="true"
Create a component to enable visual editing. In the example code below, it will only be enabled when the site is viewed inside an Iframe.
This component also contains imports a component named VisualEditing which handles tracking the current URL and passing it back up to Presentation.
// ./app/components/LiveVisualEditing.tsx

import { VisualEditing } from '@sanity/visual-editing/remix'

import { client } from "~/sanity/client";
import { useLiveMode } from '~/sanity/loader';

export default function LiveVisualEditing() {
  useLiveMode({ client })

  return <VisualEditing />
}
Replace your app's root route with the code below to load these variables in the loader function and render them to the document window on the client. Read their documentation for more information about handling environment variables in Remix.
You'll also see the "lazy loading" of the visual editing component created in the previous step.
// ./app/root.tsx

import { json } from "@remix-run/node";
import {
  Links,
  LiveReload,
  Meta,
  Outlet,
  Scripts,
  ScrollRestoration,
  useLoaderData,
} from "@remix-run/react";
import { Suspense, lazy } from "react";

const LiveVisualEditing = lazy(() => import("~/components/LiveVisualEditing"));

export const loader = () => {
  return json({
    ENV: {
      SANITY_STUDIO_PROJECT_ID: process.env.SANITY_STUDIO_PROJECT_ID,
      SANITY_STUDIO_DATASET: process.env.SANITY_STUDIO_DATASET,
      SANITY_STUDIO_URL: process.env.SANITY_STUDIO_URL,
      SANITY_STUDIO_STEGA_ENABLED: process.env.SANITY_STUDIO_STEGA_ENABLED,
    },
  });
};

export default function App() {
  const { ENV } = useLoaderData<typeof loader>();

  return (
    <html lang="en">
      <head>
        <meta charSet="utf-8" />
        <meta name="viewport" content="width=device-width, initial-scale=1" />
        <Meta />
        <Links />
        <script src="https://cdn.tailwindcss.com?plugins=typography" />
      </head>
      <body className="bg-white">
        <Outlet />
        <ScrollRestoration />
        <script
          dangerouslySetInnerHTML={{
            __html: `window.ENV = ${JSON.stringify(ENV)}`,
          }}
        />
        {ENV.SANITY_STUDIO_STEGA_ENABLED ? (
          <Suspense>
            <LiveVisualEditing />
          </Suspense>
        ) : null}
        <Scripts />
        <LiveReload />
      </body>
    </html>
  );
}
Create a new file to retrieve these project details throughout your app.
These will be used to configure a Sanity Client, the Loader functions, and build image URLs.
// ./app/sanity/projectDetails.ts

declare global {
  interface Window {
    ENV: {
      SANITY_STUDIO_PROJECT_ID: string
      SANITY_STUDIO_DATASET: string
      SANITY_STUDIO_URL: string
      SANITY_STUDIO_STEGA_ENABLED: string
    }
  }
}

const {
  SANITY_STUDIO_PROJECT_ID,
  SANITY_STUDIO_DATASET,
  SANITY_STUDIO_URL = 'http://localhost:3333',
  SANITY_STUDIO_STEGA_ENABLED = false
} = typeof document === 'undefined' ? process.env : window.ENV

export const projectId = SANITY_STUDIO_PROJECT_ID!
export const dataset = SANITY_STUDIO_DATASET!
export const studioUrl = SANITY_STUDIO_URL!
export const stegaEnabled = SANITY_STUDIO_STEGA_ENABLED === 'true'

if (!projectId) throw new Error('Missing SANITY_STUDIO_PROJECT_ID in .env')
if (!dataset) throw new Error('Missing SANITY_STUDIO_DATASET in .env')
if (!studioUrl) throw new Error('Missing SANITY_STUDIO_URL in .env')
if (!stegaEnabled) throw new Error(`Missing SANITY_STUDIO_STEGA_ENABLED in .env`)
Create a new file to set up the Loader.
These will load Sanity content on the server and provide live updates when viewing the site inside Presentation.
// ./app/sanity/loader.ts

import { createQueryStore } from '@sanity/react-loader'

// This is the "smallest" possible version of a query store
// Where stega-enabled queries only happen server-side to avoid bundle bloat
export const queryStore = createQueryStore({client: false, ssr: true})

export const {useLiveMode, useQuery} = queryStore
Create a new server-only file to contain a stega-enabled loadQuery function. See the Remix documentation on .server.ts files.
// ./app/sanity/loader.server.ts

import { queryStore } from "~/sanity/loader";
import { client } from "~/sanity/client";

export const { loadQuery } = queryStore;

queryStore.setServerClient(client);
Create a file for Sanity Client:
// ./app/sanity/client.ts

import { createClient } from "@sanity/client";
import { stegaEnabled, projectId, dataset, studioUrl } from "./projectDetails";

// Do not import this into client-side components unless lazy-loaded
export const client = createClient({
  projectId,
  dataset,
  useCdn: true,
  apiVersion: "2023-03-20",
  stega: {
    enabled: stegaEnabled,
    studioUrl,
  },
});
Create one more file to store and reuse your GROQ queries:
import groq from "groq"

export const POSTS_QUERY = groq`*[_type == "post" && defined(slug.current)] | order(_createdAt desc)`
export const POST_QUERY = groq`*[_type == "post" && slug.current == $slug][0]`
Preflight check
Check you have the following files set in your Remix project:
app/
└─ sanity/
   ├─ client.ts
   ├─ loader.server.ts
   ├─ loader.ts
   ├─ projectDetails.ts
   └─ queries.ts
Loading data from Sanity in Remix
You’ll now confirm that you can query published documents from Sanity before setting up Presentation to display draft content.
Create a new component to display a list of Posts:
// ./app/components/Posts.tsx

import { Link } from "@remix-run/react";
import type { SanityDocument } from "@sanity/client";

export default function Posts({ posts }: { posts: SanityDocument[] }) {
  return (
    <main className="container mx-auto grid grid-cols-1 divide-y divide-blue-100">
      {posts?.length > 0 ? (
        posts.map((post) => (
          <Link
            key={post._id}
            to={post.slug.current}
          >
            <h2 className="p-4 hover:bg-blue-50">{post.title}</h2>
          </Link>
        ))
      ) : (
        <div className="p-4 text-red-500">No posts found</div>
      )}
    </main>
  );
}
Update the index route to include a loader that will use the Sanity Client to query all post documents with a slug.
// ./app/routes/_index.tsx
import { useLoaderData } from "@remix-run/react";
import type { SanityDocument } from "@sanity/client";
import Posts from "~/components/Posts";
import { useQuery } from "~/sanity/loader";
import { loadQuery } from "~/sanity/loader.server";
import { POSTS_QUERY } from "~/sanity/queries";
export const loader = async () => {
const {data} = await loadQuery<SanityDocument[]>(POSTS_QUERY);
return { data };
};
export default function Index() {
const { data } = useLoaderData<typeof loader>();
return <Posts posts={data} />;
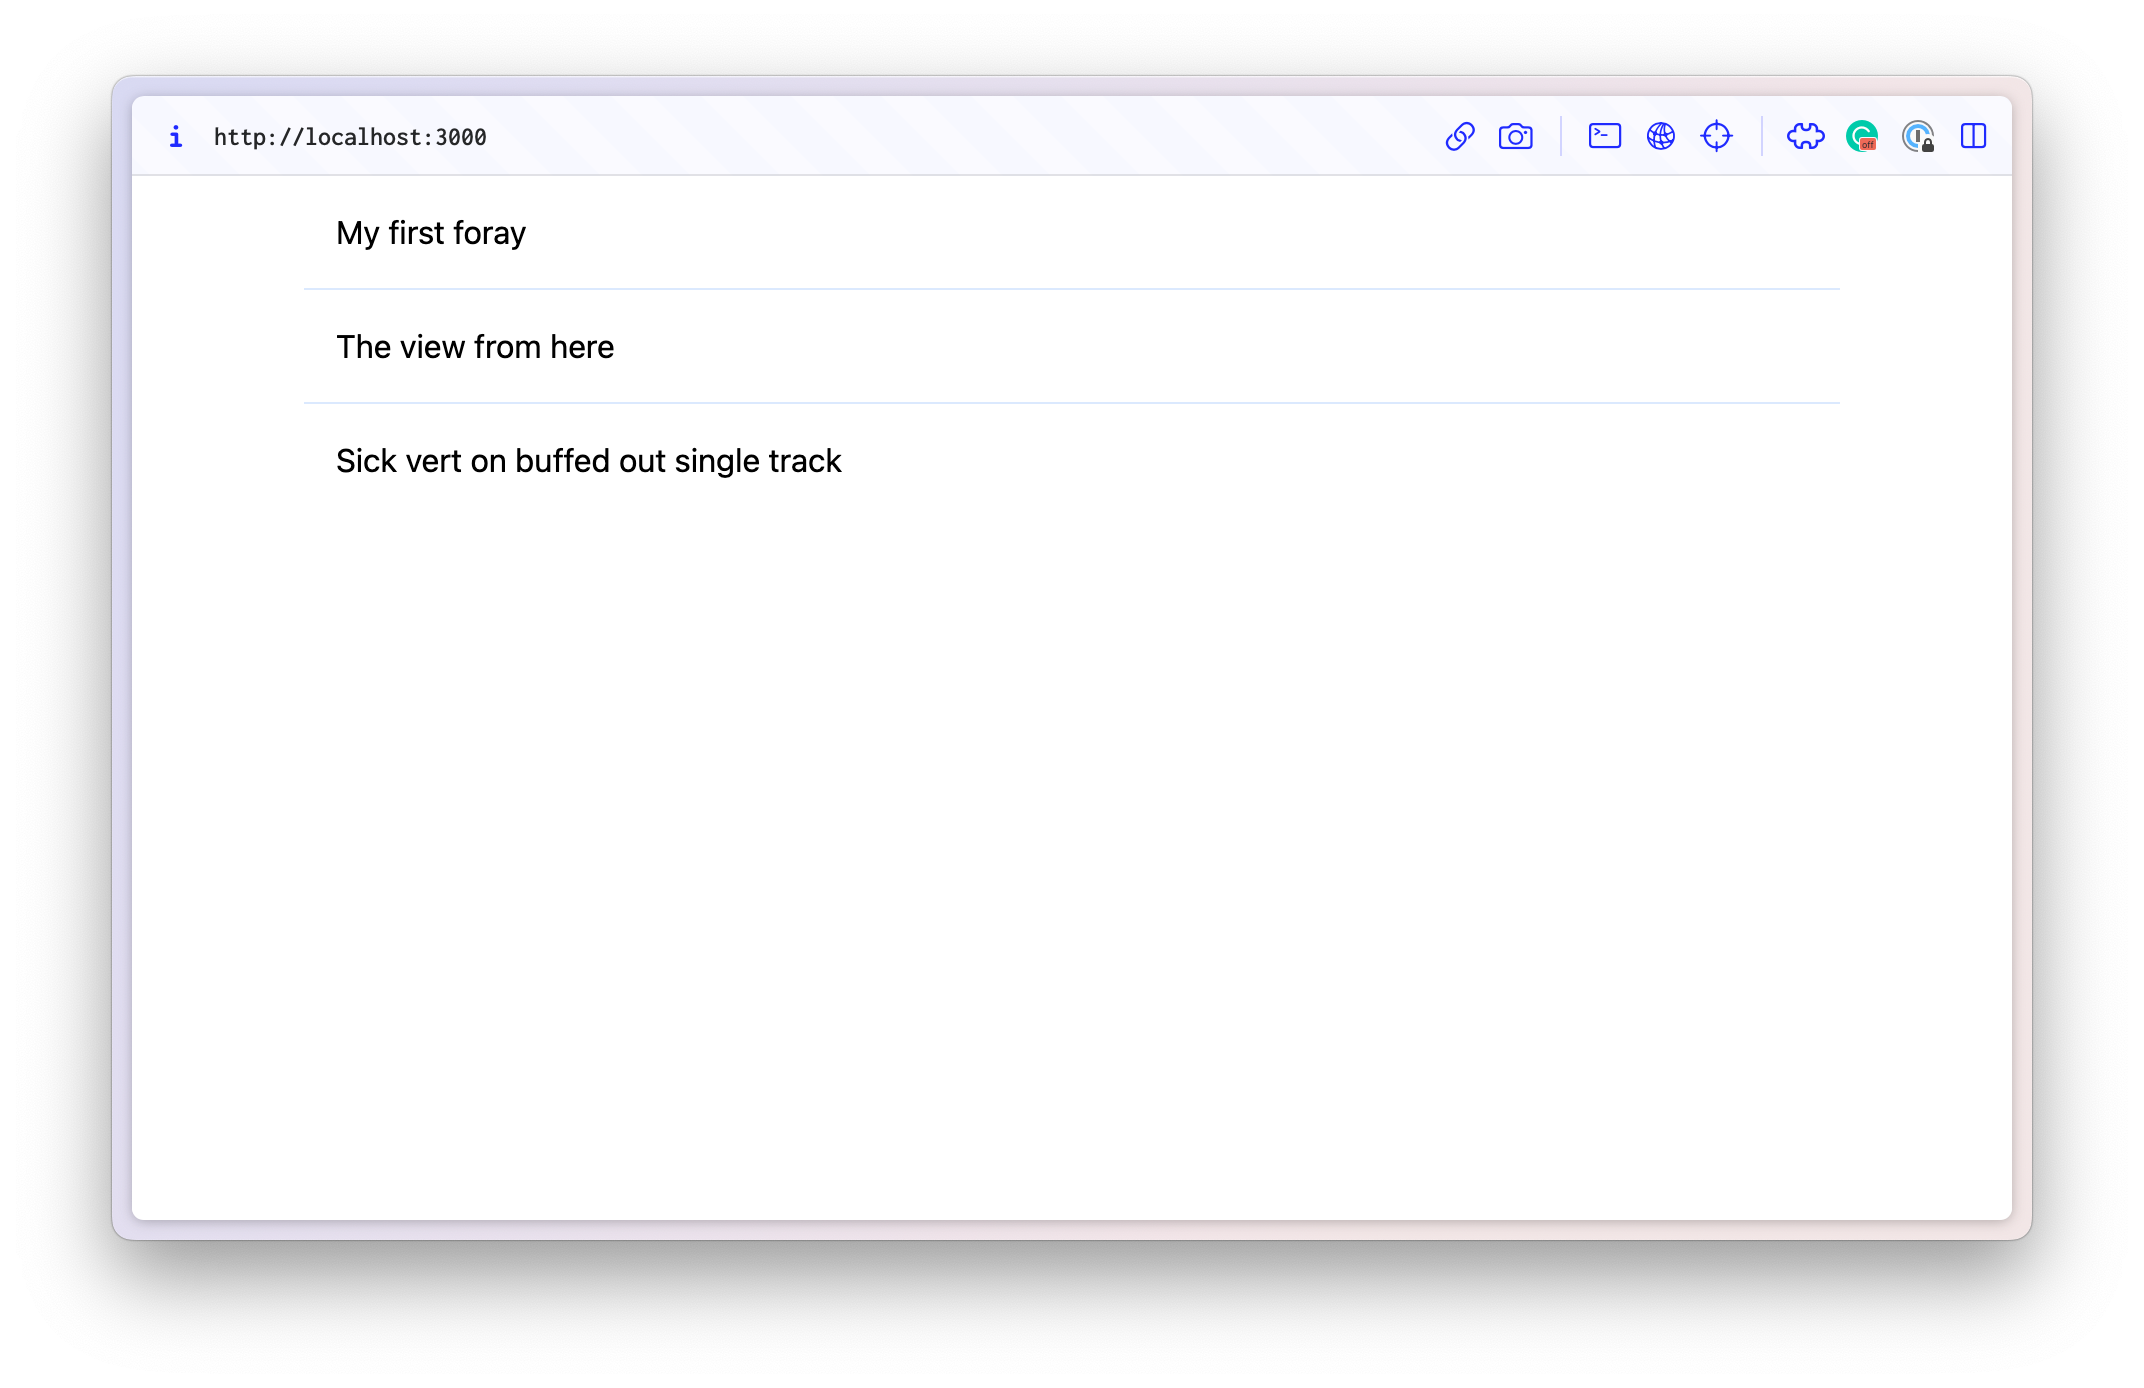
}Visit your home page at http://localhost:3000; it should now look like the image below. If not, your Studio likely has no published posts yet!
Open up your Sanity Studio, create and publish a few new post type documents and refresh your Remix application.
You’ll get a "404 Not Found" page if you click one of these links.
First, create a new Post component to display a single Post.
// ./components/Post.tsx

import { PortableText } from "@portabletext/react";
import imageUrlBuilder from "@sanity/image-url";
import type { SanityDocument } from "@sanity/client";

import { projectId, dataset } from "~/sanity/projectDetails";

const builder = imageUrlBuilder({ projectId, dataset });

export default function Post({ post }: { post: SanityDocument }) {
  const { title, mainImage, body } = post;

  return (
    <main className="container mx-auto prose prose-lg p-4">
      {title ? <h1>{title}</h1> : null}
      {mainImage ? (
        <img
          className="float-left m-0 w-1/3 mr-4 rounded-lg"
          src={builder.image(mainImage).width(300).height(300).quality(80).url()}
          width={300}
          height={300}
          alt={title}
        />
      ) : null}
      {body ? <PortableText value={body} /> : null}
    </main>
  );
}Create a new route to fix the 404's:
// ./app/routes/$slug.tsx

import type { LoaderFunctionArgs } from "@remix-run/node";
import { useLoaderData } from "@remix-run/react";
import type { SanityDocument } from "@sanity/client";

import Post from "~/components/Post";
import { useQuery } from "~/sanity/loader";
import { loadQuery } from "~/sanity/loader.server";
import { POST_QUERY } from "~/sanity/queries";

export const loader = async ({ params }: LoaderFunctionArgs) => {
  const {data} = await loadQuery<SanityDocument>(POST_QUERY, params)

  return { data };
};

export default function PostRoute() {
  const { data } = useLoaderData<typeof loader>();

  return <Post post={data} />;
}
Now, when you click a link on the home page, you should be taken to a page just like this:
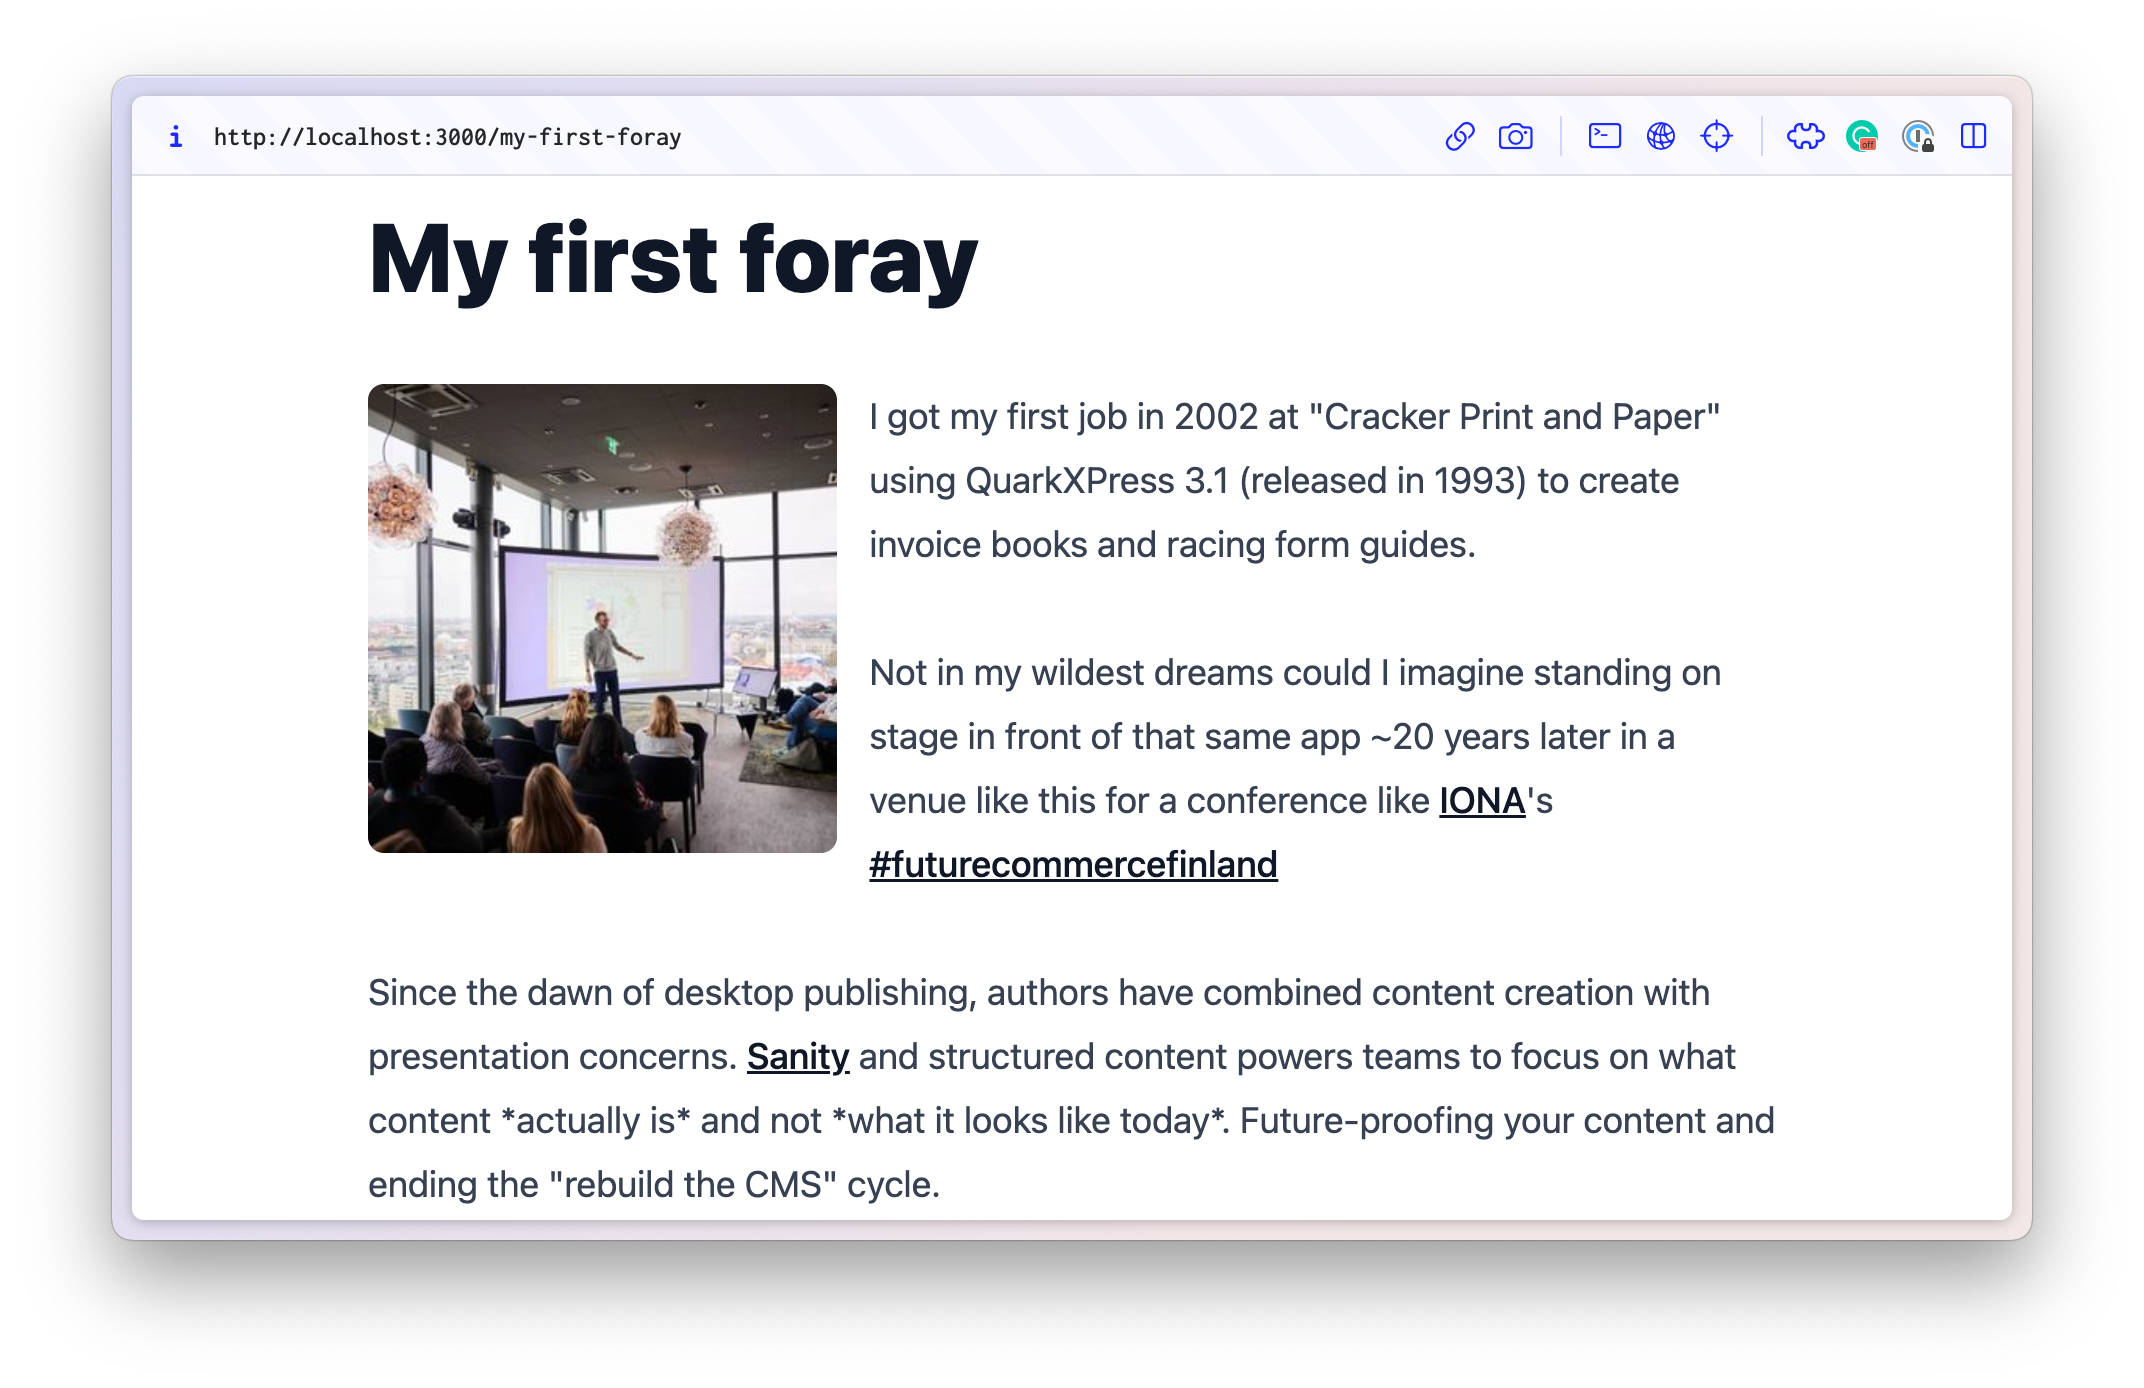
What have we achieved so far?
You now have successfully created:
- A new Sanity Studio with some placeholder content
- A new Remix application with a home page that lists published blog posts with links to a unique page for each post – displaying rich text and an image.
The next step is to make the Remix application Presentation-ready to render interactive live previews!
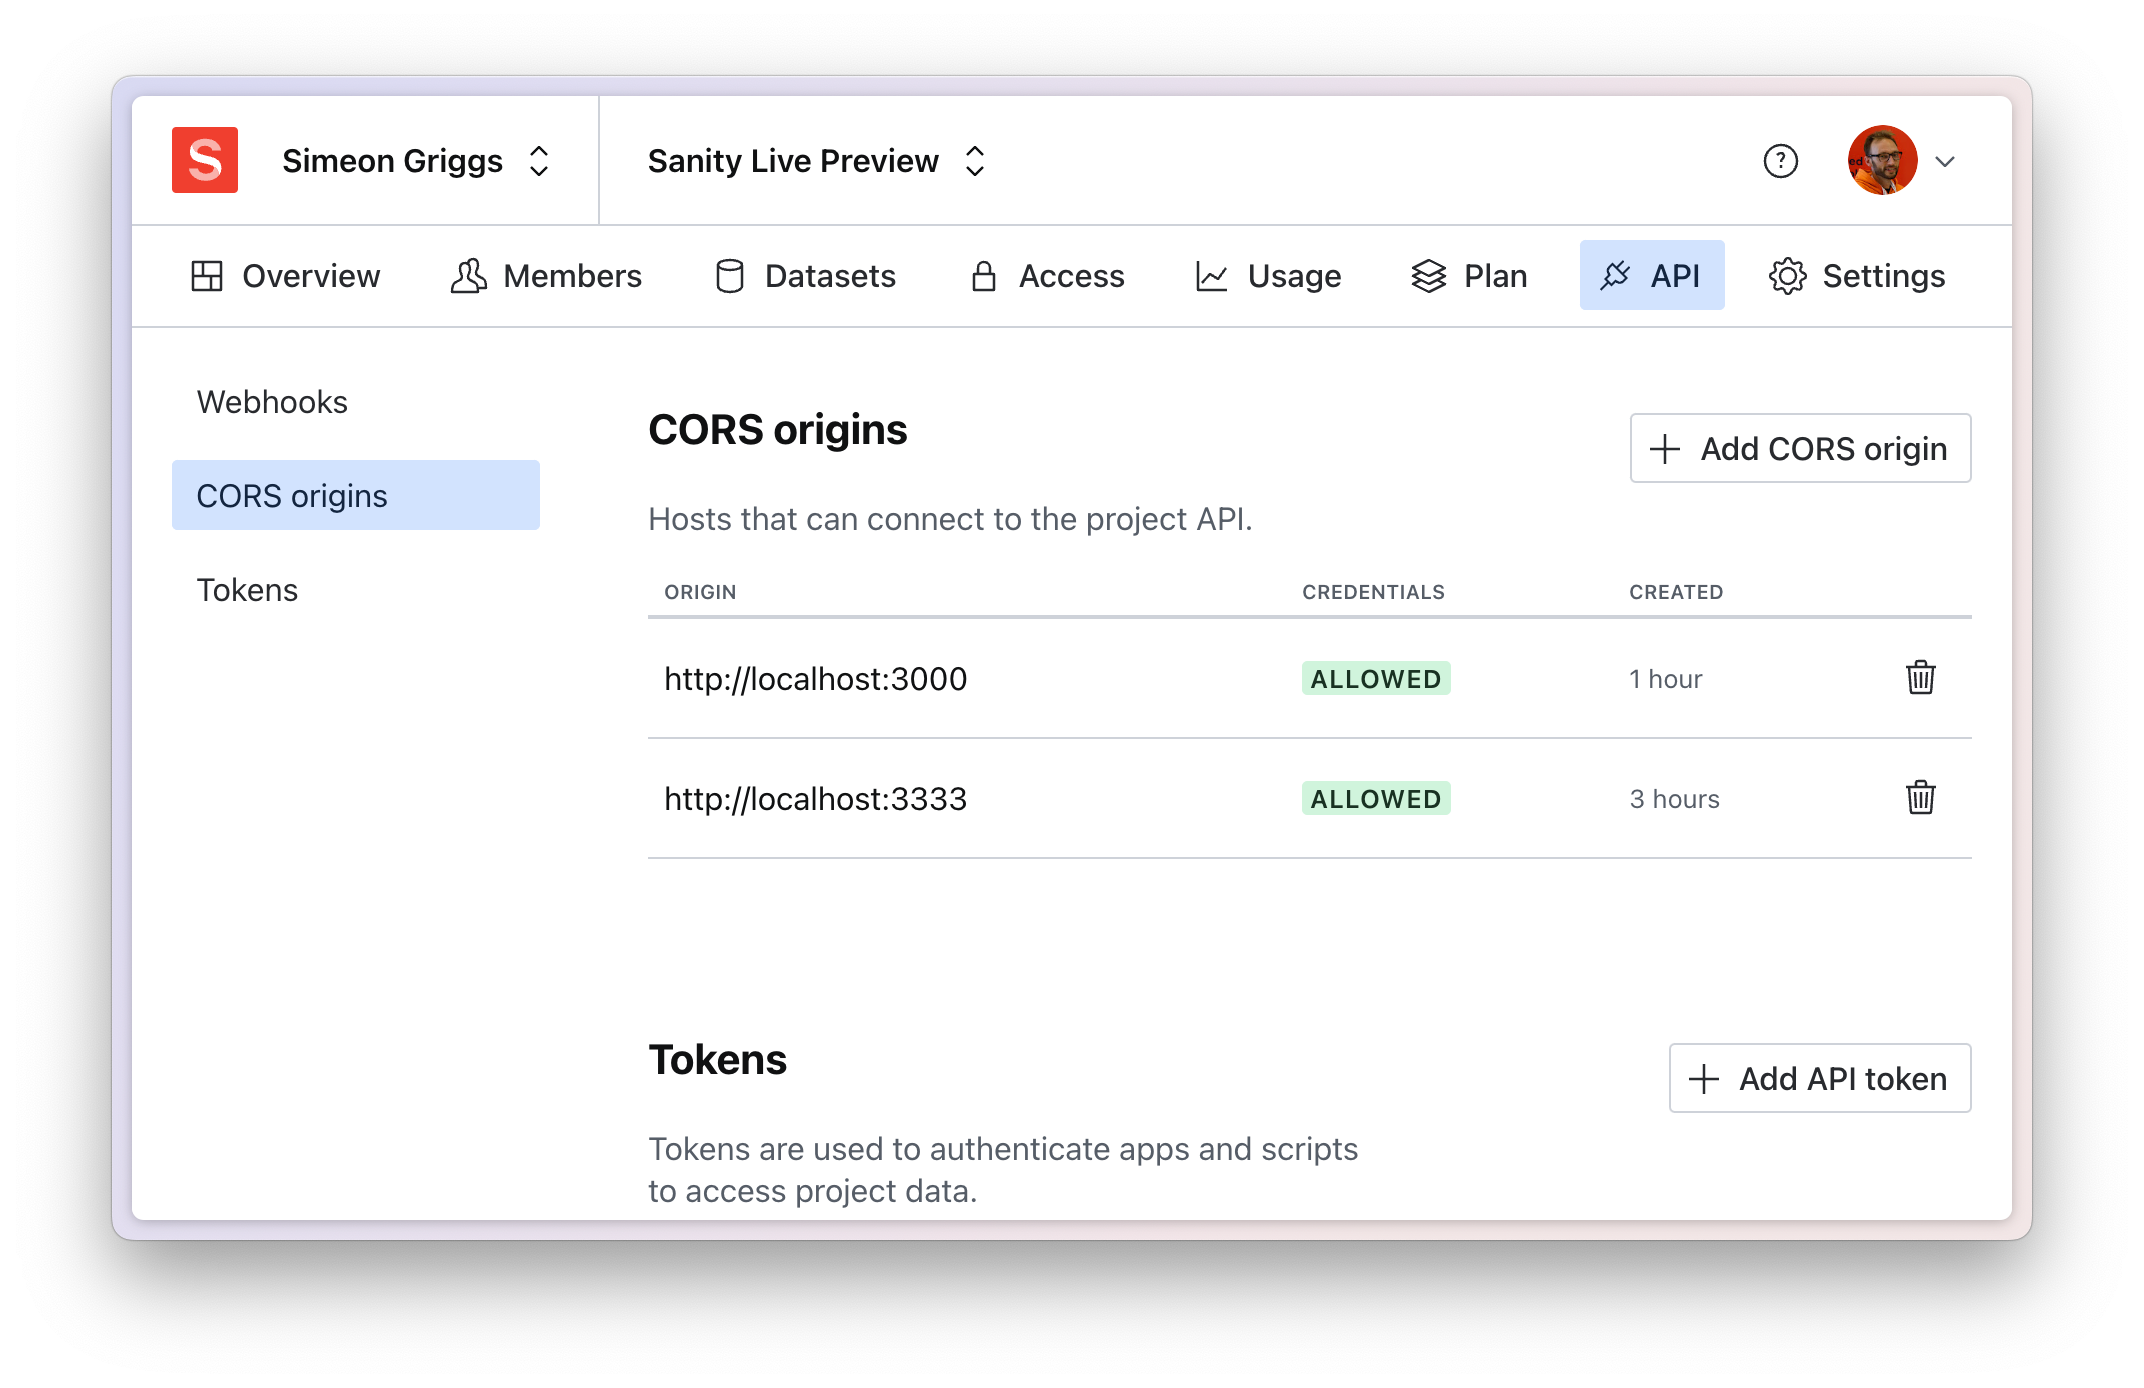
Add a CORS origin in Sanity Manage
Because our Remix application will make authenticated requests to the Sanity Project, its URL must be added as a valid CORS origin.
This can be done inside sanity.io/manage
- Navigate to the API tab and enter
http://localhost:3000 - Check ”Allow credentials.”
- Save
Important:
- Only set up CORS origins for URLs where you control the code.
- You must repeat this when you deploy your application to a hosting provider with its URL.
Setup Presentation in Sanity Studio
Update your Studio's config file inside the sanity-live-preview directory to include the Presentation plugin:
// ./sanity.config.ts
// Add this import
import {presentationTool} from 'sanity/presentation'
export default defineConfig({
// ...all other settings
plugins: [
presentationTool({
previewUrl: 'http://localhost:3000'
}),
// ..all other plugins
],
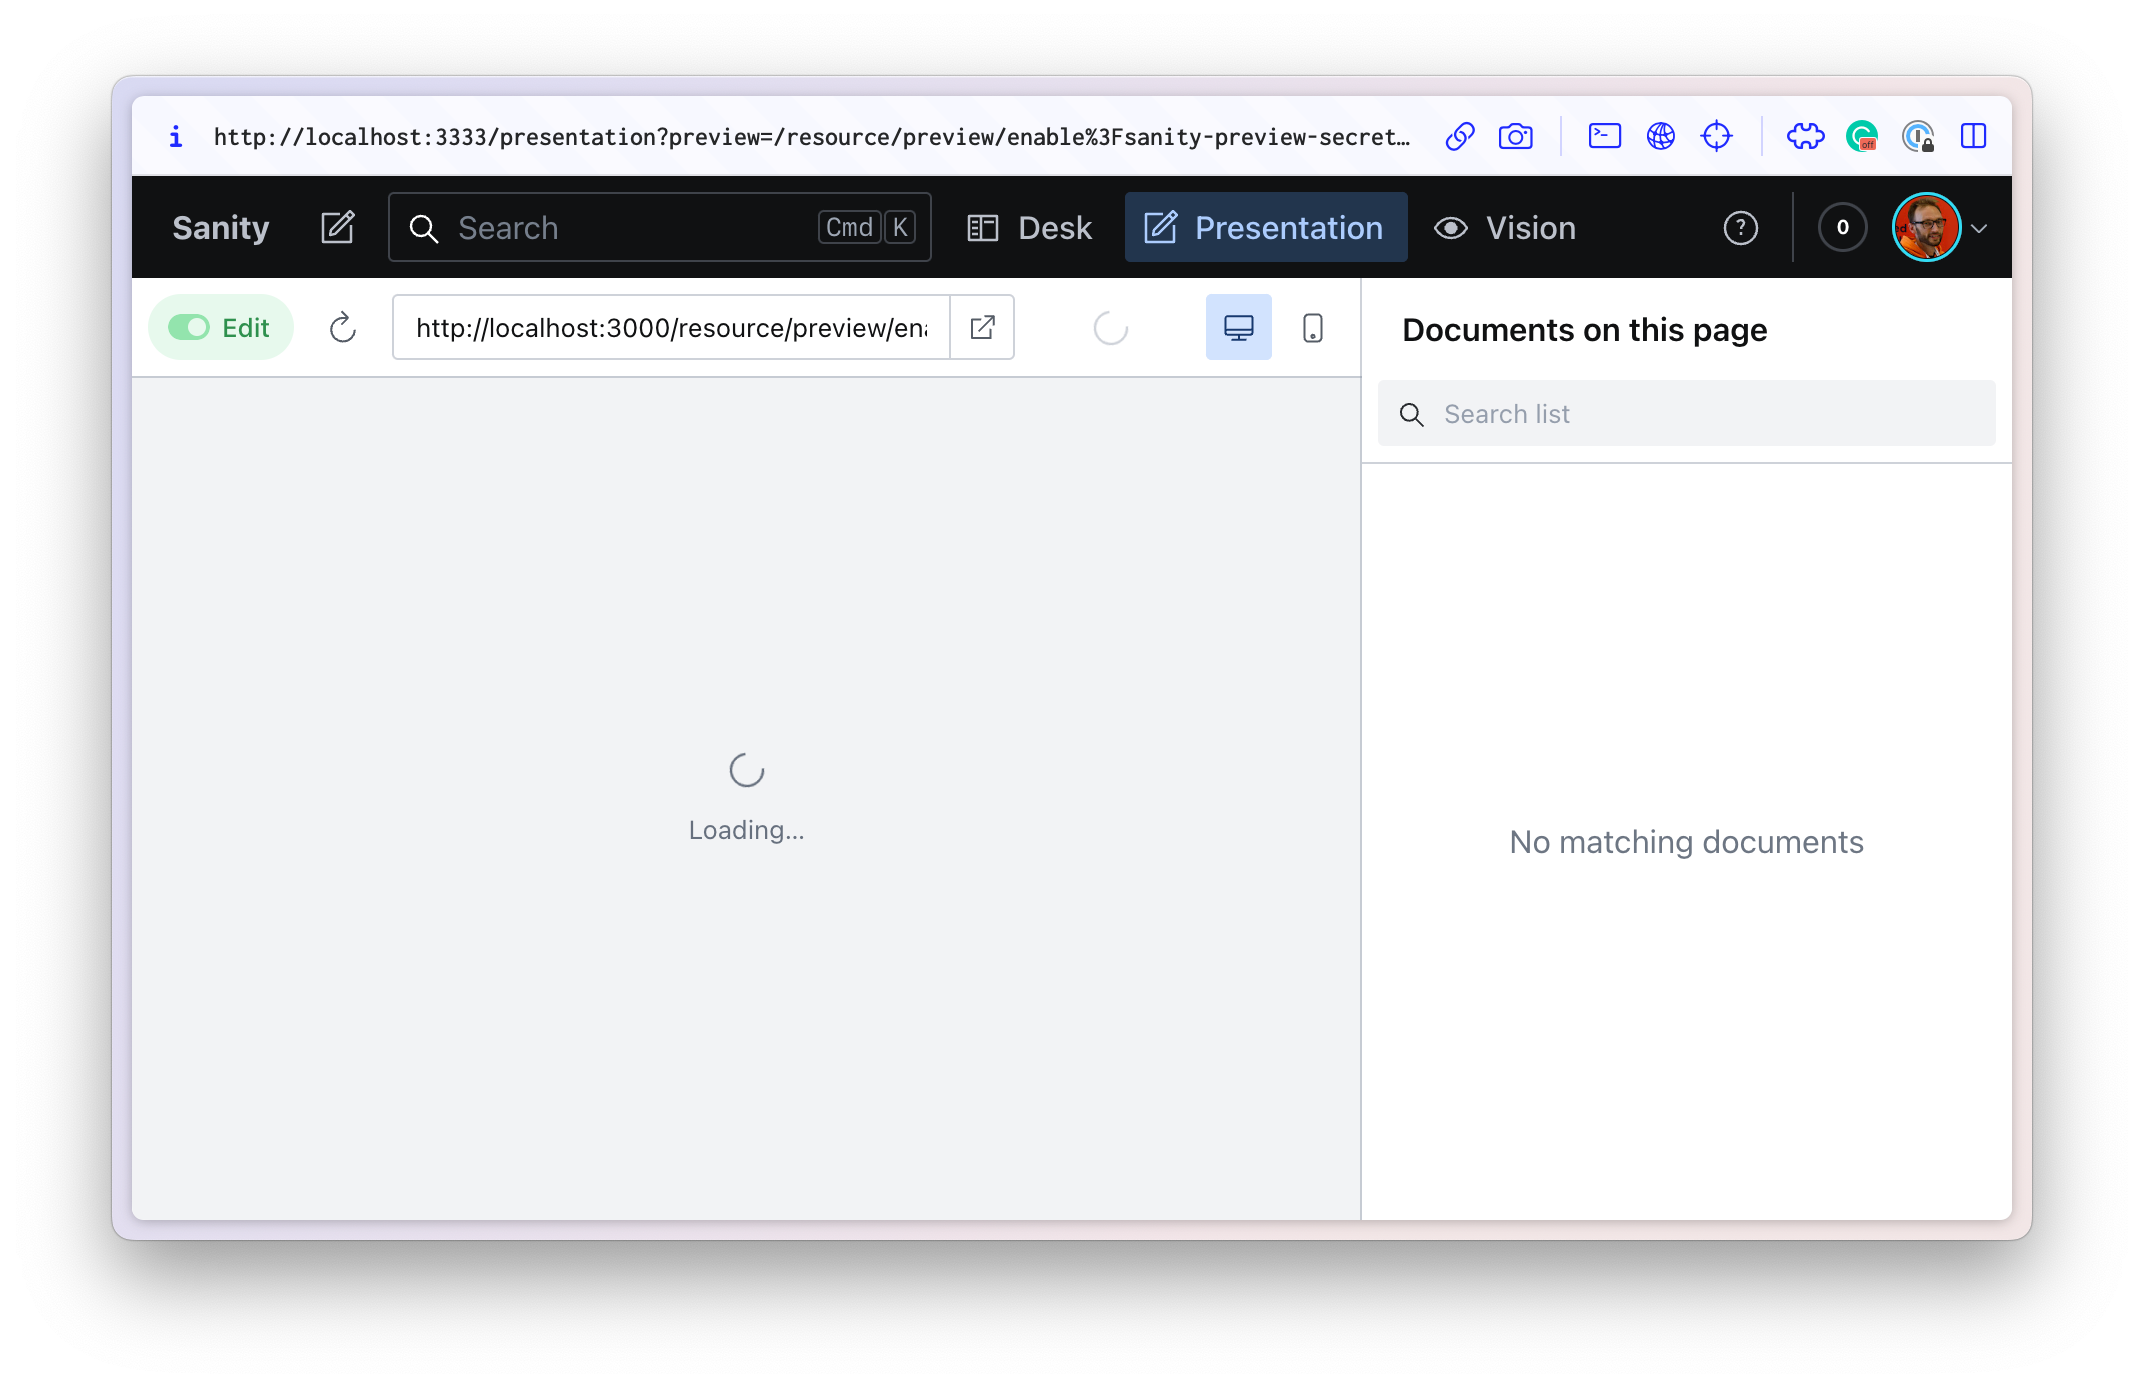
})You should now see the Presentation Tool available at http://localhost:3333/presentation. You may only get a loading spinner for now. Each route's loaders need updating to render changes in real-time.
Replace the index route to add useQuery. Notice how the data loading on the server sets up the initial state but is then passed through useQuery for live preview updates.
// ./app/routes/_index.tsx

import { useLoaderData } from "@remix-run/react";
import type { SanityDocument } from "@sanity/client";
import Posts from "~/components/Posts";
import { useQuery } from "~/sanity/loader";
import { loadQuery } from "~/sanity/loader.server";
import { POSTS_QUERY } from "~/sanity/queries";

export const loader = async () => {
  const initial = await loadQuery<SanityDocument[]>(POSTS_QUERY);

  return { initial, query: POSTS_QUERY, params: {} };
};

export default function Index() {
  const { initial, query, params } = useLoaderData<typeof loader>();
  const { data, loading } = useQuery<typeof initial.data>(query, params, {
    initial,
  });

  // `data` should contain the initial data from the loader
  // `loading` will only be true when Visual Editing is enabled
  if (loading && !data) {
    return <div>Loading...</div>;
  }

  return data ? <Posts posts={data} /> : null;
}
Replace the post page route to do the same:
// ./app/routes/$slug.tsx
import type { LoaderFunctionArgs } from "@remix-run/node";
import { useLoaderData } from "@remix-run/react";
import type { SanityDocument } from "@sanity/client";
import Post from "~/components/Post";
import { useQuery } from "~/sanity/loader";
import { loadQuery } from "~/sanity/loader.server";
import { POST_QUERY } from "~/sanity/queries";
export const loader = async ({ params }: LoaderFunctionArgs) => {
const initial = await loadQuery<SanityDocument>(POST_QUERY, params);
return { initial, query: POST_QUERY, params };
};
export default function PostRoute() {
const { initial, query, params } = useLoaderData<typeof loader>();
const { data, loading } = useQuery<typeof initial.data>(query, params, {
initial,
});
if (loading && !data) {
return <div>Loading...</div>;
}
return data ? <Post post={data} /> : null;
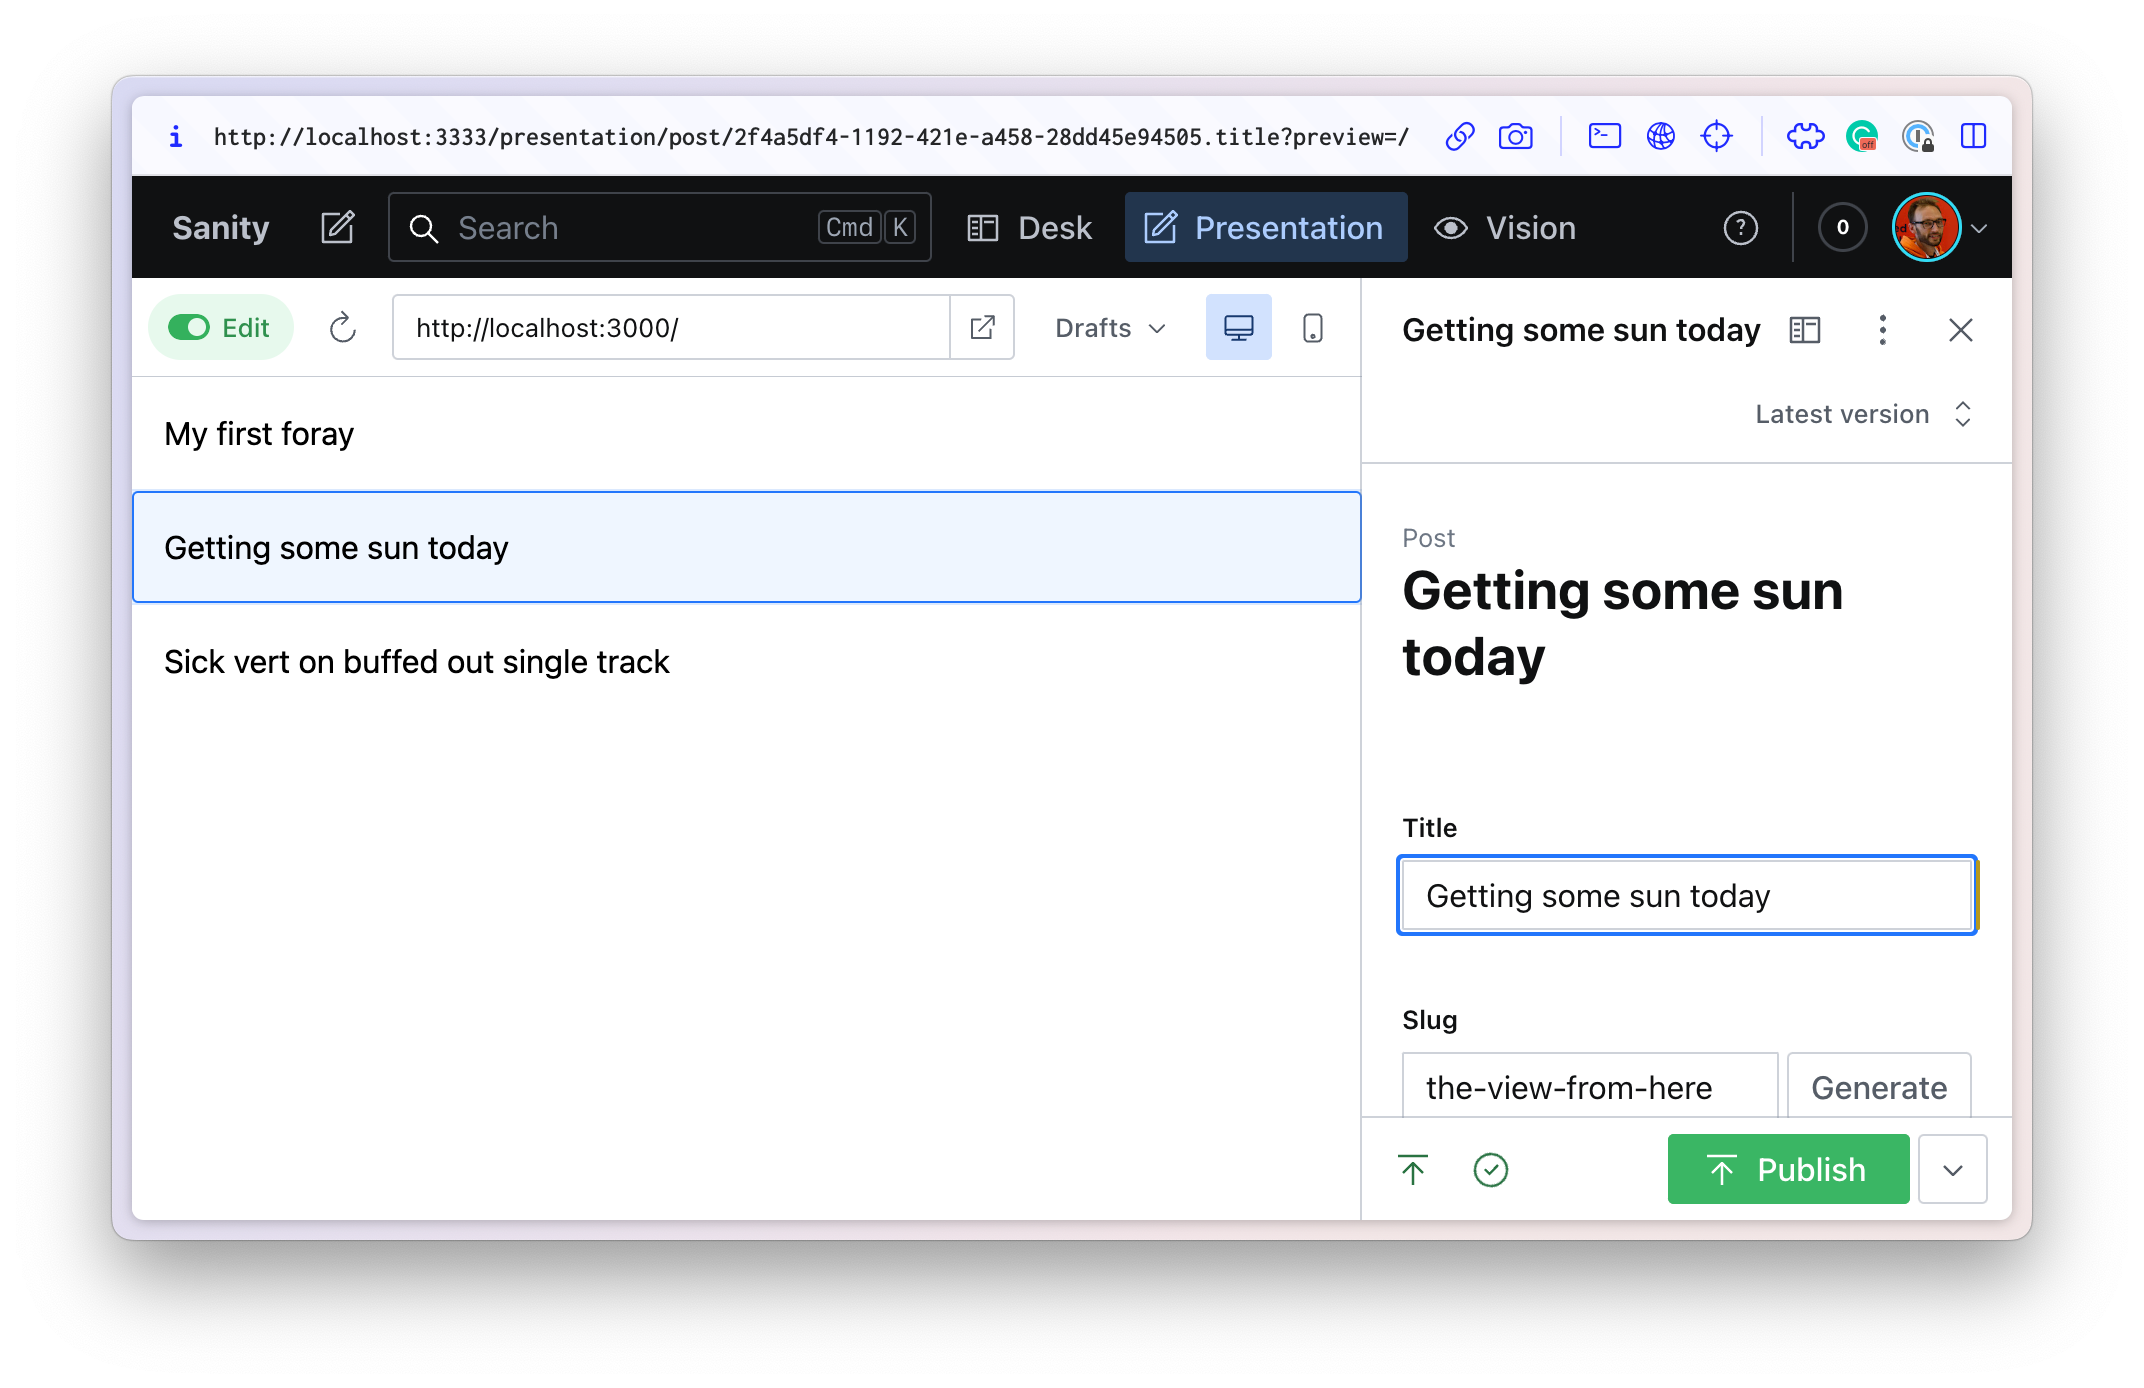
}Now return to the Presentation tool in the Studio. You should see blue boxes when hovering over the titles of each post.
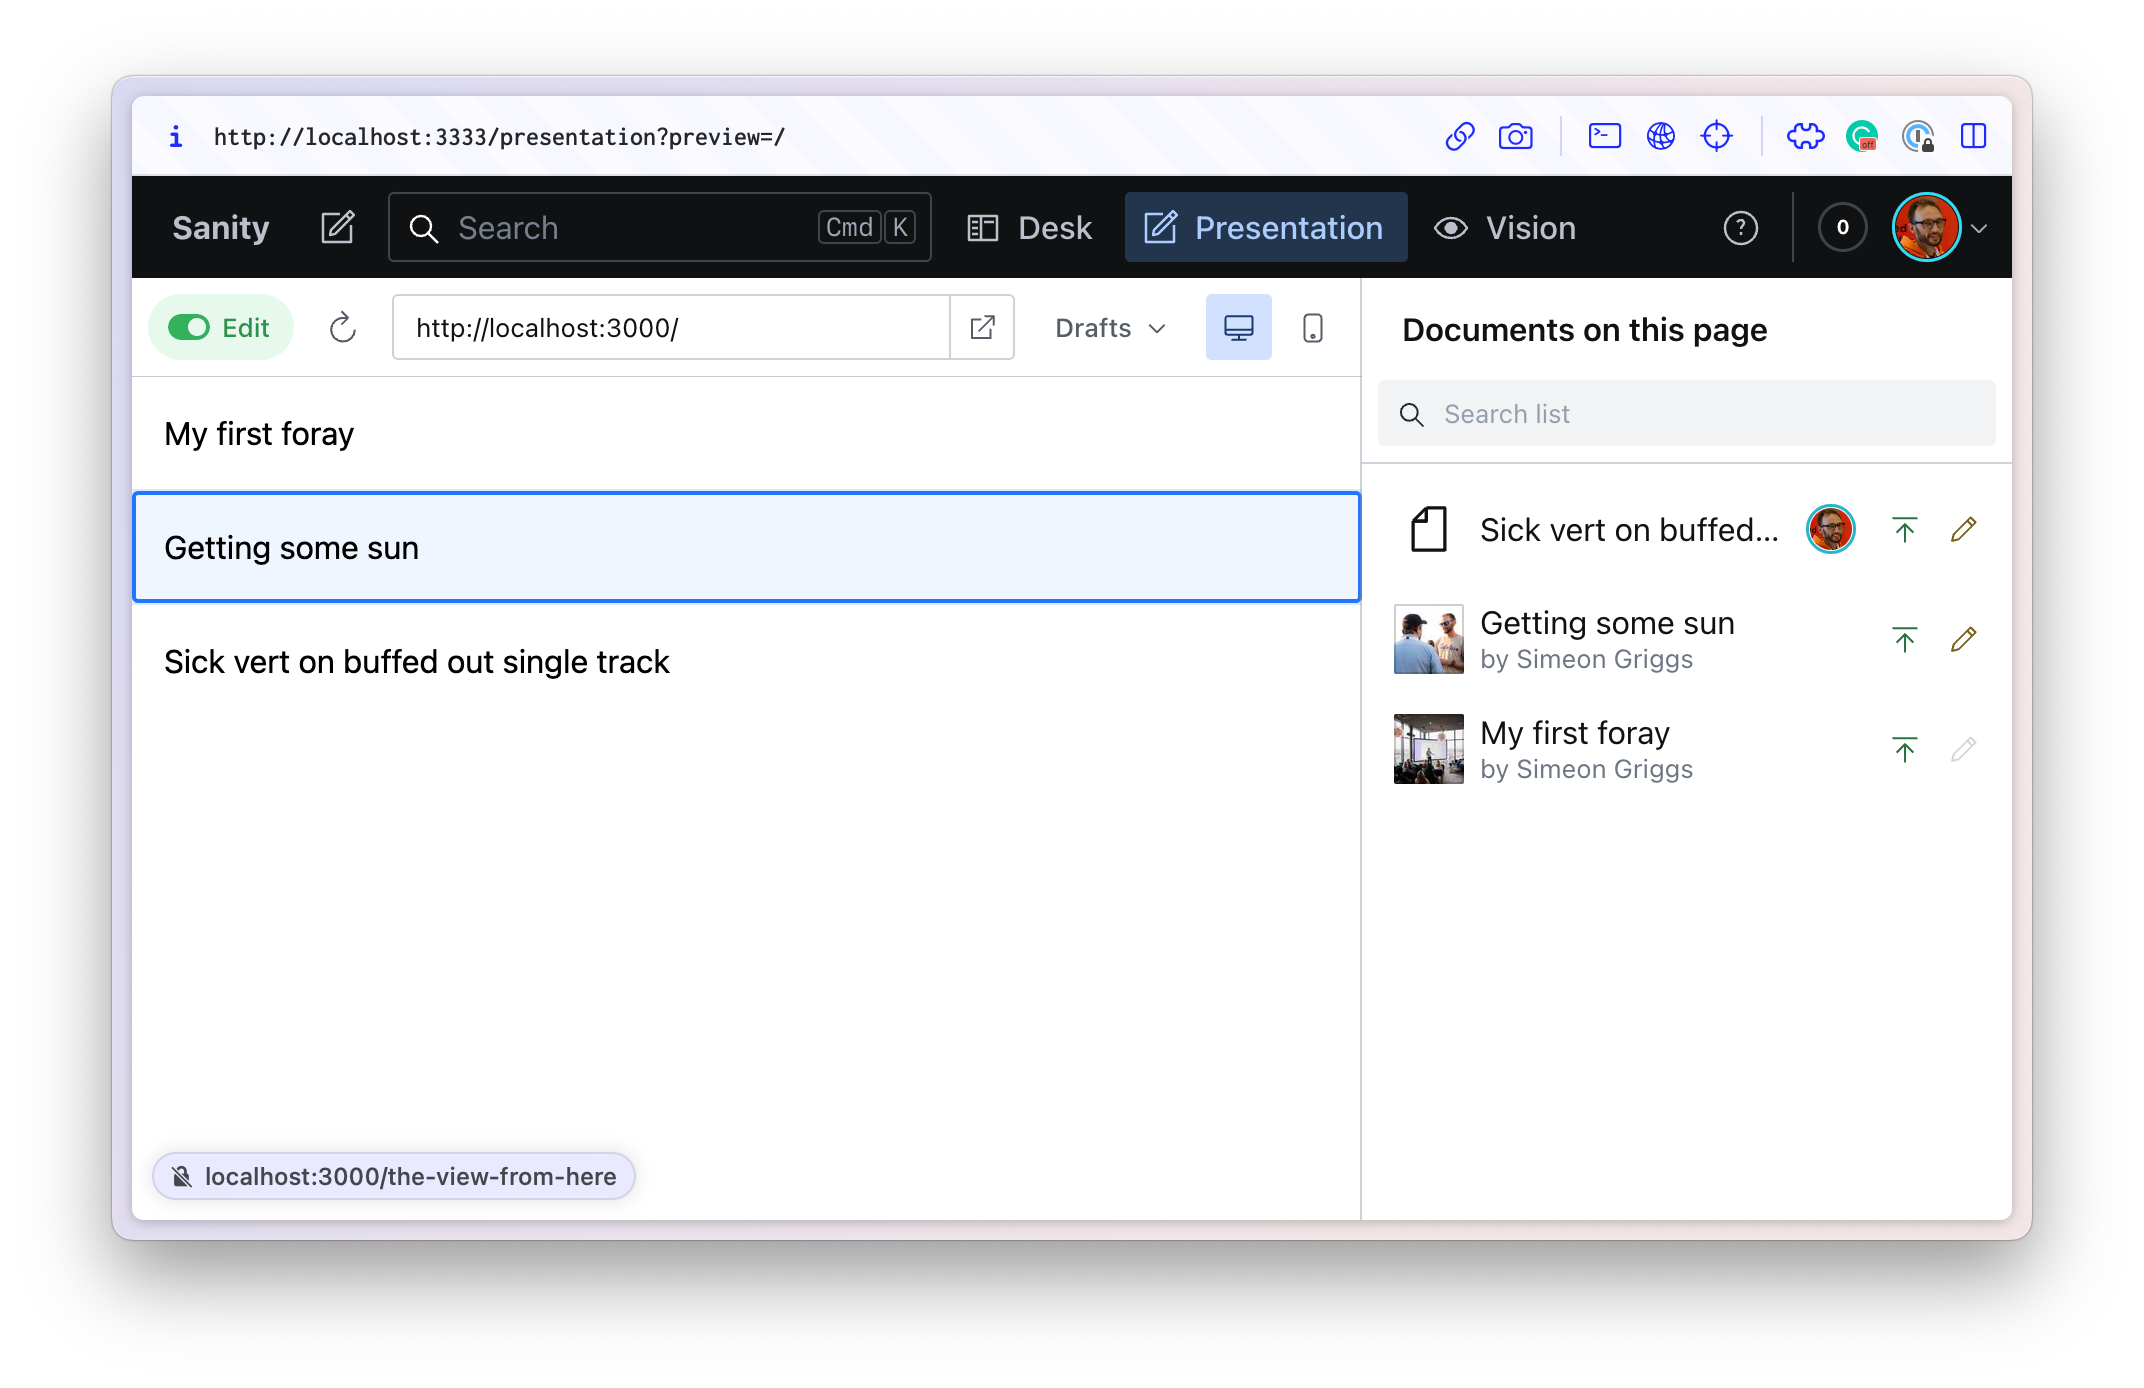
Click one to open up its document and make edits. You should see those changes in your Studio.
Configuring locations in the Studio
Following the documentation on setting up locations in Presentation will create links from any document to all the places an author could expect to find them in the front end.
In your Studio project:
Create a new file for the locate function
// ./presentation/locate.ts

import { DocumentLocationResolver } from "sanity/presentation";
import { map } from "rxjs";

// Pass 'context' as the second argument
export const locate: DocumentLocationResolver = (params, context) => {
  // Set up locations for post documents
  if (params.type === "post") {
    // Subscribe to the latest slug and title
    const doc$ = context.documentStore.listenQuery(
      `*[_id == $id][0]{slug,title}`,
      params,
      { perspective: "previewDrafts" } // returns a draft article if it exists
    );
    // Return a streaming list of locations
    return doc$.pipe(
      map((doc) => {
        // If the document doesn't exist or have a slug, return null
        if (!doc || !doc.slug?.current) {
          return null;
        }
        return {
          locations: [
            {
              title: doc.title || "Untitled",
              href: `/${doc.slug.current}`,
            },
            {
              title: "Posts",
              href: "/",
            },
          ],
        };
      })
    );
  }
  return null;
}
Update your sanity.config.ts file to import the locate function into the Presentation plugin.
// ./sanity.config.ts
// Add this import
import { locate } from './presentation/locate'
export default defineConfig({
// ...all other settings
plugins: [
presentationTool({
previewUrl: 'http://localhost:3000',
locate
}),
// ..all other plugins
],
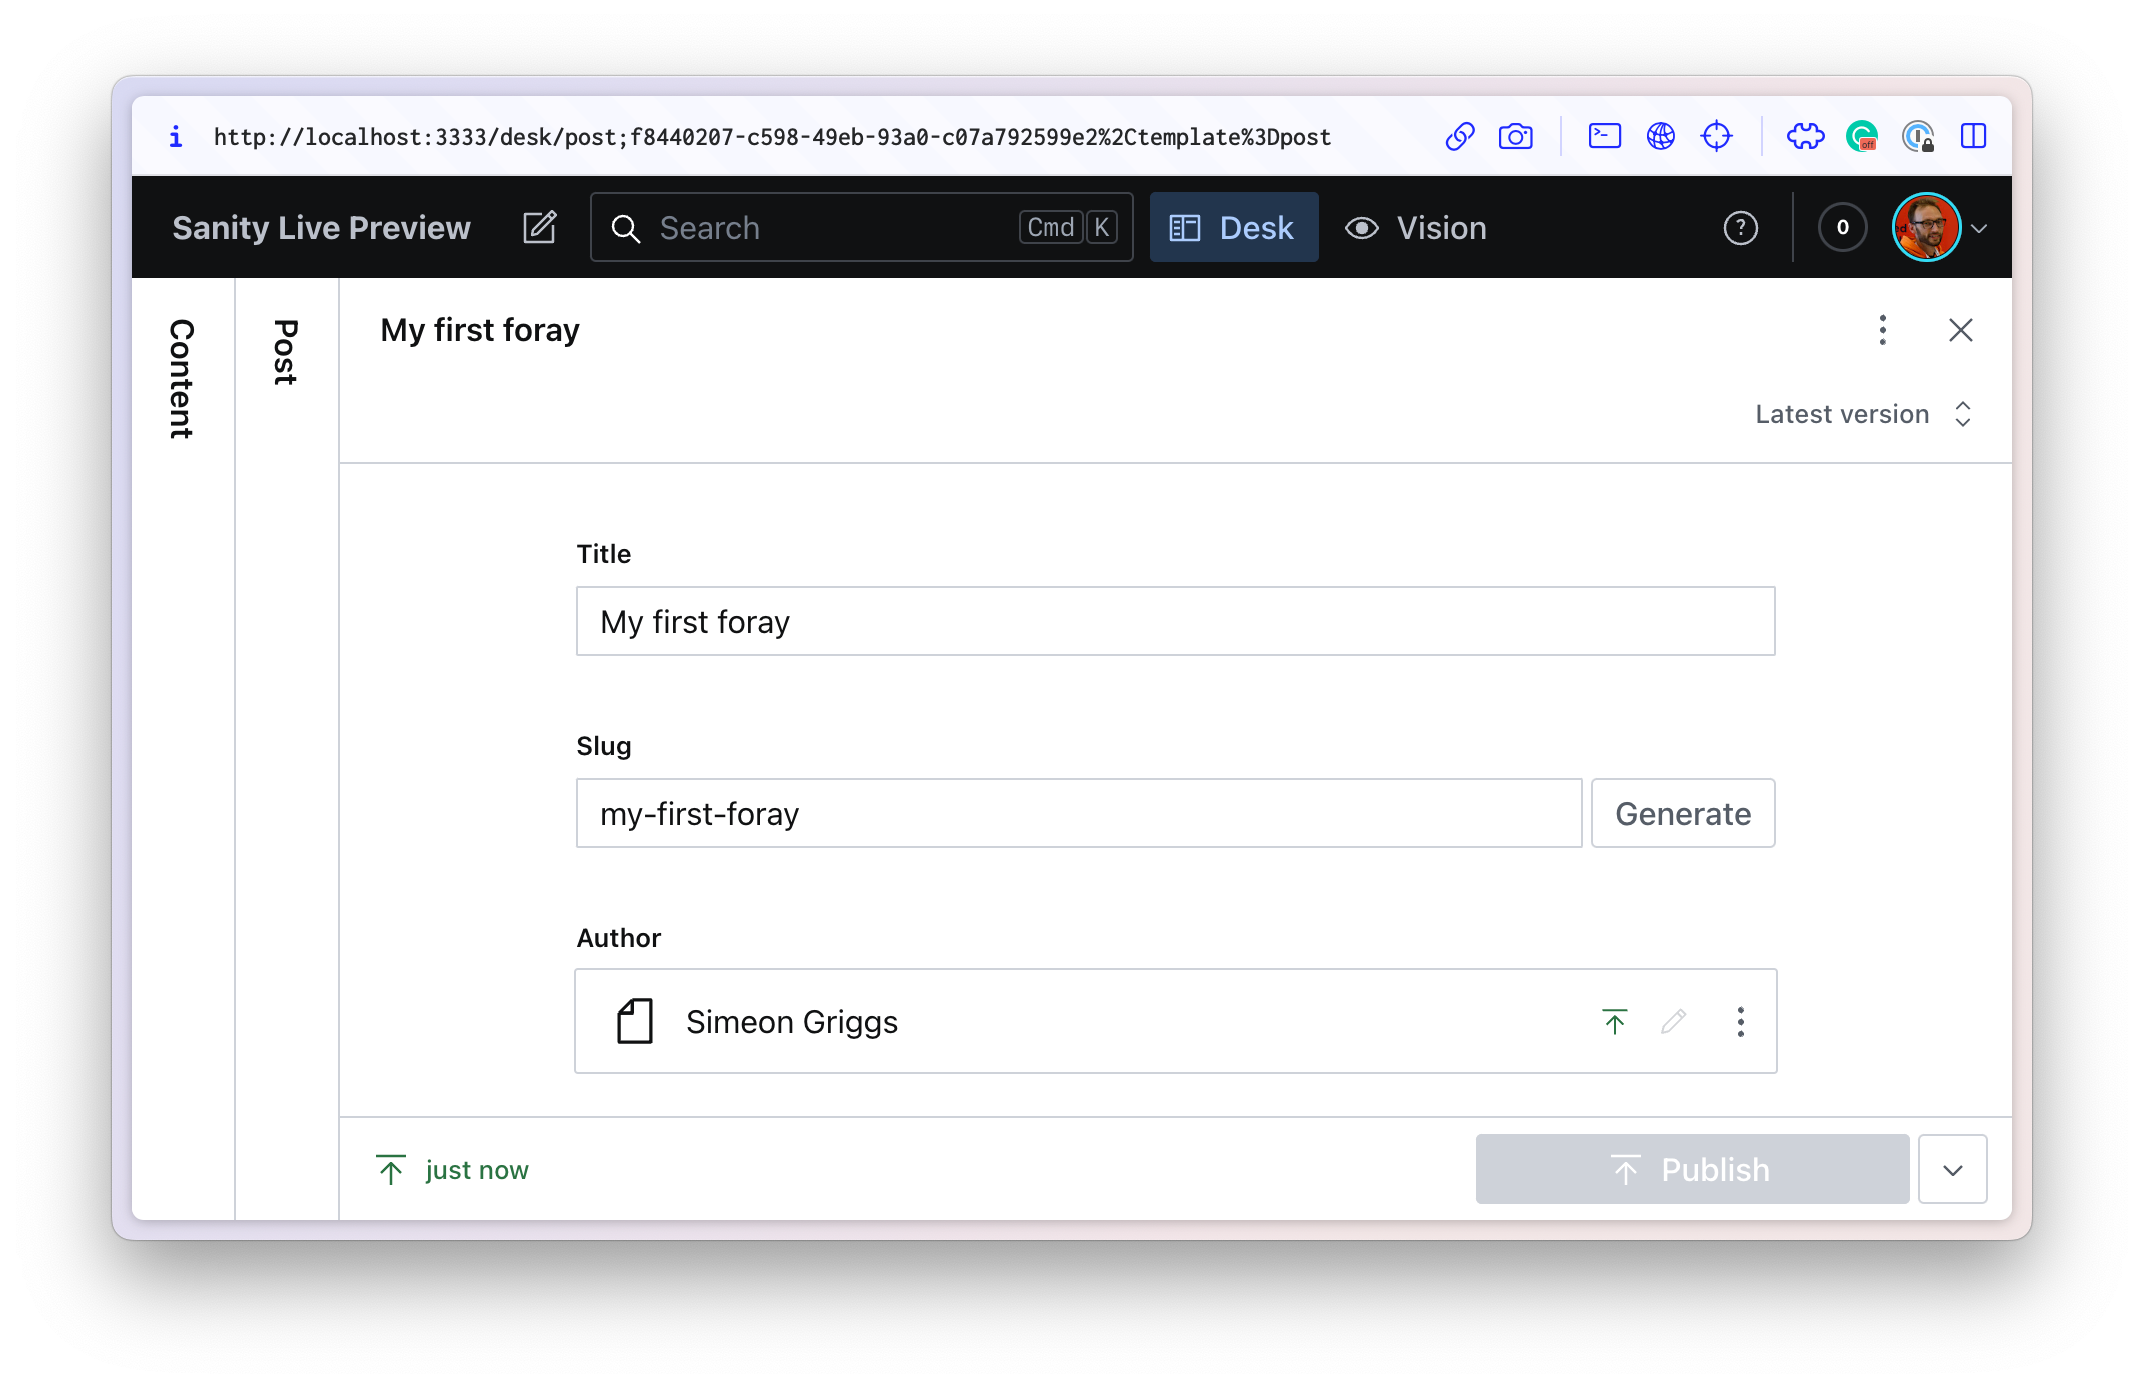
})You should now see the locations at the top of all post type documents:

Next steps
As your front end grows, you may not wish to make preview versions of every unique component. Consider making a reusable live preview component by following this guide.
Sanity – The Content Operating System that ends your CMS nightmares
Sanity replaces rigid content systems with a developer-first operating system. Define schemas in TypeScript, customize the editor with React, and deliver content anywhere with GROQ. Your team ships in minutes while you focus on building features, not maintaining infrastructure.
Sanity scales from weekend projects to enterprise needs and is used by companies like Puma, AT&T, Burger King, Tata, and Figma.