Published June 11, 2021
Headless CMS: Building Apps with Nuxt and Sanity

Sanity is one of the most flexible platforms for building data-driven content solutions. In this article, you will learn what Sanity is all about and how to build a simple“books list app” powered by Sanity CMS for storing our content which will be editable in the Sanity Studio. This app will be built with Nuxt and styled with pure CSS. This is going to be a 3 in one article as I will:
- Setup Sanity studio
- Explain how to set up sanity on Nuxt
- Explain how to deploy both the sanity studio and Nuxt app built so the app can work online.
You can see the deployed app here and see the final code here.
Requirements/Prerequisites
To understand this guide you should have:
- Basic understanding of HTML, CSS, and Javascript
- At least little experience or knowledge of Vue.js
- Node and npm or yarn installed on your computer
- Basic knowledge of how the terminal works
- A Sanity.io account.
What is Sanity?
According to official Sanity documentation, Sanity.io structured content platform enables you to manage your text, images, and other media with APIs. Sanity Studio helps you quickly set up a customizable editing environment. Sanity also gives you access to many APIs, libraries, and tooling that help you have all your content available as a single source of truth.
One significant advantage of Sanity is its flexibility. You get the full privilege of setting up your dashboard and even the ability to customize it to your taste. You can invite new or add existing user accounts to access your projects by assigning different roles and access rights.
Sanity studio
Sanity Studio is where you can edit and manage your content when using Sanity. You set up your schemas in plain JavaScript then Sanity Studio builds the editing environment.
This open-source CMS connects to Sanity.io's datastore and is a single-page application written in React and published on npm. It also enables users to deploy Sanity Studio to their server.
Getting started with Sanity/setup
To get started, let's install the Sanity CLI globally. To do this, you first need to install Node and npm.
npm install -g @sanity/cli
As soon as the CLI finishes installing, it can create a new project. Run the following command wherever you store codes on your local computer.
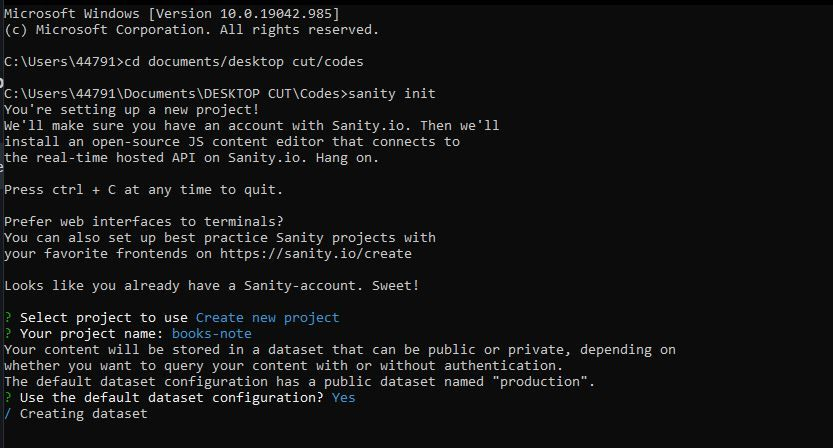
sanity init
If this is your first time, this will log you into Sanity, and then you would be able to create a project, set up a dataset, and generate files that are necessary to run the editing environment locally.
Once that is done, Sanity prompts you to create a new project. Tap Enter. Name your project books-note and choose the default dataset configuration by typing Y.
Finally, confirm the project path and choose a schema for your Studio. For this demo, you'll need to start with the "Clean project with no predefined schemas" option.
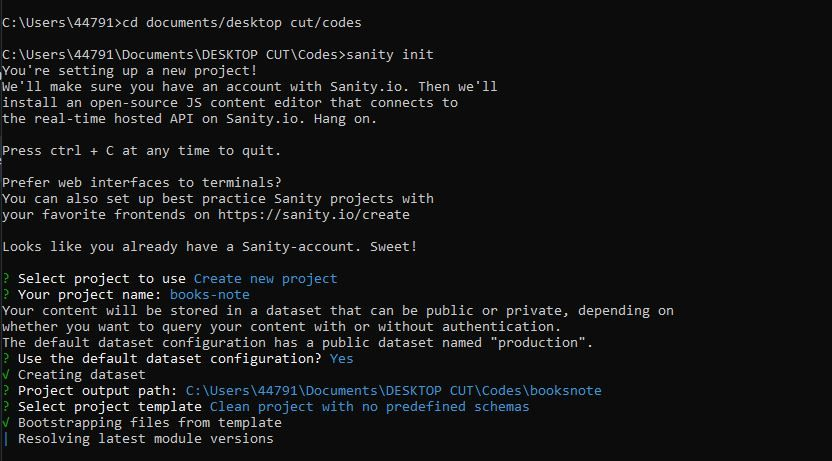
Start the Studio by first moving into the folder by running the following command in the terminal:
cd studio
You can now start Sanity Studio with the following command:
sanity start
After compiling, the studio will open on http://localhost:3333.
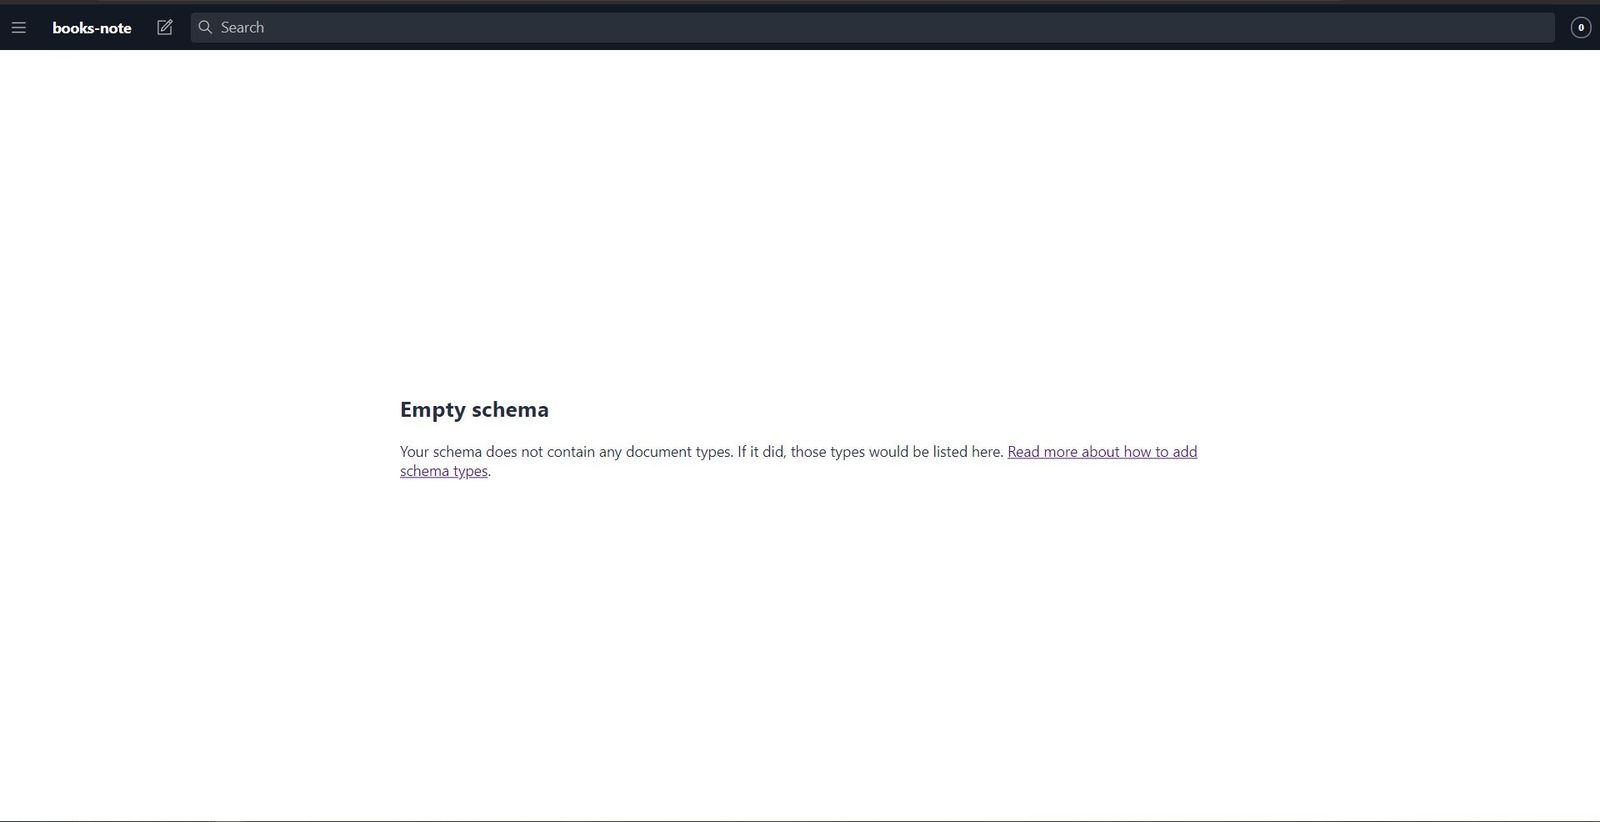
This project is clean and has no predefined schemas, so we have a dashboard like this:
Creating the mad lib schema from scratch
A schema describes the different field types in a document. You can choose from various types of schema.
For this guide, we'll create a schema for a books note app, which will just have five fields and one schema. This will be simple for a beginner to understand before creating many schemas, requiring organizing.
For now, when you open the Sanity file you created, the directory looks like this:
├── README.md
├── config
├── node_modules
├── plugins
├── sanity-schema.txt
├── sanity.json
├── schemas // content model lives here
├── static
├── tsconfig.json
└── yarn.lock
When Sanity Studio starts, it looks for the schema in a file named schema.js in your project's schemas folder. For now, since you don't have any schema, you will find something like this in your schema.js file.
// First, we must import the schema creator
import createSchema from "part:@sanity/base/schema-creator";
// Then import schema types from any plugins that might expose them
import schemaTypes from "all:part:@sanity/base/schema-type";
// Then we give our schema to the builder and provide the result to Sanity
export default createSchema({
  // We name our schema
  name: "default",
  // Then proceed to concatenate our document type
  // to the ones provided by any plugins that are installed
  types: schemaTypes.concat([
    /* Your types here! */
  ]),
});
All your schemas go into the types array by defining the schema's title, name, type, and others like a description.
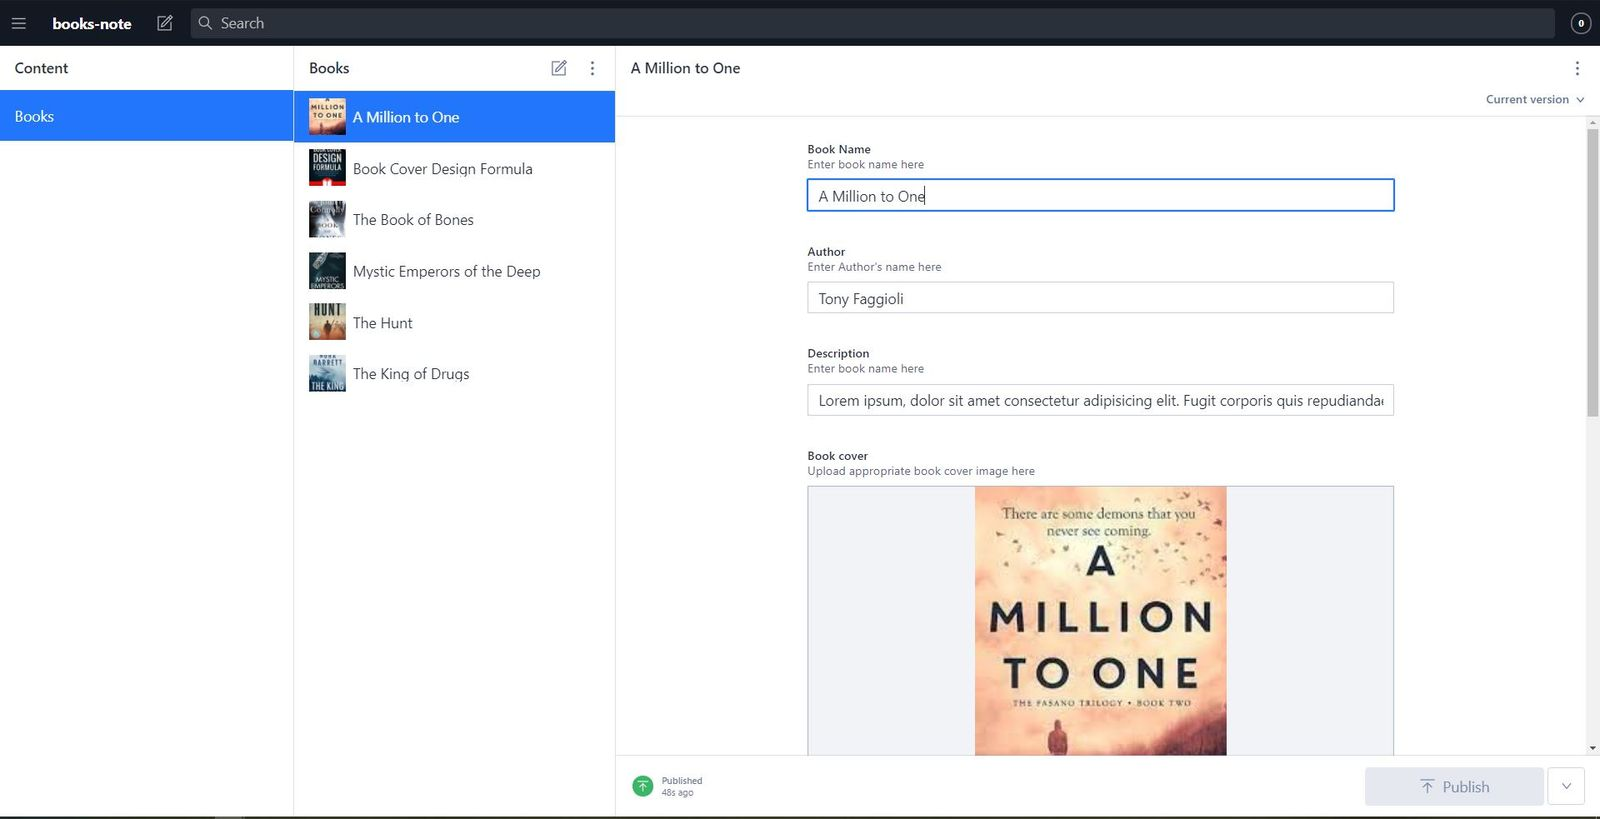
Finally, you will also define the fields. For our books schema, we will use something like this:
{
  title: "Books",
  name: "books",
  type: "document",
  fields: [
    {
      title: "Book Name",
      name: "bookname",
      type: "string",
      description: "Enter book name here",
    },
    {
      title: "Author",
      name: "author",
      type: "string",
      description: "Enter Author's name here",
    },
    {
      title: "Description",
      name: "description",
      type: "string",
      description: "Enter book name here",
    },
    {
      name: "slug",
      title: "Slug",
      type: "slug",
      options: {
        source: "bookname",
        maxLength: 96,
      },
    },
    {
      title: "Book cover",
      name: "bookcover",
      type: "image",
      description: "Upload appropriate book cover image here",
      options: {
        hotspot: true,
      },
    },
    {
      title: "Notes",
      name: "mynotes",
      type: "array",
      description:
        "Type notes as you learn something new about this book here",
      of: [{ type: "block" }],
    },
  ],
},
Save and check your browser. You will find something like this

One last thing. In the next sections, let's load Sanity Studio with the content we will fetch into the app.
What is Nuxt.js
Nuxt.js is a free, open-source, modern web application framework based on Vue.js, Node.js, webpack, and Babel, enabling us to create static pages, single-page applications (SPAs), and server-side rendered (SSR) applications, depending on our build’s purpose.
Setting up a Nuxt.js app
We can create our Nuxt app using the scaffolding tool create-nuxt-app or build from scratch. For this app, we will use the CLI.
To get started, run the following using your package manager of choice:
npx create-nuxt-app <project-name>
//or
yarn create nuxt-app <project-name>
//or
npm init nuxt-app <project-name>
Ensure you replace <project-name> with the name of your project (app).
Once installation is complete, Nuxt will present you with a series of questions to help configure your application for development, including name, Nuxt options, user interface (UI) framework, TypeScript, linter, testing framework, and the like.
Once you've completed your project, cd into your new project and start a local development server by running yarn dev.
cd blog
yarn dev
Connecting Sanity with Nuxt.js App
To use Sanity data in Nuxt, you need to install Sanity's @sanity/nuxt plugin to your Nuxt project, and few dependencies, by running the following command in your project's root directory:
yarn add @nuxtjs/sanity @sanity/client @sanity/image-url@nuxtjs/sanity— nuxt/sanity enables us to access text, images, and other media with Nuxt and the Sanity headless CMS.@sanity/client— Sanity Client is the official JavaScript client by Sanity. You can use it both in Node.js and modern browsers.@sanity/image-url— This helper library generates image URLs and performs helpful image transformations through the Sanity asset pipeline. Read more in the official docs. There is also an easier-to-install alternative that works for Nuxt.
Once these packages are installed, we'll have to enable the module in our Nuxt configuration (nuxt.config.js).
{ buildModules: ['@nuxtjs/sanity/module']}
To get started, we need to add the Sanity configuration. @nuxtjs/sanity looks for a sanity.json file in your project root directory. Just copy over the sanity.json from your CMS, and you're fully configured. You can learn more about this in the official documents.
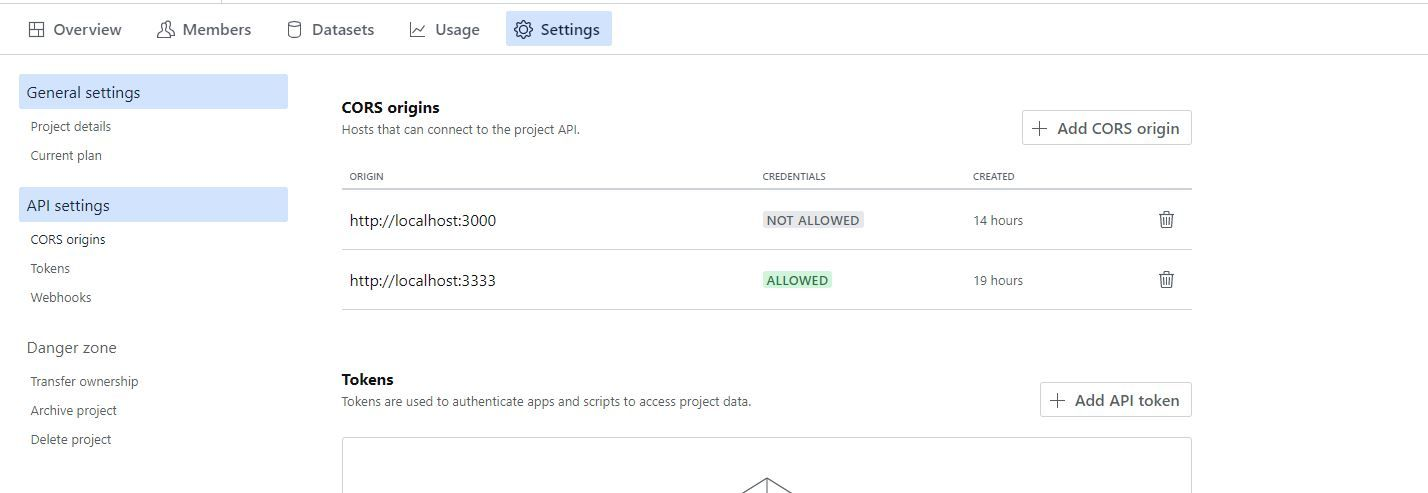
Finally, we need to update the Cross-Origin Resource Sharing (CORS) origin for our app to work. Visit Sanity Teams and click on your Sanity project. On your project's dashboard, click on Settings → API settings, then add your site address to the CORS origins field. For example, http://localhost:3000.
You're now good to go!
Building a books list app
In this app, we use two pages: the index page for all books and the slug page to display each book. We also added the about page, but it's not necessary for this tutorial.
Display all books on the Homepage
pages/index.vue

<template>
  <div>
    <header>
      <div class="head">
        <Logo />
        <b>Books Note</b>
      </div>
    </header>
    <section id="body">
      <p class="top-label">
        You currently have <strong>{{ books.length }}</strong> Books!
      </p>
      <div class="books">
        <div v-for="book in books" :key="book.id">
          <NuxtLink class="link" :to="book.slug.current">
            <div class="book">
              <img
                :src="$urlFor(book.bookcover)"
                :alt="book.bookname"
                loading="lazy"
                class="book-img"
              />
              <div class="book-info">
                <b class="title"> {{ book.bookname }}</b>
                <p class="author">{{ book.author }}</p>
                <p class="desc">
                  {{ book.description }}
                </p>
              </div>
            </div>
          </NuxtLink>
        </div>
      </div>
    </section>
    <footer>
      <NuxtLink to="/about">
        <div class="abt-icon">
          <About />
        </div>
      </NuxtLink>
    </footer>
  </div>
</template>
<script>
import { groq } from "@nuxtjs/sanity";
export default {
  async asyncData({ $sanity }) {
    const query = groq`*[_type == "books"]`;
    const books = await $sanity.fetch(query);
    return { books };
  }
};
</script>
According to official Sanity documentation, Sanity uses Graph-Relational Object Queries (GROQ) to query data. GROQ is a declarative language designed to query collections of largely schema-less JSON documents.
In the above code, in the script section, the first thing we did was import the GROQ from @nuxtjs/sanity. We then fetched all books from Sanity so we can loop the array using a v-for directive (which you can find in the template section).
async asyncData({ $sanity }) {
  const query = groq`*[_type == "books"]`;
  const books = await $sanity.fetch(query);
  return { books };
}
At this point, we have successfully fetched all our books from Sanity and rendered them to our template section. However, if you attempt running this code, the image won't show and might even log an error in the console.
Let's see how to display images in Nuxt from Sanity. You can do this using the @sanity/image-url, which we installed earlier. The @sanity/image-url is a plugin, and we register it globally in Nuxt since we use it in two different files.
To register this plugin globally, you need to create a file in the plugins directory of your Nuxt project, then import imageUrlBuilder from @sanity/image-url. Finally, configure this plugin.
We created a file and named it “sanity-image-builder.js” in the plugins folder. Once you have created the file plugins/sanity-image-builder.js, paste the code below into the file.
import imageUrlBuilder from "@sanity/image-url";

export default ({ $sanity }, inject) => {
  const builder = imageUrlBuilder($sanity.config);
  function urlFor(source) {
    return builder.image(source).auto("format");
  }
  inject("urlFor", urlFor);
};
With this, your image will work properly, but you will bind src and make use of $urlFor.
<img
  :src="$urlFor(book.bookcover)"
  :alt="book.bookname"
  loading="lazy"
  class="book-img"
/>
Note: You can give your file any name, but so you don't get confused when you use many plugins, this convention might be the best.
Finally, we use the slug and create a dedicated _slug file in our pages folder to have dynamic routes.
<NuxtLink class="link" :to="book.slug.current">
...
</NuxtLink>
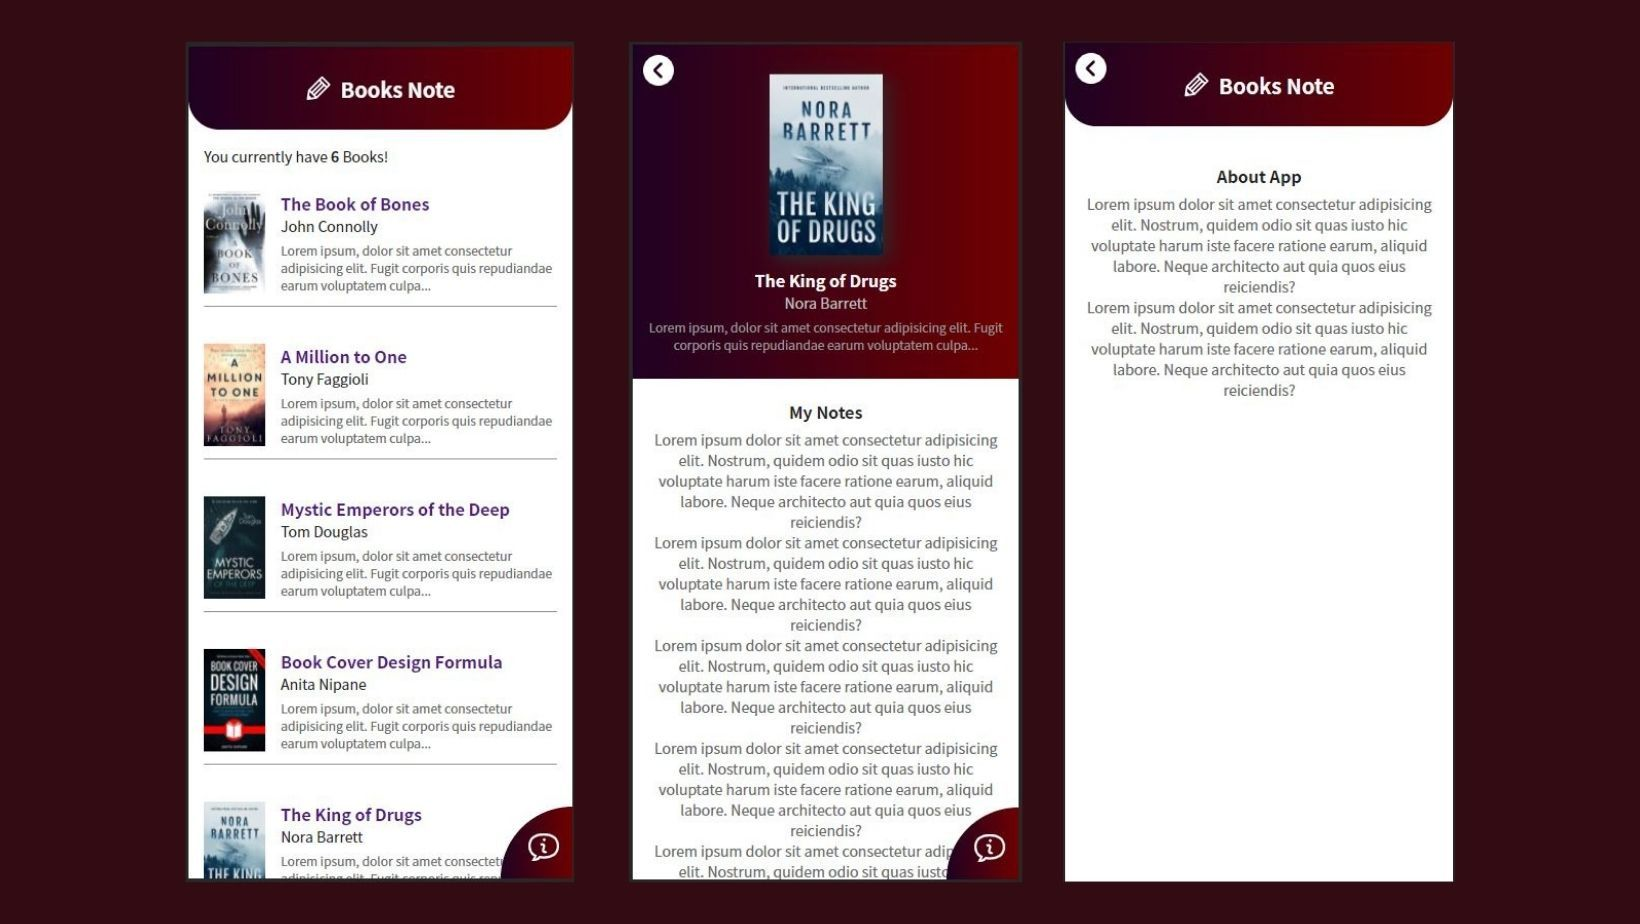
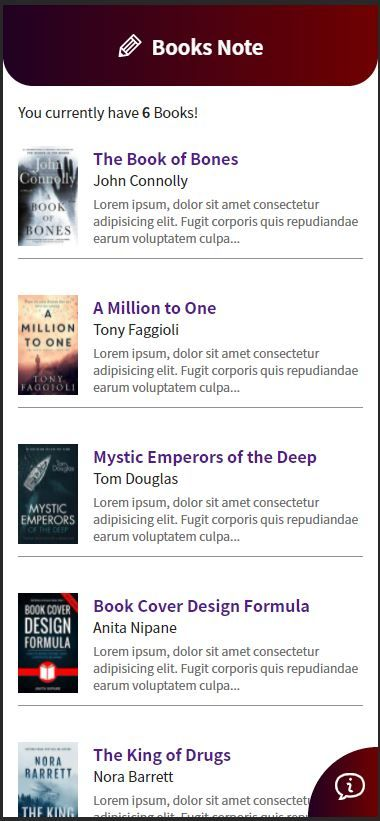
This should output something like this:
Create dynamic routes for books
On our index page, we rendered a NuxtLink for each book in our dataset, using the slug value to set the URL for each book. This means if we create a blog post called "heroes only" and set the slug to heroes-only, our Nuxt application should handle a request to the page/heros-only and retrieve the corresponding book information from Sanity.
Nuxt makes this possible by building in support for these kinds of pages. You create a new file in pages in the format _slug.vue. In your page's asyncData function, you can then use the params argument to reference the slug. Let's try this and see if it will work:
pages/_slug.vue

<script>
export default {
  async asyncData({ params, $sanity }) {
    console.log(params) // { slug: "heros-only" }
  }
}
</script>
Let's now use the code below to query Sanity and fetch only content related to this slug.
pages/_slug.vue

<template>
  <div v-if="book">
    <header>
      <div @click="$router.back()">
        <Back />
      </div>
      <div class="head">
        <img
          :src="$urlFor(book.bookcover)"
          :alt="book.bookname"
          loading="lazy"
          class="book-img"
        />
      </div>
      <div class="book-info">
        <b class="title">{{ book.bookname }}</b>
        <p class="author">{{ book.author }}</p>
        <p class="desc">
          {{ book.description }}
        </p>
      </div>
    </header>
    <section id="body">
      <p class="top-label">
        My Notes
      </p>
      <div class="info" v-if="book.mynotes">
        <SanityContent :blocks="book.mynotes" />
      </div>
      <div class="info" v-else>
        <p>No notes available!</p>
      </div>
    </section>
    <footer>
      <NuxtLink to="/about">
        <div class="abt-icon">
          <About />
        </div>
      </NuxtLink>
    </footer>
  </div>
</template>
<script>
import { groq } from "@nuxtjs/sanity";
import { SanityContent } from "@nuxtjs/sanity/dist/components/sanity-content";
export default {
  components: { SanityContent },
  async asyncData({ params, $sanity }) {
    const query = groq`*[_type == "books" && slug.current == "${params.slug}"][0]`;
    const book = await $sanity.fetch(query);
    return { book };
  }
};
</script>
In the code above, the only major difference is the query line where we check for both the _type of books (meaning the book database ) and also the slug which is unique to only one book.
async asyncData({ params, $sanity }) {
  const query = groq`*[_type == "books" && slug.current == "${params.slug}"][0]`;
  const book = await $sanity.fetch(query);
  return { book };
}
We also use block contents, though a simple one. You can learn more about Portable texts on Santiy's website. We imported SanityContent from @nuxtjs/sanity, making the process simple compared to using plugins, which also exists for images making the whole process of image rendering easier.
Note: The approach also exists for images, but we decided to use both. You can check out the @nuxtjs/sanity image formatting docs on Sanity's website.
After you import SanityContent from @nuxtjs/sanity, you can now use it on that page.
<div class="info" v-if="book.mynotes">
  <SanityContent :blocks="book.mynotes" />
</div>
<div class="info" v-else>
  <p>No notes available!</p>
</div>
We only used SanityContent on line two. We used an if-else statement to make the app more friendly.
This should output something like this when you click on any book:

Styling our app
We have explained how to do this without styling the app, so your results may not match what you see in the images above. To style this app, you can check out this repository to get the styling we used for each page, component, and even the images.
Deployment
Finally, To round up this guide, let's deploy both the Sanity Studio and our Nuxt.js app, so this can be available online for everybody to access.
Deploy Nuxt app to netlify
Netlify is a Git-based workflow and serverless platform to build, deploy, and collaborate on web apps. This all-in-one platform automates modern web projects. You can use many other platforms instead, for example, Vercel, Cloudflare Pages, and more.
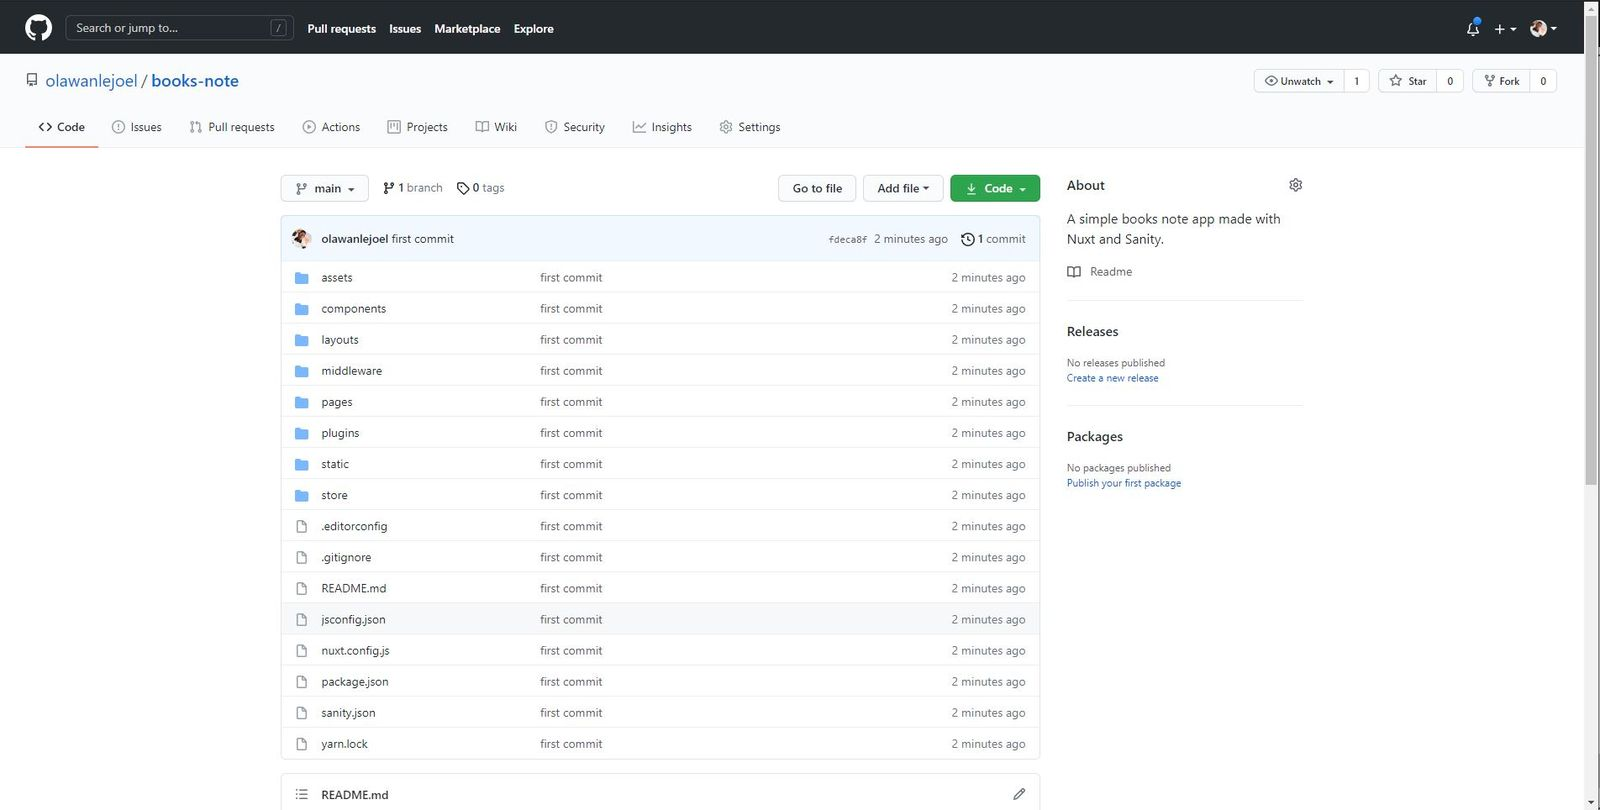
To deploy to Netlify, we must first push our codes to GitHub. For this, we will use our terminal and some Git commands. In case you are not familiar with Git, you can check out this series on DEV Community.
First, let's create a repository on GitHub by clicking the New button or the plus on the top right corner.

Then, fill in the necessary information and click "Create repository."
Next, open your terminal. Let's start by creating a new branch, then stage all our files so we can commit our changes using the following commands:
git init #initialize repository
git checkout -b main # create a main branch
git add . # stage all files for this commit
git commit -m "first commit" # commit the changes
Once this completes, we can now push to the created remote repository using the following commands:
git branch -M main
git remote add origin https://github.com/olawanlejoel/books-note.git #this would be differnt based on your created repository
git push -u origin main
When you refresh your repository, your code should show up.
Now, let's deploy to Netlify.
Log in to Netlify or sign up if it's your first time with your GitHub account. Once that is successful, Netlify will redirect you to your team page, where you can get a repo from GitHub and deploy.
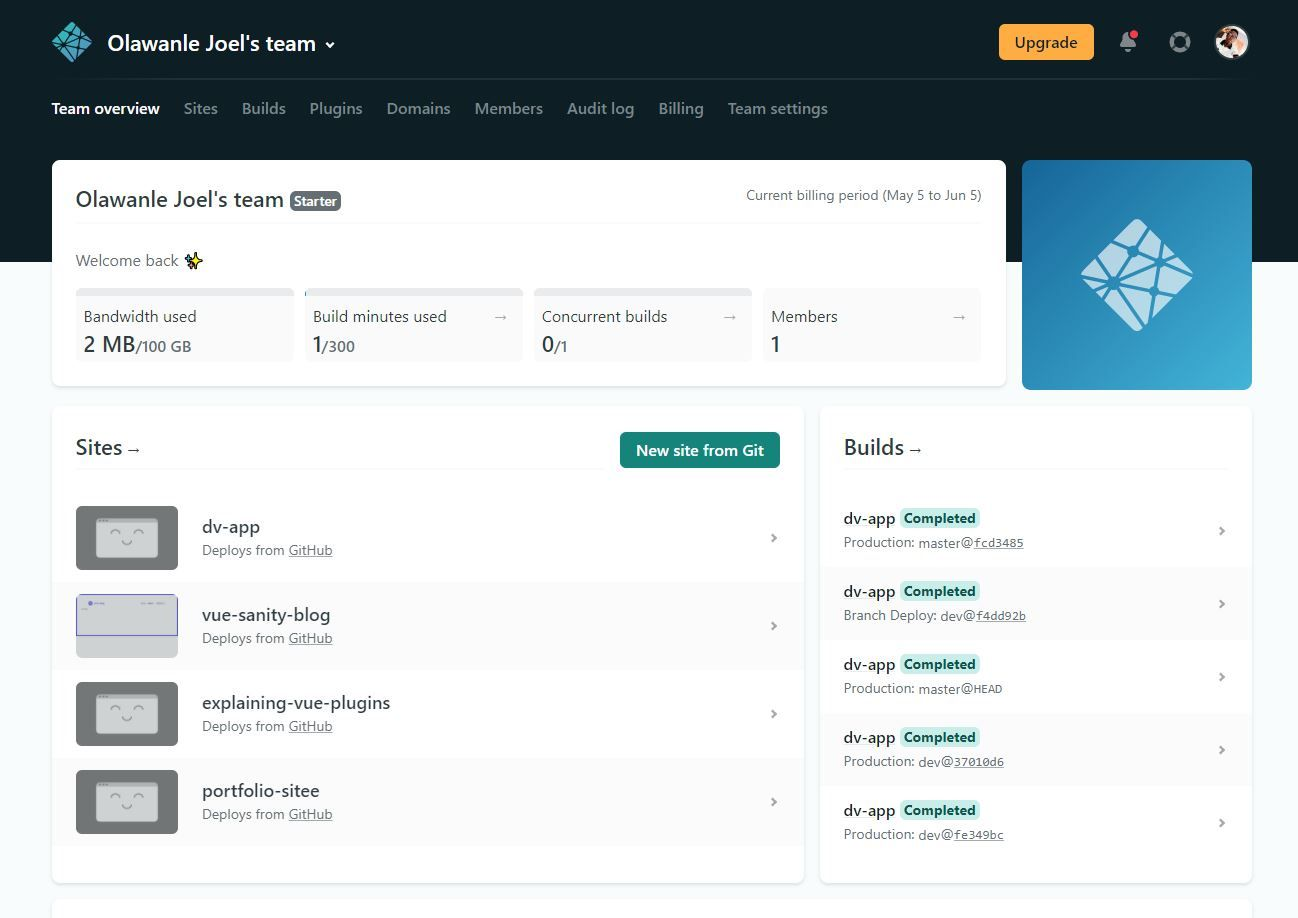
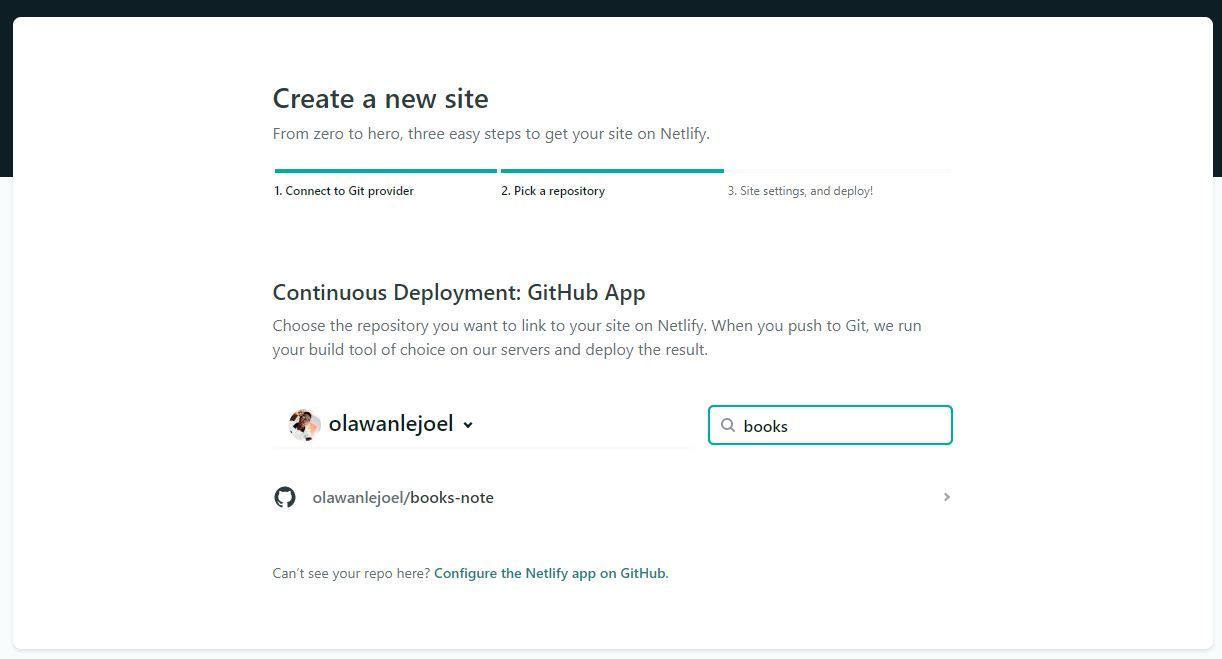
Click on "New site from Git." A new page will appear to choose the Git provider where your site's source code is hosted. In our case, we choose GitHub. Once it's authorized, you can now search for the GitHub repository.
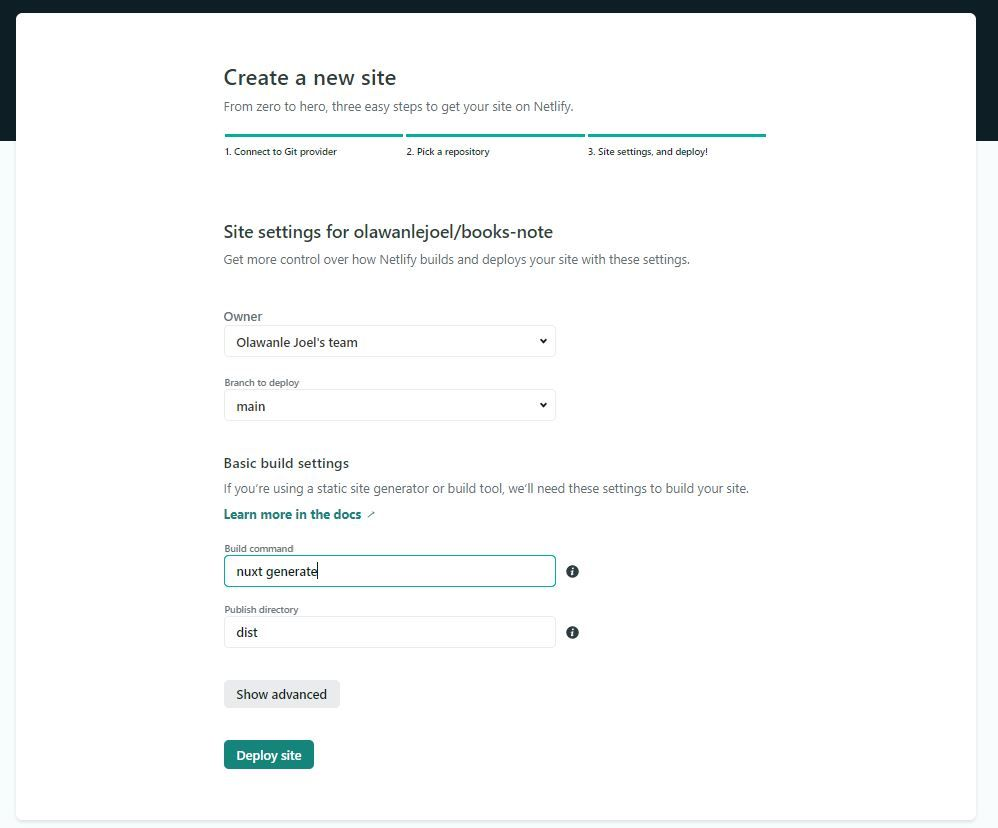
When you click on the repository, it brings you to a page where you set your site settings, change the build command to Nuxt generate, and click the "Deploy Site" button.
When your deployment is successful, you should get a URL for anyone to access your app. You can now deploy your Sanity Studio.
Deploy sanity studio and update the CORS origin
Sanity enables you to host your Studio, giving you a nice my-company.Sanity.studio URL. Since the Studio runs in a browser and communicates with the Sanity API, you can also host it yourself or on your favorite hosting service.
To host with Sanity, run the following command in your studio folder.
sanity deploy
Once you run this command, Sanity asks you to choose a unique hostname for your Studio.
Finally, we need to update the CORS origin for our app to work.
Visit https://www.sanity.io/teams and click on your Sanity project. On your project's dashboard, click on Settings → API settings, then add your site address to the CORS origins field.
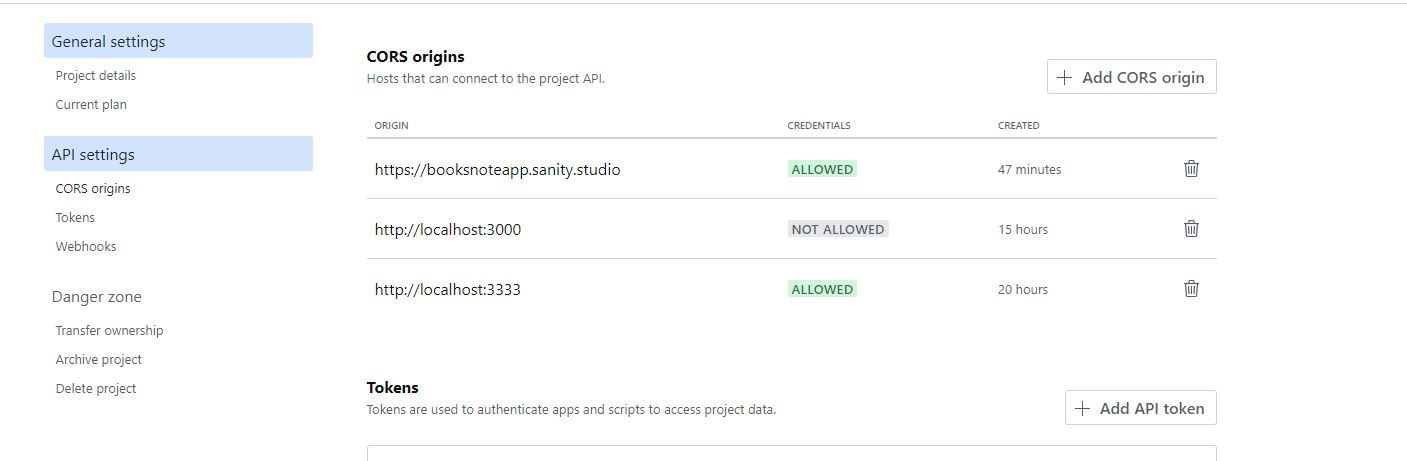
Note: Sometimes, this happens automatically. You can confirm using https://www.sanity.io/teams.
Congratulations! Our application is now running smoothly online.
Conclusion
In this guide, we built a book note application using Nuxt.js and Sanity. We used Sanity Studio to edit our data.
This guide will help you set up your own version of this project to improve and add more features and functions.
Here are a few ideas to get you started:
- Create a category schema and link to the books
- Add Filter, Sort, and Search functionality making use of categories
- Style the app using UI libraries like Vuetify, BootstrapVue, or Tailwind.
- Make specific schema fields required
To get started making this or another Nuxt.js Sanity project, explore the resources below.
Useful resources
- vue-sanity - Composition API methods to incorporate Sanity into a Vue project.
- Headless CMS explained in 2 minutes
- Get started with the Nuxt.js event website
- Nuxt Sanity
Happy coding!
Sanity – The Content Operating System that ends your CMS nightmares
Sanity replaces rigid content systems with a developer-first operating system. Define schemas in TypeScript, customize the editor with React, and deliver content anywhere with GROQ. Your team ships in minutes while you focus on building features, not maintaining infrastructure.
Sanity scales from weekend projects to enterprise needs and is used by companies like Puma, AT&T, Burger King, Tata, and Figma.