Published June 08, 2021
How to Create a Progressive Web Application with Vue and Sanity

In this article, you will learn how to build a simple web application with Vue.js, query your data from Sanity, and make it a Progressive Web Application (PWA) by installing the PWA plugin. In making it a PWA, the app will be able to be installed on mobile phones.
You can see the deployed app here and see the final code here.
Requirements/Prerequisites
To understand this guide you should have:
- Basic understanding of HTML, CSS, and Javascript
- At least little experience or knowledge of Vue.js
- Node and npm or yarn installed on your computer
- Basic knowledge of how the terminal
What is PWA?
PWA stands for Progressive Web App. Google Chrome engineer Alex Russell introduced the term in his blog post in 2015. Since then, Google has been promoting the use of PWAs actively and has provided a lot of resources on the topic such as a site explaining them in more detail.
A PWA is an app built from the web technologies we all know and love, like HTML, CSS, and JavaScript, but with a feel and functionality that challenges an actual native app. Big applications like Twitter makes use of PWAs.
Why do you need PWA
Over the years, we have always had native apps but the cost of building and maintaining a native app is cumbersome and quite expensive. Luckily, we now have the option of building progressive web applications, which combines the features of a native app — such as native speed and offline usage — with the technology we use on the web, all without downloading from an app store.
Still thinking of why you should make use of PWA?
- It is reliable and loads instantly
- It loads and responds very fast
- It feels natural
If that sounds nice to you, then read on because we will install PWA in this article and set it up in our application.
What is Sanity?
Sanity is a content platform that treats your structured content as data. It comes bundled with an open-source, real-time headless CMS that can be customized with JavaScript. With Sanity, you can manage your text, images, and other media via their APIs.
Why Sanity
As you make use of Sanity, you will discover many reasons to continue using Sanity to store your content, but for this article, I will highlight two:
- Flexibility – Sanity gives you the full privileges of setting up your dashboard and even the ability to customize up to your taste. You are also entirely in charge of managing your dashboard. Sanity is the most flexible platform for building data-driven content solutions.
- Support – Sanity has a robust community, always ready to either help you as a newbie or whenever you have challenges using Sanity. They have a huge slack channel that appreciates you whenever you build with sanity or provide content with sanity.
You can read more on why you should make use of Sanity here.
Sanity Studio
The Sanity Studio is an open-source CMS built with React.js that allows users to use toolkits and plugins to create the workflow that optimizes for how you want to work with content. It offers rapid configuration and free form customization.
Getting setup with Sanity
To start a new project with Sanity, we'll install the Sanity CLI globally. To do this you will need to have Node and NPM installed.
npm install -g @sanity/cliAs soon as the CLI finishes installing, you'll be able to create a new project using it. Run the following command wherever you store your codes on your local computer.
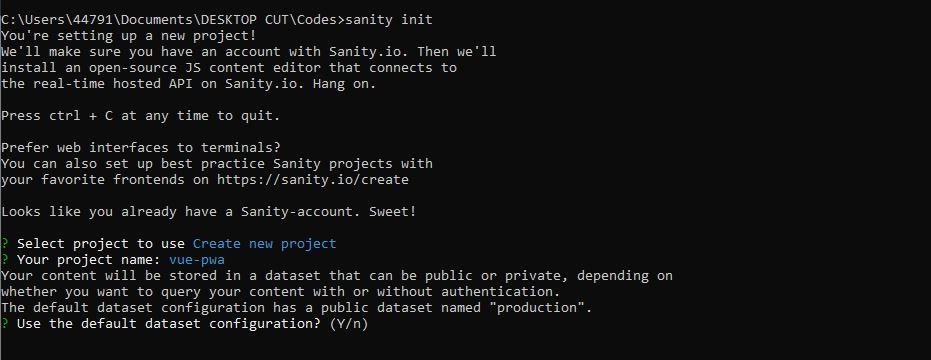
sanity initThis will log you into Sanity, if this is your first time, and let you create a project, set up a dataset, and generate the files needed to run the editing environment locally.
Once that is done, you will be prompted to create a new project, tap Enter. Name your project vue-pwa and choose the default dataset configuration by typing Y.
The last thing will be to confirm the project path and choose a schema for your studio. For this demo, you'll need to start with the “Clean project with no predefined schemas” option.
To start the studio, move to the folder by running the following command in the terminal:
cd studioNow you can start the studio with the following command:
sanity startAfter compiling, the studio will open on http://localhost:3333.
Creating a friends schema from scratch
A schema describes the different field types in a document. There are different types of schema you can choose from.
For this guide, we will be creating a schema for a friends list app. We need two schemas for this: one for the contacts and one for categories. The contact schema will have properties including first name, last name, age, religion, and phone number, while the category will have name and description. We will also see how to use options, implement dropdowns, and lots more within Sanity studio.
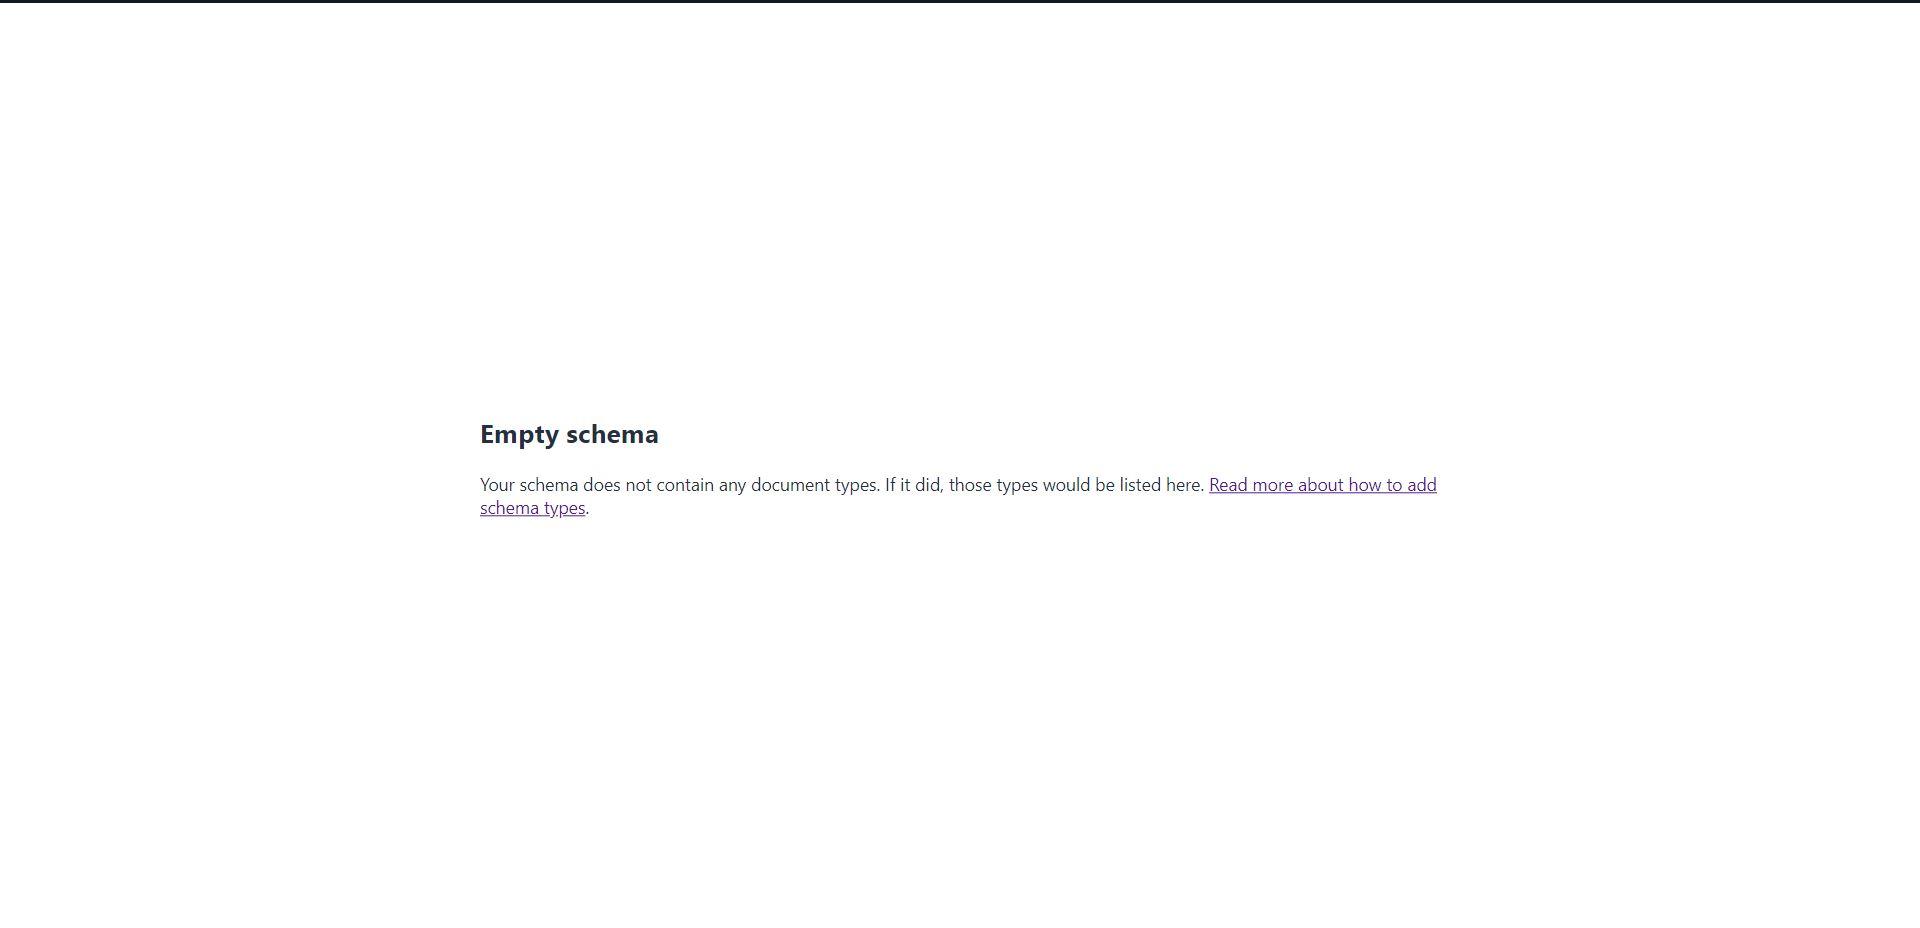
When the studio starts up, it looks for the schema in a file named schema.js in the schemas folder in your project. For now, since we don’t have any schema, you will find something like this in your schema.js file.
// First, we must import the schema creator
import createSchema from "part:@sanity/base/schema-creator";
// Then import schema types from any plugins that might expose them
import schemaTypes from "all:part:@sanity/base/schema-type";
// Then we give our schema to the builder and provide the result to Sanity
export default createSchema({
  // We name our schema
  name: "default",
  // Then proceed to concatenate our document type
  // to the ones provided by any plugins that are installed
  types: schemaTypes.concat([
    /* Your types here! */
  ]),
});
All your schemas go into the types array by defining the schemas title, name, type, and finally, the fields. For our personalDetails schema, we will be having something like this.
types: schemaTypes.concat([
/* Your types here! */
{
title: "Personal Details",
name: "personalDetails",
type: "document",
fields: [
{
title: "Firstname",
name: "firstname",
type: "string",
},
{
title: "Lastname",
name: "lastname",
type: "string",
},
{
title: "Nickname",
name: "nickname",
type: "string",
},
{
name: "slug",
title: "Slug",
type: "slug",
options: {
source: "nickname",
maxLength: 96,
},
},
{
title: "Birth Day",
name: "birthday",
type: "number",
},
{
title: "Birth Month",
name: "birthmonth",
type: "string",
options: {
list: [
{ title: "January", value: "January" },
{ title: "Febuary", value: "Febuary" },
{ title: "March", value: "March" },
{ title: "April", value: "April" },
{ title: "May", value: "May" },
{ title: "June", value: "June" },
{ title: "July", value: "July" },
{ title: "August", value: "August" },
{ title: "September", value: "September" },
{ title: "October", value: "October" },
{ title: "November", value: "November" },
{ title: "December", value: "December" },
], // <-- predefined values
layout: "dropdown", // <-- defaults to 'dropdown'
},
},
{
title: "Phone Number",
name: "phoneNumber",
type: "string",
options: {
maxLength: 11,
},
},
{
title: "Profile image",
name: "profileImage",
type: "image",
options: {
hotspot: true,
},
},
{
title: "Short Bio",
name: "excerpt",
type: "string",
options: {
maxLength: 200,
},
},
],
},
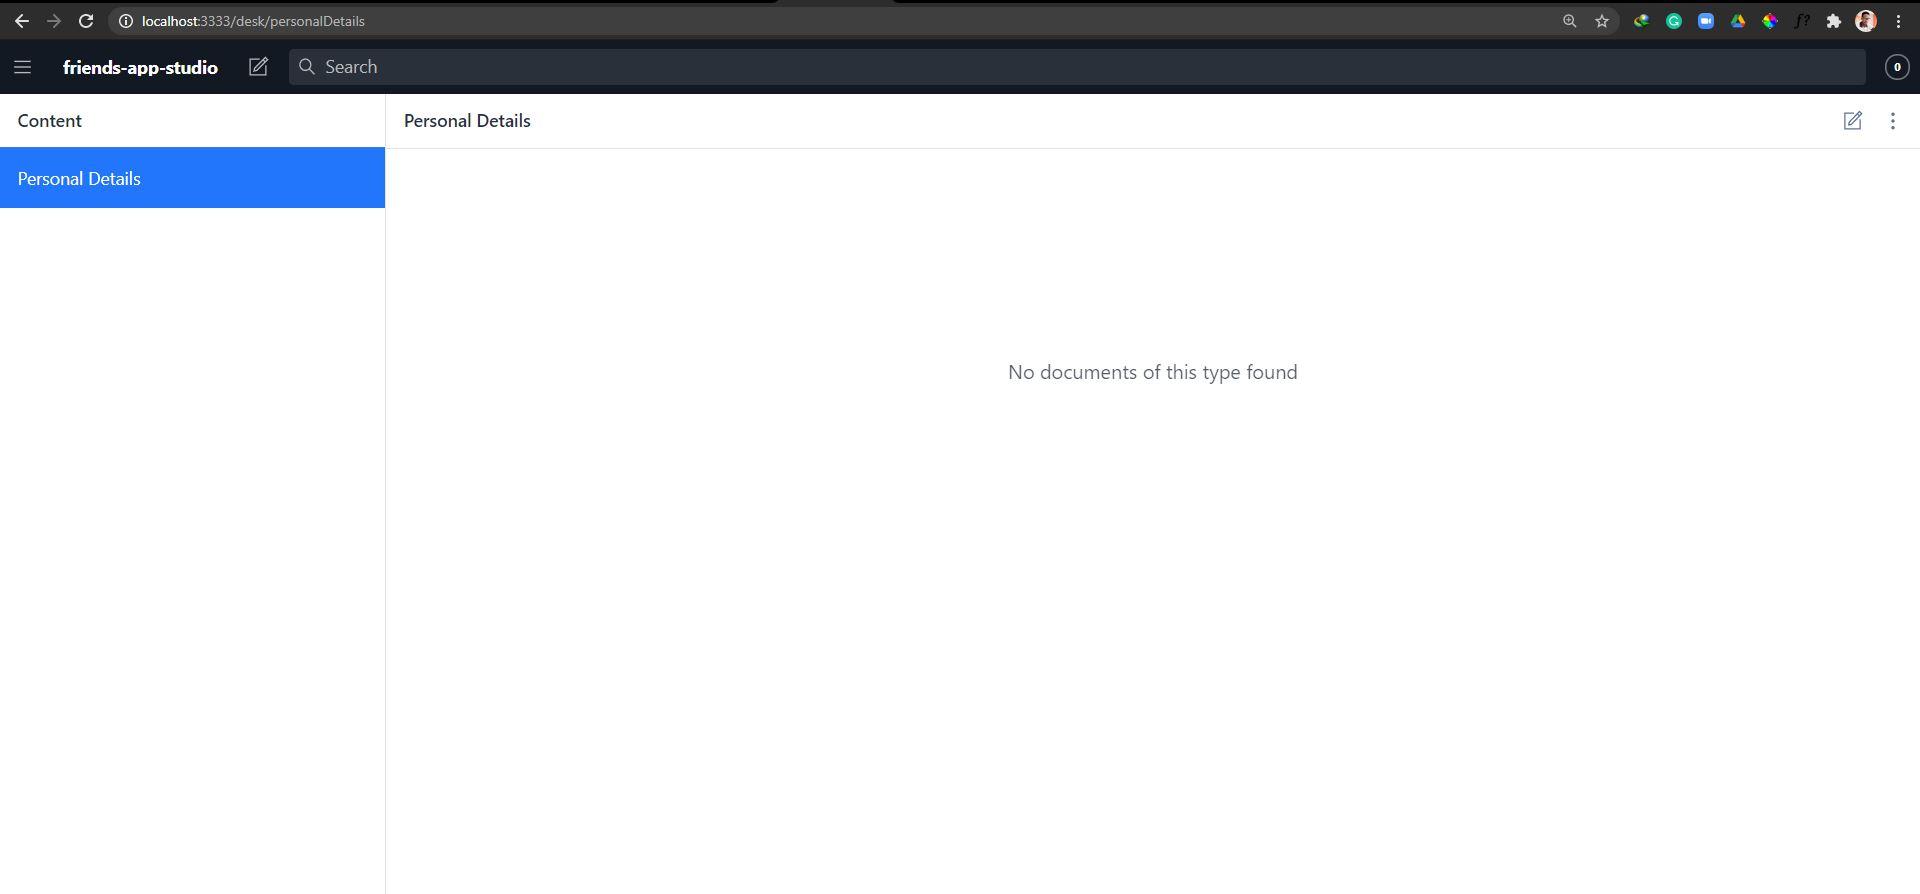
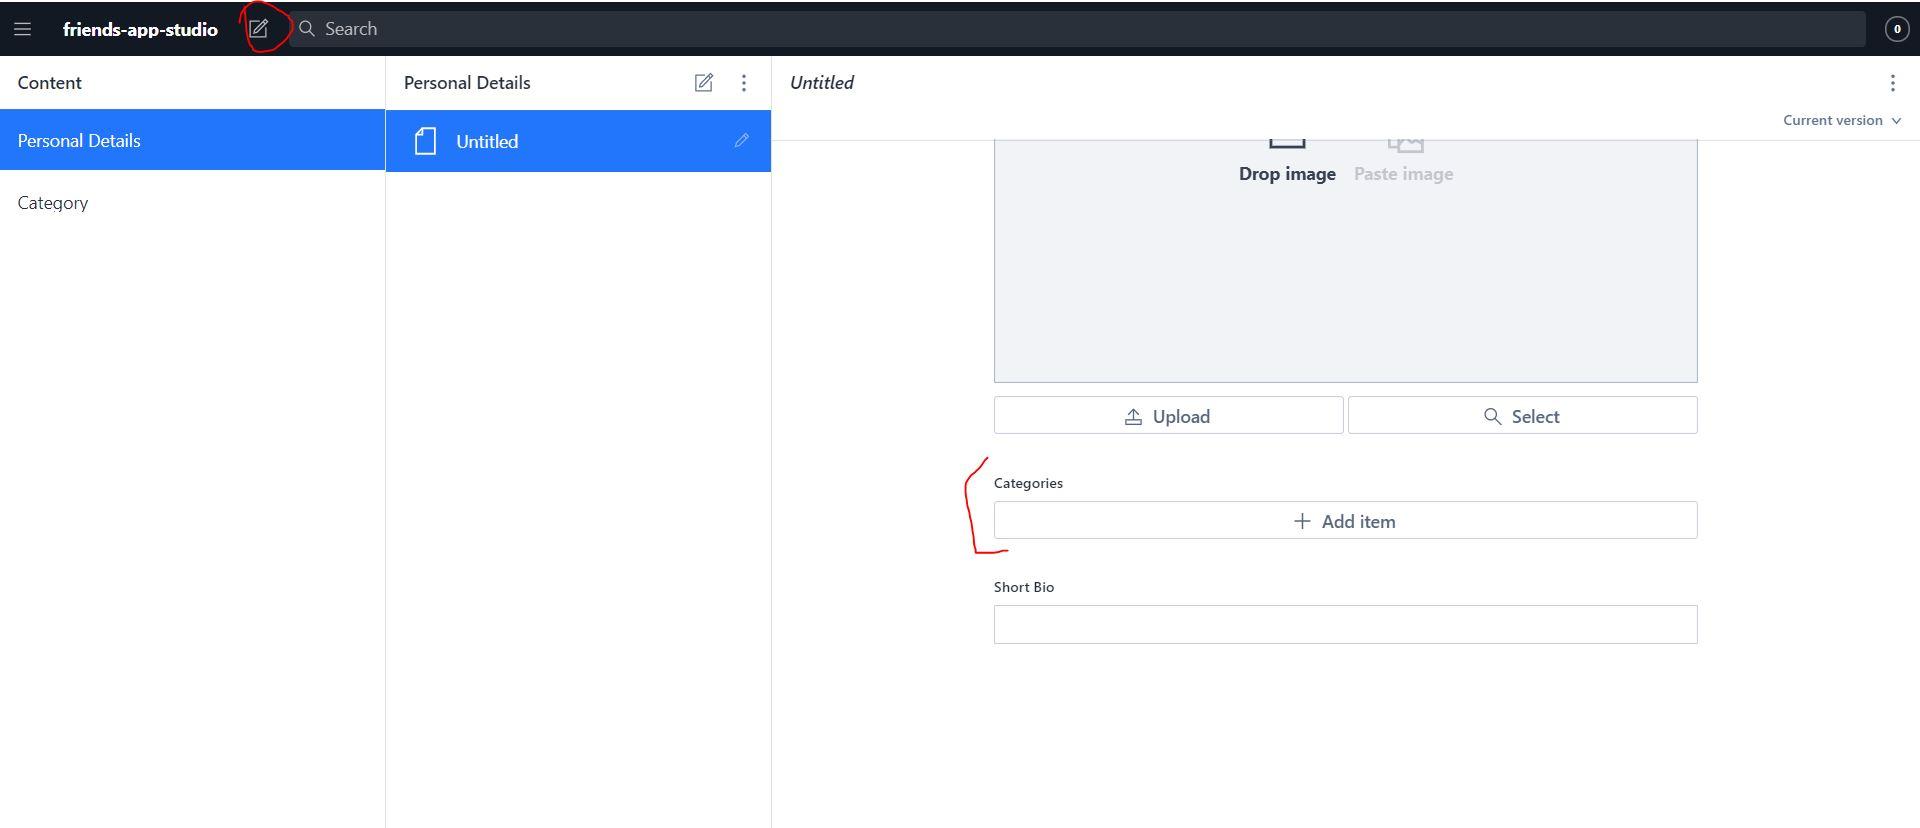
]),Once you save and check your browser, you will find something like this
Taking a deeper look at the code above, each Object represents a field and must have a title, name, and type.
- Title: The display name for this field
- Name: The identifier for this field used in the API's
- Type: The type of this field e.g string, image, e.t.c. You can find the full list of types here.
For some fields there is an additional property called options, this is used to add more features to our fields like maxlength, dropdown, etc.
The second schema to create is the category schema which will be added just below the contact details schema object.
{
name: "category",
title: "Category",
type: "document",
fields: [
{
name: "title",
title: "Title",
type: "string",
},
{
name: "description",
title: "Description",
type: "text",
},
],
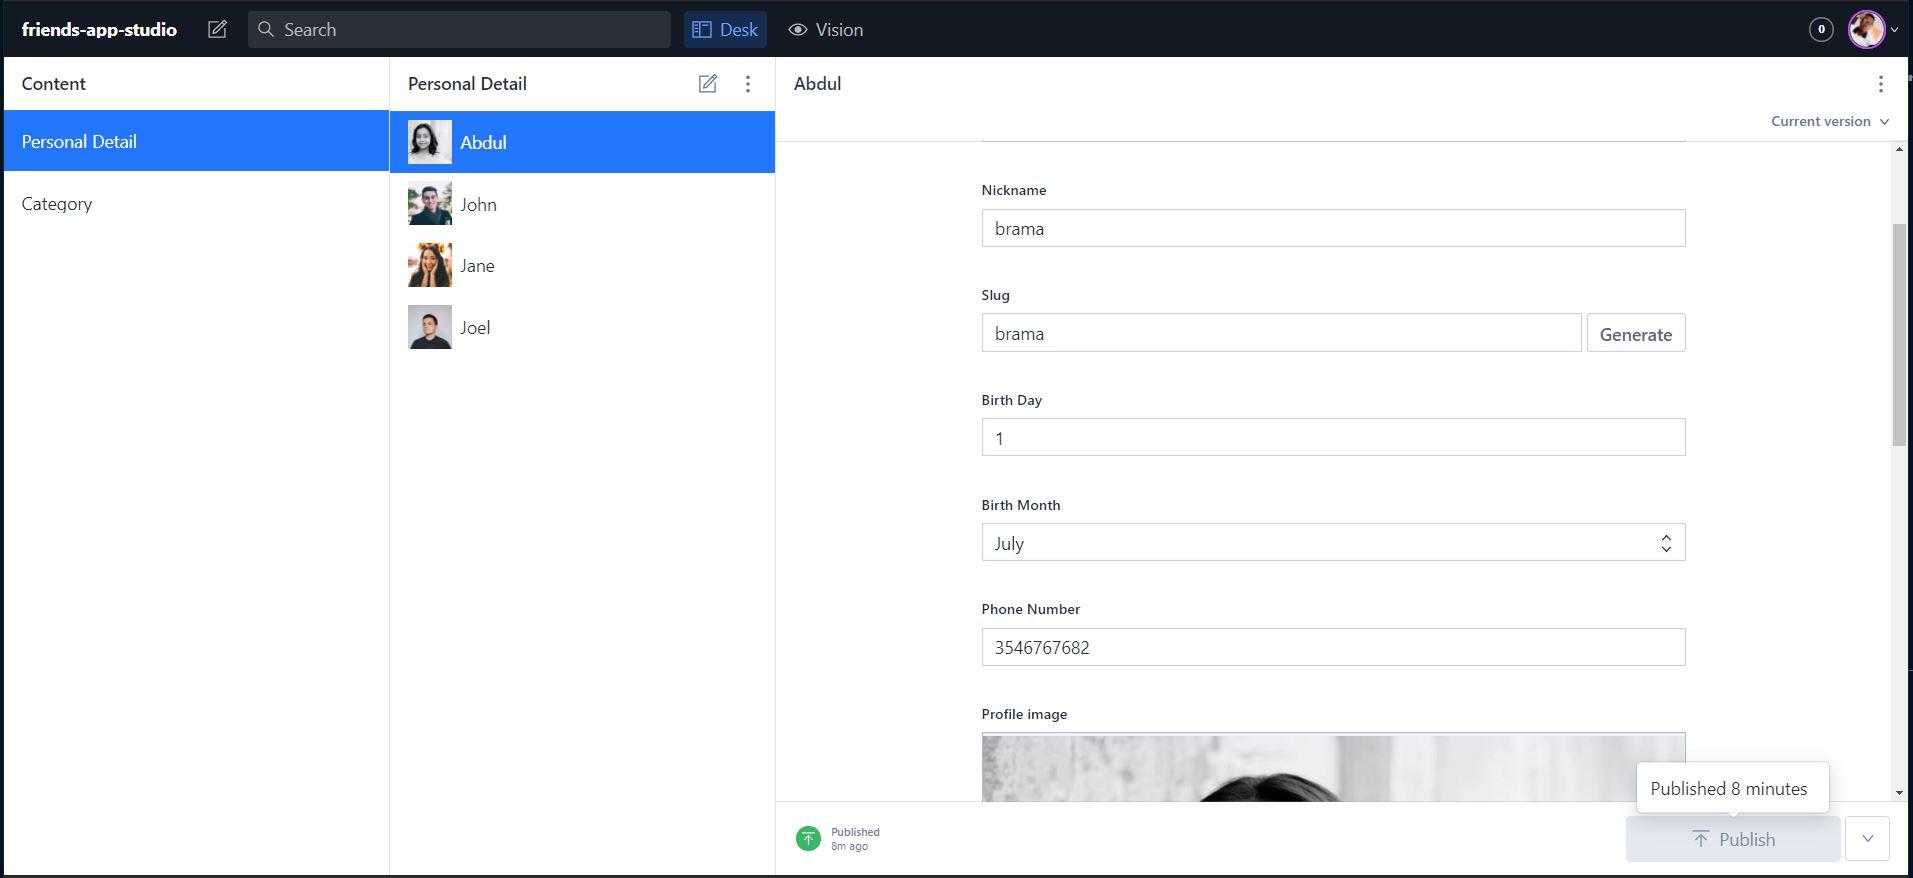
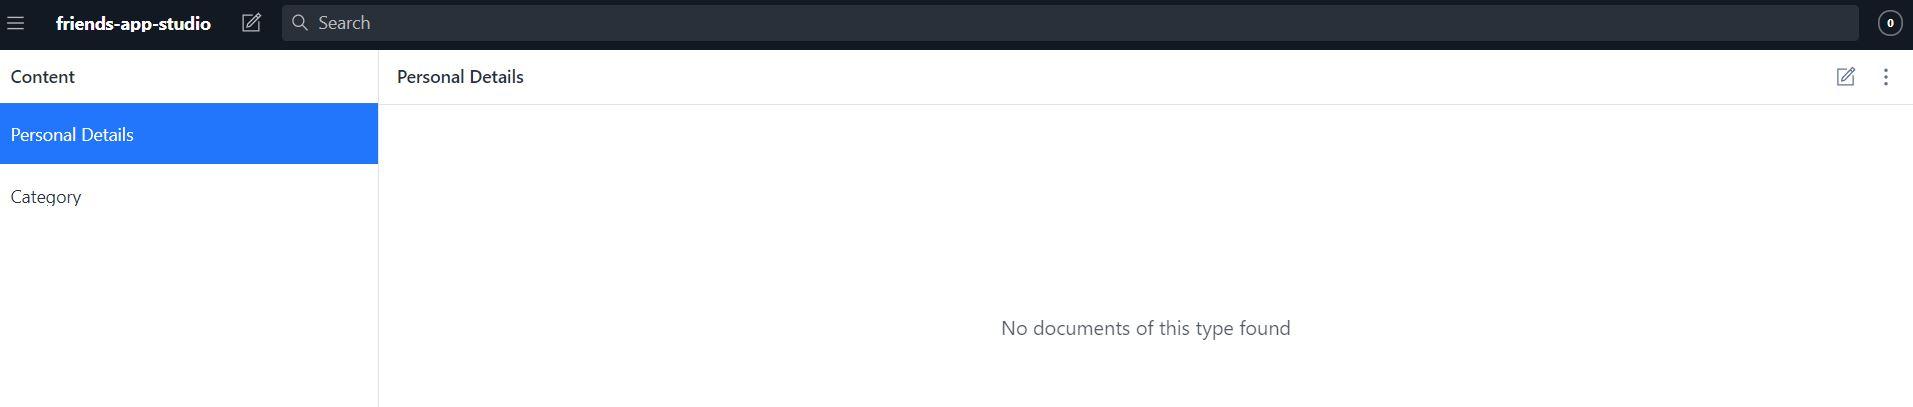
}Save the file, and the studio will refresh to show you both types in the studio.
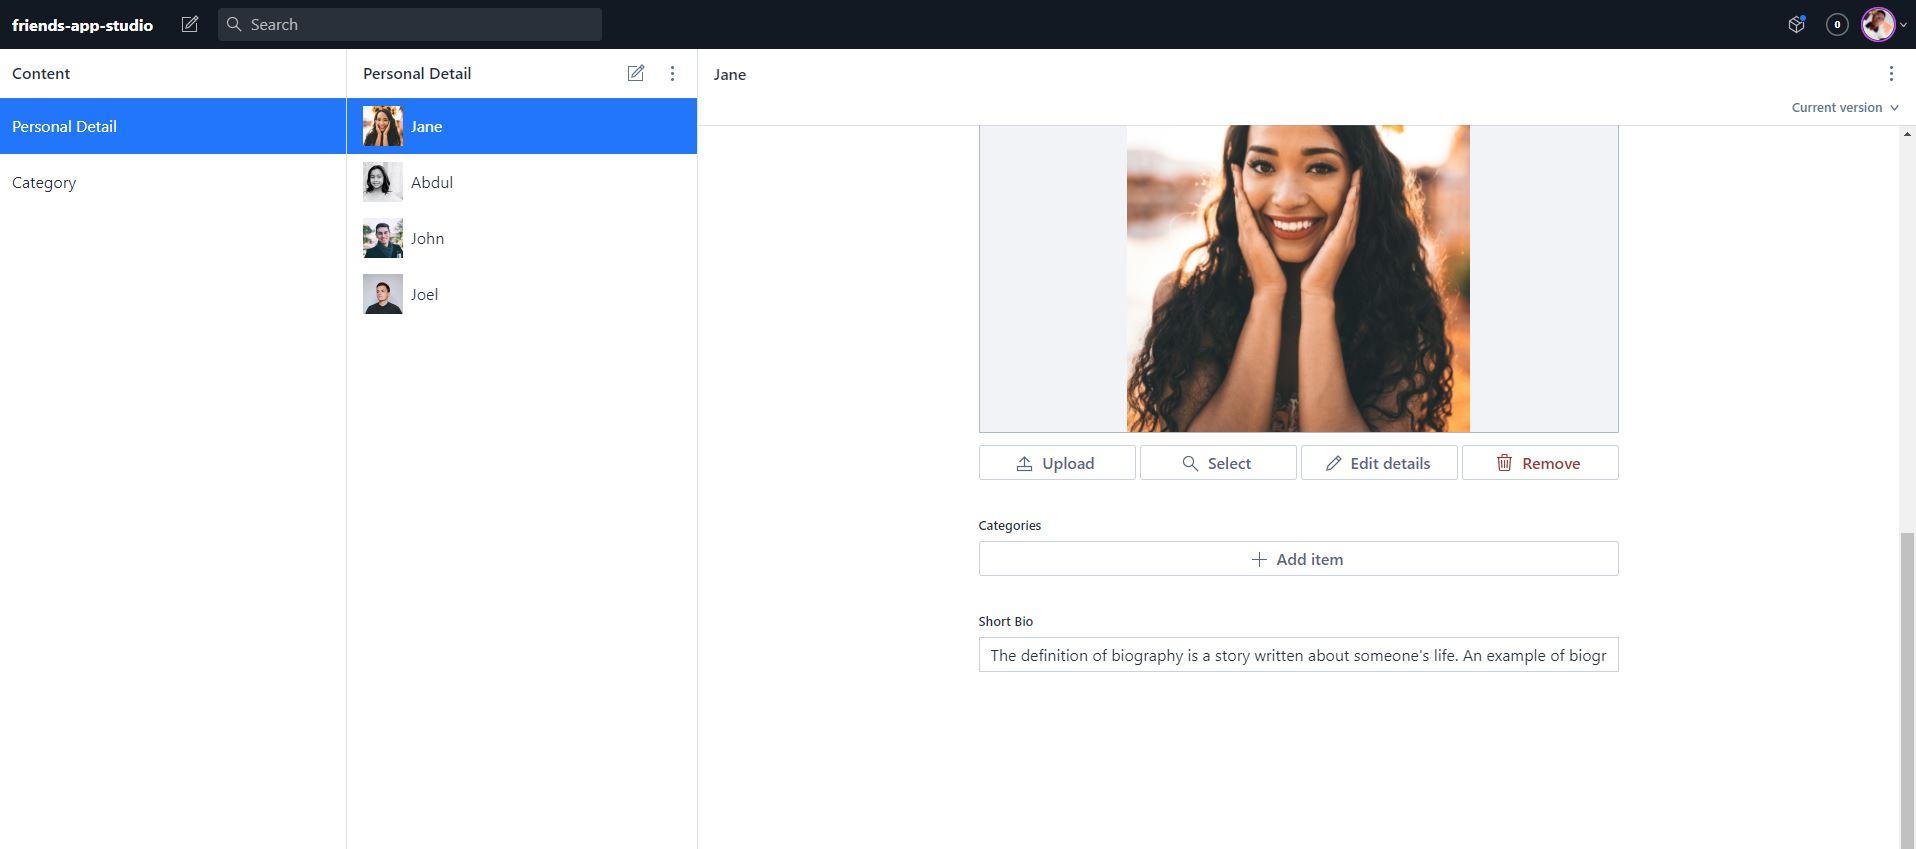
One last thing to do will be to include a category in our contactDetails schema. It displays the category fetched from the category schema for you when filling in contact detail. To do that, we will create a new object anywhere in the array we want this field to be
{
  name: "categories",
  title: "Categories",
  type: "array",
  of: [{ type: "reference", to: { type: "category" } }],
},
Once you save and click on the pencil at the top so you fill in a contact detail, you will see the categories field there.
Organizing our schema
Having all our schemas in just one will always work but can become very difficult to maintain with more added. It is recommended to describe each document type in a separate file and import them into schema.js like this:
// First, we must import the schema creator
import createSchema from "part:@sanity/base/schema-creator";
// Then import schema types from any plugins that might expose them
import schemaTypes from "all:part:@sanity/base/schema-type";
// importing two schema files
import personalDetails from "./contactDetails";
import category from "./category";
// Then we give our schema to the builder and provide the result to Sanity
export default createSchema({
// We name our schema
name: "default",
// Then proceed to concatenate our document type
// to the ones provided by any plugins that are installed
types: schemaTypes.concat([
/* Your types here! */
personalDetails,
category,
]),
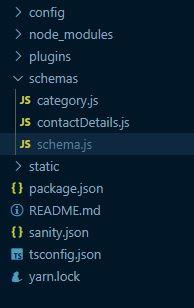
});Looking deeper at the code above, we imported two files that export the schemas and call them in the types array. At this point, your directory will look like this:
One last thing let's load our studio with contents which we will be fetched into the app.
What is Vue.js
Vue.js is a progressive JavaScript framework used to develop interactive web interfaces and focuses more on the front end. It can be integrated with other projects and libraries.
Setting up a Vue.js app
There are many ways of making use of Vue.js, such as CDN and CLI but for this guide, we will make use of the CLI.
To install via the CLI, run the following command:
npm install -g @vue/cliOnce this installs, the next thing will be to scaffold our application.
vue create vue-friends-appSelect "Manually select features" when prompted to choose the preset.
Vue CLI v4.5.12
? Please pick a preset:
  Default ([Vue 2] babel, eslint)
  Default (Vue 3 Preview) ([Vue 3] babel, eslint)
> Manually select features
We are doing this so we just install Vue router and PWA from start instead of running the command later. The will prompt some features, ensure you select PWA and router
Vue CLI v4.5.12
? Please pick a preset: Manually select features
? Check the features needed for your project:
 (*) Choose Vue version
 (*) Babel
 ( ) TypeScript
 (*) Progressive Web App (PWA) Support
>(*) Router
 ( ) Vuex
 ( ) CSS Pre-processors
 (*) Linter / Formatter
 ( ) Unit Testing
 ( ) E2E Testing
Once you hit Enter, it will ask you to choose the version of Vue.js for your project, select 3.x (Preview)
Vue CLI v4.5.12
? Please pick a preset: Manually select features
? Check the features needed for your project: Choose Vue version, Babel, PWA, Router, Linter
? Choose a version of Vue.js that you want to start the project with
  2.x
> 3.x (Preview)
For history mode, you can type n, and for the linter, you can choose any options that make sense for the way you code.
Vue CLI v4.5.12
? Please pick a preset: Manually select features
? Check the features needed for your project: Choose Vue version, Babel, PWA, Router, Linter
? Choose a version of Vue.js that you want to start the project with 3.x (Preview)
? Use history mode for router? (Requires proper server setup for index fallback in production) No
? Pick a linter / formatter config: (Use arrow keys)
> ESLint with error prevention only
  ESLint + Airbnb config
  ESLint + Standard config
  ESLint + Prettier
Once you are done, Vue begins to install everything you selected. After the installation, you can move into the project's root directory to start the development server.
npm run serveThen we can open our app in the browser at http://localhost:8080.
Connecting Sanity with Vue.js App
For us to make use of Sanity data in Vue.js, we need to install few dependencies by running the following command in your project's root directory. This will install the Sanity Client and other packages that will be used later.
npm install @sanity/client @sanity/image-url@sanity/client— Sanity Client is the official JavaScript client by Sanity and can be used both in Node.js and modern browsers.@sanity/image-url— An helper library used to generates image URLs and perform helpful image transformations through the Sanity asset pipeline. Read more on the official docs here.
Once these packages are installed, we'll create a new file named client.js inside the src directory and then add the following code to the client.js file.
import sanityClient from "@sanity/client";

export default sanityClient({
  projectId: "Your Project ID Here", // find this at manage.sanity.io or in your sanity.json
  dataset: "production", // this is from those question during 'sanity init'
  useCdn: true,
  apiVersion: "2021-03-25"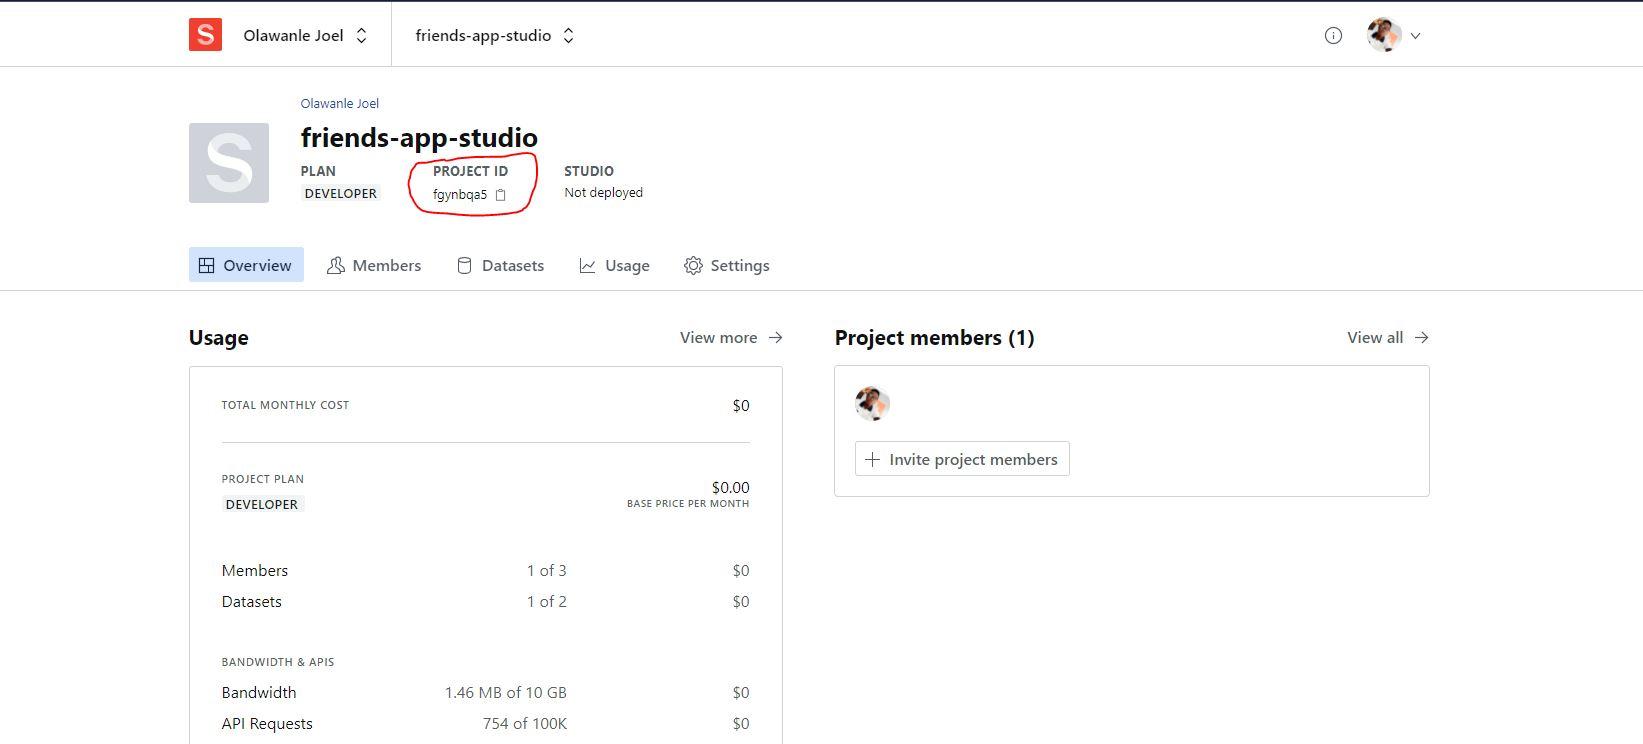
});Note: To get your project ID, visit https://www.sanity.io/teams, click on the project so it displays full info about the project including the Project ID.
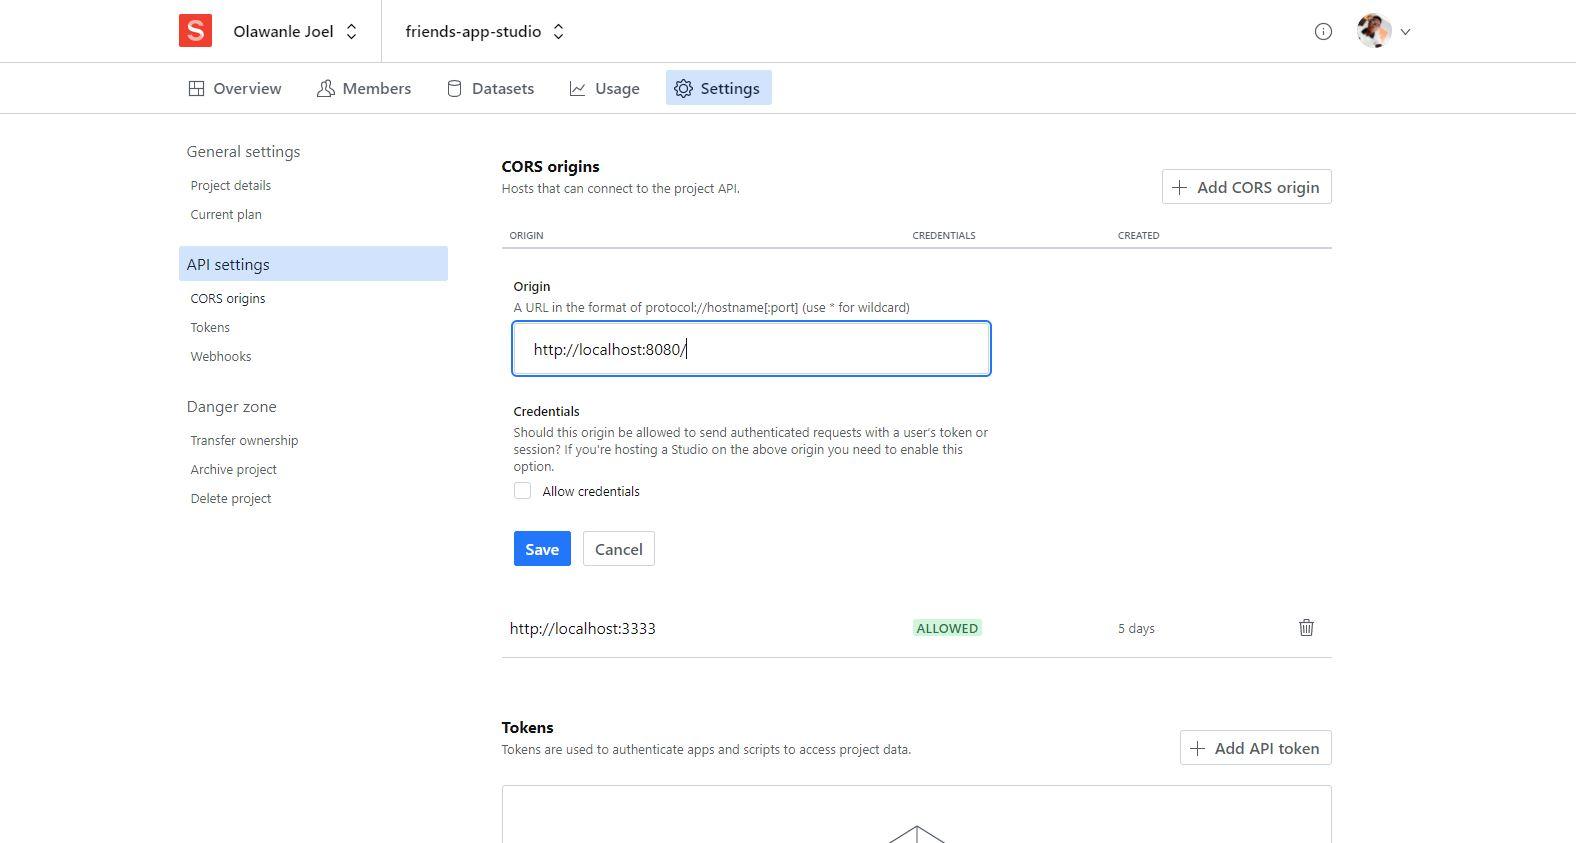
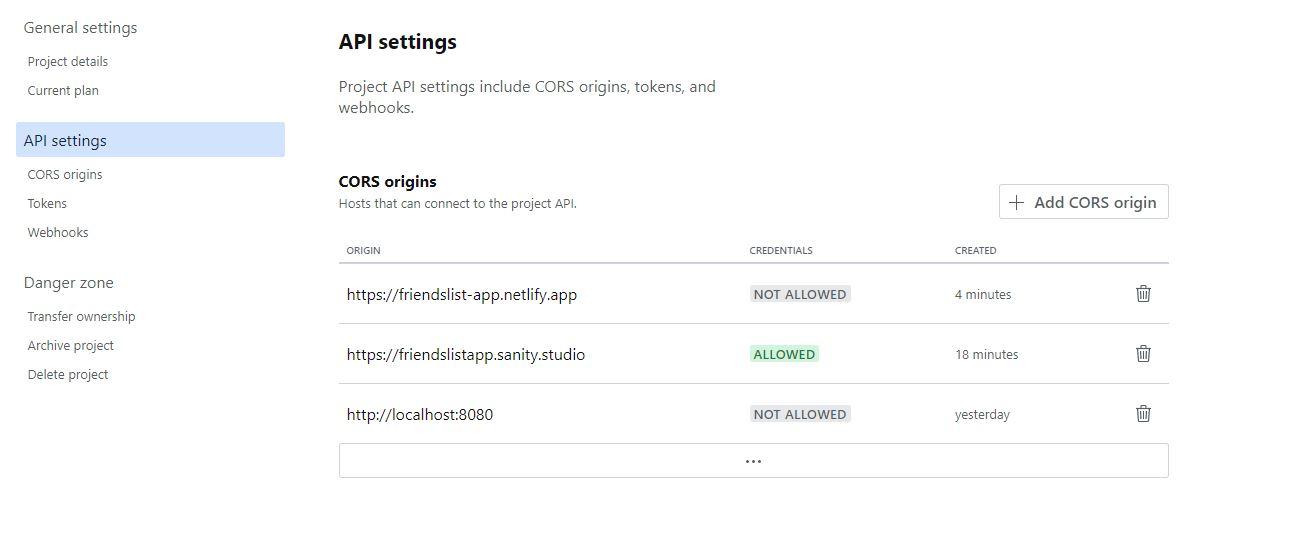
Finally, You will also need to add the port where the Vue.js development server is running to the CORS origins of your Sanity project. Visit https://www.sanity.io/teams and click on your Sanity project. On your project's dashboard, click on Settings → API settings and then add http://localhost:8080/ to the CORS origins field.
You can also use the Sanity CLI to add the CORS origins to your project by running the following command in the studio folder of your project. Read more about this here.
sanity cors add <http://localhost:8080>You will also need to update the browserslist in the Vue.js project's package.json. Replace not dead with not ie <= 8.
"browserslist": [ "> 1%", "last 2 versions", "not ie <= 8" ]Building the friend's list app
The app in this guide will fetch all your friends from the Sanity API and open up contact details on a new page.
In this app, we will be making use of two pages which are the Home page for all contacts and the personal details page.
Router is already installed. That’s why we have a home page instead of an index page.
Display all friends on the Homepage
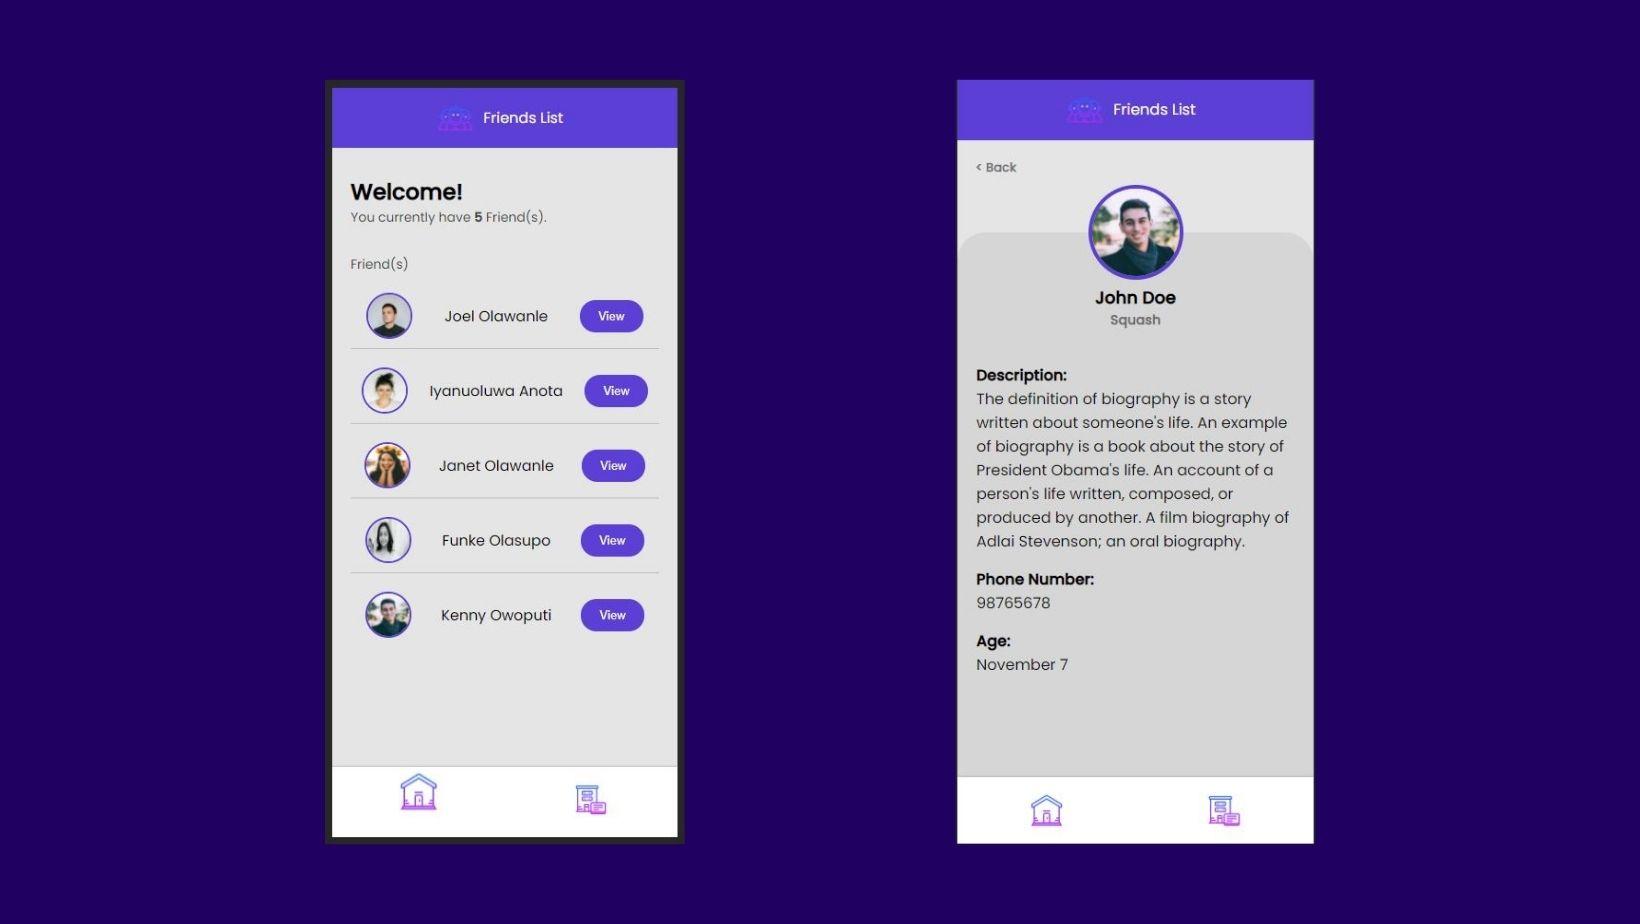
<template>
  <div class="home">
    <div class="head-info">
      <p class="title">Welcome!</p>
      <p class="sm-text">
        You currently have
        <strong>{{ personalDetails.length }}</strong> Friend(s).
      </p>
    </div>
    <div class="friends-area">
      <p class="sm-title">Friend(s)</p>
      <div class="friends">
        <div
          class="friend"
          v-for="personalDetail in personalDetails"
          :key="personalDetail.id"
        >
          <img
            v-if="personalDetail.image"
            :src="imageUrlFor(personalDetail.image)"
          />
          <p>{{ personalDetail.firstname }} {{ personalDetail.lastname }}</p>
          <router-link :to="`/personalDetails/${personalDetail.slug.current}`">
            <button>View</button>
          </router-link>
        </div>
      </div>
    </div>
  </div>
</template>


<script>
// @ is an alias to /src
import sanity from "../client";

import imageUrlBuilder from "@sanity/image-url";
const imageBuilder = imageUrlBuilder(sanity);

const query = `*[_type == "personalDetail"]{
  _id,
  firstname,
  lastname,
  slug,
  "image": profileImage{
  asset->{
  _id,
  url
}
}
}[0...50]`;

export default {
  name: "Home",
  data() {
    return {
      loading: true,
      personalDetails: [],
    };
  },
  created() {
    this.fetchData();
  },
  methods: {
    imageUrlFor(source) {
      return imageBuilder.image(source);
    },
    fetchData() {
      this.error = this.personalDetail = null;
      this.loading = true;
      sanity.fetch(query).then(
        (personalDetails) => {
          this.loading = false;
          this.personalDetails = personalDetails;
        },
        (error) => {
          this.error = error;
        }
      );
    },
  },
};
</script>
GROQ (Graph-Relational Object Queries) is a declarative language designed to query collections of largely schema-less JSON documents.
In the above code, the first thing we did was import the client from the file we created so we can have access to the sanity studio.
import sanity from "../client";After importing the client file, the next thing was to import imageUrlBuilder from @sanity/image-url which we use to generate image URLs for our images by creating a method called imageUrlFor() and making use of it inside the template.
The GROQ query fetched all the documents of _type of personalDetail . This will return all the contacts.
For the query to be executed we created a function fetchData() to request the data using sanity.fetch() and pass the query variable in it. We then stored the fetched content in the personalDetails array using this.personalDetails=personalDetails.
In the template section, you will notice the <router-link> component enables user navigation in a router-enabled app. The slug of the post is passed to its prop. You can read more about this component here.
<router-link :to="`/personalDetails/${personalDetail.slug.current}`">
  <button>View</button>
</router-link>
Finally, we looped the personalDetails array and added the queried data to the template area.
Restart the development server and navigate to http://localhost:8080/ in your browser. Your app will look like this.

Create dynamic routes for friends
To create a dynamic route, we will be making use of a component, creating a new file named personalDetail.vue in the src/components directory.
The next thing will be to define this route in router/index.js file.
const routes = [
  {
    path: "/",
    name: "Home",
    component: Home,
  },
  {
    path: "/about",
    name: "About",
    component: () => import("../views/About.vue"),
  },
  {
    path: "/personalDetails/:slug",
    name: "personalDetail",
    component: () => import("../components/personalDetail.vue"),
  },
];
Then use the code below in your personalDetail.vue component.
<template>
<div class="personalDetails">
<div class="loading" v-if="loading">Loading...</div>
<div v-if="error" class="error">
{{ error }}
</div>
<div>
<p class="back">< Back</p>
</div>
<div class="main" v-if="personalDetail">
<div class="container">
<img
v-if="personalDetail.image"
:src="imageUrlFor(personalDetail.image)"
class="pic"
/>
<div class="content">
<p class="name">
{{ personalDetail.firstname }} {{ personalDetail.lastname }}
</p>
<p class="nickname">{{ personalDetail.nickname }}</p>
<div class="main-info">
<p class="bio">
<span class="label">Description</span><br />
{{ personalDetail.excerpt }}
</p>
<p class="phone-number">
<span class="label">Phone Number</span><br />
{{ personalDetail.phoneNumber }}
</p>
<p class="age">
<span class="label">Age</span><br />
{{ personalDetail.birthmonth }} {{ personalDetail.birthday }}
</p>
</div>
</div>
</div>
</div>
</div>
</template>
<script>
import sanity from "../client";
import imageUrlBuilder from "@sanity/image-url";
const imageBuilder = imageUrlBuilder(sanity);
const query = `*[slug.current == $slug]{
_id,
firstname,
lastname,
nickname,
slug,
birthday,
phoneNumber,
birthmonth,
"image": profileImage{
asset->{
_id,
url
}
},
categories,
excerpt
}[0]
`;
export default {
name: "PersonalDetails",
data() {
return {
loading: true,
personalDetail: [],
};
},
created() {
this.fetchData();
},
methods: {
imageUrlFor(source) {
return imageBuilder.image(source);
},
fetchData() {
this.error = this.personalDetail = null;
this.loading = true;
sanity.fetch(query, { slug: this.$route.params.slug }).then(
(personalDetail) => {
this.loading = false;
this.personalDetail = personalDetail;
},
(error) => {
this.error = error;
}
);
},
},
};
</script>This is similar to the previous route, except we are fetching this component via a dynamic route. We'll use its unique slug to fetch the data for a specific person, which is accessed using this.$route.params.slug. This is the route object present in Vue Router, representing the currently active route. You can read more about Vue Router route object here. We also make use of *[slug.current == $slug] to query our data via GROQ.
Styling our app
The app looks a little odd right now, but you can check out this repository to get the styling used for each of the pages, components, and even the images used here.
PWA
In this section, we'll set up PWA for our app. Be sure PWA is already installed by checking your package.json file in the root directory and looking in the dependencies array. You should find register-service-worker and @vue/cli-plugin-pwa alongside their version. If it isn't there, you will have to install PWA using the command below and read more info here.
vue add pwaSetting up the PWA
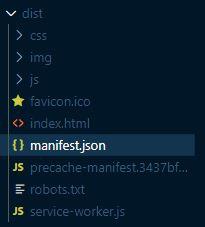
The service worker added with this plugin is only enabled in the production environment (e.g. only if you run npm run build or yarn build). Once you run either of the build commands, you will have a folder structure like this in your dist folder.
This won’t work for us or won’t be the best idea since we would be deploying our app online. To configure our PWA app, this is handled via the pwa property of either the vue.config.js file or the "vue" field in package.json.
vue.config.js is an optional config file that will be automatically loaded by @vue/cli-service if it's present in your project root (next to package.json). You can create this file in the root of your project manually if it’s not there. Read more here.
Once you have created the file, add the code below
// Inside vue.config.js
module.exports = {
  // ...other vue-cli plugin options...
  pwa: {
    name: "Friends List",
    themeColor: "#4DBA87",
    msTileColor: "#000000",
    appleMobileWebAppCapable: "yes",
    appleMobileWebAppStatusBarStyle: "black",
  },
};
You can read about these settings in the vue.js pwa docs here.
PWA caching
If you try to access the app offline at this point, it won’t show anything. For our app to work offline, we need service workers. The first thing we will do is create a file named service-worker.js or sw.js in the src folder and use the code below.
// Inside src/service-worker.js
self.__precacheManifest = [].concat(self.__precacheManifest || []);
workbox.precaching.precacheAndRoute(self.__precacheManifest, {});
Then in the vue.config.js file we created, we will configure the workbox plugin and include the service worker file. Our vue.config.js file will now look like this
// Inside vue.config.js
module.exports = {
// ...other vue-cli plugin options...
pwa: {
name: "My App",
themeColor: "#4DBA87",
msTileColor: "#000000",
appleMobileWebAppCapable: "yes",
appleMobileWebAppStatusBarStyle: "black",
// configure the workbox plugin
workboxPluginMode: "InjectManifest",
workboxOptions: {
// swSrc is required in InjectManifest mode.
swSrc: "src/service-worker.js",
// ...other Workbox options...
},
},
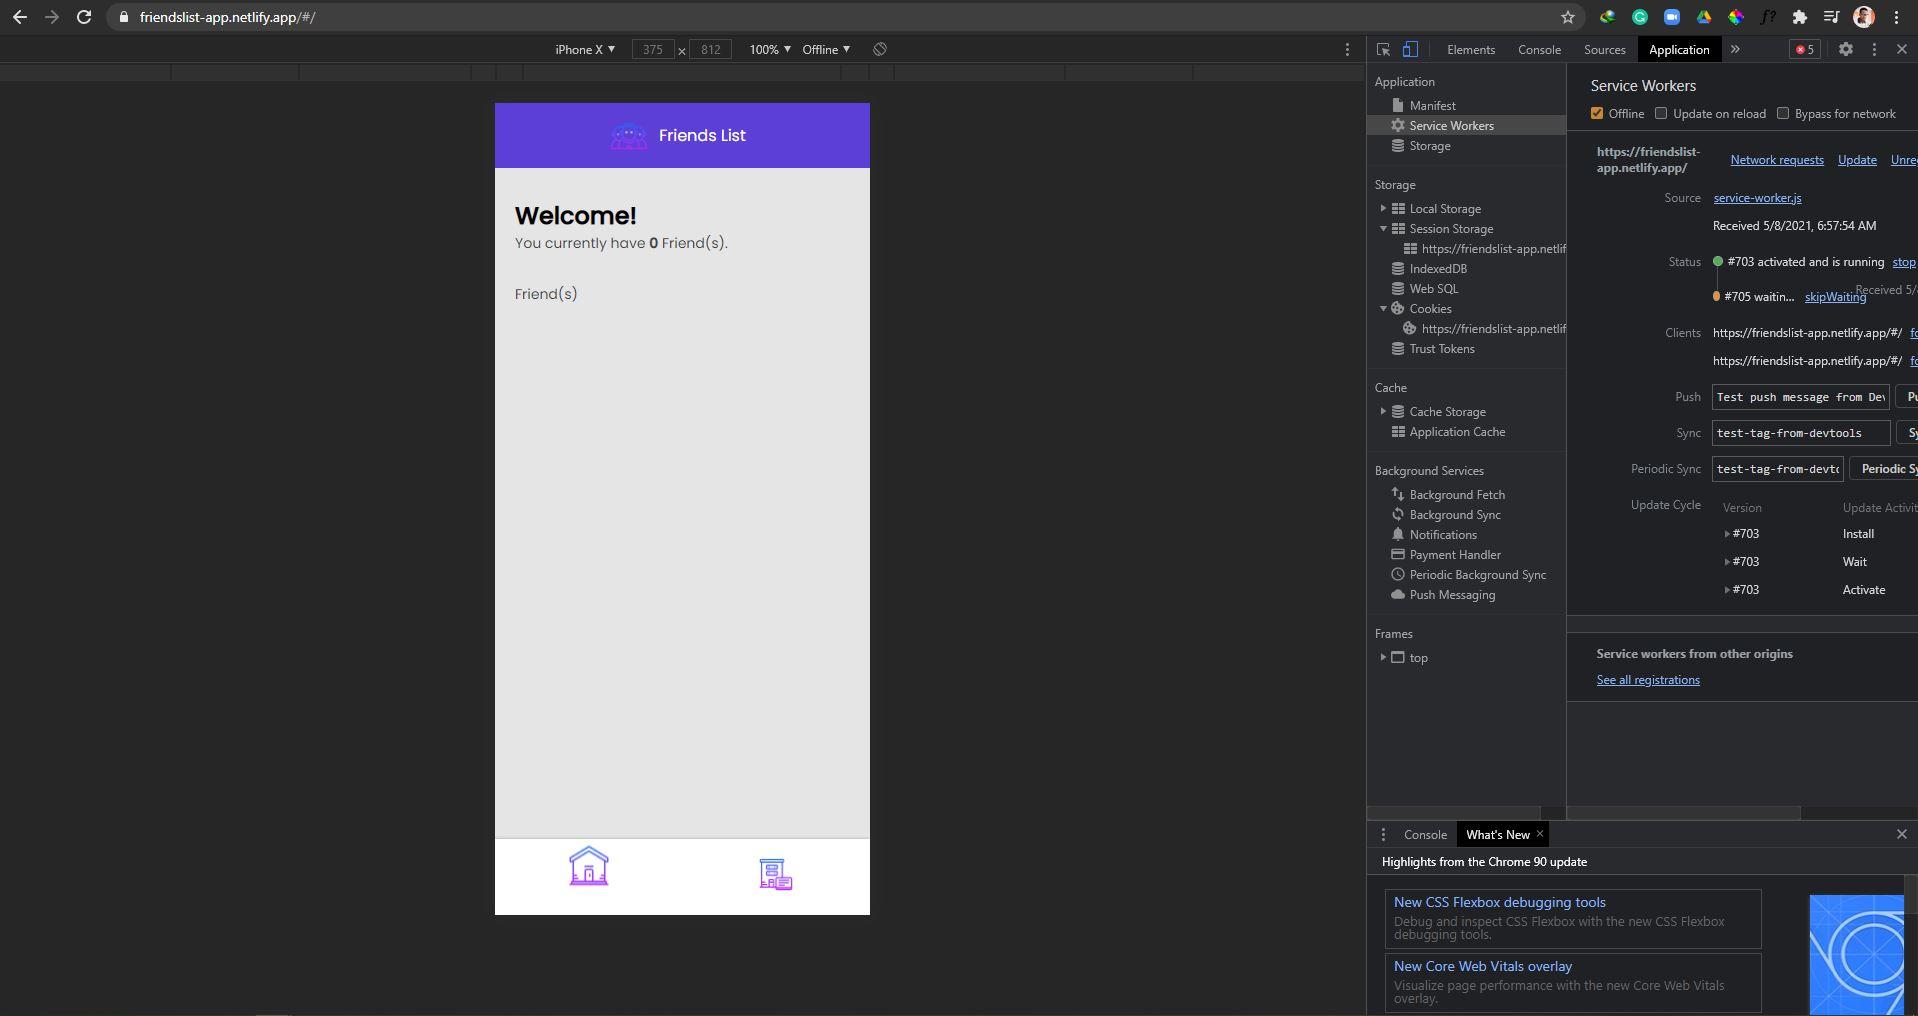
};At this point, our app can now work offline. Our data won’t be stored offline unless it’s being cached, to confirm check the offline box in the service worker area of your application when you inspect the app and refresh your browser.
Deployment
To round up this guide, let's deploy both the Sanity Studio and our Vue.js app, so this can be available online for everybody to access.
Deploy Vue app to Netlify
Netlify is a Git-based workflow and serverless platform used to build, deploy, and collaborate on web apps. It is an all-in-one platform for automating modern web projects.
Note: There are many other platforms you can use e.g vercel, Cloudflare pages, e.t.c.
To deploy to Netlify, we will have to push our code to GitHub. For this, we will be using the terminal and making use of git commands. In case you are not familiar with git, you can check out this series on DevCommunity.
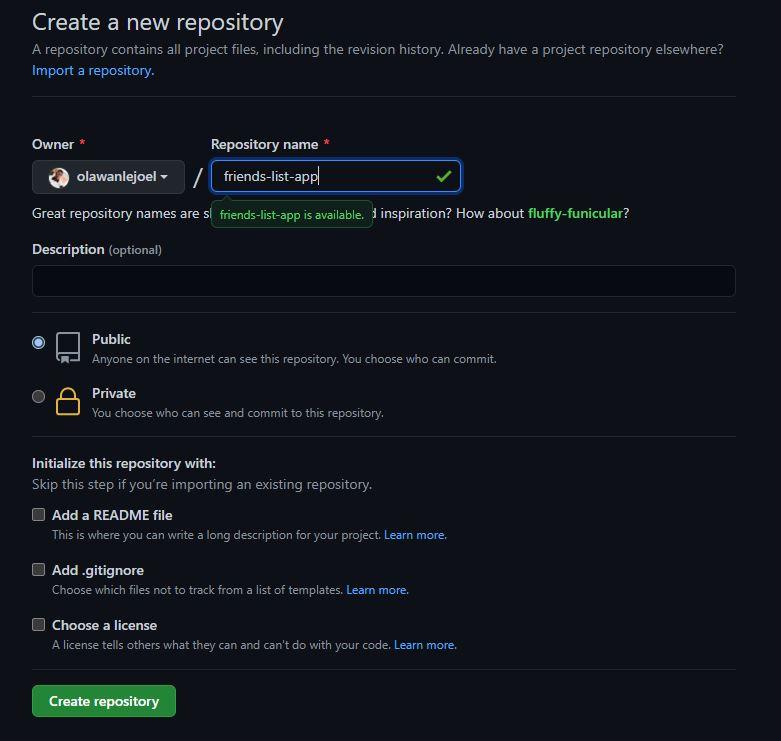
First thing, let's create a repository on GitHub

Then fill in the necessary info and create a repo!
Back in the terminal, let's start by creating a new branch, then stage all our files so we can commit our changes using the following commands:
git init #initialize repository
git checkout -b main # create a main branch
git add . # stage all files for this commit
git commit -m "first commit" # commit the changes
Once this is done, we can now push to the created remote repository using the following commands:
Note: You would have to replace the GitHub remote URL with yours.
git branch -M main
git remote add origin https://github.com/olawanlejoel/friends-list-app.git
git push -u origin main
When you refresh your repository, your code should show up!

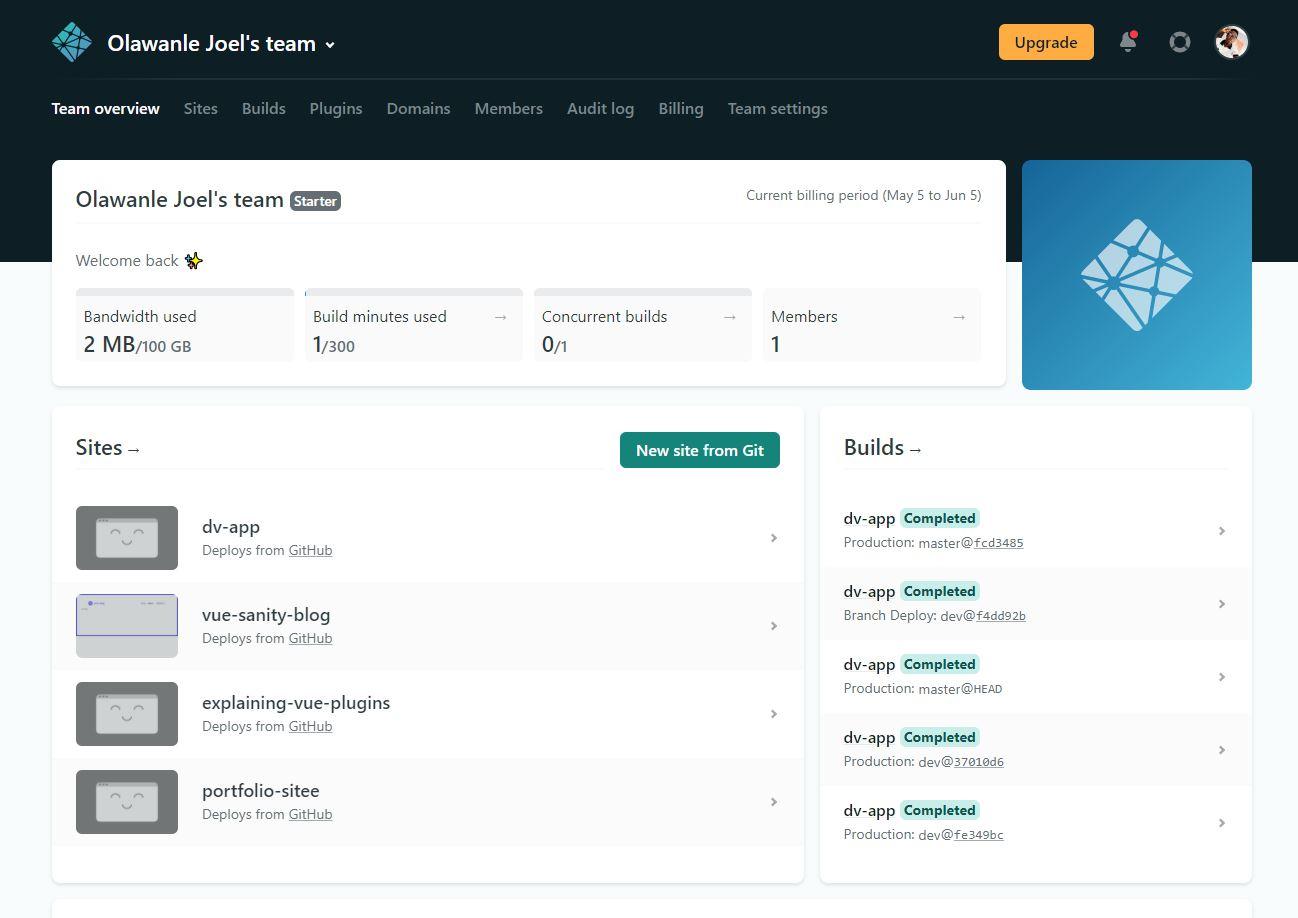
Now we can deploy to Netlify!
Login to Netlify or sign up if it’s your first time with your GitHub account. Once that is successful, you will be redirected to your team page where you can get a repo from GitHub and deploy it.
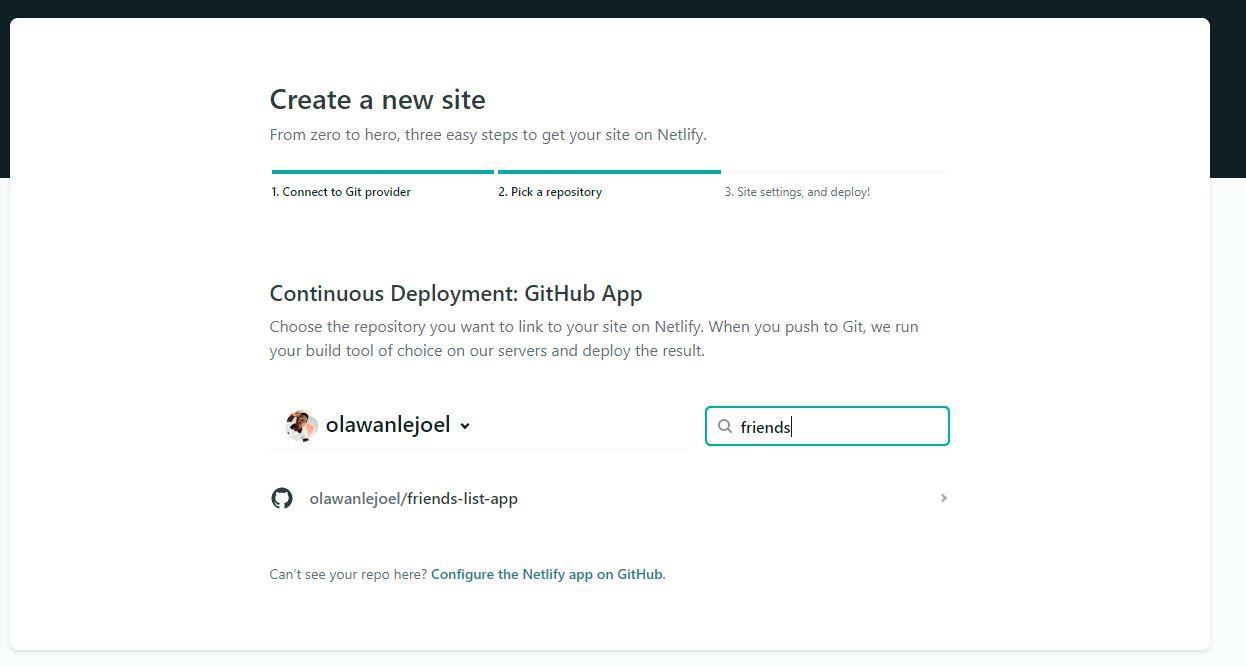
Click on “New site from Git," a new page will appear for you to choose the Git provider where your site’s source code is hosted. In our case, we will choose GitHub. Once it's authorized, you can now search for the GitHub repository
When you click on the repository, it will bring you to a page where you set your site settings
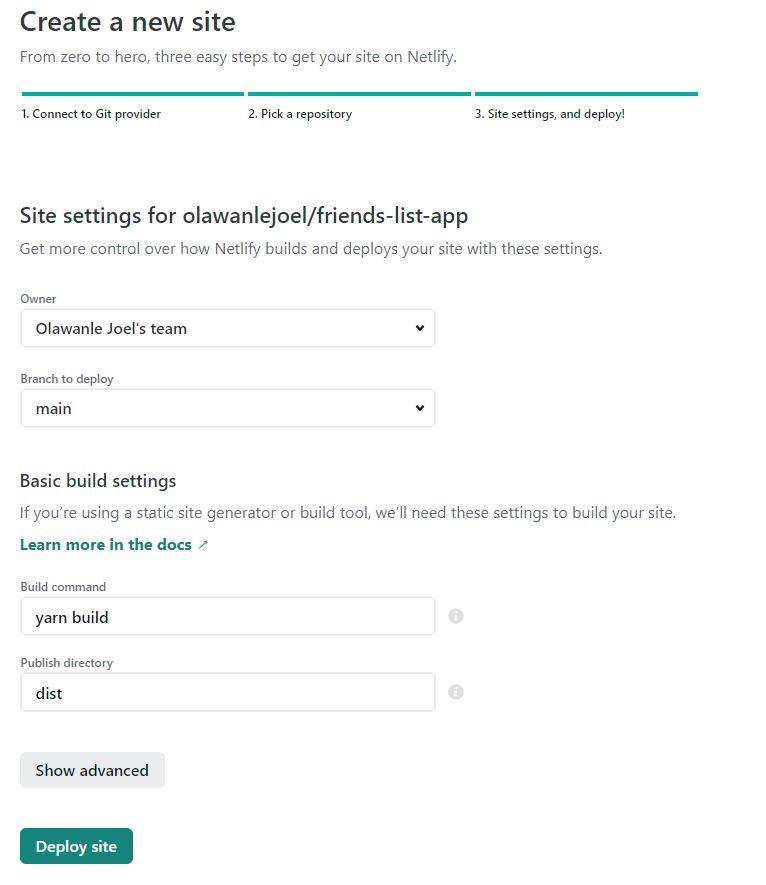
If you have something like this, you can now deploy your site. There are many other things you can do like Domain settings, e.t.c.
Once your deployment is successful, you can now deploy your sanity studio.
Deploy sanity studio and update the CORS origin
Sanity allows you to host your studio, giving you a nice my-company.sanity.studio URL. Since the Studio runs in the browser and communicates with the Sanity API, it is also possible to host yourself or your favorite hosting service. To host with Sanity, run the following command in your studio folder.
sanity deployOnce you run this command, it will ask you to choose a unique hostname for your Studio.
Finally, we need to update the CORS origin for our app to work. If you check the deployed Vue.js app, you will notice it did not fetch your data. For us to fix this issue, copy your site address e.g. https://friendslist-app.netlify.app/ so we can add it to the allowed CORS origins as we did earlier.
Visit https://www.sanity.io/teams and click on your Sanity project. On your project's dashboard, click on Settings → API settings and then add your site address to the CORS origins field.
Congratulations! we now have our application running smoothly online.
Conclusion
In this guide, we built a friends list application using Progressive Web App (PWA) functionality with Vue.js and Sanity. When you access this web app via the deployed link, you would be asked to add "to home screen." We made use of Sanity Studio to edit our data. This guide will help you set up your own version of this project to improve on and add certain features and functionalities.
Here are a few ideas to get you started:
- Cache the data from Sanity and make it visible offline
- Add Filter, Sort, and Search functionality making use of categories.
- Implement notification with PWA
- Style the app using UI libraries like Vuetify, BootstrapVue, or Tailwind.
- Make certain fields of the schema required
Useful resources
- vue-sanity - Composition API methods to incorporate Sanity into a Vue project.
- Headless CMS explained in 2 minutes
- Get started with the Nuxt.js event website
- Make a Progressive Web App with React
- Master PWA in Vue
Happy coding!
Sanity – The Content Operating System that ends your CMS nightmares
Sanity replaces rigid content systems with a developer-first operating system. Define schemas in TypeScript, customize the editor with React, and deliver content anywhere with GROQ. Your team ships in minutes while you focus on building features, not maintaining infrastructure.
Sanity scales from weekend projects to enterprise needs and is used by companies like Puma, AT&T, Burger King, Tata, and Figma.