Published October 12, 2021
How to Create a Single Page Application with React and Sanity

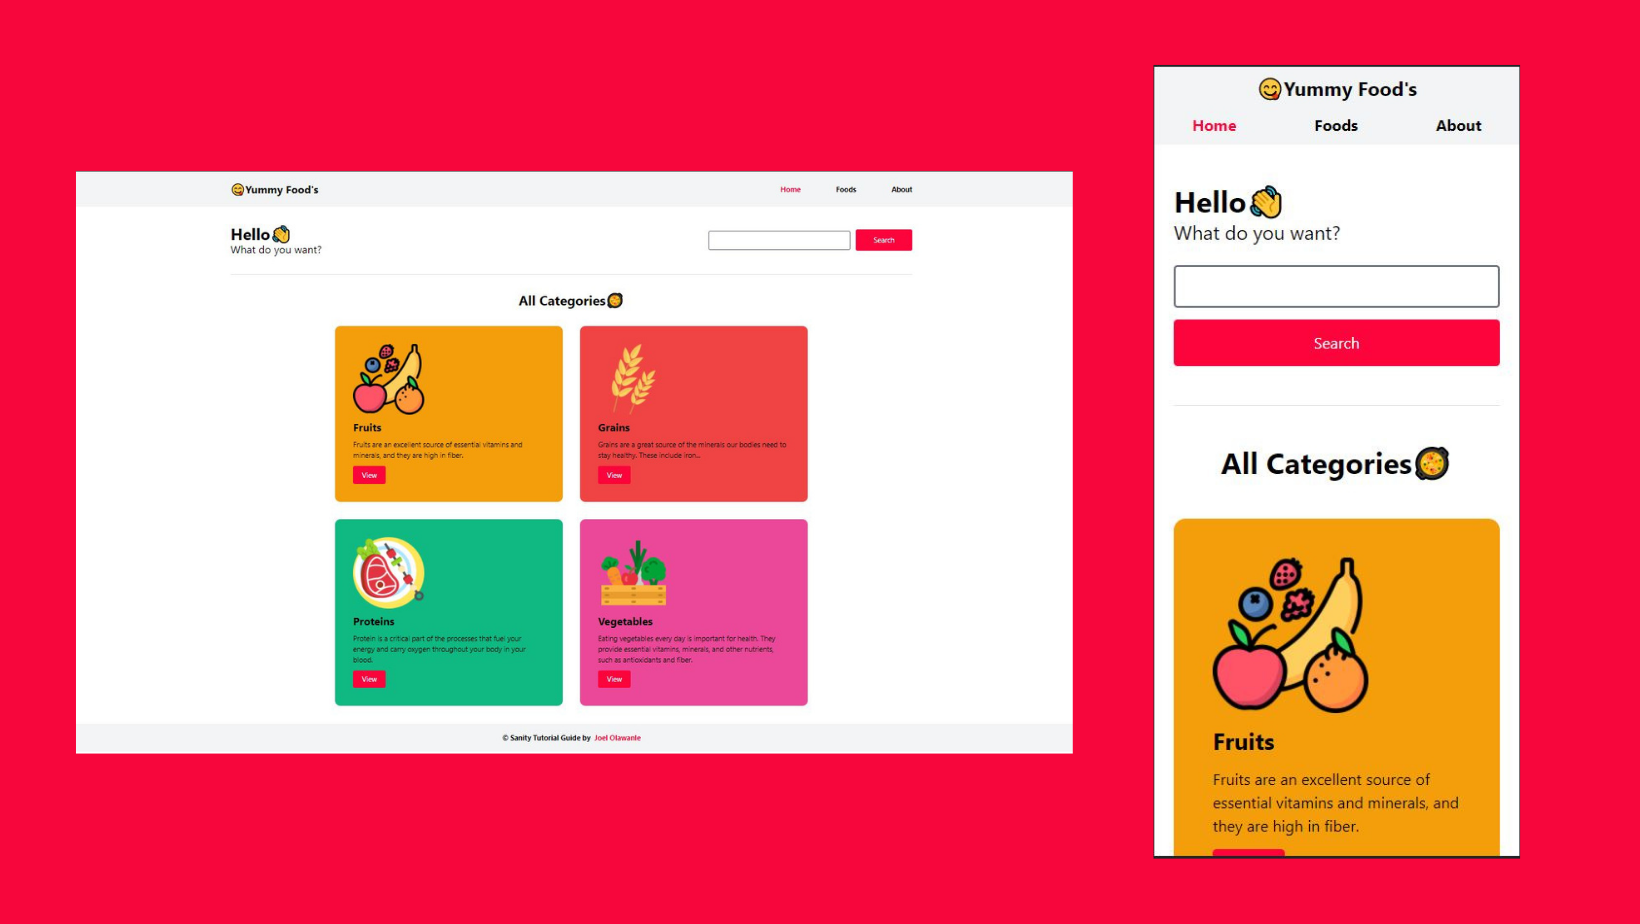
Have you ever thought of building a single-page application(SPA) with react & Sanity? In this guide, I will take you on an exciting journey to build your first SPA with react and Sanity. We will create a Food Catalog app that will contain various food items and categories to organize them by themselves. All these categories and foods will be fetched from Sanity.
Here is the project GitHub repository; you can clone or download the complete project. You can also see the deployed app here.
Requirements/Prerequisites
To understand this guide and code along, you should have:
- Basic understanding of HTML, CSS, and JavaScript
- At least a little experience or knowledge of React and some of its hooks.
- Node and npm or yarn installed on your computer
- Basic understanding of how the terminal works
What is React?
React is an open-source JavaScript library created for building fast and interactive user interfaces for web and mobile applications. It is maintained by Facebook and a community of individual developers and companies. React can be used for the development of single-page or mobile applications.
React is a component-based framework, which means we'll be writing our code in small, reusable pieces and putting them all together to make our website.
Understanding SPA
SPA stands for Single Page Application. It is a web application or website that interacts with the user by dynamically rewriting the current page rather than loading entire new pages from the server. In simpler terms, it is an app that works inside a browser and does not require page reloading during use. We'll also touch on how routing works in React and learn how to map different parts of our website to different views.
Setting up a React app
For this guide, we will make use of create-react-app — the React recommended way to create a single-page application. To make use of create-react-app, You'll need to have Node >= 14.0.0 and npm >= 5.6 on your machine.
To install, run the following command:
npx create-react-app food-catalog-app
After the installation, you can move into the project's root directory to start the development server.
cd food-catalog-app
npm start
When the dev server is ready, you can view your project in the browser at http://localhost:3000/.
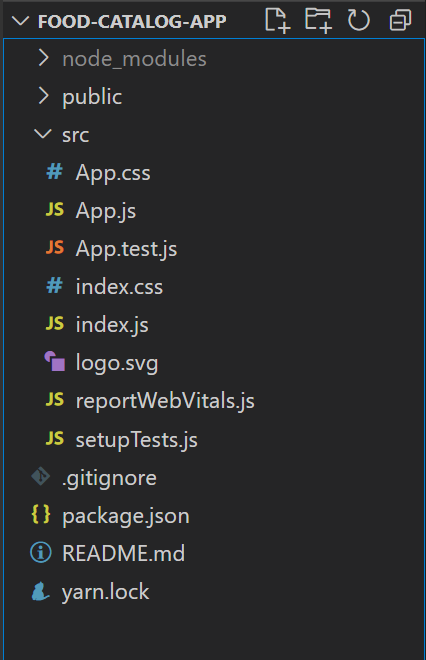
Your project directory should look like this once the setup is complete.
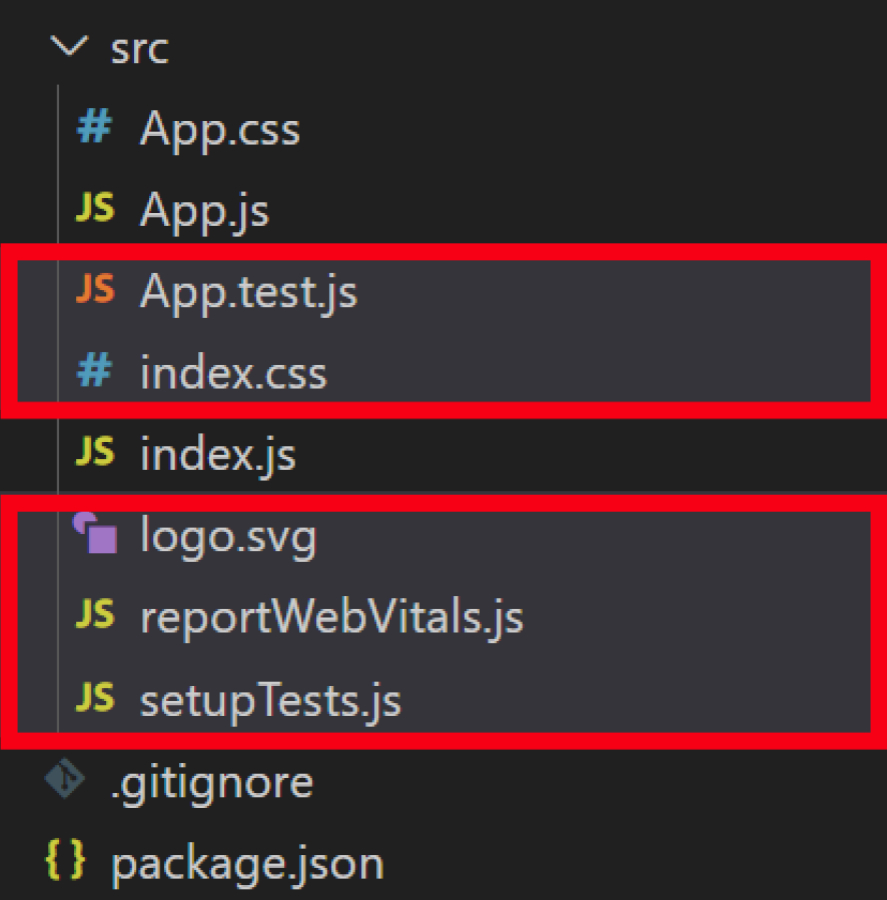
Let's clean up the app by deleting files we don't need so we can get started building our app. You can delete the following highlighted files.
To be sure your files look like mine exactly, I pushed my setup files to this GitHub repository, and you can clone it or cross-check.
Using Tailwind CSS
TailwindCSS is a utility-first CSS framework used to build frontend applications. Rather than adding obscure CSS classes to your code, with TailwindCSS, you use utility classes to create your components, with as much control over every single styling as you want. All without having to ever write a single line of CSS.
There are so many ways to make use of Tailwind CSS in React and other frameworks generally, but for this guide, we will be making use of the CDN.
In the /src folder, add the following CDN import to the App.css file.
@import url('<https://unpkg.com/tailwindcss@^2/dist/tailwind.min.css>');Once this is done, we can now proceed to set up our sanity studio.
What is Sanity?
Sanity is a content platform that treats your structured content as data. It comes bundled with an open-source, real-time headless CMS that can be customized with JavaScript. We'll be using the Sanity studio to manage our content and accessing it in our frontend through Sanity's "out of the box" API.
One of the key benefits of Sanity is that the content management interface, or "studio," is open source and built to be built upon. If you know React, you can extend and customize it to your heart's content.
Getting started with Sanity/setup
To start a new project with Sanity, we'll install the Sanity CLI globally. To do this, you will need to have Node and npm installed.
npm install -g @sanity/cli
As soon as the CLI finishes installing, you'll be able to create a new project using it. Run the following in the directory of the React project you just created (i.e., food-catalog-app).
sanity initIf this is your first time, this will log you into Sanity, and then you will be able to create a project, set up a dataset, and generate files that are necessary to run the editing environment locally.
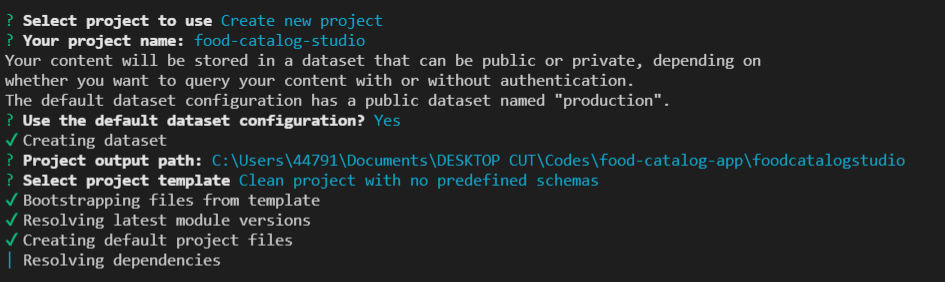
Once that is done, you will be prompted to create a new project, tap Enter. Name your project food-catalog-studio and choose the default dataset configuration by typing Y.

Finally, confirm the project path and choose a schema for your studio. For this demo, you'll need to start with the "Clean project with no predefined schemas" option.
To start the studio, move to the folder by running the following command in the terminal:
cd studioNow, you can start the studio with the following command:
sanity startAfter compiling, the studio will open on http://localhost:3333, and we will have something like this displayed because we choose "clean project with no predefined schemas" when setting up our studio.

Sanity studio
The Sanity Studio is an open-source CMS built with React.js that allows users to use toolkits and plugins to create the workflow that optimizes for how you want to work with content. It offers rapid configuration and free form customization.
Creating a food catalog schema from scratch
A schema describes the different field types in a document. There are different types of schema you can choose from.
For this guide, we will be creating two schemas: one for the food categories and the other for food items. The food schema will have properties such as food name, food description, food image, and its category, while the category schema will have the name, image, description, and then a hex-code field for creating dynamic styling.
When the studio starts up, it looks for the schema.js file in the schemas folder of your project. For now, since we don't have any schema, you will find something like this in your schema.js file.
// First, we must import the schema creator
import createSchema from "part:@sanity/base/schema-creator";
// Then import schema types from any plugins that might expose them
import schemaTypes from "all:part:@sanity/base/schema-type";
// Then we give our schema to the builder and provide the result to Sanity
export default createSchema({
  // We name our schema
  name: "default",
  // Then proceed to concatenate our document type
  // to the ones provided by any plugins that are installed
  types: schemaTypes.concat([
    /* Your types here! */
  ]),
});
All your schemas go into the types array by defining the schemas title, name, type, and finally, the fields. For our foods schema, we will be having something like this.
types: schemaTypes.concat([
    /* Your types here! */
    {
  title: 'Foods',
  name: 'foods',
  type: 'document',
  fields: [{
      title: 'Food Name',
      name: 'foodName',
      type: 'string',
      validation: Rule => Rule.required()
    },
    {
      title: 'A little description',
      name: 'foodDesc',
      type: 'text',
      options: {
        maxLength: 200,
      },
      validation: Rule => Rule.required()
    },
    {
      title: "Food Image",
      name: "foodImage",
      type: "image",
      options: {
        hotspot: true,
      },
    }
  ]
},

//Category schema goes here

]),
Once you have done this, save and now let's take a deeper look at the code above, each object represents a field and must have a title, name, and type.
- Title: The display name for this field
- Name: The identifier for this field used in the API's
- Type: The type of this field, e.g., string, image, e.t.c. You can find the complete list of built-in types here.
The second schema to create is the category schema which we'll add just below the foods schema object.
{
  name: "category",
  title: "Category",
  type: "document",
  fields: [{
      title: "Title",
      name: "title",
      type: "string",
    },
    {
      title: "Slug",
      name: "slug",
      type: "slug",
      options: {
        source: "title",
        maxLength: 96,
      },
    },
    {
      title: "Description",
      name: "description",
      type: "text",
    },
    {
      title: "Image",
      name: "image",
      type: "image",
      options: {
        hotspot: true,
      },
    },
    {
      title: "Hex Code",
      name: "hexCode",
      type: "string",
    },
  ],
}
Save the file, and you will see something like this:

One last thing to do will be to include a category in our foods schema. It displays the category fetched from the category schema for you when filling in your foods. To do that, we will create a new field wherever in the array we want this field to be
{
name: "category",
title: "Category",
type: "reference",
to: {
type: "category"
}
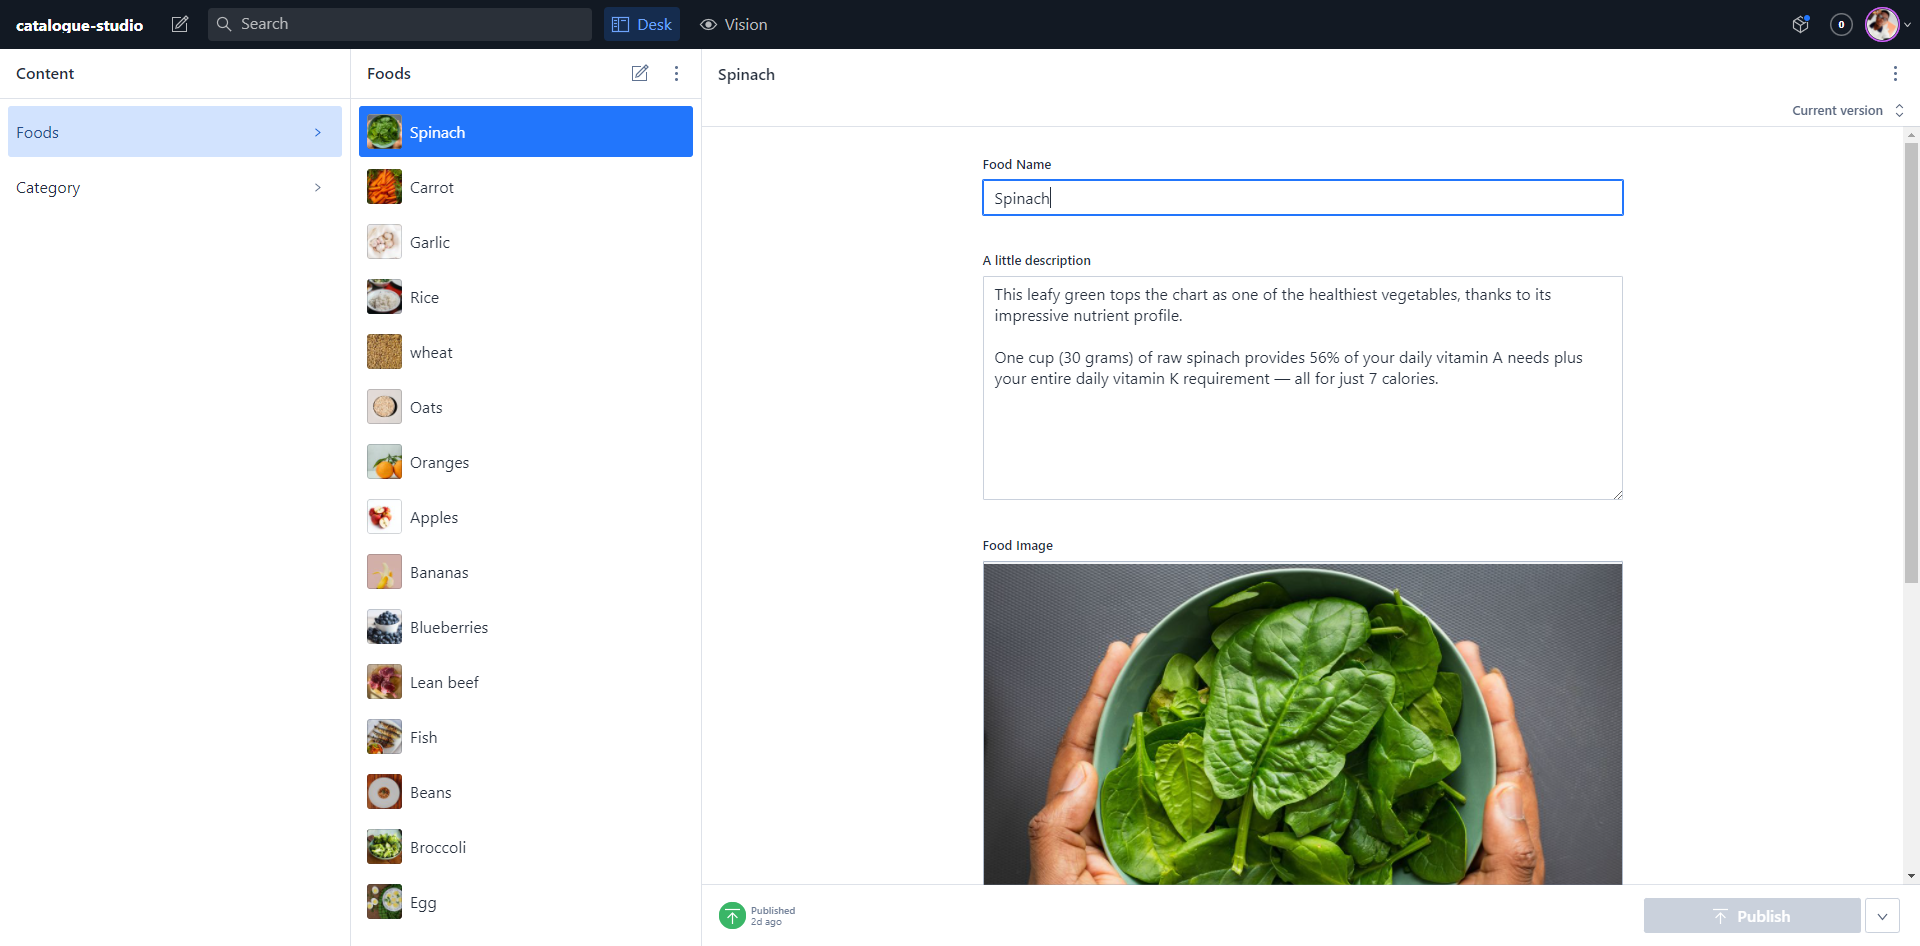
},Once you save your code and create a new document of type food in your studio, you should see the categories field show up as expected.
Organizing our schema
Let's organize our schemas before loading them with foods and categories. Having all our schemas in just one file will always work but can become very difficult to maintain when you have more schemas.
It is recommended to describe each document type in a separate file and import them into schema.js like this:
// First, we must import the schema creator
import createSchema from 'part:@sanity/base/schema-creator'
// Then import schema types from any plugins that might expose them
import schemaTypes from 'all:part:@sanity/base/schema-type'
import foods from "./foods";
import category from "./category";
// Then we give our schema to the builder and provide the result to Sanity
export default createSchema({
// We name our schema
name: 'default',
// Then proceed to concatenate our document type
// to the ones provided by any plugins that are installed
types: schemaTypes.concat([
foods,
category
]),
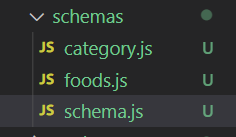
})Looking deeper at the code above, we imported two files that export the schemas and called them in the types array. At this point, your directory will look like this:
One last thing will be for us to load our studio with content which we will be fetching into the app. This is totally up to you; you can get lovely images from Unsplash.
Connecting Sanity with React App
Let's allow our frontend to query for and receive data from Sanity.
Connecting React to Sanity
This is done by installing the sanity client package in our React project. Then run this command:
npm install @sanity/client @sanity/image-url
- @sanity/client — Sanity Client is the official JavaScript client by Sanity and can be used both in Node.js and modern browsers.
- @sanity/image-url — A helper library used to generate image URLs and perform helpful image transformations through the Sanity asset pipeline. Read more on the official docs here.
Once these packages have been installed, we'll create a new file named client.js inside the src directory and add the following code to the client.js file.
import sanityClient from "@sanity/client";

export default sanityClient({
  projectId: "Your Project ID Here", // find this at manage.sanity.io or in your sanity.json
  dataset: "production", // this is from those question during 'sanity init'
});Note: To get your project ID, visit https://www.sanity.io/manage, click on the project, so it displays full info about the project, including the Project ID.

Ensure you save the file.
Connecting Sanity to React
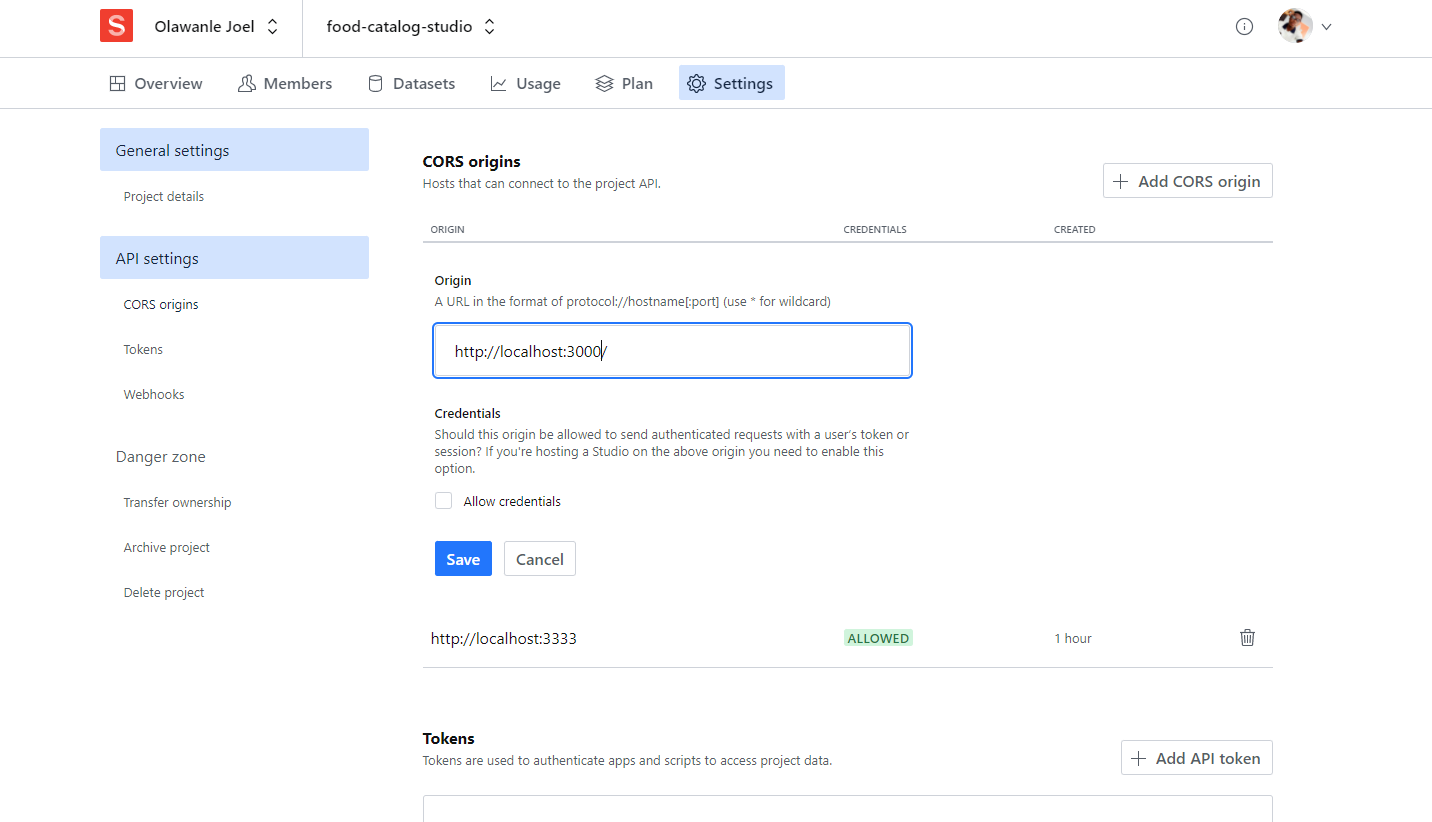
Finally, You will also need to add the port where the React development server is running to the CORS origins of your Sanity project. Visit https://www.sanity.io/manage and click on your Sanity project.
On your project's dashboard, click on Settings → API settings and then add http://localhost:3000/ to the CORS origins field if it was not added automatically.
Once you save, that will be all for our sanity studio; we can now start building the front end of our app to consume the data from the sanity studio.
Building a food catalog application
The first thing to handle would be routing, and this is usually handled in the App.js file. We'll be implementing this using react-router-dom and the Switch and Route components.
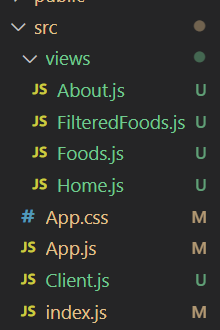
We will create a new folder in the /src directory to put all our routes in this app. We will have four routes:
views/Home.js- The main index is where we will list all the categories fetched from the Sanity studio.views/Foods.js- This will contain a random list of all foods fetched from the Sanity studio.views/About.js- This is the about page of the application.views/FilteredFoods.js- This is an individual page containing foods related to a particular category.
Let's create the above files, and our file directory will now look like this:
Let's now handle routing in the App.js file. In this file, we will handle routing using React router. This enables the navigation among views of various components in a React Application.
The first thing will be to install the React Router package using the command below:
npm install react-router-dom --save
After installing react-router-dom, add its components (BrowserRouter, Route, Switch) to the App.js file. You can now proceed to define your routes.
In the code below, you will notice all the routes are wrapped in the Switch and BrowserRouter components. The Switch component is used to render only the first route that matches the location, rather than rendering all matching routes, and the BrowserRouter is a router implementation that uses the HTML5 history API to keep your UI in sync with the URL. It is the parent component that is used to store all the other components. Learn more about routing in react here.
import { BrowserRouter, Route, Switch } from "react-router-dom";

// views
import Home from "./views/Home";
import About from "./views/About";
import Foods from "./views/Foods";
import FilteredFoods from "./views/FilteredFoods";

// styles
import "./App.css";

function App() {
	return (
		<BrowserRouter>
			<Switch>
				<Route component={Home} exact path="/" />
				<Route component={About} path="/About" />
				<Route component={Foods} path="/Foods" />
				<Route component={FilteredFoods} path="/FilteredFoods/:slug" />
			</Switch>
		</BrowserRouter>
	);
}

export default App;
You can confirm if the routes are working, visiting the paths. Now the next thing would be to work on the NavBar of our application.
Let's now create a folder and name its components in the /src directory to house all our reusable components. This would help organize our application. In this folder, we have about five different components, but let's start with the Header section of our application.
Building the Header and footer Section
The header section is going to house the application's logo and nav links, while the footer section will contain footer text. We mentioned earlier that React is all about components, so let's make some!
components/Header.js- This would be the overall container housing the Navbar.
import React from "react";
import NavBar from "./NavBar";

const Header = () => {
	return (
		<header>
			<div className="bg-gray-100">
				<NavBar />
			</div>
		</header>
	);
};

export default Header;
In the above code, we created a functional component and then imported Navbar.js.
components/NavBar.js- This will contain the logo and all the navigation links.
import React from "react";
import { NavLink } from "react-router-dom";

const Header = () => {
	return (
		<nav className="container lg:px-0 px-5 py-2 lg:py-0 lg:w-3/4 w-full mx-auto flex flex-col lg:flex-row justify-between h-20 items-center font-bold">
			<NavLink to="/">
				<p className="text-xl lg:text-2xl">😋Yummy Food's</p>
			</NavLink>
			<div className=" lg:block">
				<ul className="flex gap-x-20">
					<li>
						<NavLink
							to="/"
							exact
							className="nav-link"
							activeClassName="active-link"
						>
							Home
						</NavLink>
					</li>
					<li>
						<NavLink
							to="/foods"
							className="nav-link"
							activeClassName="active-link"
						>
							Foods
						</NavLink>
					</li>
					<li>
						<NavLink
							to="/about"
							className="nav-link"
							activeClassName="active-link"
						>
							About
						</NavLink>
					</li>
				</ul>
			</div>
		</nav>
	);
};

export default Header;
For the links which we declared in App.js to work, we need to import NavLink from react-router-dom and then made use of NavLink in the navbar.
components/Footer.js- This will contain the footer text, which is very simple.
import React from "react";
const Footer = () => {
return (
<div className="bg-gray-100 flex justify-center font-bold p-5">
<p>
© Sanity Tutorial Guide by
<a href="https://joel-new.netlify.app/" style={{ color: "#FE043C" }}>
Joel Olawanle
</a>
</p>
</div>
);
};
export default Footer;The last thing will be to add Header.js and Footer.js files to our App.js file, making the app.js file to now look like this
import { BrowserRouter, Route, Switch } from "react-router-dom";

// views
import Home from "./views/Home";
import About from "./views/About";
import Foods from "./views/Foods";
import FilteredFoods from "./views/FilteredFoods";

// components
import Header from "./components/Header";
import Footer from "./components/Footer";

// styles
import "./App.css";

function App() {
	return (
		<BrowserRouter>
			{/* Header Area */}
			<div className="max-w-full">
				<Header />
			</div>
			{/* Route Area */}
			<Switch>
				<Route component={Home} exact path="/" />
				<Route component={About} path="/About" />
				<Route component={Foods} path="/Foods" />
				<Route component={FilteredFoods} path="/FilteredFoods/:slug" />
			</Switch>
			{/* Footer Area */}
			<div className="max-w-full">
				<Footer />
			</div>
		</BrowserRouter>
	);
}

export default App;
At this stage, when you save, the application will look like this

You'll notice we have a Header and a Footer but no content! Let's now work on the index page, so it displays all our categories from Sanity.
Display all food categories on the Homepage
import React from "react";

import Categories from "../components/Categories";

const Home = () => {
	return (
		<section className="container w-full lg:px-0 px-5 lg:w-3/4 mx-auto">
			<div className="flex lg:flex-row flex-col my-10 justify-between">
				<div className="">
					<h2 className="text-3xl lg:text-4xl font-bold">Hello👋</h2>
					<p className="text-xl lg:text-2xl">What do you want?</p>
				</div>
				<div className="flex items-center lg:mt-0 mt-5 gap-3 lg:flex-row flex-col">
					<input
						type="text"
						className="w-full lg:w-80 p-2 border-2 border-gray-500 rounded focus:outline-none"
					/>
					<button
						style={{ backgroundColor: "#FE043C" }}
						className="rounded w-full lg:w-auto px-10 py-3 text-white"
					>
						Search
					</button>
				</div>
			</div>
			<hr className="my-10" />
			<Categories />
		</section>
	);
};

export default Home;
In the code above, we have a div containing welcome information and a search bar, and then after that, we imported a component called categories from the components' folder.
To continue, you will have to create a component and name it Categories.js in the /components folder. This is where we will fetch all our food categories from Sanity, either using GROQ or GraphQL. For this guide, we will make use of GROQ.
Please paste the following code in the Categories.js file:
import React, { useState, useEffect } from "react";
import sanityClient from "../Client";

import Category from "./Category";

const Categories = () => {
	const [categories, setCategories] = useState(null);

	useEffect(() => {
		sanityClient
			.fetch(
				`*[_type == "category"]{
      title,
      slug,
      description,
      image{
        asset->{
          _id,
          url
        },
      },
      hexCode,
    }`
			)
			.then((data) => setCategories(data))
			.catch(console.error);
	}, []);

	return (
		<div className="">
			<h3 className="text-3xl font-bold text-center my-10 lg:my-5">
				All Categories🥘
			</h3>

			<div className="flex flex-col lg:flex-row lg:justify-center flex-wrap w-full gap-10 my-10">
				{categories &&
					categories.map((category) => (
						<Category key={category._id} category={category} />
					))}
			</div>
		</div>
	);
};

export default Categories;
The above code might seem tricky since we are now fetching data from our Sanity, but I will explain. Let's first understand what GROQ is all about.
GROQ (Graph-Relational Object Queries) is a declarative language designed to query collections of largely schema-less JSON documents.
Explaining the code...
The first thing we did was to import Sanity Client, which we installed earlier.
import sanityClient from "../Client";
In react, we make use of some hooks to query for data. For this guide, we will make use of useState() and useEffect(). The useState() is a Hook that allows you to have state variables in functional components, while useEffect() lets you perform side effects in function components.
To make use of these two hooks, you have to import them from react, and that's what we did in the first line alongside react, which is necessary.
import React, { useState, useEffect } from "react";We can now set our states
const [categories, setCategories] = useState(null);
Note: This follows a common pattern where categories is where we access the current value of that particular piece of state, while setCategories is our method for setting or changing it.
To fetch data/information from Sanity studio, you can make use of GROQ, let's now explore our Groq Query:
useEffect(() => {
		sanityClient
			.fetch(
				`*[_type == "category"]{
      title,
      slug,
      description,
      image{
        asset->{
          _id,
          url
        },
      },
      hexCode,
    }`
			)
			.then((data) => setCategories(data))
			.catch(console.error);
	}, []);
This query is searching through your Sanity data store, or Content Lake, for a schema that has a _type of category (this is the name of the schema) and then gets the title, slug, description, e.t.c.
Reading further through our code, you'll notice that we are looping through our categories array and mapping each item to an instance of our Category component.
{categories &&
	categories.map((category) => (
		<Category key={category._id} category={category} />
	))}
In the category.js file, paste the code below and save
import React from "react";
import { Link } from "react-router-dom";
import sanityClient from "../Client";
import imageUrlBuilder from "@sanity/image-url";
const builder = imageUrlBuilder(sanityClient);
function urlFor(source) {
return builder.image(source);
}
const Category = ({ category }) => {
return (
<div
className="bg-gray-100 rounded-xl p-10 w-full lg:w-1/3"
style={{ backgroundColor: `#${category.hexCode}` }}
>
<img
src={urlFor(category.image).url()}
alt={category.title}
className="w-40"
/>
<h4 className="text-2xl py-3 font-bold capitalize">{category.title}</h4>
<p>{category.description}</p>
<Link to={"/filteredfoods/" + category.slug.current}>
<button
style={{ backgroundColor: "#FE043C" }}
className="rounded mt-3 px-5 py-2 text-white"
>
View
</button>
</Link>
</div>
);
};
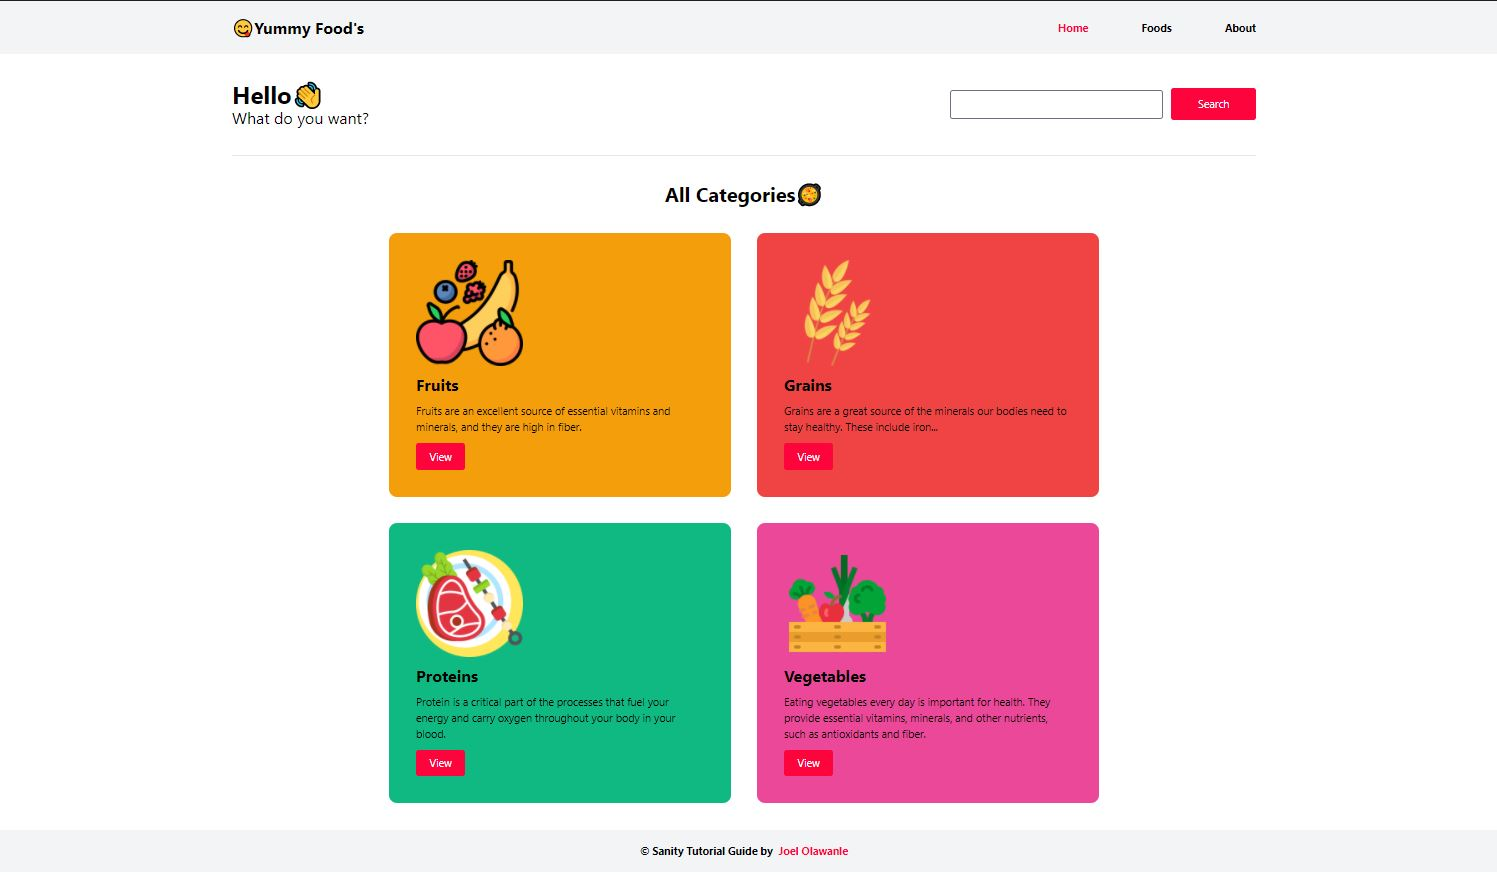
export default Category;In the above code, we imported imageUrlBuilder from @sanity/image-url, which we use to generate image URLs for our images by creating a method called UrlFor() and making use of it inside the template. This helps us get thumbnail-sized images compared to the regular size of images uploaded to Sanity.
Once you save, you will notice the homepage/index page now looks like this, depending on the data you entered into your studio.
Display all foods on Food's page
Just as we were able to display all categories on the home page, we will also use the same approach to display all foods on the foods page. In the /views/Foods.js paste the code below:
import React, { useState, useEffect } from "react";
import { Link } from "react-router-dom";
import sanityClient from "../Client";
import imageUrlBuilder from "@sanity/image-url";
const builder = imageUrlBuilder(sanityClient);
function urlFor(source) {
return builder.image(source);
}
// import foodImage from "../images/protein/001.jpg";
const Foods = () => {
const [foods, setFoods] = useState(null);
useEffect(() => {
sanityClient
.fetch(
`*[_type == "foods"]{
_id,
foodName,
foodDesc,
foodImage{
asset->{
_id,
url
},
},
category->{
title
}
}`
)
.then((data) => setFoods(data))
.catch(console.error);
}, []);
return (
<section className="container w-full lg:px-0 px-5 lg:w-3/4 mx-auto min-h-screen">
<div className="flex lg:flex-row flex-col my-10 justify-center">
<div className="flex items-center lg:mt-0 mt-5 gap-3 lg:flex-row flex-col">
<input
type="text"
className="w-full lg:w-80 p-2 border-2 border-gray-500 rounded focus:outline-none"
/>
<button
style={{ backgroundColor: "#FE043C" }}
className="rounded w-full lg:w-auto px-10 py-3 text-white"
>
Search
</button>
</div>
</div>
<hr className="my-10" />
<div className="my-5">
<h3 className="text-3xl font-bold text-center my-10 lg:my-5">
All Foods🥗
</h3>
<div className="grid grid-cols-1 lg:grid-cols-3 gap-8">
{foods &&
foods.map((food) => (
<div
className="bg-gray-100 rounded shadow-xl p-5 std-border"
key={food.foodName}
>
<div className="flex flex-col items-center">
<img
src={urlFor(food.foodImage).width(200).url()}
alt={food.title}
className="rounded-full object-cover w-40 h-40 border-4 shadow-inner std-border"
/>
<h4 className="text-2xl pt-3 font-bold capitalize">
{food.foodName}
</h4>
<Link to={"/filteredfoods/" + food.category.title}>
<small className="uppercase text-gray-400 font-semibold">
{food.category.title}
</small>
</Link>
</div>
<p className="mt-5">{food.foodDesc}</p>
</div>
))}
</div>
</div>
</section>
);
};
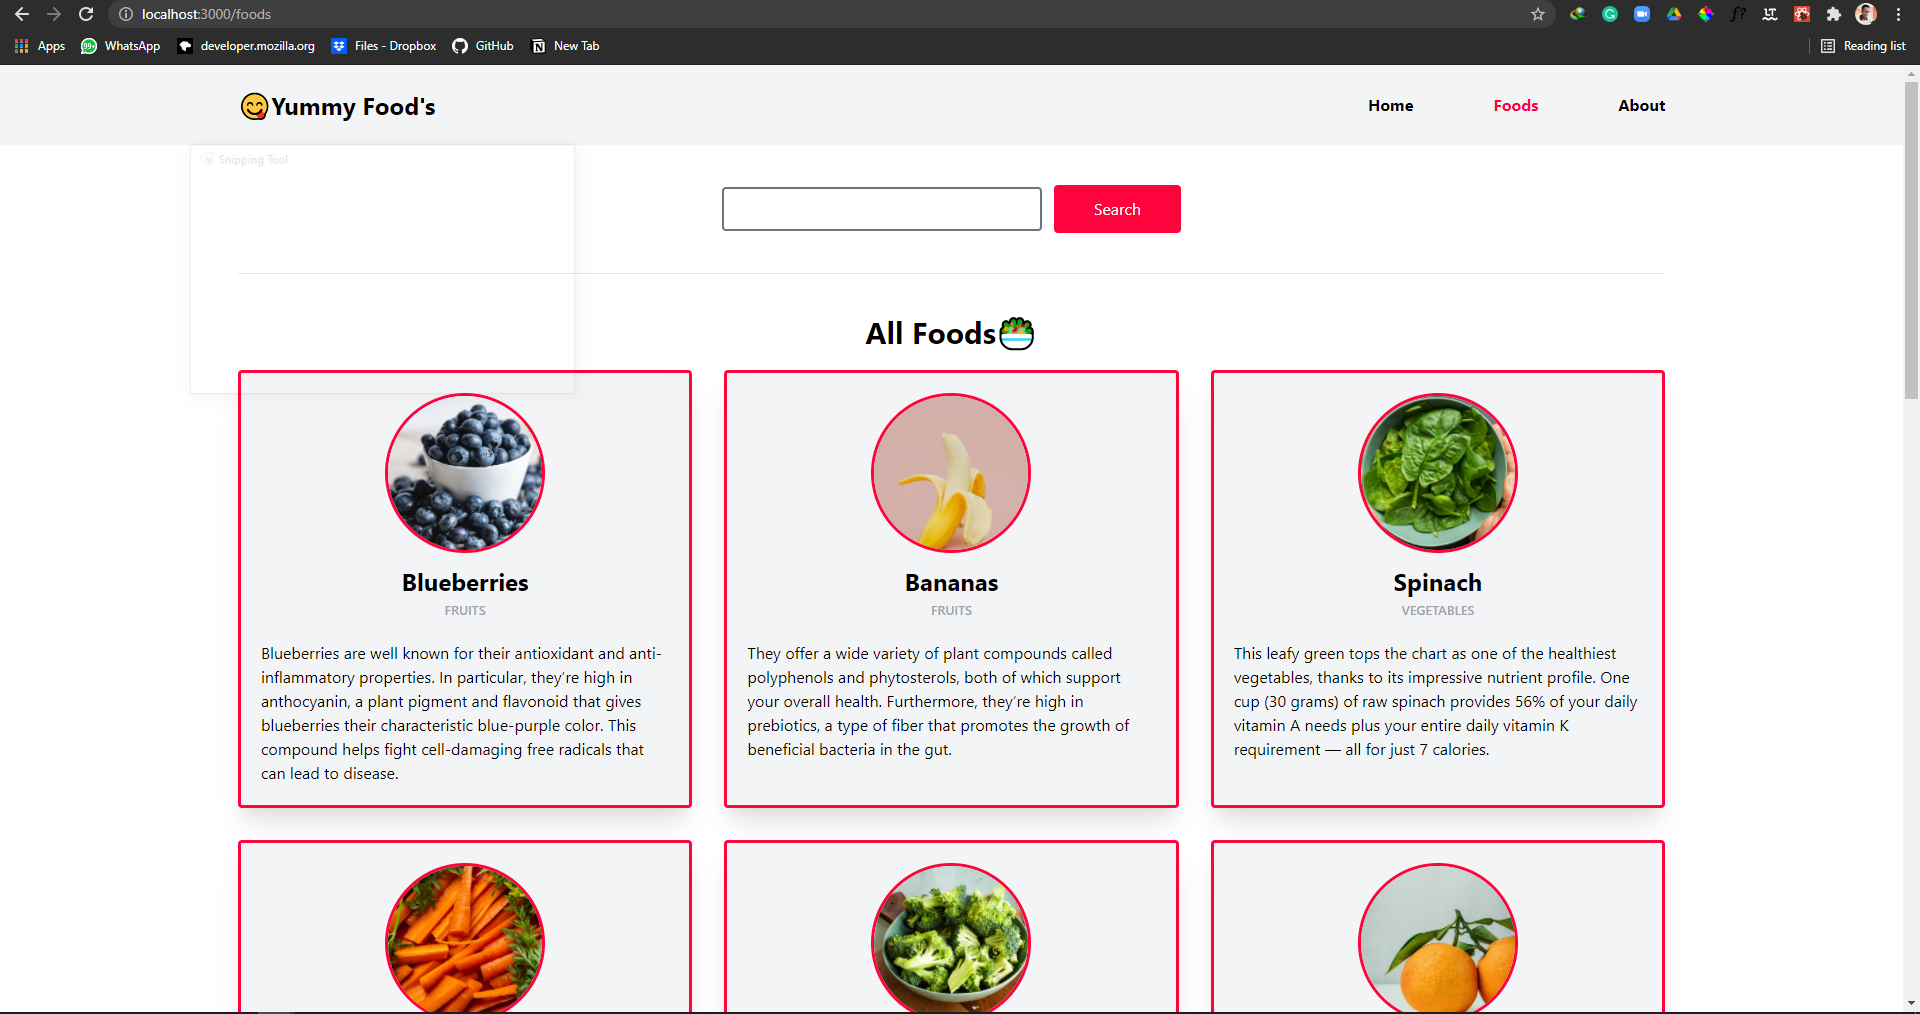
export default Foods;In the code above, We are simply fetching all the foods from the foods schema of our sanity studio. Once you save, you will get something like this, depending on what you have in your sanity studio.
Finally, let's take a look at something very important; you will notice some links in the foods page and home page, which are supposed to take us to a dynamic route. Let's now see how it works.
Create dynamic routes for each category
To create a dynamic route, we will be making use of a component. We will be making use of the FilteredFoods.js page, and if you recall, when we were declaring routes, we added a slug to the route of this page
<Route component={FilteredFoods} path="/FilteredFoods/:slug" />We will get that slug via useParams which we would import into this component. In the FilteredFoods.js component, paste the code below:
import React, { useState, useEffect } from "react";
import { useParams, Link } from "react-router-dom";
import sanityClient from "../Client";
import imageUrlBuilder from "@sanity/image-url";

const builder = imageUrlBuilder(sanityClient);
function urlFor(source) {
	return builder.image(source);
}

const Foods = () => {
	const [filteredFoods, setFilteredFoods] = useState(null);
	const { slug } = useParams();

	useEffect(() => {
		sanityClient
			.fetch(
				` *[_type == "foods" && category._ref in *[_type=="category" && title=="${slug}"]._id ]{
          _id,
              foodName,
              foodDesc,
              foodImage{
                asset->{
                  _id,
                  url
                },
              },
              category->{
                title
              }
        }`
			)
			.then((data) => setFilteredFoods(data))
			.catch(console.error);
	}, [slug]);

	return (
		<section className="container w-full lg:px-0 px-5 lg:w-3/4 mx-auto min-h-screen">
			<div className="flex lg:flex-row flex-col my-10 justify-center">
				<div className="flex items-center lg:mt-0 mt-5 gap-3 lg:flex-row flex-col">
					<input
						type="text"
						className="w-full lg:w-80 p-2 border-2 border-gray-500 rounded focus:outline-none"
					/>
					<button
						style={{ backgroundColor: "#FE043C" }}
						className="rounded w-full lg:w-auto px-10 py-3 text-white"
					>
						Search
					</button>
				</div>
			</div>
			<hr className="my-10" />
			<div className="my-5">
				<h3 className="text-3xl font-bold text-center my-10 lg:my-5">
					All Foods🥗
				</h3>
				<div className="grid grid-cols-1 lg:grid-cols-3 gap-8">
					{filteredFoods &&
						filteredFoods.map((food) => (
							<div
								className="bg-gray-100 rounded shadow-xl p-5 std-border"
								key={food.foodName}
							>
								<div className="flex flex-col items-center">
									<img
										src={urlFor(food.foodImage.asset.url).width(200).url()}
										alt=""
										className="rounded-full object-cover w-40 h-40 border-4 shadow-inner std-border"
									/>
									<h4 className="text-2xl pt-3 font-bold capitalize">
										{food.foodName}
									</h4>
									<Link to={"/filteredfoods/" + food.category.title}>
										<small className="uppercase text-gray-400 font-semibold">
											{food.category.title}
										</small>
									</Link>
								</div>
								<p className="mt-5">{food.foodDesc}</p>
							</div>
						))}
				</div>
			</div>
		</section>
	);
};

export default Foods;
The code above can be quite tricky, but I will explain everything in plain words. The first thing we did was to import useParams which would enable us to get the slug
const { slug } = useParams();Once that is successful, we can now query our sanity studio, but this time around, the query is quite different. To get a feeling for queries in GROQ, you can check their cheat sheet here.
Once you save this code, you will now be able to access dynamic routes via the Link declared either in the home page or foods page
<Link to={"/filteredfoods/" + category.slug.current}>
	<button
		style={{ backgroundColor: "#FE043C" }}
		className="rounded mt-3 px-5 py-2 text-white"
	>
		View
	</button>
</Link>
By now, the whole application should be working fine and fast without reloading the browser, we have not yet added any information to the About page, you can paste the code below, so we are sure everything is complete:
import React from "react";

import foodsAboutImg from "../images/foods-abt-img.jpg";

const About = () => {
	return (
		<section className="container w-full lg:px-0 px-5 lg:w-3/4 mx-auto min-h-screen">
			<div className="mt-16">
				<h3 className="text-3xl font-bold text-center my-10 lg:my-5">
					About Us🦻
				</h3>
				<div className="flex gap-10 justify-center items-center flex-col lg:flex-row mt-10">
					<div className="">
						<img
							src={foodsAboutImg}
							className="w-96 rounded-xl lg:rounded-l-xl"
							alt=""
						/>
					</div>
					<div className="w-full lg:w-1/3 flex gap-5 mb-10 lg:mb-0 flex-col">
						⭐⭐⭐
						<p>
							A healthy diet rich in fruits, vegetables, whole grains and
							low-fat dairy can help to reduce your risk of heart disease by
							maintaining blood pressure and cholesterol levels. High blood
							pressure and cholesterol can be a symptom of too much salt and
							saturated fats in your diet.
						</p>
						<p>
							Many healthful foods, including vegetables, fruits, and beans, are
							lower in calories than most processed foods.
						</p>
						<p>
							Children learn most health-related behaviors from the adults
							around them, and parents who model healthful eating and exercise
							habits tend to pass these on.
						</p>
						⭐⭐⭐
					</div>
				</div>
			</div>
		</section>
	);
};

export default About;
This might throw an error due to the image imported. Feel free to use another image or get the image from this GitHub repository.
Congratulations! We now have our application running smoothly offline. You can decide to deploy your application online so that others can access it easily.
Conclusion
In this guide, we built a single-page application with React, Tailwind CSS, and Sanity. This guide will help you set up your own version of this project. You can also improve on it by adding/implementing certain features and functionalities.
Here are a few ideas to get you started:
- Add Search functionality to the search field, making use of foods.
- Style the app using UI libraries like Vuetify, BootstrapVue, or standard CSS.
- Make certain fields of the schema required and play with other field types.
Useful resources
- Headless CMS explained in 2 minutes
- Make a Progressive Web App with React
- Build a Portfolio Website With React & Sanity.io
- Sanity.io Crash Course | Headless CMS
Happy coding!
Sanity – The Content Operating System that ends your CMS nightmares
Sanity replaces rigid content systems with a developer-first operating system. Define schemas in TypeScript, customize the editor with React, and deliver content anywhere with GROQ. Your team ships in minutes while you focus on building features, not maintaining infrastructure.
Sanity scales from weekend projects to enterprise needs and is used by companies like Puma, AT&T, Burger King, Tata, and Figma.