Learn how to build a portfolio site with Sanity and Next.js 13 and also create custom hooks for deployment
Knowing how to handle content is important when creating a personal website for yourself or a client.
This is because maintaining and updating a site can result in substantial expenses if you don't do it correctly. This is even more the case if you're building for someone with a non-technical background.
To address this, you can integrate your website with a headless CMS service that offers an API for content management and updates. In this case, we will utilize Sanity for this purpose.
Sanity is a headless CMS framework for managing content. It provides tools to leverage APIs to connect to your web app providing instantaneous, rich and automated infrastructure for managing content on the cloud.
With Sanity, you can hook up pages or content that require regular updating to the studio and manage them from the content lake without having to touch code frequently. This makes the content creation and management process accessible to more people regardless of their technical background.
In this post, you'll learn how to use Sanity as a data source to build a portfolio site with Next.js 13 and Tailwind CSS. You'll also learn how to host it on Vercel and set-up webhooks to trigger deployments.
Sanity studio is Sanity's open source single-page app for managing your data and operations. This is the interface from which you can create, delete, and update your data within Sanity.
Open up a new terminal outside of your Next.js application and type the commands below:
mkdir sanity-studio

cd sanity-studio

npm create sanity@latest
Once your run the command in your terminal, you'll be prompted to select a login provider from the list of options. If you already have an account, it will authenticate your account and automatically log you in or else you can create a new account on Sanity.
Once your account has been successfully authenticated, more prompts will be provided in the terminal to configure your project. Here are the options set for the studio:
$ Project name: Sanity Next.js Site
$ Use the default dataset configuration?: Yes
$ Project output path: C:\Users\USER\Desktop\sanity-studio
$ Select project template: Clean project with no predefined schemas
$ Do you want to use TypeScript? Yes
$ Package manager to use for installing dependencies?: npm
Once completed, this should install Sanity studio locally. To see the studio, run npm run dev and visit localhost:3333, log into your account using the same method used in creating your account, and you should see the studio running locally.
You can choose to host your studio separately, but in this tutorial you'll be mounting it together with your Next.js application using the next-sanity toolkit.
End the server running your Next app and run this command:
npminstall sanity next-sanity
And then on the sanity-studio directory running the studio locally, copy the schema folder and sanity.config.ts file and paste into the root of your Next.js app.
Next, inside the sanity.config.ts file, add a basePath key and give it a value of /studio or any valid URL path where you would like your studio to live.
This is where the studio page will be mounted within your Next app. You can name this file whatever you prefer, but it must match with the basePath key specified inside the sanity.config.ts file. In my case, the file name will be studio.
To create the studio route, we'll utilize Next.js dynamic segments. Inside the app directory, create a studio/[[...index]]/page.tsx file.
app/
└── studio/
    └── [[...index]]/
         └── page.tsx
With this, when you visit any route that matches with /studio, the studio component page.tsx will be rendered.
To complete this setup, paste this code inside the component:
First, NextStudio is imported from the next-sanity library and the configuration file is imported from the sanity.config.ts file you created earlier.
Now run npm run dev and visit localhost:3000/studio. You will get a prompt to add localhost:3000as a CORS origin to your Sanity project. Just click continue to add the URL.
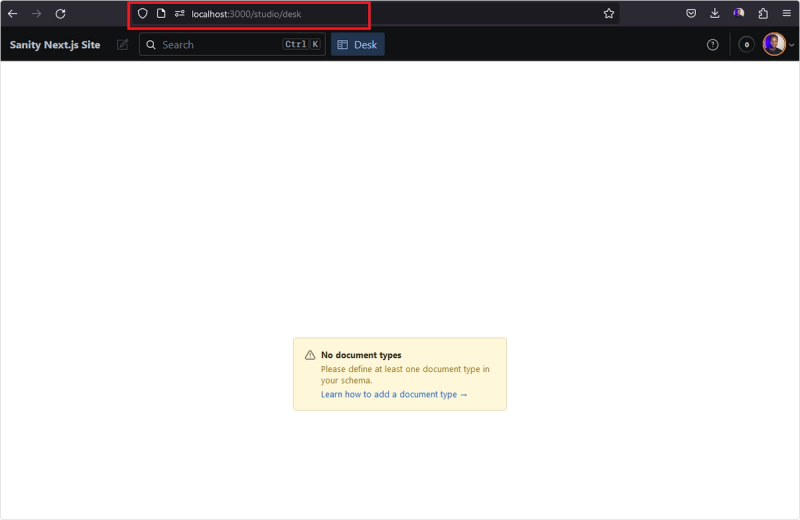
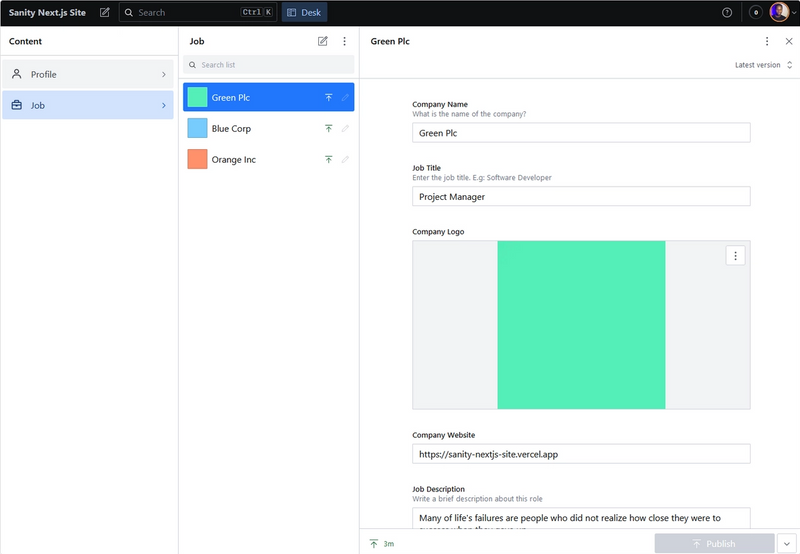
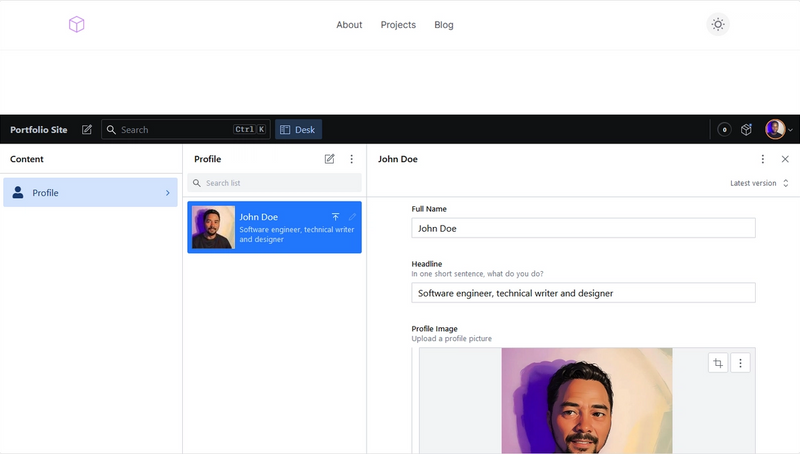
Once added, log into your Sanity account using the same method you used in creating your account and you should see the Studio mounted into your Next.js application as shown in the image below:
Studio mounted into Next.js app
With the studio now running in your Next.js app, you don't need the separate sanity-studio directory anymore. You can delete or close it.
By default, the studio will be blank because you haven't created any schemas files. Let's do that in the next section.
Schemas are essentially a way of organizing datasets in a database depending on what type of content you need.
Since we're building a portfolio site, we'll create schemas to handle projects, profile, and so on. To be more specific, you'll create three schemas files for this portfolio project:
profile: Schema file for defining your personal information like name, about, skills, and so on.
project: Schema file for your projects.
work: Schema file for defining your work experience.
Each schema file must contain a name, title, and type property. Here's a brief breakdown of the function of each property:
The name key is the property that is used to reference a schema in the query language. The value must be a unique value to avoid conflating schemas.
title defines what the schema type is called in the Studio UI.
type defines what schema type you're working with. The document value will tell the studio that it should make it possible to make new documents.
The icon is an optional property you can add alongside the title. To use the icon, install the react-icons library with the command npm install -D react-icons
The fields array, is where the individual input fields will be defined. Here are the fields for the profile schema:
fields:[defineField({
name:"fullName",
title:"Full Name",
type:"string",validation:(rule)=> rule.required(),}),defineField({
name:"headline",
title:"Headline",
type:"string",
description:"In one short sentence, what do you do?",validation:(Rule)=> Rule.required().min(40).max(50),}),{
name:"profileImage",
title:"Profile Image",
type:"image",
description:"Upload a profile picture",
options:{ hotspot:true},
fields:[{
name:"alt",
title:"Alt",
type:"string",},],},{
name:"shortBio",
title:"Short Bio",
type:"text",
rows:4,},{
name:"email",
title:"Email Address",
type:"string",},{
name:"location",
title:"Location",
type:"string",},{
name:"fullBio",
title:"Full Bio",
type:"array",of:[{ type:"block"}],},{
name:"resumeURL",
title:"Upload Resume",
type:"file",},{
name:"socialLinks",
title:"Social Links",
type:"object",
description:"Add your social media links:",
fields:[{
name:"github",
title:"Github URL",
type:"url",
initialValue:"https://github.com/",},{
name:"linkedin",
title:"Linkedin URL",
type:"url",
initialValue:"https://linkedin.com/in/",},{
name:"twitter",
title:"Twitter URL",
type:"url",
initialValue:"https://twitter.com/",},{
name:"twitch",
title:"Twitch URL",
type:"url",
initialValue:"https://twitch.com/",},],
options:{
collapsed:false,
collapsible:true,
columns:2,},},{
name:"skills",
title:"Skills",
type:"array",
description:"Add a list of skills",of:[{ type:"string"}],},],
To understand how fields work, visualize each field object as a HTML <input> that will be available in the studio. The value in each input will be exported to a JSON object you can use to inject your data. You can add as many fields, but each must contain a name, title, and type property.
The defineField() helper function helps enable auto-completion of field types in your schema file.
Sanity comes with its own built-in schema types: number, datetime, image, array, object, string, url, and more. You can check out the full list of schema types here.
To expose this newly created schema file to the Studio, you need to import it into the schemas array inside the schemas/index.ts file:
Now you can start working with it from within the studio. Visit your studio at localhost:3000/studio or whatever path you used to mount it. Then click on the Profile tab and select the edit button on the top corner to start editing the fields.
This is what that looks like:
Preview of the profile schema in studio
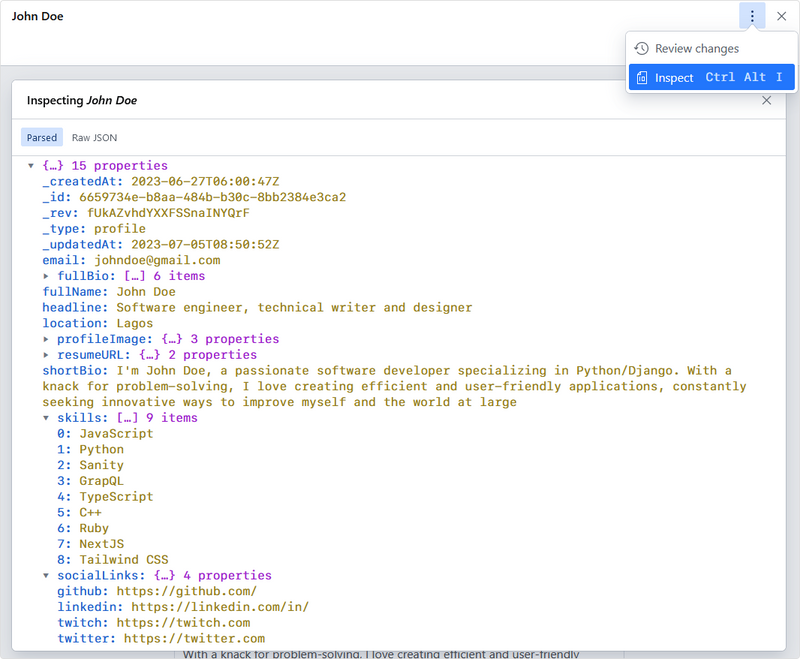
Fill in all the fields and click publish once completed. This will append the data into a parsed JSON document. To view this JSON output, click the menu button on the top right corner and hit "Inspect" or simply hold down Ctrl Alt I on your keyboard.
Here's what the structure for the profile schema looks like:
Preview of schema document
With this, you can easily query the data to fetch the exact content you need in your front-end. Let's do that in the next section.
GROQ (Graph-Relational Object Queries) is Sanity's query language designed to query collections of largely schema-less JSON documents. The idea behind the query language is to be able to describe exactly what information you need from your schema, or filter certain data, and return only specific elements from your data
To start using GROQ, first create a sanity/sanity.client.ts file in your project root directory.
apiVersion: The version of the Sanity API you're using. For the latest API version, use your current date in this format YYYY-MM-DD.
useCdn is used to disable edge cases
What this file does is provide a few configurations that will be defined in each query so this is just to avoid repeating it every time. Now for the main query, create a sanity/sanity.query.ts file.
touch sanity/sanity.query.ts
Note: There is not clear-cut way to arrange or name these files so feel free to change it up as needed.
Here we created an exported async function called getProfile() that returns a groq fetch query wrapped with the client config created in the first step.
The groq query starts with an asterisk (*) which represents every document in your dataset followed by a filter in brackets. The filter above returns the schema that has a _type of "profile".
Schema JSON showing profile schema _type
The filter is followed by curly braces which contains specific content from the dataset needed like: fullName, headline, profileImage and so on. This is called projections in the Sanity docs and it returns the entire data as an array.
If you want to learn more about querying using GROQ, I suggest you go through the how queries work section in the documentation. For syntax highlighting of your GROQ query, install the sanity.io extension available on the Visual Studio Code marketplace.
We're done with the configuration you need to start using your content. Let's look at how to display this content in your Next application.
First, remove all the styling inside the global.css file, except for the necessary Tailwind imports at the top. Then clear everything inside the root page.tsx file of your Next.js app and paste the following code inside:
First the getProfile query is imported from the sanity.query.ts file which is a filtered-down version of our data coming from the schema.
ProfileType is imported to add types to the data.
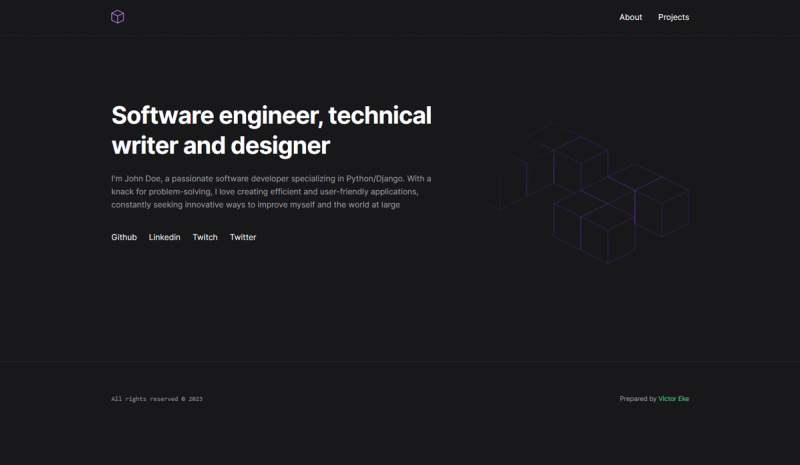
The profile array is mapped inside the component to return the headline, shortBio, and socialLinks.
<HeroSvg /> is essentially an svg element imported as a react component added just for UI aesthetics. You can download the HeroSVG icon component.
Here's the resulting output:
hero section output result
To speed things up, I've created the navbar and footer navigation components. Simply download the directory and import them into the layout.tsx file like so:
// app/layout.tsximport"./globals.css";importtype{ Metadata }from"next";import{ Inter }from"next/font/google";import Navbar from"./components/global/Navbar";import Footer from"./components/global/Footer";const inter =Inter({ subsets:["latin"]});exportconst metadata: Metadata ={
title:"Sanity Next.js Portfolio Site",
description:"A personal portfolio site built with Sanity and Next.js",
openGraph:{
images:"add-your-open-graph-image-url-here",},};exportdefaultfunctionRootLayout({children}:{children: React.ReactNode}){return(<htmllang="en"><bodyclassName={`${inter.className} bg-zinc-900 text-white`}><Navbar/>{children}<Footer/></body></html>);}
With these components, the home page should look like this:
Let's build the about page using content from the getProfile query as well. In this section you'll need to install a React library called PortableTextBlock by Sanity. This library will allow you easily de-structure the block content of the rich text editor.
To install this package run npm install -D @portabletext/react and I'll explain how to use it later on.
Create an about folder inside the app directory and add a page.tsx file inside this new folder. You can also do this quickly using the following command:
mkdir app/about &&touch app/about/page.tsx
Here's the code snippet for the about page:
// app/about/page.tsximport Image from"next/image";import{ getProfile }from"@/sanity/sanity.query";importtype{ ProfileType }from"@/types";import{ PortableText }from"@portabletext/react";import{ BiEnvelope, BiFile }from"react-icons/bi";exportdefaultasyncfunctionAbout(){const profile: ProfileType[]=awaitgetProfile();return(<mainclassName="lg:max-w-7xl mx-auto max-w-3xl md:px-16 px-6">{profile &&
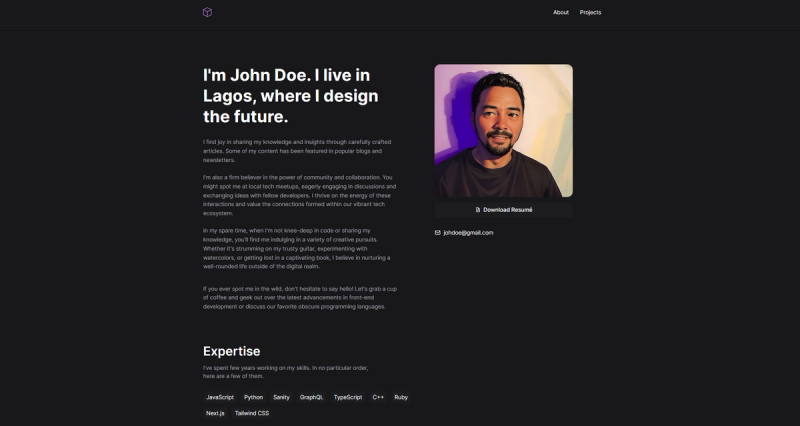
profile.map((data)=>(<divkey={data._id}><sectionclassName="grid lg:grid-cols-2 grid-cols-1 gap-x-6 justify-items-center"><divclassName="order-2 lg:order-none"><h1className="lg:text-5xl text-4xl lg:leading-tight basis-1/2 font-bold mb-8">
I'm {data.fullName}. I live in {data.location}, where I
design the future.
</h1><divclassName="flex flex-col gap-y-3 text-zinc-400 leading-relaxed"><PortableTextvalue={data.fullBio}/></div></div><divclassName="flex flex-col lg:justify-self-center justify-self-start gap-y-8 lg:order-1 order-none mb-12"><div><ImageclassName="rounded-2xl mb-4 object-cover max-h-96 min-h-96 bg-top bg-[#1d1d20]"src={data.profileImage.image}width={400}height={400}quality={100}alt={data.profileImage.alt}/><ahref={`${data.resumeURL}?dl=${data.fullName}_resume`}className="flex items-center justify-center gap-x-2 bg-[#1d1d20] border border-transparent hover:border-zinc-700 rounded-md duration-200 py-2 text-center cursor-cell font-medium"><BiFileclassName="text-base"/> Download Resumé
</a></div><ul><li><ahref={`mailto:${data.email}`}className="flex items-center gap-x-2 hover:text-purple-400 duration-300"><BiEnvelopeclassName="text-lg"/>{data.email}</a></li></ul></div></section><sectionclassName="mt-24 max-w-2xl"><h2className="font-semibold text-4xl mb-4">Expertise</h2><pclassName="text-zinc-400 max-w-lg">
I've spent few years working on my skills. In no particular
order, here are a few of them.
</p><ulclassName="flex flex-wrap items-center gap-3 mt-8">{data.skills.map((skill, id)=>(<likey={id}className="bg-[#1d1d20] border border-transparent hover:border-zinc-700 rounded-md px-2 py-1">{skill}</li>))}</ul></section></div>))}</main>);}
Similar to the home page, we're also fetching the data from the getProfile query and assigning the ProfileType for type safety.
The profile data is also mapped to get the individual properties: fullName, location, fullBio, profileImage, resumeURL, email, and skills array.
The portable text editor was de-structured using the <PortableText /> component which takes in a value prop that receives the content of the rich text editor.
Adding the image from Sanity's CDN should throw an error in Next.js since you haven't added Sanity's image source hostname in your next.config.ts file. Here's how to do it in Next.js 13:
To view the component, you can import it into the home page:
// Note: This is a truncated version of the home page (app/page.tsx) file to illustrate how the Job component is declared.import{ getProfile }from"@/sanity/sanity.query";importtype{ ProfileType }from"@/types";import HeroSvg from"./icons/HeroSvg";import Job from"./components/Job";// import job componentexportdefaultasyncfunctionHome(){const profile: ProfileType[]=awaitgetProfile();return(<mainclassName="max-w-7xl mx-auto lg:px-16 px-6"><section> // code truncated for brevity
<HeroSvg/></section><Job/> // declare job component
</main>);}
Here's the resulting output:
work experience section
By now, you should have a clear understanding of the necessary steps to showcase content with Sanity: Create schema file, > Query the dataset > Display the content in your application.
Let's now focus on configuring data for dynamic routes in your application and leveraging it to construct the projects page.
As always, you'll start by creating the schema file:
touch schemas/project.ts
Here's the code for the schema fields:
import{ BiPackage }from"react-icons/bi";import{ defineField }from"sanity";const project ={
name:"project",
title:"Project",
description:"Project Schema",
type:"document",
icon: BiPackage,
fields:[{
name:"name",
title:"Name",
type:"string",
description:"Enter the name of the project",},defineField({
name:"tagline",
title:"Tagline",
type:"string",validation:(rule)=> rule.max(60).required(),}),defineField({
name:"slug",
title:"Slug",
type:"slug",
description:"Add a custom slug for the URL or generate one from the name",
options:{ source:"name"},validation:(rule)=> rule.required(),}),{
name:"logo",
title:"Project Logo",
type:"image",},{
name:"projectUrl",
title:"Project URL",
type:"url",},{
name:"coverImage",
title:"Cover Image",
type:"image",
description:"Upload a cover image for this project",
options:{ hotspot:true},
fields:[{
name:"alt",
title:"Alt",
type:"string",},],},{
name:"description",
title:"Description",
type:"array",
description:"Write a full description about this project",of:[{ type:"block"}],},],};exportdefault project;
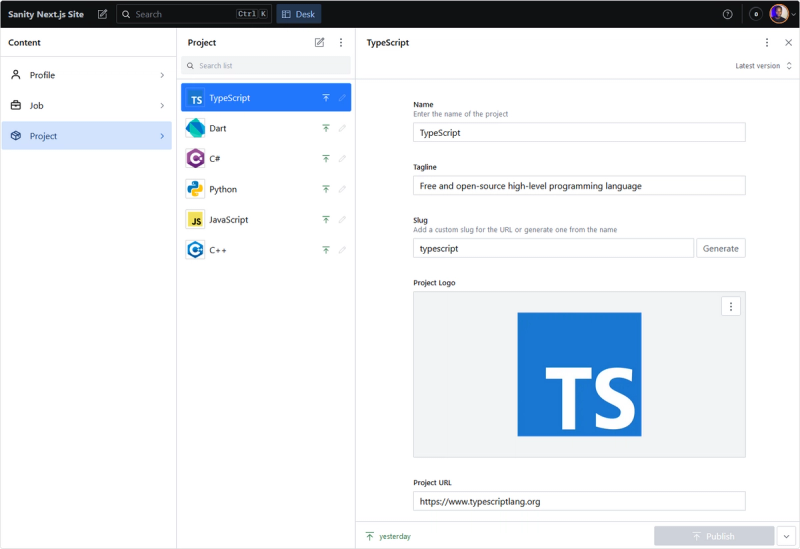
Visit your studio, click the project schema, and add as many projects as you want. You can download the asset files used for each project from the repository.
This will create a page.tsx file inside a directory called project. Here's the code for the projects:
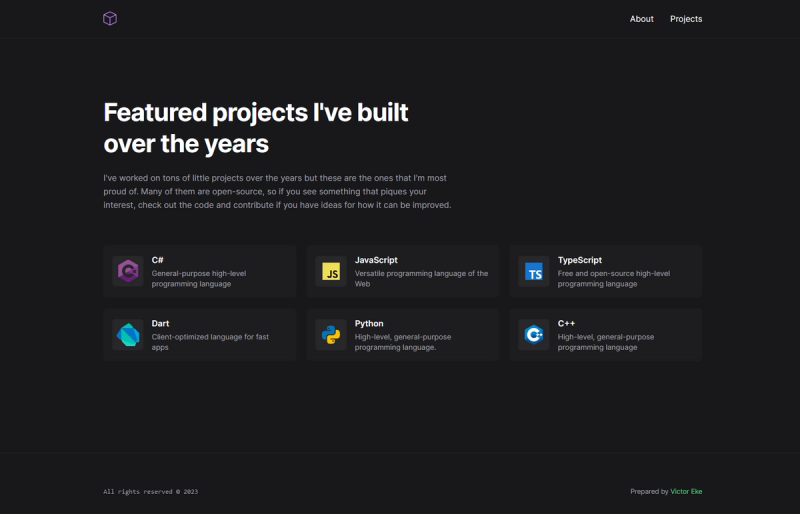
// app/projects/page.tsximport Image from"next/image";import Link from"next/link";import{ getProjects }from"@/sanity/sanity.query";importtype{ ProjectType }from"@/types";exportdefaultasyncfunctionProject(){const projects: ProjectType[]=awaitgetProjects();return(<mainclassName="max-w-7xl mx-auto md:px-16 px-6"><sectionclassName="max-w-2xl mb-16"><h1className="text-3xl font-bold tracking-tight sm:text-5xl mb-6 lg:leading-[3.7rem] leading-tight">
Featured projects I've built over the years
</h1><pclassName="text-base text-zinc-400 leading-relaxed">
I've worked on tons of little projects over the years but these
are the ones that I'm most proud of. Many of them are
open-source, so if you see something that piques your interest, check
out the code and contribute if you have ideas for how it can be
improved.
</p></section><sectionclassName="grid xl:grid-cols-3 md:grid-cols-2 grid-cols-1 gap-5 mb-12">{projects.map((project)=>(<Linkhref={`/projects/${project.slug}`}key={project._id}className="flex items-center gap-x-4 bg-[#1d1d20] border border-transparent hover:border-zinc-700 p-4 rounded-lg ease-in-out"><Imagesrc={project.logo}width={60}height={60}alt={project.name}className="bg-zinc-800 rounded-md p-2"/><div><h2className="font-semibold mb-1">{project.name}</h2><divclassName="text-sm text-zinc-400">{project.tagline}</div></div></Link>))}</section></main>);}
Each project card is wrapped in a link that points to their respective page based on the slug: /projects/${project.slug}. With this, the dynamic component can be easily created in next.js
Create a folder called [project] (wrapped in square brackets) inside the projects directory, and add a page.tsx file.
This folder enclosed in square brackets is known as a dynamic segment in Next.js, and it allows the component to be mounted based on the params property.
Since you've already created the project schema type, all that's left is to query the dataset to fetch single projects.
To fetch the slug from the route, we've added a parameter called slug into the function, which will allow the getSingleProject function to be called with the respective slug using the Next.js params property.
Next.js 13 introduced a special file loading.js that helps you create an instant loading state from the server while the content of a route segment loads. This helps users understand the app is responding and provides a better user experience.
With this special file, you can create a loading state that mimics the UI of the single project page easily.
Create a loading.tsx file inside the [project] directory and add the code snippet:
You may have noticed the navbar and footer components are showing up in the studio route. This is because these components we're defined in the root layout —which applies to all routes in the application.
Navbar and footer components in studio page
To fix this, you'll have to create a separate layout.tsx file for the studio component:
Create two folders wrapped in parenthesis inside the app directory. Name one folder (site), and the other (studio). These folders are wrapped in parenthesis to prevent Next.js from mounting them as routes.
Move all the files in the app directory that relates to the next app except the studio folder, global.css and favicon.ico into the (site) directory, and then move the studio folder inside the (studio) directory.
The only files that will live in the app root is global.css and favicon.ico.
Here's what your new folder structure should look like:
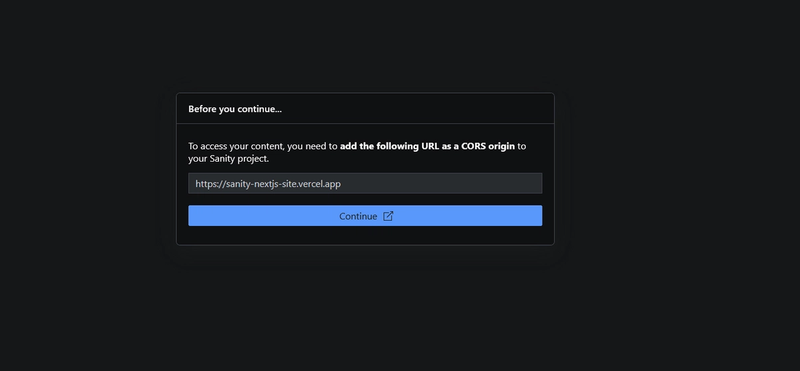
After successfully deploying your site, visit the studio route; your-site-name/studio, and you should get a prompt to add the URL to the CORS setting in Sanity:
Sanity CORS settings prompt
Simply click "continue" and follow the on-screen instructions to do so. If successful, you should be able to see your studio.
Updates made to your site would be triggered only on build time. What this means is that if you update a field in your studio using the hosted link, you would have to manually trigger a deployment on Vercel to see the changes.
Having to trigger the deployment server each time can be a cumbersome task, especially when building for a client.
In this section, I'll guide you through the steps to manually deploy your site whenever a change is made to your studio using Sanity GROQ-powered Web Hooks.
First, you will need the URL endpoint from your hosting service to trigger the deployment.
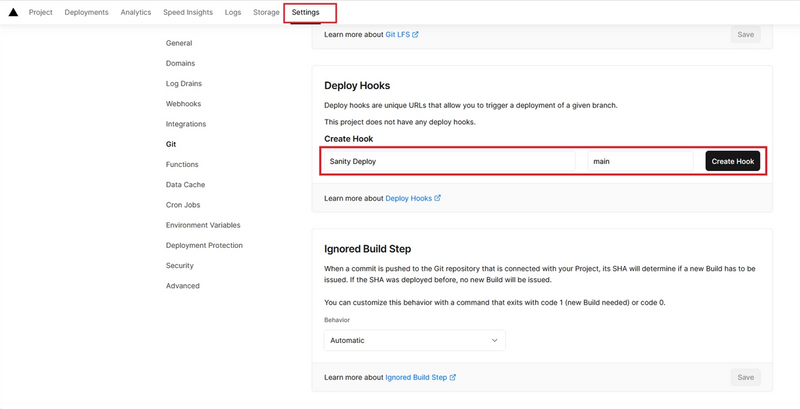
Navigate to your project settings on Vercel and click the Git tab. Under the Deploy Hooks section, choose a name for your hook and the select the branch that will be deployed when the generated URL is requested.
Creating hook endpoint on Vercel
Submit the form and copy the URL endpoint generated by Vercel.
Visit sanity.io/manage, pick your project, navigate to the API section and click on the "Create webhook" button.
Sanity GROQ-powered Webhooks
Fill in the form with information about the hook you want to create.
Name: Portfolio Deployment.
Description: Trigger rebuild when portfolio content is created, updated, and deleted.
URL: [Paste the URL endpoint generated by Vercel here].
Dataset: The dataset to apply the hook to.
Trigger on: Check the "create", "update", and "delete" boxes.
Leave filter and projection inputs blank so the hook will be applied to all documents, and for the rest of the fields, leave it as is and hit save.
Sanity groq powered hook created
Now visit your hosted studio and update any document. Once you click publish, this should trigger the deploy hook and update your site when completed.
Deploy hook triggering deployment on Vercel
Another good alternative to setting up live updates in your Sanity/Next.js app is using Incremental Static Regeneration (ISR), which is a better option if you're building a large scale application.
Sanity – The Content Operating System that ends your CMS nightmares
Sanity replaces rigid content systems with a developer-first operating system. Define schemas in TypeScript, customize the editor with React, and deliver content anywhere with GROQ. Your team ships in minutes while you focus on building features, not maintaining infrastructure.
Sanity scales from weekend projects to enterprise needs and is used by companies like Puma, AT&T, Burger King, Tata, and Figma.
Sanity Webhooks and On-demand Revalidation in Nextjs
Learn how to set up and trigger content updates in your Sanity Headless CMS site built in Nextjs using on-demand revalidation and GROQ-powered webhooks for delivering fast and non-cached content updates