Published March 31, 2021
Power your Vue.js apps with a CMS

In this article, we explore how to build a CMS-powered blog with Vue.js. Our content will be stored in Sanity's Content Lake and will be editable in the Sanity Studio. We'll start by installing Vue.js CLI and setting up a Vue.js project using the CLI. We will then integrate Sanity, our content management system, with the Vue.js app. Then we will write the query to fetch remote data in Vue.js and setup dynamic routes with Vue Router.
What is Vue.js?
Vue.js is an open-source model–view–view model frontend JavaScript framework for building user interfaces and single-page applications.
With its easy learning curve and great documentation, Vue.js is one of the most popular and used web frameworks according to the 2020 StackOverflow Developer Survey.
Prerequisites
If you want to jump right into the code, you can check out the GitHub Repo and the deployed version of the blog:
Before we get started, you should have:
- Knowledge of HTML, CSS, and JavaScript
- Basic knowledge of Vue.js
- Node and NPM installed on your local dev machine
- Vue Dev Tools (optional)
How to setup and install Vue.js
In this tutorial, we will use the official Vue CLI to initialize your project. The CLI is the best way to scaffold Vue Single Page Applications (SPAs), and it provides batteries-included build setups for a modern frontend workflow.
Run the following command in the terminal to install the Vue CLI globally.
npm install -g @vue/cli
Next, we'll scaffold our application.
vue create vue-sanity-blog
Select Default (Vue 3 Preview) ([Vue 3] babel, eslint) when prompted to choose the preset.
? Please pick a preset:
  Default ([Vue 2] babel, eslint)
❯ Default (Vue 3 Preview) ([Vue 3] babel, eslint)
  Manually select features
We will use Vue Router, the official router for Vue.js, for creating dynamic routes to the posts in this tutorial. Run the following command to install the Vue Router plugin.
vue add routerWhen prompted for the history mode, type Yes and hit Enter.
? Use history mode for router? (Requires proper server setup for index fallback in production) Yes
Run the following command in the project's root directory to start the development server.
npm run serveThen we can open our app in the browser at http:localhost:8080.
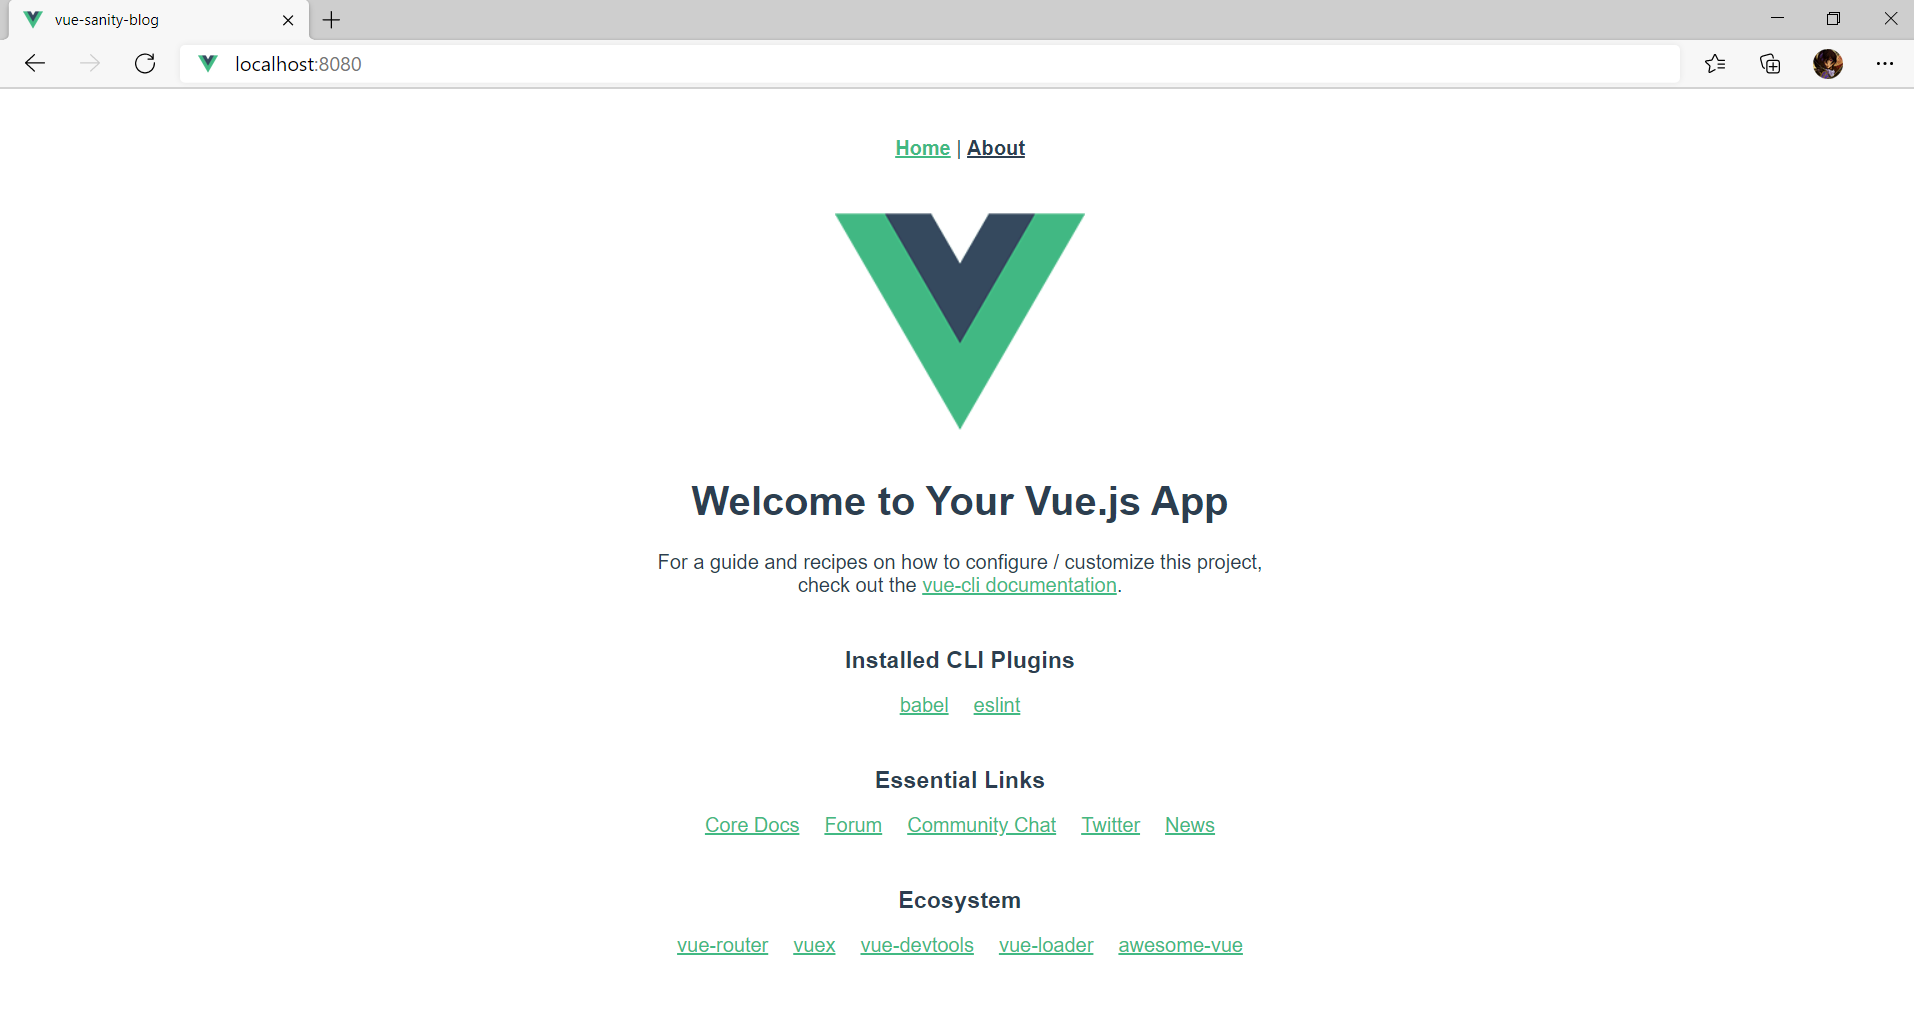
You can stop your development server now by hitting Ctrl + C in the terminal.
How to set up Sanity
Sanity Studio is an open-source headless CMS built with React that connects to Sanity's real-time datastore. Sanity's datastore treats your content as data that's fully accessible via a robust API, that we'll use to integrate with Vue.
To start a new project with Sanity, we'll install the Sanity CLI globally.
npm install -g @sanity/cli
The next step is to create a new project using the CLI. Run the following command inside your project's root directory (vue-sanity-blog).
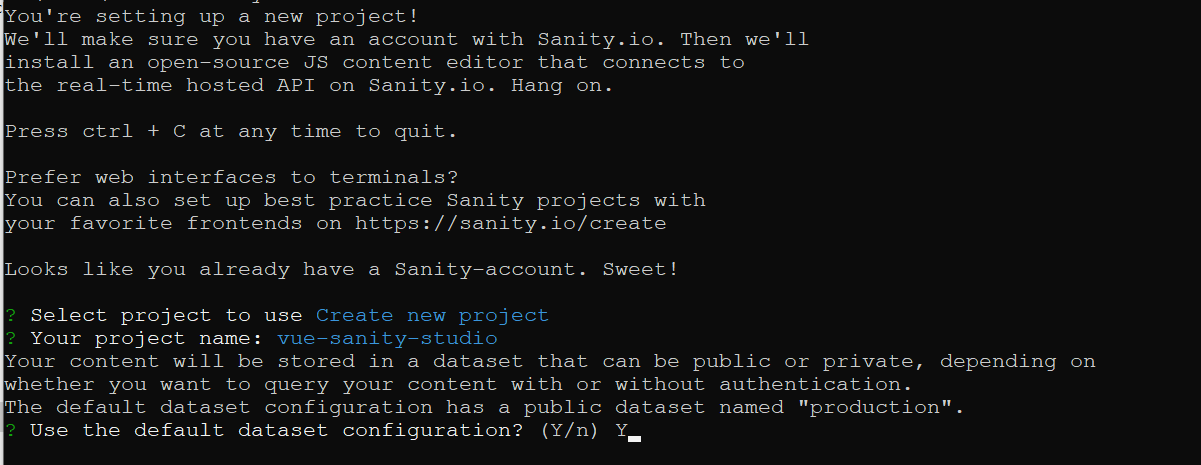
sanity initIf this is your first time creating a project using the CLI, you may also need to log into your Sanity account or create a new Sanity account in the browser first.
After this, you will be prompted to create a new project, hit Enter. Name your project vue-sanity-studio and choose the default dataset configuration.
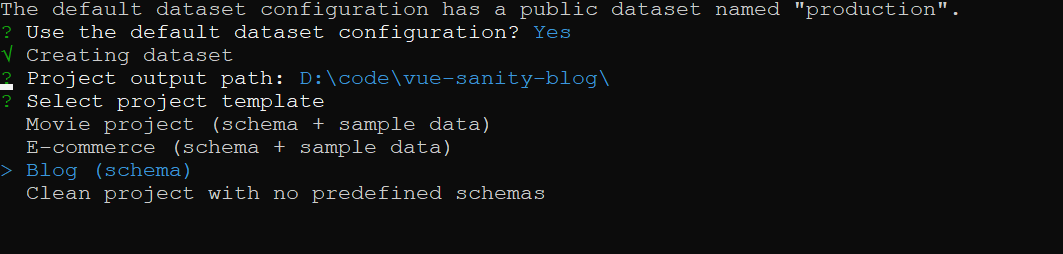
Confirm your project's output path and choose Blog (schema) as the project template.
It is recommended to rename the folder vuesanitystudio to studio on your local machine.
You will also need to update the browserslist in the Vue.js project's package.json. Replace not dead with not ie <= 8.
"browserslist": [ "> 1%", "last 2 versions", "not ie <= 8" ]
To start the Sanity Studio, run the following commands in the terminal after renaming the folder.
cd studio sanity start
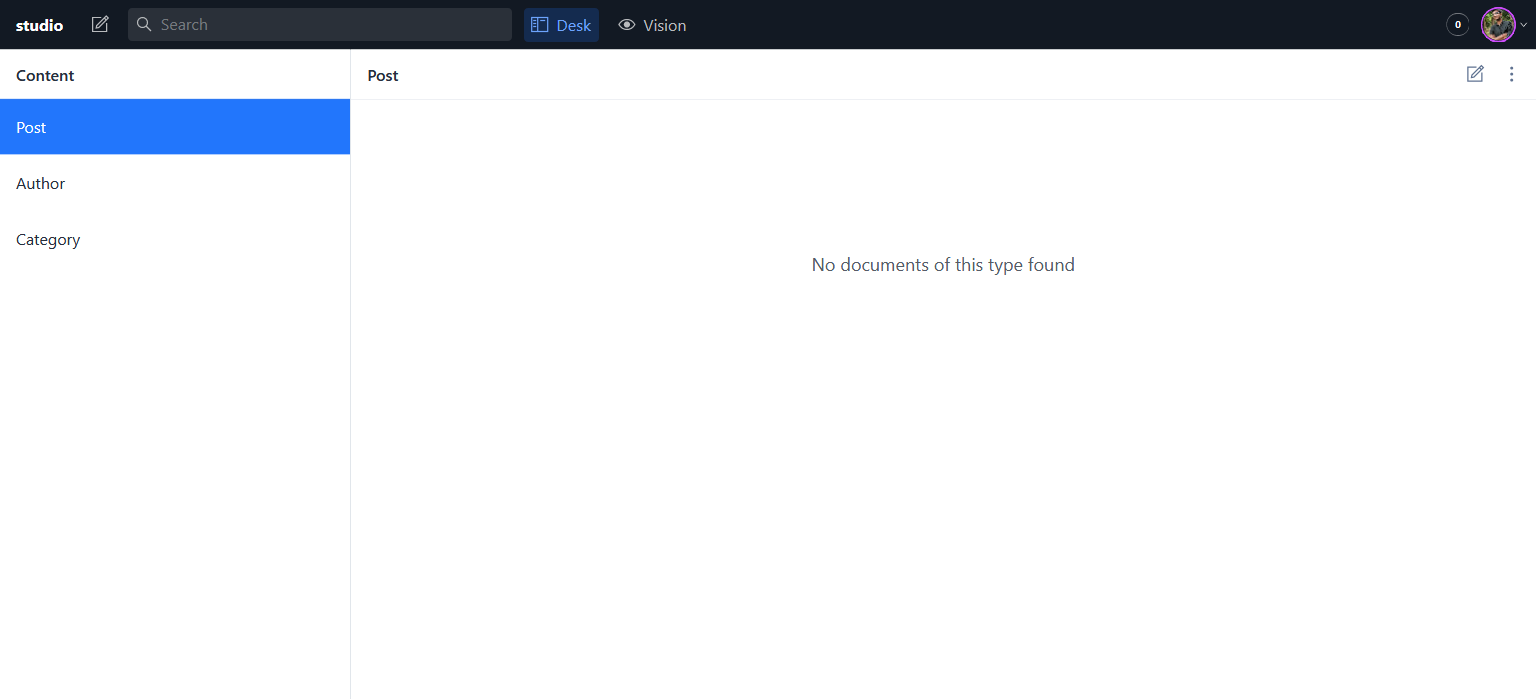
After compiling, the studio will open on http://localhost:3333. To start, the studio will have sections for posts, authors, and categories but no data.
Before adding any content to the studio, let's modify the default blog schema to include the post description in the content.
Sometimes a title alone cannot express the core of the article entirely, having a good description or excerpt gives an insight about the post to the reader.
To update the studio/schemas/post.js file to include the description field, we need to add the following code after the slug field. You can see the entire code of studio/schemas/post.js here.
{
name: "excerpt",
title: "Description",
type: "string",
options: {
maxLength: 200,
},
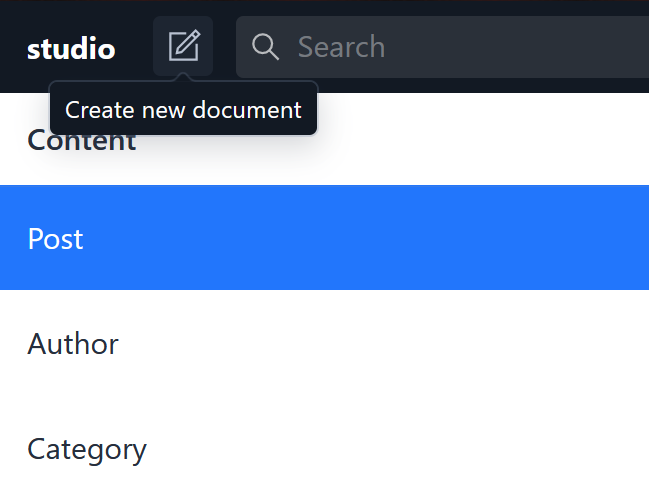
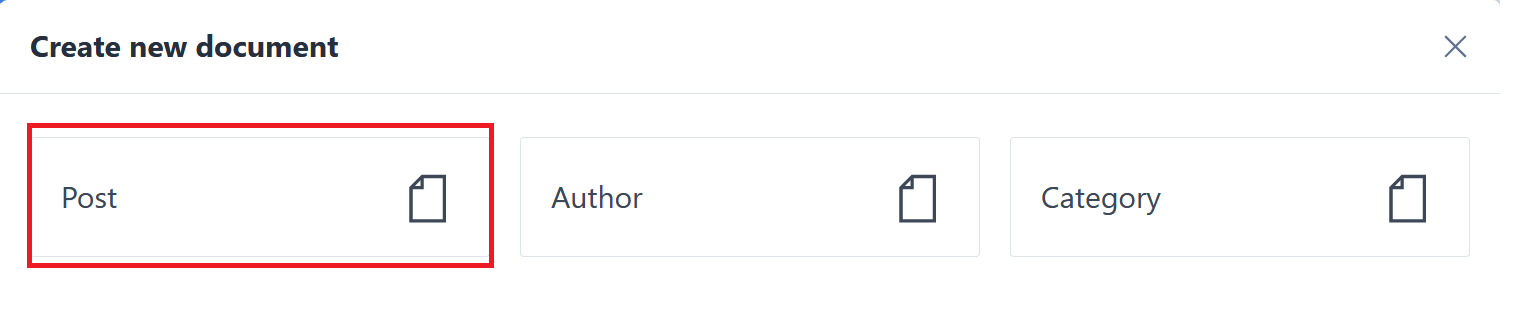
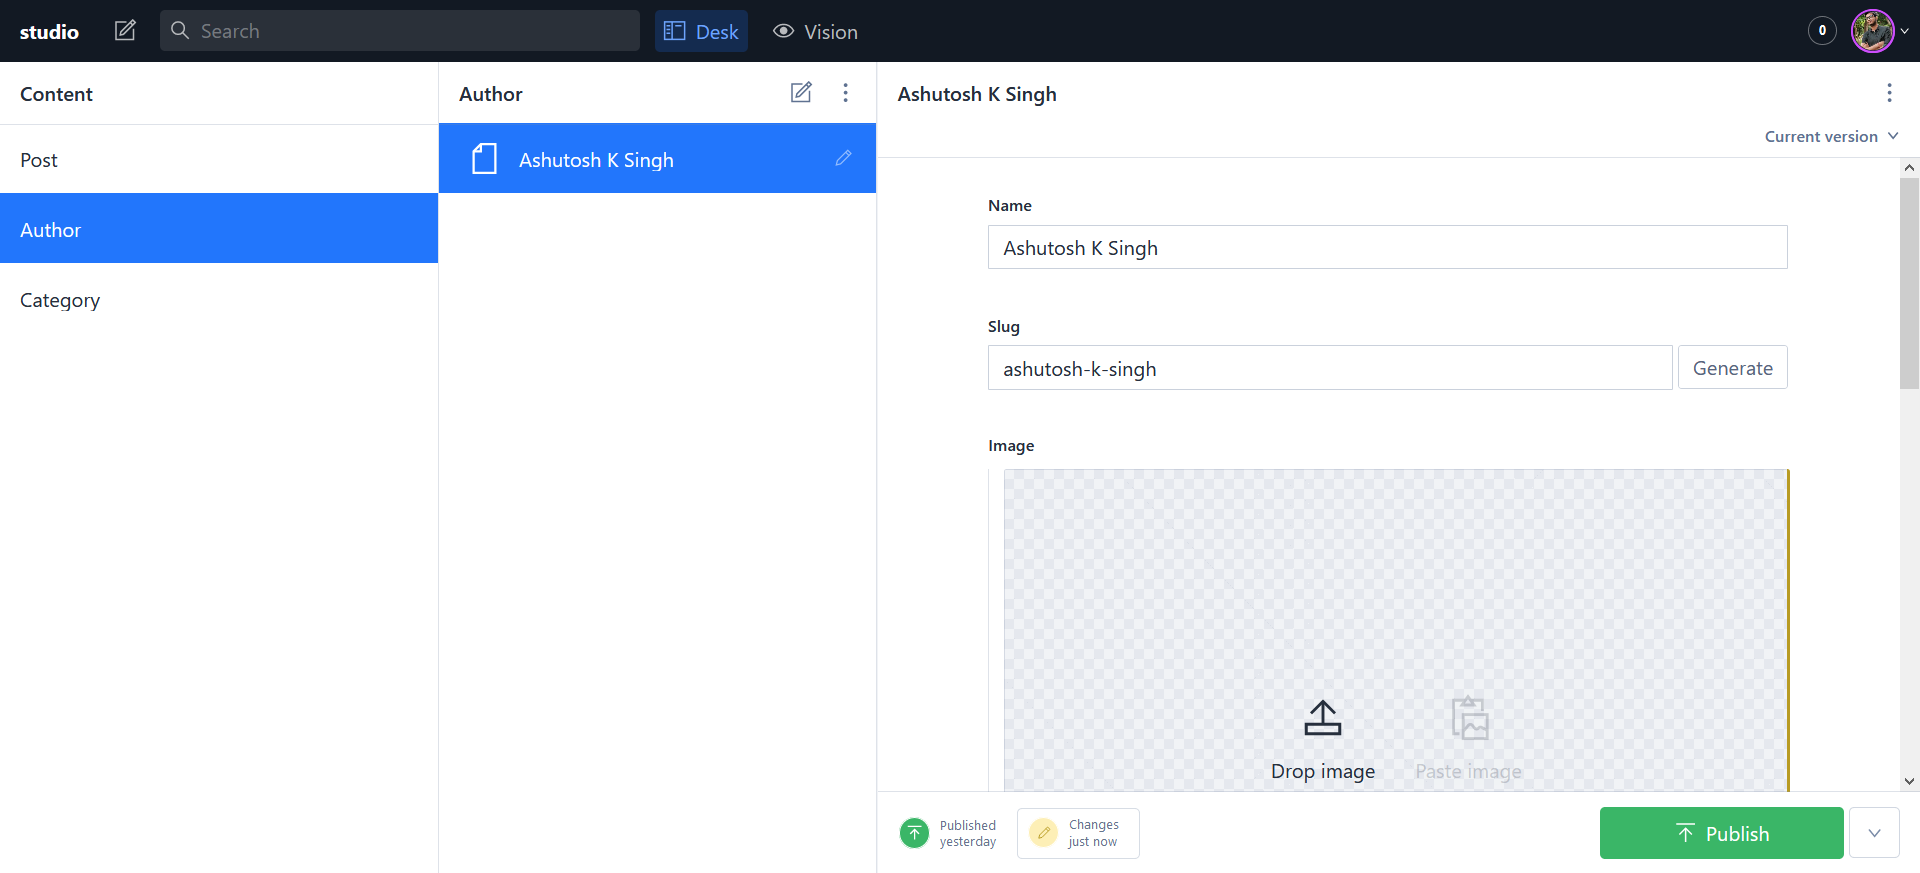
},To add our first post, we can click on the edit icon next to the project's name in our dashboard.
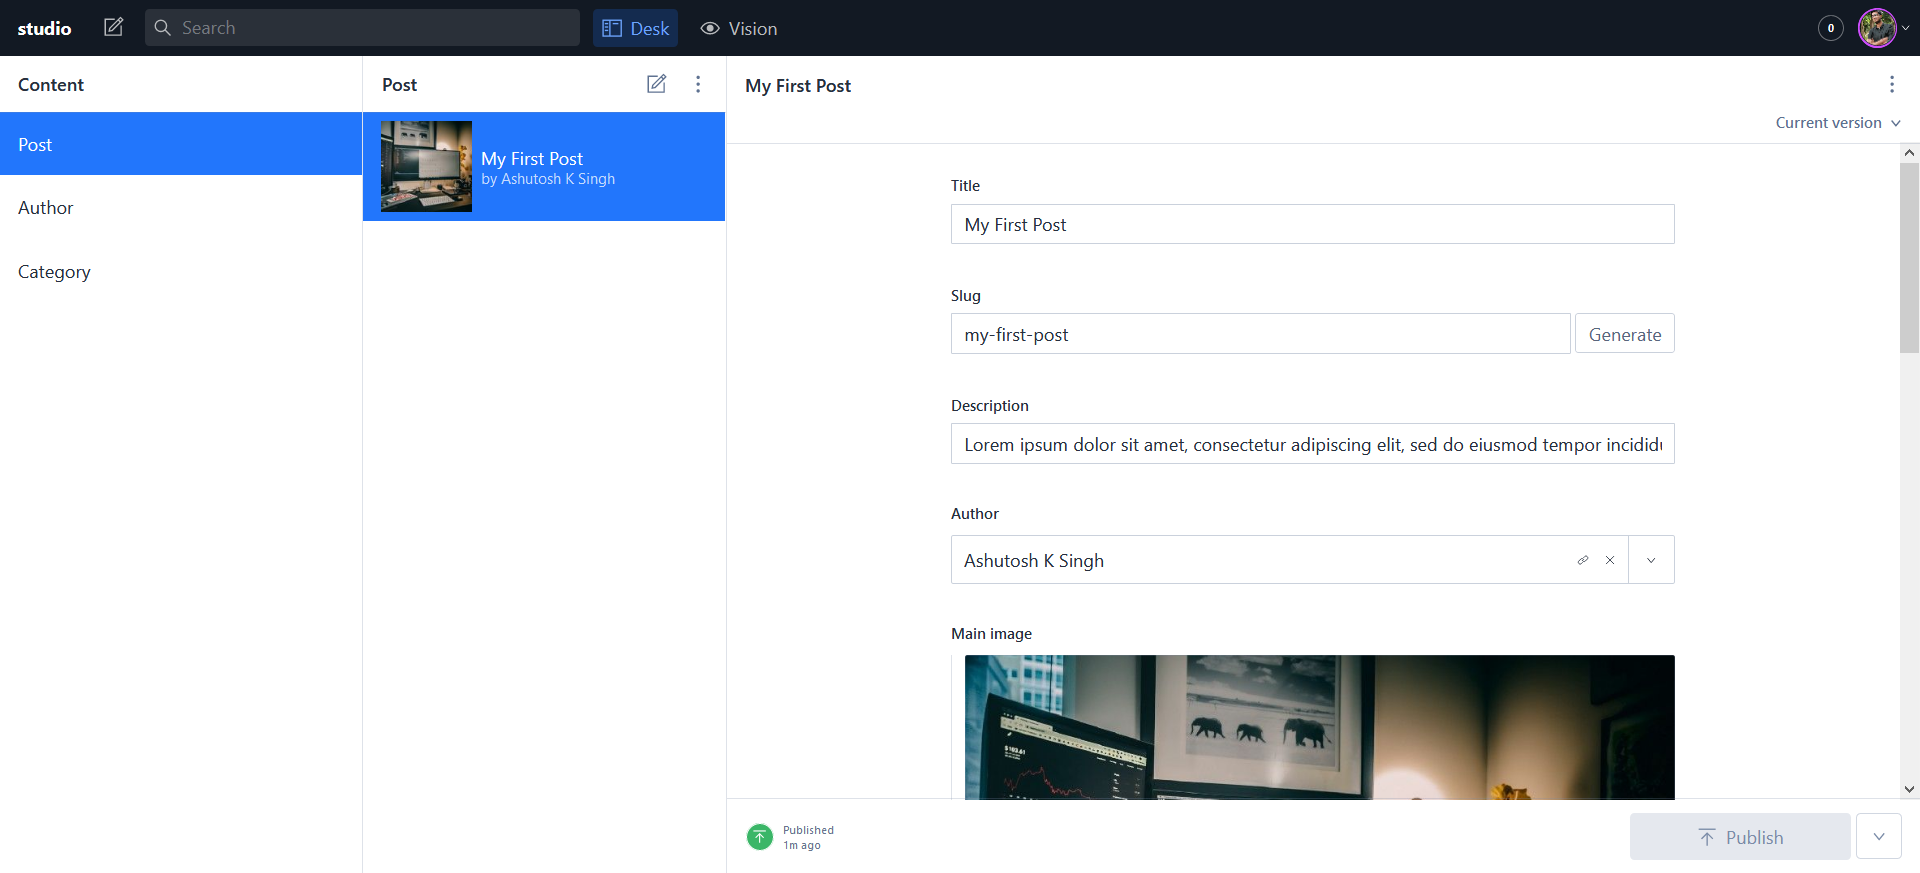
On the next prompt, choose Post, and an untitled page will appear with the fields for the post as defined in the schema we just edited.
Create a sample blog article and author for our code to fetch.
How to connect Sanity with Vue.js App
We need to install few dependencies to connect Vue.js app to Sanity.
Run the following command in your project's root directory to install the Sanity Client and other packages you will need in the future.
npm install @sanity/client @sanity/image-url sanity-blocks-vue-component
@sanity/client— Sanity Client is the official JavaScript client by Sanity and can be used both in node.js and modern browsers.sanity-blocks-vue-component— Vue component for rendering block content from Sanity. You can learn more about this in the official docs here.@sanity/image-url— A helper library to generates image URLs and perform helpful image transformations through Sanity asset pipeline. You learn more about this in the official docs here.
Once these packages are installed, we'll create a new file named client.js inside the src directory.
Add the following code to the client.js file.
import sanityClient from "@sanity/client";

export default sanityClient({
  projectId: "Your Project ID Here", // find this at manage.sanity.io or in your sanity.json
  dataset: "production", // this is from those question during 'sanity init'
  useCdn: true,
  apiVersion: "2021-03-25"
});
This code configures the Sanity client with information about the specific project we're accessing.
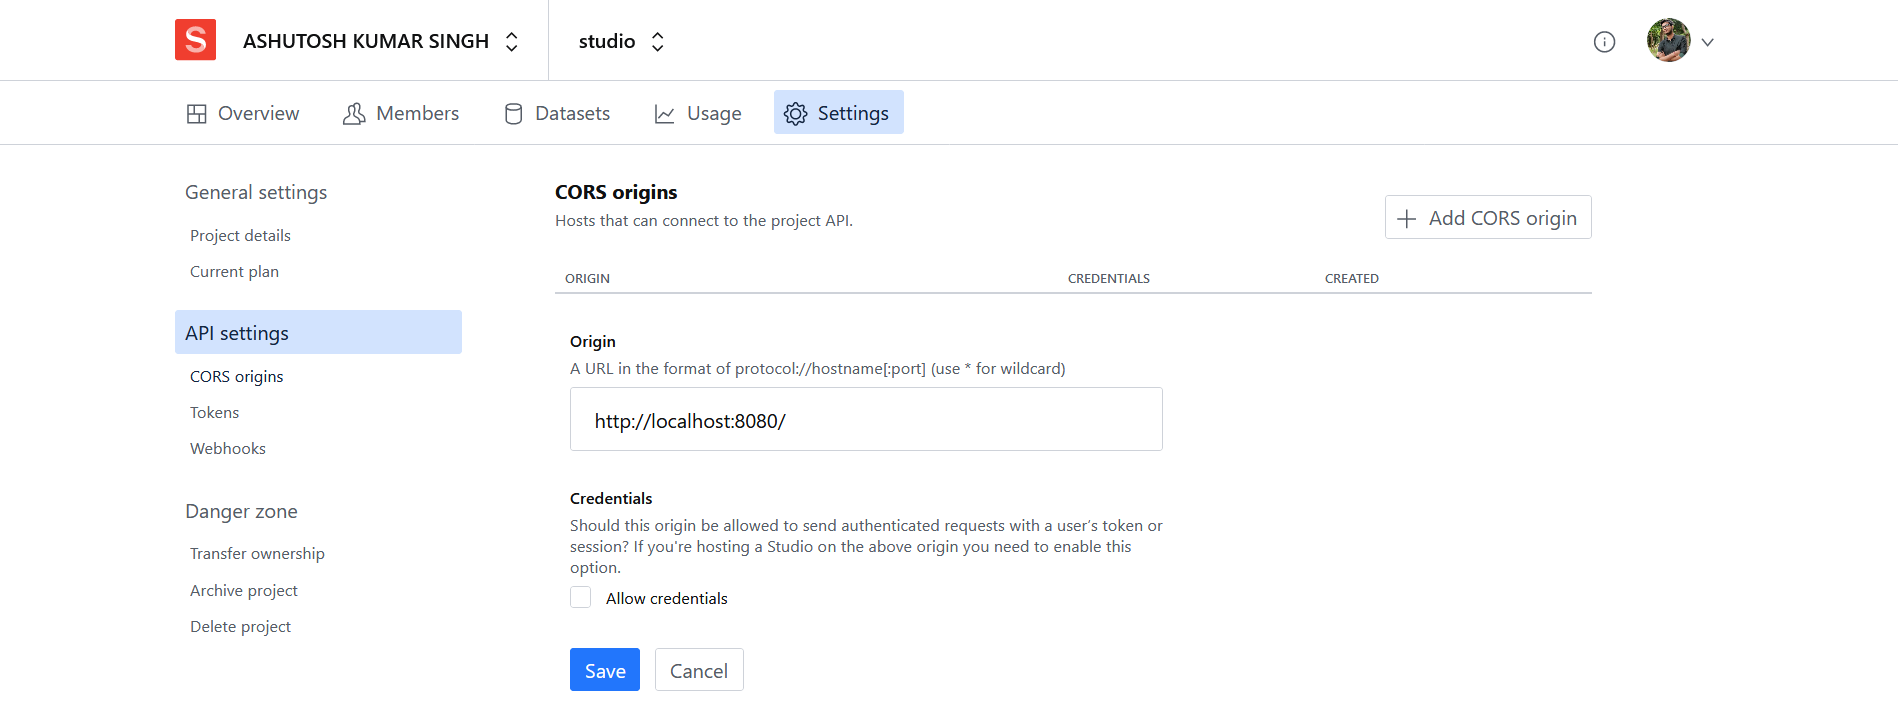
You will also need to add the port where the Vue.js development server is running to the CORS origins of your Sanity project.
Head over to https://www.sanity.io/teams and click on your Sanity project. On your project's dashboard, click on Settings → API settings and then add http://localhost:8080/ to the CORS origins field.
You can also use the Sanity CLI to add the CORS origins to your project. Run the following command in the studio folder of your project. You can read more about this here.
sanity cors add http://localhost:8080
How to Display the Posts on the Homepage
Next, we need to fetch the data from Sanity and display the posts on our Vue.js app. For this, we need a function named fetchData and inside this function, fetch the data using the client we just configured, and then map over the response containing posts returned by Sanity.
Modify src/Views/Home.vue like this.
<template>
  <div class="home">
    <h1>Welcome to your Vue + Sanity Blog</h1>
    <div class="posts">
      <div class="loading" v-if="loading">Loading...</div>
      <div v-if="error" class="error">
        {{ error }}
      </div>
      <div class="container">
        <div v-for="post in posts" class="post-item" :key="post._id">
          <router-link :to="`/blog/${post.slug.current}`">
            <h2>{{ post.title }}</h2>
          </router-link>
          <p>{{post.excerpt}}</p>
          <hr />
        </div>
      </div>
    </div>
  </div>
</template>

<script>
import sanity from "../client";

const query = `*[_type == "post"]{
  _id,
  title,
  slug,
  excerpt
}[0...50]`;

export default {
  name: "Home",
  data() {
    return {
      loading: true,
      posts: [],
    };
  },
  created() {
    this.fetchData();
  },
  methods: {
    fetchData() {
      this.error = this.post = null;
      this.loading = true;
      sanity.fetch(query).then(
        (posts) => {
          this.loading = false;
          this.posts = posts;
        },
        (error) => {
          this.error = error;
        }
      );
    },
  },
};
</script>

<style scoped>
.home h1{
    text-align: center;

}
.container {
  margin: 0 auto;
  max-width: 42em;
  width: 100%;
}
.post-item {
  box-sizing: border-box;
}
</style>
Let's break down the above code piece by piece.
First, we need to import the client from the file we created in the last step.
import sanity from "../client";
In this tutorial, you will use Sanity's GROQ API to query your data. GROQ, Graph-Relational Object Queries, is Sanity's open-source query language. You can learn more about GROQ here.
The following GROQ query is used to fetch the _id, title, slug, and excerpt of posts from Sanity's backend. You can have thousands of posts but it doesn't make sense to display all of them on the homepage, hence the result is slice using [0...50]. This means that only the first 50 posts will be fetched.
*[_type == "post"]{
  _id,
  title,
  slug,
  excerpt
}[0...50]
To execute the query, we'll create a fetchData function inside the methods object to request the data using sanity.fetch() and pass the query variable in it.
The fetched content is stored in the posts array using this.posts=posts.
fetchData() {
      this.error = this.post = null;
      this.loading = true;
      sanity.fetch(query).then(
        (posts) => {
          this.loading = false;
          this.posts = posts;
        },
        (error) => {
          this.error = error;
        }
      );
    },
  },
Inside the template, we map over the posts array using the v-for directive to display posts on the page. The v-for directive renders a list of items based on an array. You can read more about this directive here.
So that Vue's virtual DOM can differentiate between the different VNodes, we'll provide the :key attribute a value of our post's ID.
<div v-for="post in posts" class="post-item" :key="post._id">
  <router-link :to="`/blog/${post.slug.current}`">
    <h2>{{ post.title }}</h2>
  </router-link>
  <p>{{post.excerpt}}</p>
  <hr />
</div>
The <router-link> component enables user navigation in a router-enabled app. The slug of the post is passed to its to prop. You can read more about this component here.
<router-link :to="`/blog/${post.slug.current}`">
<h2>{{ post.title }}</h2>
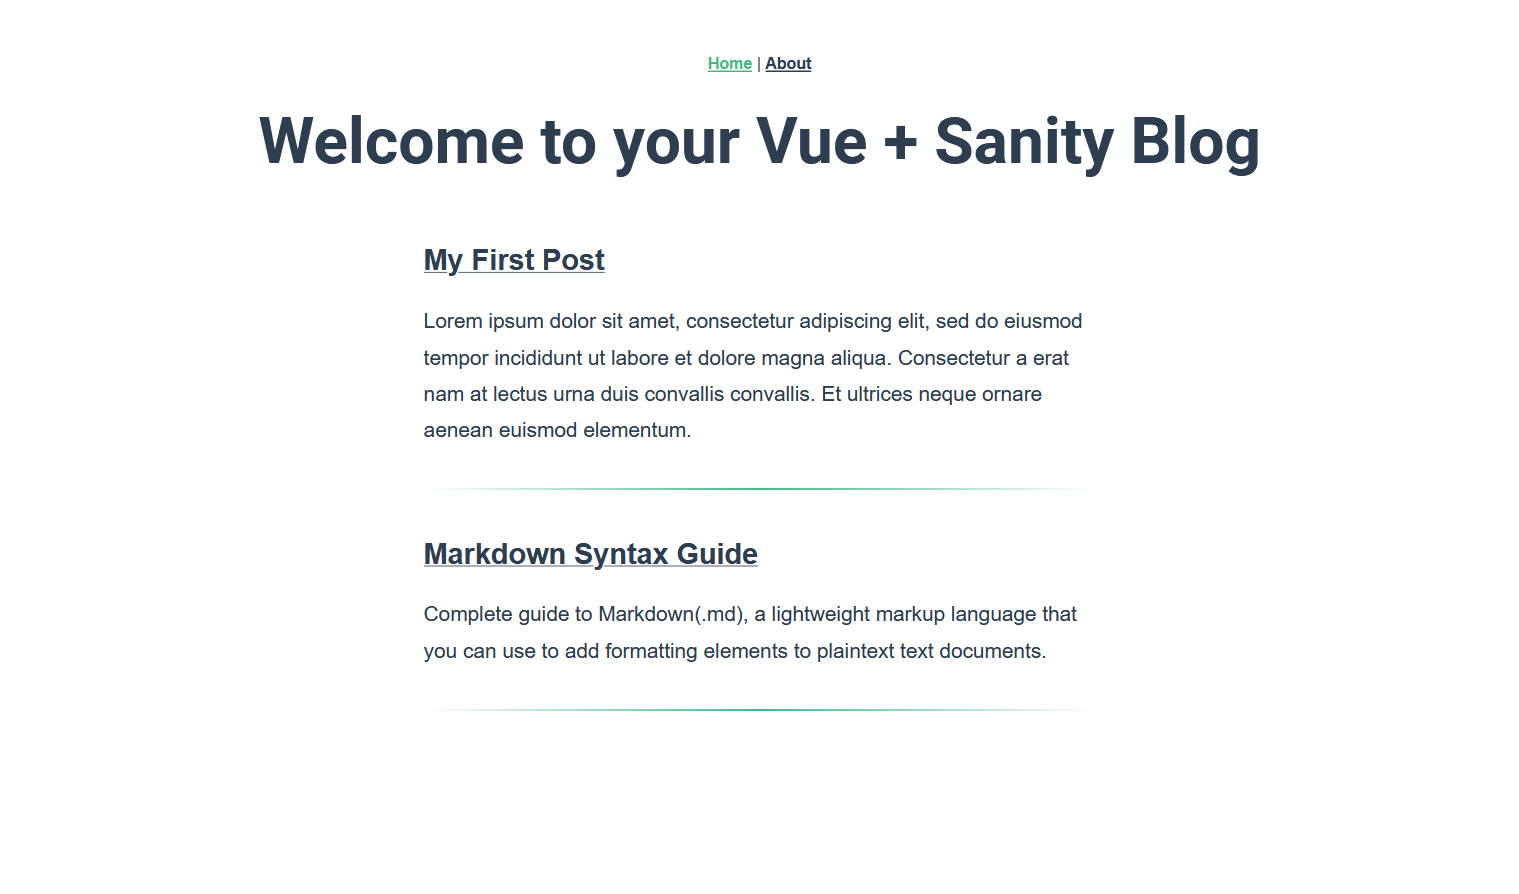
</router-link>Restart the development server using the npm run serve command and navigate to http://localhost:8080/ in your browser.
Here is how the app will look.
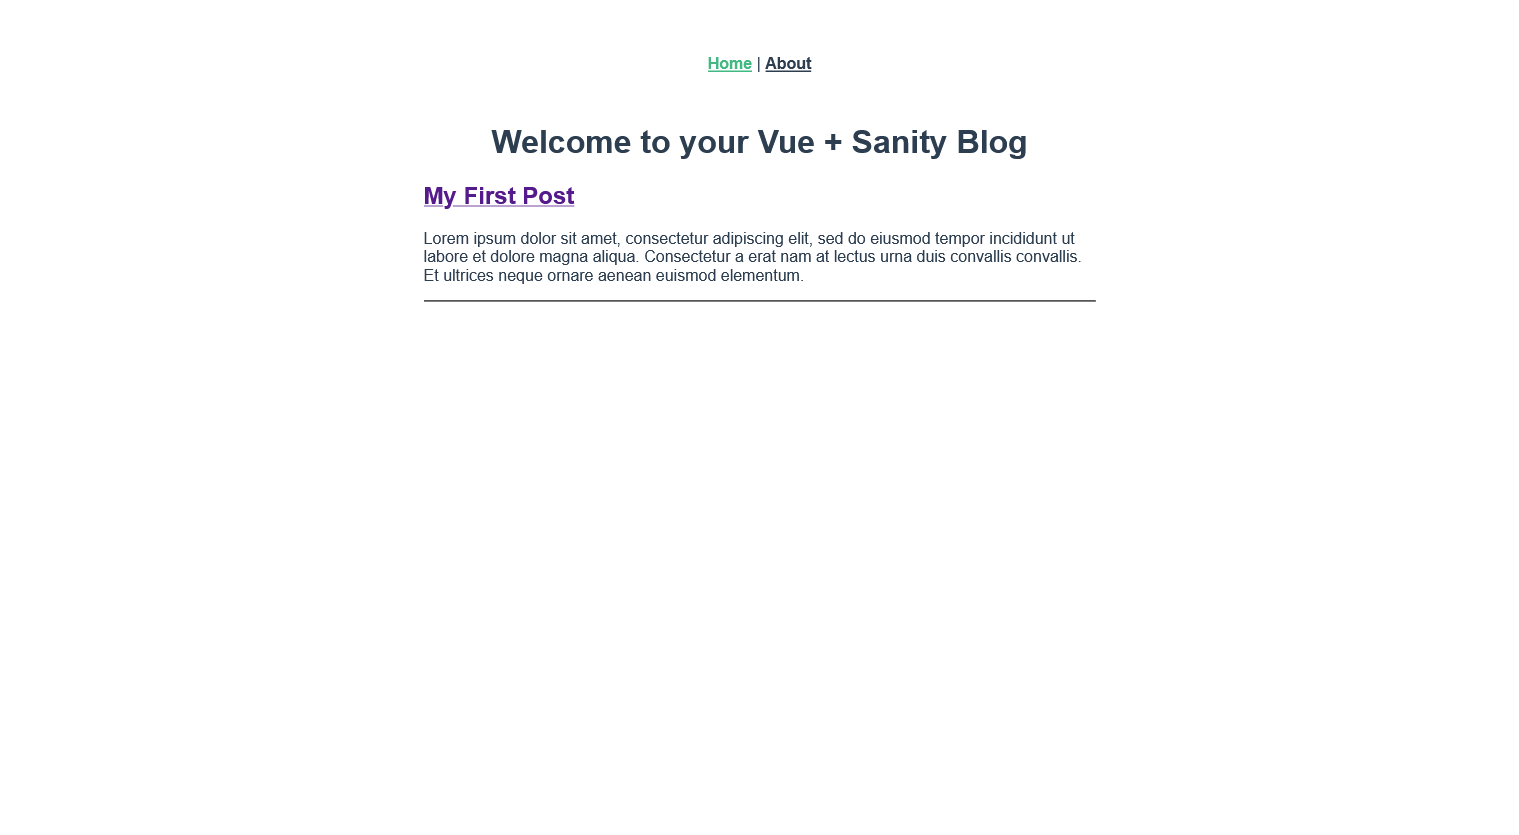
We now have blog posts populating the homepage, but if you click on the post we created, it will take you to an empty page. This is because we have not yet created the routes for this post.
How to create dynamic routes for posts
To create a dynamic route, we'll create a new file named SinglePost.vue in the src/components directory.
Add the following code to SinglePost.vue.
<template>
  <div>
    <div class="loading" v-if="loading">Loading...</div>

    <div v-if="error" class="error">
      {{ error }}
    </div>

    <div v-if="post" class="content">
      <h1>{{ post.title }}</h1>
      <img v-if="post.image" :src="imageUrlFor(post.image).width(480)" />

      <h6>By: {{ post.name }}</h6>
      <SanityBlocks :blocks="blocks" />
    </div>
  </div>
</template>

<script>
import { SanityBlocks } from "sanity-blocks-vue-component";
import sanity from "../client";
import imageUrlBuilder from "@sanity/image-url";

const imageBuilder = imageUrlBuilder(sanity);

const query = `*[slug.current == $slug] {
  _id,
  title,
  slug,
  body,
 "image": mainImage{
  asset->{
  _id,
  url
}
},
"name":author->name,
"authorImage":author->image
}[0]
`;

export default {
  name: "SinglePost",
  components: { SanityBlocks },
  data() {
    return {
      loading: true,
      post: [],
      blocks: [],
    };
  },
  created() {
    this.fetchData();
  },
  methods: {
    imageUrlFor(source) {
      return imageBuilder.image(source);
    },
    fetchData() {
      this.error = this.post = null;
      this.loading = true;

      sanity.fetch(query, { slug: this.$route.params.slug }).then(
        (post) => {
          this.loading = false;
          this.post = post;
          this.blocks = post.body;
        },
        (error) => {
          this.error = error;
        }
      );
    },
  },
};
</script>

<style scoped>
.content {
  display: flex;
  flex-direction: column;
  margin: 0 auto;
  max-width: 42em;
}
h1 {
  text-align: center;
}
h6 {
  color: #aaa;
  padding: 1em;
}
</style>
In the above code, we use imageUrlBuilder from @sanity/image-url to generate image URLs for our images. To do this, we create a method called imageUrlFor() and use it inside template. We can chain additional methods onto this template tag to do things like specify width, height, or a crop. You can read more about imageUrlBuilder here.
<img v-if="post.image" :src="imageUrlFor(post.image).width(480)" />
To fetch the data for a specific post we'll use its unique slug which is accessed using this.$route.params.slug. This is the route object present in Vue Router which represents the state of the current active route. You can read more about Vue Router route object here.
sanity.fetch(query, { slug: this.$route.params.slug }).then(
  (post) => {
    this.loading = false;
    this.post = post;
    this.blocks = post.body;
  },
  (error) => {
    this.error = error;
  }
);
Another thing to notice here is SanityBlocks component from the sanity-blocks-vue-component package which renders an array of block content to Vue Components or Vue Nodes which is stored in blocks, passed inside the blocks prop of the component.
<SanityBlocks :blocks="blocks" />
We also need to define this route in router/index.js file.
const routes = [
  {
    path: "/",
    name: "Home",
    component: Home,
  },
  {
    path: "/about",
    name: "About",
    component: () =>
      import(/* webpackChunkName: "about" */ "../views/About.vue"),
  },
  {
    path: "/blog/:slug",
    name: "SinglePost",
    component: () => import("../components/SinglePost.vue"),
  },
];
In Vue Router, we create a dynamic segment. This is denoted by a colon : as seen in the above code, /blog/:slug. Once this route is saved, you can navigate from the homepage to the blog post.
How to add styles to the app
Our app works great but doesn't look as good as it could so update src/App.vue like this to include the global styles for your Vue app.
<template>
<div id="nav">
<router-link to="/">Home</router-link> |
<router-link to="/about">About</router-link>
</div>
<router-view />
</template>
<style>
#app {
font-family: Avenir, Helvetica, Arial, sans-serif;
-webkit-font-smoothing: antialiased;
-moz-osx-font-smoothing: grayscale;
color: #2c3e50;
display: flex;
flex-direction: column;
min-height: 100%;
min-height: 100vh;
padding: 1em 2em;
width: 100%;
margin-bottom: 8em;
}
#nav {
text-align: center;
padding: 30px;
}
#nav a {
font-weight: bold;
color: #2c3e50;
}
#nav a.router-link-exact-active {
color: #42b983;
}
*,
*:before,
*:after {
box-sizing: border-box;
}
h1,
h2,
h3,
h4,
h5,
h6 {
font-family: Avenir, sans-serif;
font-weight: 700;
line-height: 1.2;
margin: 0 0 0.5em 0;
}
h1 {
font-family: Roboto, serif;
font-size: 4em;
margin: 0 0 1em 0;
}
h2 {
margin: 1.6em 0 0 0;
font-size: 1.8em;
}
h3 {
font-size: 1.5em;
}
h4 {
font-size: 1.4em;
}
h5 {
font-size: 1.3em;
}
h6 {
font-size: 1.2em;
}
p,
ul,
ol {
font-size: 1.3rem;
line-height: 1.75em;
margin: 1.2em 0;
}
a {
color: inherit;
transition: color linear 0.15s;
}
a:hover {
color: #42b983;
}
img {
max-width: 100%;
}
hr {
background-image: linear-gradient(
to right,
rgba(0, 0, 0, 0),
rgba(66, 185, 131, 1), rgba(0, 0, 0, 0)
);
border: 0;
height: 2px;
margin: 40px auto;
}
blockquote {
border-left: 4px solid #cccccc;
font-size: 1.4em;
font-style: italic;
margin: 2rem 0;
padding-left: 2rem;
padding-right: 2rem;
}
.content h1 {
font-size: 3em;
margin: 1em 0;
}
@media (max-width: 1020px) {
h1 {
font-size: 3em;
}
.content h1 {
font-size: 2.4em;
}
}
@media (max-width: 480px) {
body {
font-size: 14px;
}
p,
ul,
ol {
font-size: 1.2rem;
margin: 1em 0;
}
}
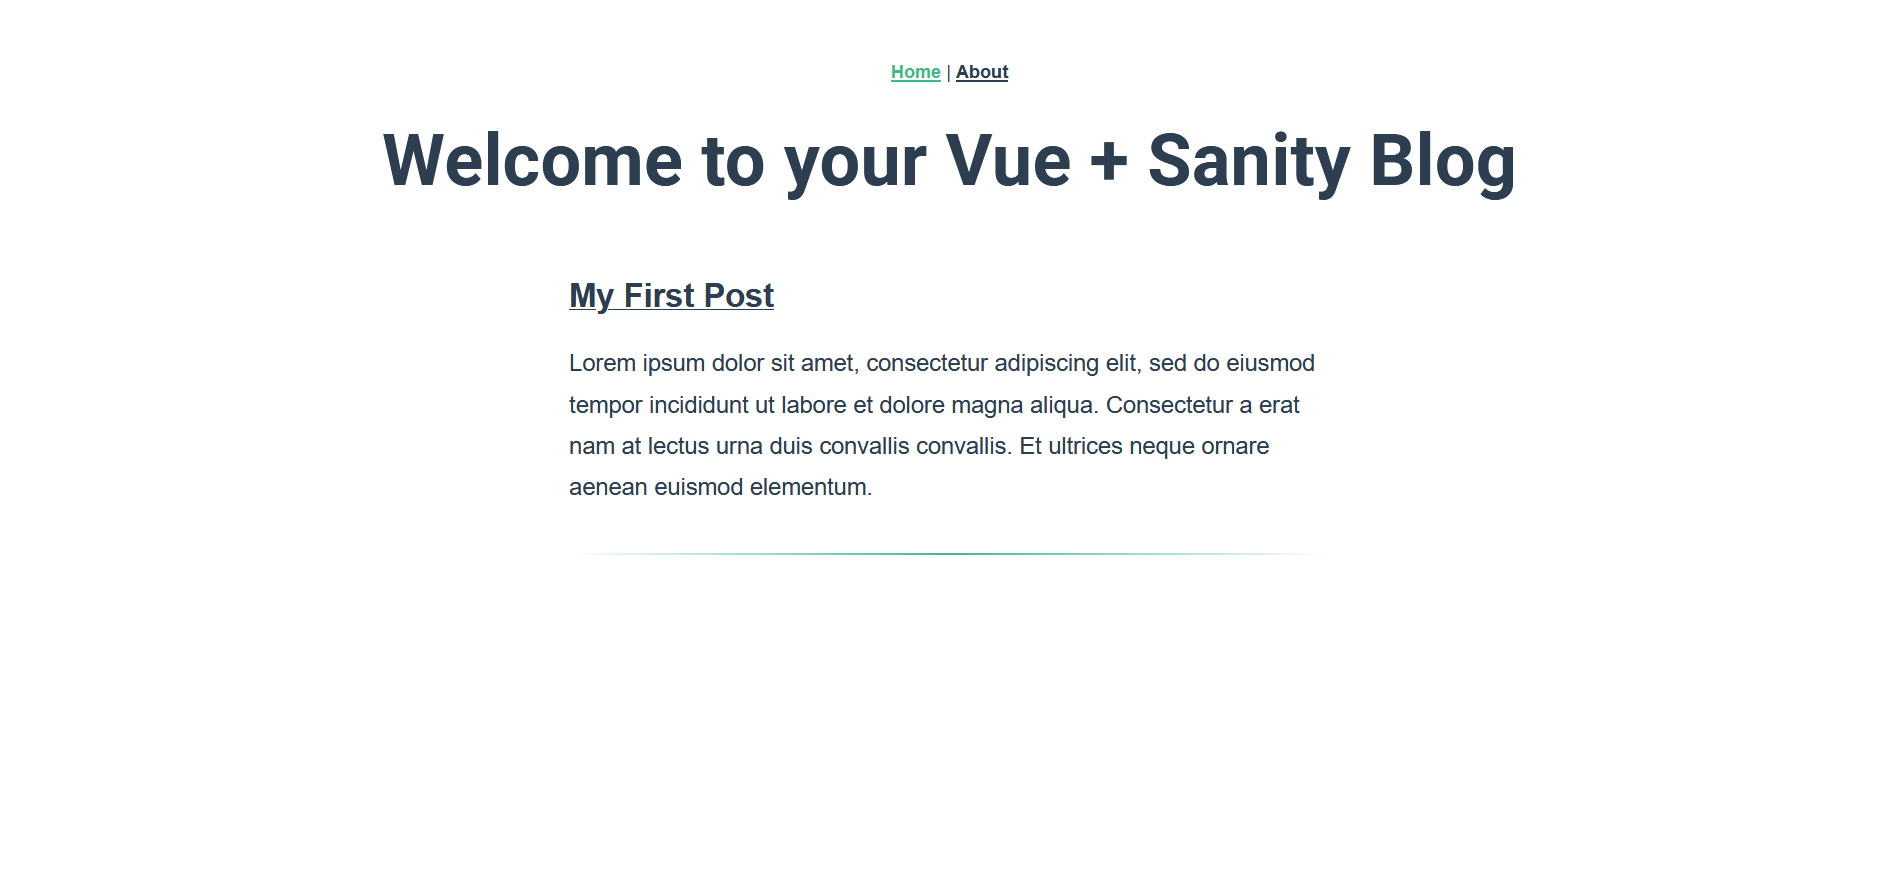
</style>These are some basic styling for your app. You can experiment with different Vue.js UI component libraries like Element, Vuetify, BootstrapVue, etc. to style your app.
Conclusion
In this article, we built a Vue.js app to function as a blog. We set up Sanity Studio as a headless CMS to power our Vue app. You can follow this tutorial and create your own unique version of this project with additional features and functionalities.
Here are a few ideas to get you started:
- Add
Authorroutes and link them to the blog posts. - Add an
SEOcomponent to the posts - Add
Filter,Sort, andSearchfunctionality. - Style the app using UI libraries like Vuetify, BootstrapVue, etc.
Here are some additional resources that can be helpful.
- How to deploy Vue.js application
- How to deploy Sanity Studio
- vue-sanity - Composition API methods to incorporate Sanity into a Vue project.
- Headless CMS explained in 2 minutes
- Get started with the Nuxt.js event website
Happy coding!
Sanity – The Content Operating System that ends your CMS nightmares
Sanity replaces rigid content systems with a developer-first operating system. Define schemas in TypeScript, customize the editor with React, and deliver content anywhere with GROQ. Your team ships in minutes while you focus on building features, not maintaining infrastructure.
Sanity scales from weekend projects to enterprise needs and is used by companies like Puma, AT&T, Burger King, Tata, and Figma.