Published March 27, 2020
How to migrate your HTML blog-content from Ghost

Learn how to migrate from Ghost to Sanity
This is a guide from Mux, the API for video. A few months ago, we moved our blog off of our existing system and into Sanity + Gatsby. We were starting with a marketing site that was already built with Gatsby and a blog that was hosted and backed by an old version of Ghost.
Over the course of a couple months we migrated our 128 existing blog posts to Sanity, hosted and customized our Sanity Studio, and made the blog part of our existing Gatsby site. To see the final product, you can visit: mux.com/blog and learn more about us at mux.com. If you are doing video, we would love to talk.
Here are the steps we followed to migrate:
- Export from ghost, which gives us a
mux-blog.ghost.jsonjson file - This is a structured file that defines all the authors and posts and gives us posts in both Markdown and HTML format.
- Define the data structure for blog posts and blog authors (we call them team members, and the same records are used to show team members on the mux.com/team page).
- Define custom schemas for the parts that blog posts were allowed to contain. Aside from text, our blog posts contain:
- Dividers (shows up as an
<hr>-tag) - Gist embeds
- CTAs (call to action buttons)
- Twitch video embeds
- YouTube video embeds
- Codesandbox embeds
- Mux video embeds
- Table views
- Images
- Footnotes
- Code blocks
- Dividers (shows up as an
- Write a script that loops through all the records in the
mux-blog.ghost.jsonfile and creates an ndjson file that can be uploaded to Sanity. This was fairly straightforward but took a lot of trial and error to get the records importing cleanly. The best approach here was to do a few records at a time, check to make sure they came out as expected, and then move onto the next ones.
Defining our schema
Before you start migrating your old posts over, you first have to define your schema. A prerequisite for this guide is that you understand how content modeling works in Sanity and you have defined your schema. If you haven’t done that yet, then check out: Getting Started with Content Modeling.
Without going too deep, here’s an example of defining a custom schema object called muxCta that we added to our schema. We did this for all the types described in section 4 above.
// schemas/muxCta.js
import { IoIosRocket as icon } from 'react-icons/io'

export default {
  name: 'muxCta',
  title: 'CTA',
  type: 'object',
  icon,
  fields: [
    {
      name: 'text',
      title: 'Text',
      description: 'This is the text that will show on the button',
      type: 'string',
    },
    {
      name: 'href',
      title: 'Href',
      description: 'This is the URL for the button',
      type: 'string',
    },
  ],
}
We also added the Sanity plugin for Mux videos so that we could use the mux.video type in the blockContent definition for posts.
sanity install mux-inputNext, add the mux.video type to the blockContent that is used for posts.
// schemas/blockContent.js

import React from 'react'
import { FaVideo as videoIcon } from 'react-icons/fa'


const h1Styles = {
  fontSize: '28px',
  lineHeight: 1.1,
  marginTop: 0,
  marginBottom: 0,
}
const h2Styles = {
  fontSize: '21px',
  lineHeight: 1.3,
  marginTop: 0,
  marginBottom: 0,
}

const H1Style = props => <h1 style={h1Styles}>{props.children}</h1>
const H2Style = props => <h2 style={h2Styles}>{props.children}</h2>

export default {
  title: 'Simple block content',
  name: 'simpleBlockContent',
  type: 'array',
  of: [
    {
      title: 'Block',
      type: 'block',
      // Styles let you set what your user can mark up blocks with. These
      // correspond with HTML tags, but you can set any title or value
      // you want and decide how you want to deal with it where you want to
      // use your content.
      lists: [
        { title: 'Bullet', value: 'bullet' },
        { title: 'Number', value: 'number' },
        ],
      styles: [
        { title: 'H1', value: 'h1', blockEditor: { render: H1Style } },
        { title: 'H2', value: 'h2', blockEditor: { render: H2Style } },
      ],
      // Marks let you mark up inline text in the block editor.
      marks: {
        // Decorators usually describe a single property - e.g. a typographic
        // preference or highlighting by editors.
        decorators: [
          { title: 'Strong', value: 'strong' },
          { title: 'Emphasis', value: 'em' },
          { title: 'Code', value: 'code' },
          { title: 'Underline', value: 'underline' },
          { title: 'Strike', value: 'strike-through' },
        ],
        // Annotations can be any object structure - e.g. a link or a footnote.
        annotations: [
          {
            name: 'link',
            type: 'object',
            title: 'URL',
            fields: [
              {
                title: 'URL',
                name: 'href',
                type: 'url',
                validation: Rule =>
                  Rule.uri({
                    scheme: ['http', 'https', 'mailto'],
                    allowRelative: true,
                  }),
              },
            ],
            blockEditor: {
              render: props => <span>{props.children}</span>,
            },
          },
        ],
      },
      },
    {
      title: 'Mux Video',
      type: 'mux.video',
      icon: videoIcon,
    },
    {
      type: 'muxCta',
    },

    /*
     add all the custom types here
      {
      },
      {
      }
    */
  ],
}
Import script
This is the code that would process a Ghost post:
writeJsonis a function that would pipe JSON objects to an ndjson serializer so that at the end we can write an ndjson file.convertHtmlToBlockis where most of the magic happens, to convert HTML into the block content that Sanity expects.
import jsdom from 'jsdom'
import ndjson from 'ndjson'
import blockTools from '@sanity/block-tools'
import Schema from '@sanity/schema'
import types from '../../schemas/types'

const { JSDOM } = jsdom

const ndSerialize = ndjson.serialize()
let ndJsonLines = ''
ndSerialize.on('data', line => (ndJsonLines += `${line}`))
const writeJson = obj => ndSerialize.write(obj)

const rootSchema = Schema.compile({
  name: 'Mux CMS',
  types,
})
const bodyContentType = rootSchema
  .get('post')
  .fields.find(field => field.name === 'body').type

// This is a simplified version of processPost - we take a JSON object
// that is a 'post' from the Ghost archive and turn it into a 'post' in
// sanity's world
async function processPost(post) {
  const {
    html,
    meta_title,
    meta_description,
    published_at,
  } = post
  // Take html and converts it into the data structure for a post 'body'
  const body = await convertHtmlToBlock(html)
  writeJson({
    _id: `post-${post.uuid}`,
    _type: 'post',
    title,
    slug: { _type: 'slug', current: slug },
    seoTitle: meta_title || undefined,
    seoDescription: meta_description || undefined,
    body,
    publishedAt: published_at,
  })
}


// this function takes in html and returns the structured block content that Sanity expects
// we hook into the `deserialize` function and return custom types
// one example is how w
async function convertHtmlToBlock(html) {
  return blockTools.htmlToBlocks(html, bodyContentType, {
    parseHtml: html => {
      return new JSDOM(html).window.document
    },
    rules: [
      {
        deserialize(el, next, block) {
          // This is an example of over-riding the 'pre' tag in our
          // html and returning a custom 'codeBlock' type
          if (el.tagName.toLowerCase() === 'pre')
            return block({
              _type: 'codeBlock',
              language: 'text',
              codeContent: el.textContent,
            })
          // This is an example of over-riding the 'iframe' tag in our html, detecting
          // that the src is a github gist, then returning the custom '_type' for 'githubGist'
          if ((el.tagName.toLowerCase() === 'iframe') && el.src.match(/gist.github.com/))
            const GIST_ID_RX = /gist.github.com\/.*\/(\w+)\.js/
            const matches = el.src.match(GIST_ID_RX)
            const gistId = matches && matches[1]
            if (!gistId) {
              console.log('Error - unable to find gistId for src', el.src)
              return undefined
            }
            const urlParts = qs.parseUrl(el.src)
            return block({
              _type: 'gistEmbed',
                           gistId,
              filename: urlParts.query.file || undefined,
            })
          return undefined
        },
      },
    ],
  })
}
The code that does the magic is convertHtmlToBlock. The blockTools object is from @sanity/block-tools. blockTools.htmlToBlocks takes HTML and does its best to convert it into portable text. What we do here is hook into the deserialize function and check each HTML element. This is where we can check for specific cases and return our own custom types.
This script can loop through a series of posts and ultimately create a .ndjson file which we’ll then use in the final step:
sanity dataset import sanity-import.ndjson production --replaceThis last import step can take a long time if you have a lot of images. For our blog posts, it wasn’t too bad. I did our posts in groups of 10 and after I imported a batch I would check to make sure they looked good before moving onto the next batch.
Building with Gatsby
In parallel with the import process, I started working on pulling in the posts from Sanity into our existing Gatsby project that runs mux.com. This was straightforward and didn’t come with any big surprises. As expected, I was able to use gatsby-source-sanity in my Gatsby config and it worked the same way as the rest of the gatsby sources that I was already familiar with. The only minor issue I ran into was how to use @sanity/image-url when I don’t have access to a sanityClient instance.
The process I went through was:
- Import a batch of posts.
- Add Sanity queries to the Gatsby app and start pulling in blog posts from Sanity.
- Check the batch I imported, see if the data is structured as I expect and if the styling looks right.
- Fix styling bugs.
- Repeat with a new batch of posts.
Previewing draft content
In the development environment for mux.com, we run gatsby-source-sanity with overlayDrafts and watchMode set to true. This means that draft content and the latest changes to posts will automatically be pulled in.
To preview draft content for everyone working in the CMS we’re using the “Real-time Preview” feature of Gatsby Cloud. This is great because it allows us to have a fully functioning version of mux.com in an environment that pulls in draft content from Sanity.
Publishing content is as easy as clicking “Publish” in Sanity, which sends a webhook to trigger a rebuild of our production Gatsby site.
Customizing the CMS frontend and making it pretty
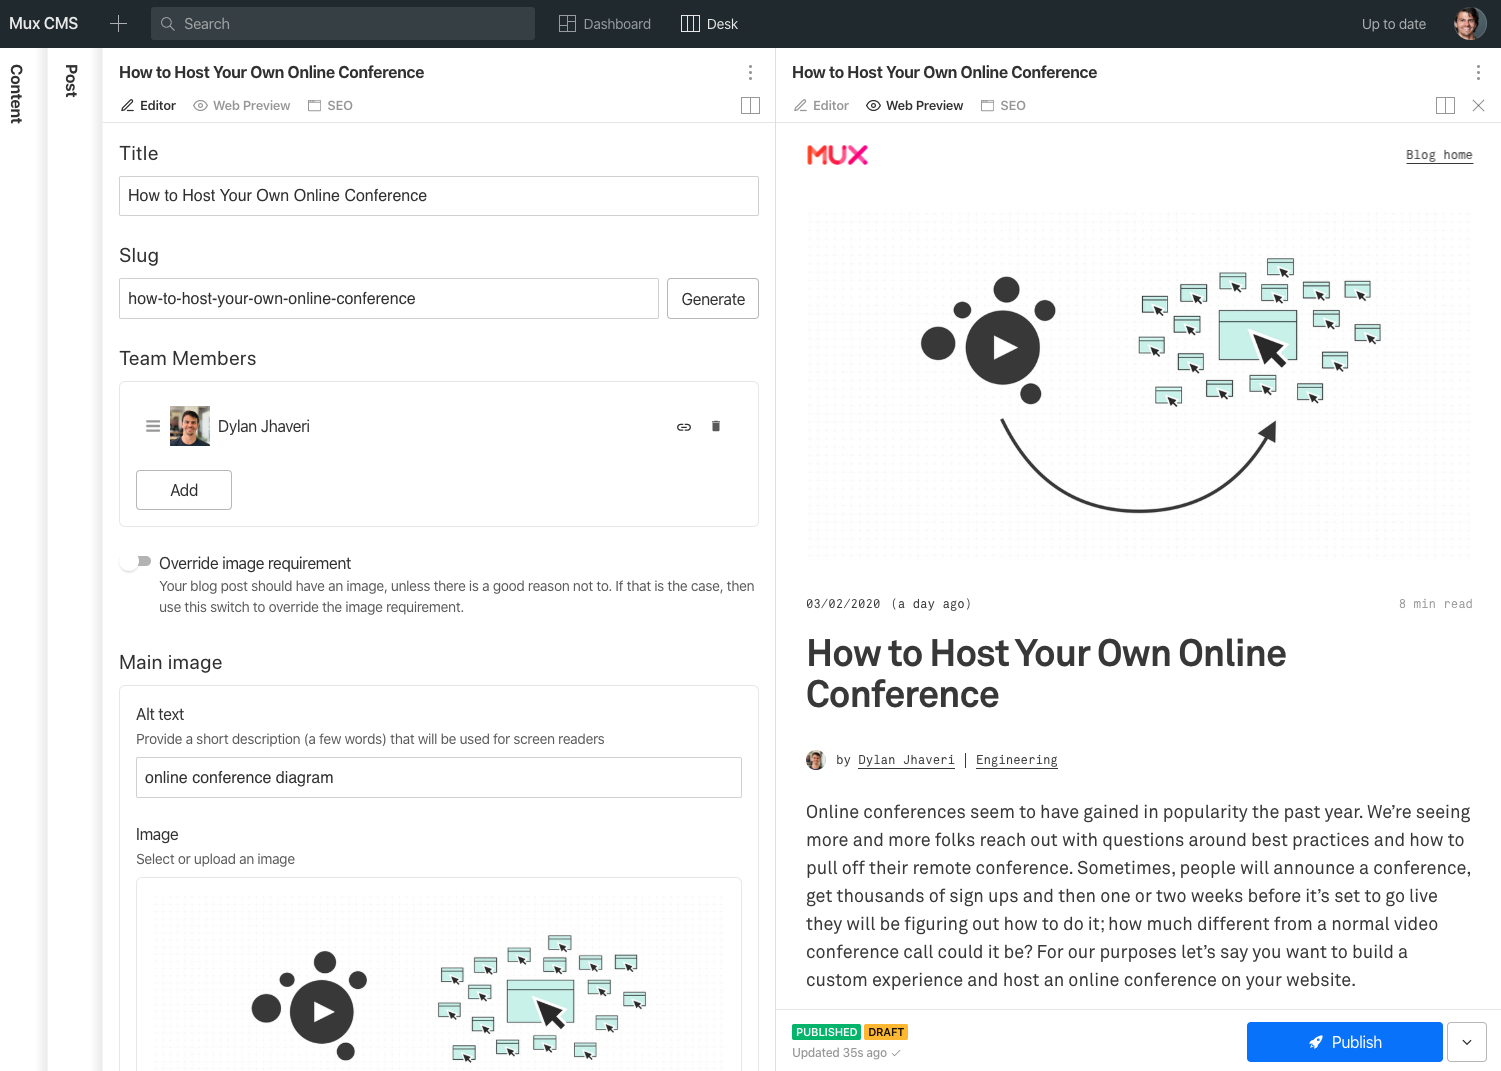
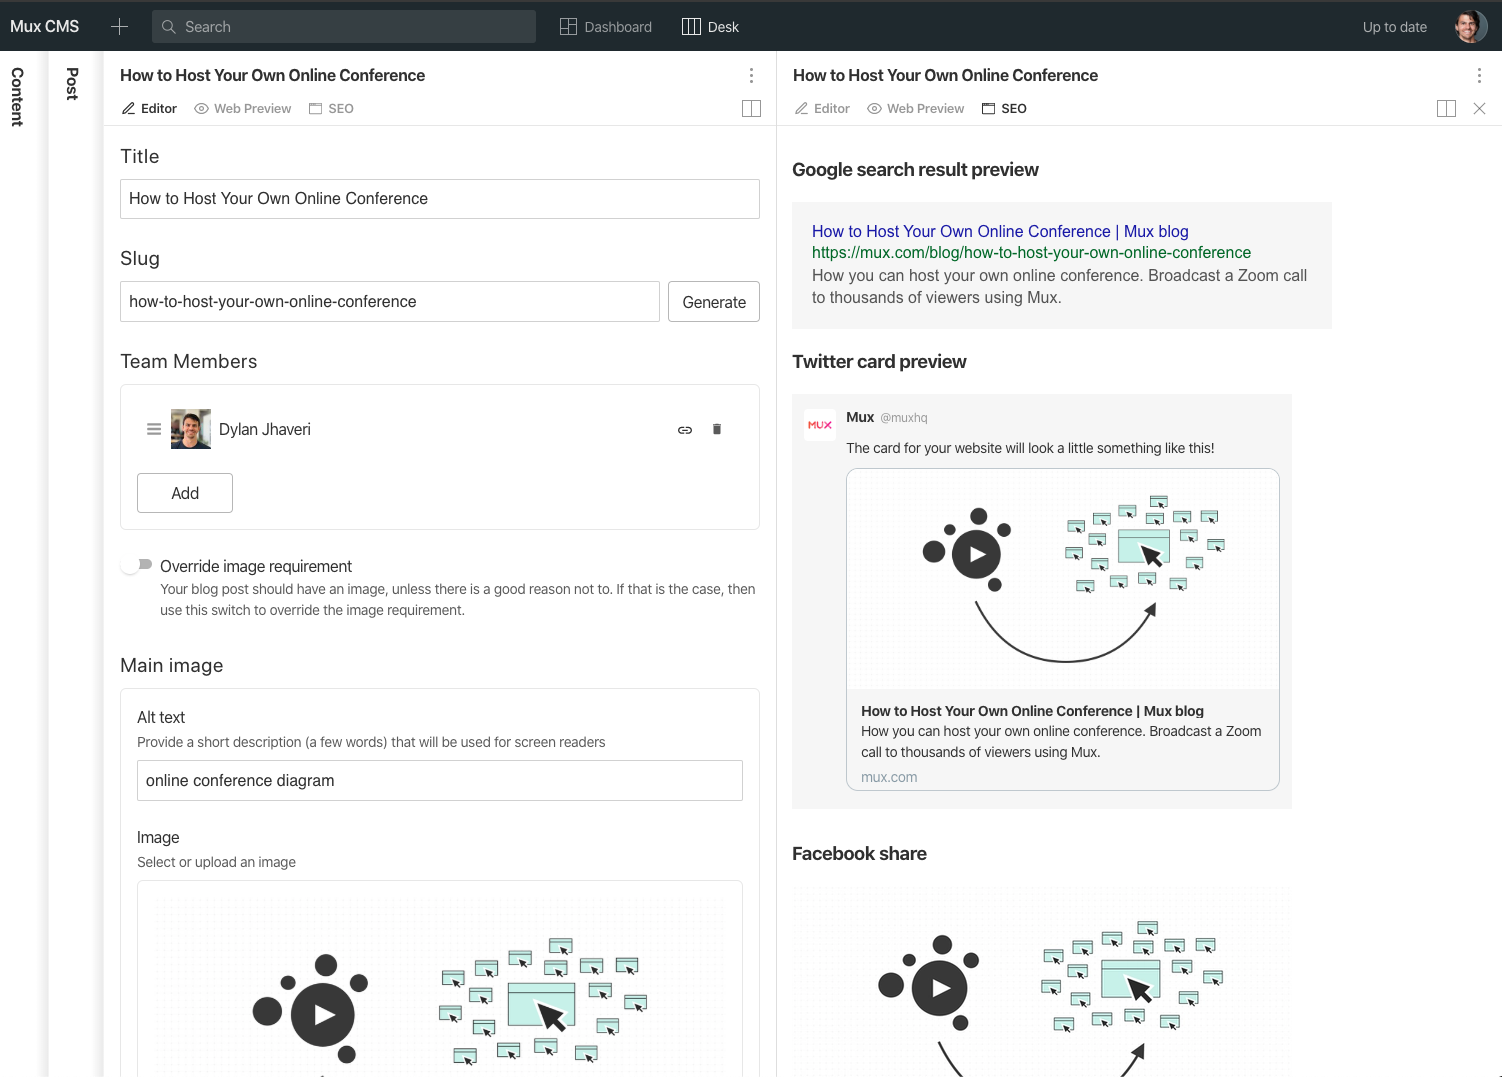
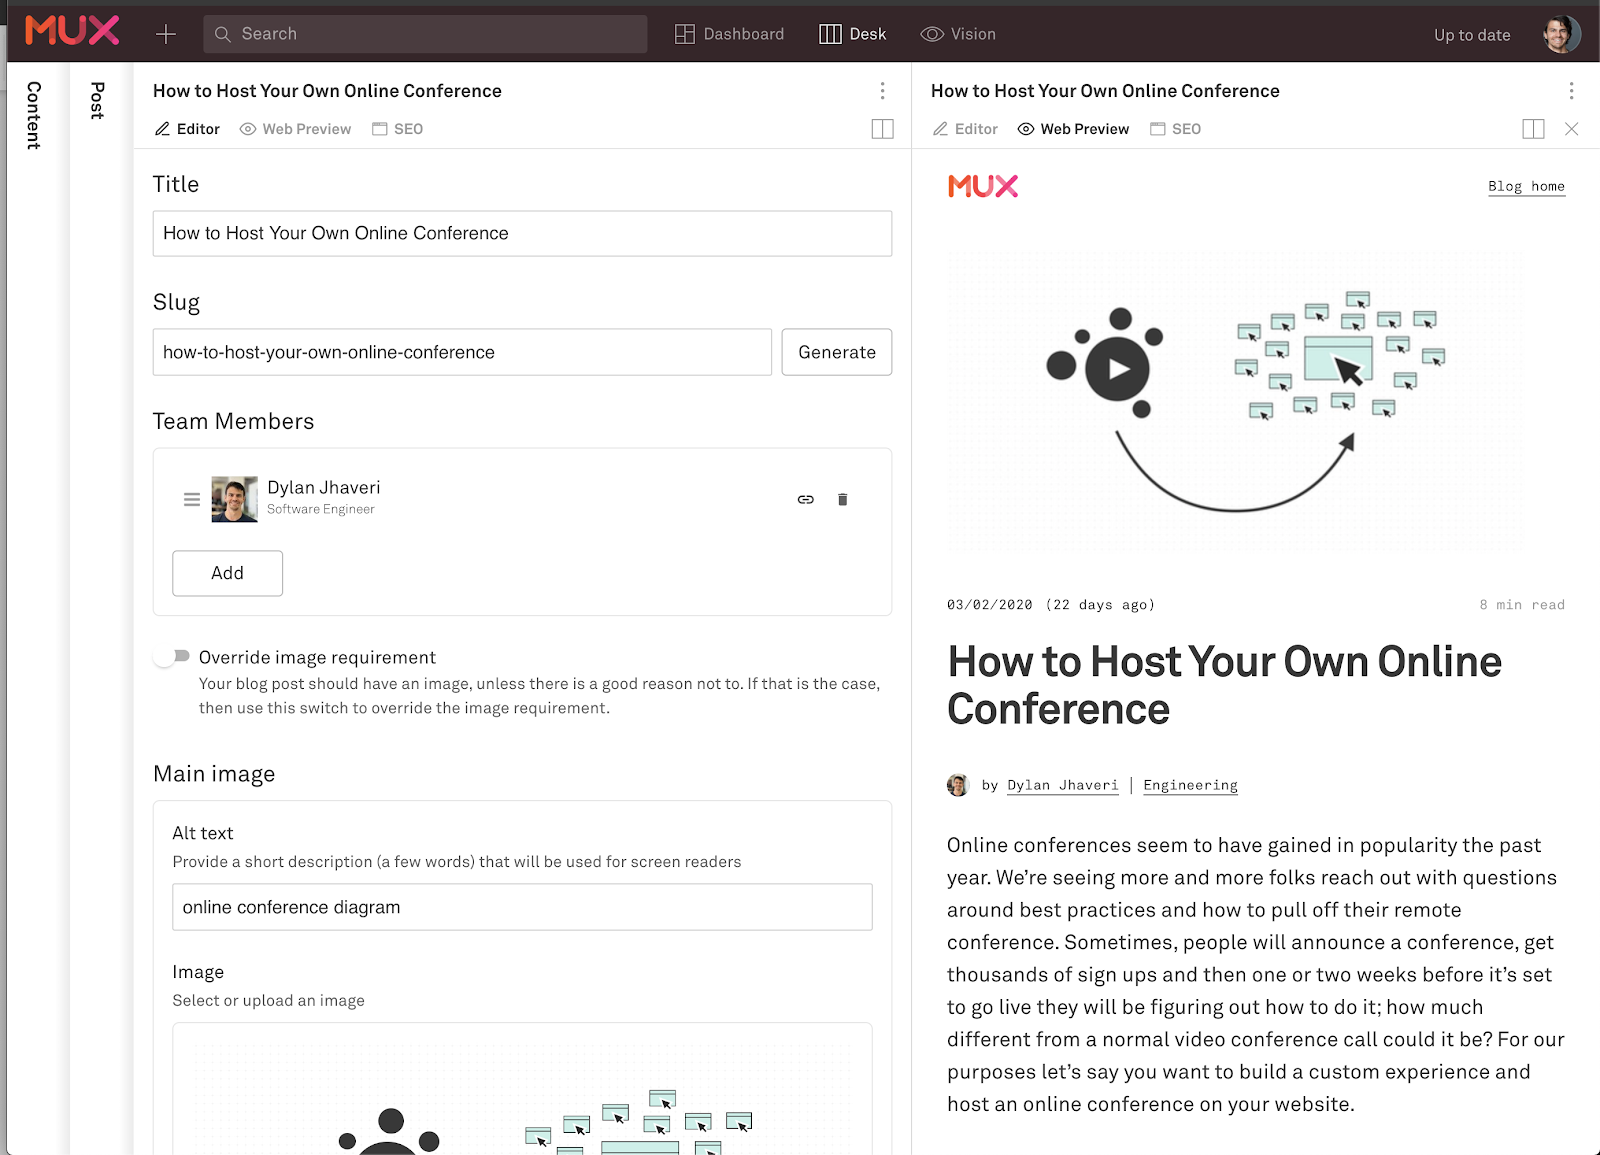
After migrating our blog content to Sanity and getting our blog up and running I implemented some of the more advanced Sanity features like a custom “web preview” pane to see what the draft content will look like on production, and a custom “SEO” pane that shows a preview of how content will look in Google search results, Twitter cards and Facebook posts.
Custom panes with the deskStructure API
The “Web Preview” pane is a react component that renders an iframe to the live Gatsby Cloud Preview site. The SEO pane is a react component that I mostly copied from Sanity’s proof of concept repo.
Sanity exposes “deskStructure” APIs in order to create these custom panes. The first step is to add this to your sanity.json “parts” array:
// sanity.json
{
   "name": "part:@sanity/desk-tool/structure",
   "path": "./deskStructure/index.js"
}
The deskStructure/index.js file tells the Sanity editor to add these custom panes only for “posts”, pretty neat!
// deskStructure/index.js
import S from '@sanity/desk-tool/structure-builder'
import { FiEdit3 as EditIcon } from 'react-icons/fi'
import { FiEye as PreviewIcon } from 'react-icons/fi'
import { GoBrowser as SeoIcon } from 'react-icons/go'
import WebPreview from './previews/WebPreview'
import SeoPreviews from './previews/seo/SeoPreviews'

const previewUrl = 'https://your-preview-url.is'

export const getDefaultDocumentNode = ({ schemaType }) => {
  if (schemaType === 'post') {
    return S.document().views([
      S.view.form().icon(EditIcon),
      S.view
        .component(WebPreview)
        .options({ previewUrl: `${previewUrl}/blog/` })
        .title('Web Preview')
        .icon(PreviewIcon),
      S.view
        .component(SeoPreviews)
        .title('SEO')
        .icon(SeoIcon),
    ])
  }
  return S.document().views([S.view.form()])
}

export default () =>
  S.list()
    .title('Content')
    .items([...S.documentTypeListItems()])
Custom colors and theming
This final step is easy to gloss over, but it’s important to do. This final step made the studio feel like our CMS. A nice fresh coat of paint in the Mux colors. You can go to this guide to learn more about how to brand your studio.
First you need to add where the studio should look for the logo and the custom CSS. You can also run sanity init plugin and choose the logo plugin starter if you want to customize even more with JSX.
// sanity.json
{
  "implements": "part:@sanity/base/brand-logo",
  "path": "./logo/myLogo.js"
},
{
  "implements": "part:@sanity/base/theme/variables/override-style",
  "path": "./styles/variables.css"
}
// styles/variables.css
//
// find more variables on github https://github.com/sanity-io/sanity/tree/master/packages/%40sanity/base/src/styles/variables
// @import url(''");
:root {
/* Brand colors */
--brand-primary: #FF2B61;
--brand-secondary--inverted: #383838;
/* Typography */
--font-family-sans-serif: 'Helvetica Neue', Helvetica, Arial, sans-serif;
--font-size-base: 16px;
--text-color: var(--brand-secondary--inverted);
}
Thanks for reading! You can find me on twitter @dylanjha and read more of my writing on the Mux blog. I also hang out sometimes in the Sanity Slack community.
Sanity – The Content Operating System that ends your CMS nightmares
Sanity replaces rigid content systems with a developer-first operating system. Define schemas in TypeScript, customize the editor with React, and deliver content anywhere with GROQ. Your team ships in minutes while you focus on building features, not maintaining infrastructure.
Sanity scales from weekend projects to enterprise needs and is used by companies like Puma, AT&T, Burger King, Tata, and Figma.