Setting up single sign-on with SAML
This article will take you through the process of setting up SAML (Security Assertion Markup Language) SSO (single sign-on) for your organization.
Introduction
SAML (Security Assertion Markup Language) SSO (single sign-on) enables your organization to control access to Sanity projects by using a third-party identity provider, such as Okta, Google, or Microsoft Entra ID (formerly Azure AD). When you enable SAML SSO, users who log into a project through the Studio or the management interface will be authenticated through the organization’s identity provider. Once they log in, they will be assigned roles according to rules based on group membership from their user record in the identity provider.
Prerequisites
- An organization with a project on the Enterprise plan, or on the Growth plan with the SAML SSO add-on.
- An external identity provider that supports SAML authentication (e.g., Okta, Google, or Azure AD).
- Organization administrator permissions.
Configuration steps
1. Create a new SAML SSO configuration for your organization
Access your organization's settings by going to sanity.io/manage and selecting the appropriate organization in the dropdown menu in the upper left corner. Then select the SAML SSO section in the left sidebar, and click the button to create a SAML SSO provider.
This is a paid feature
This feature is available on certain Enterprise plans. Talk to sales to learn more.
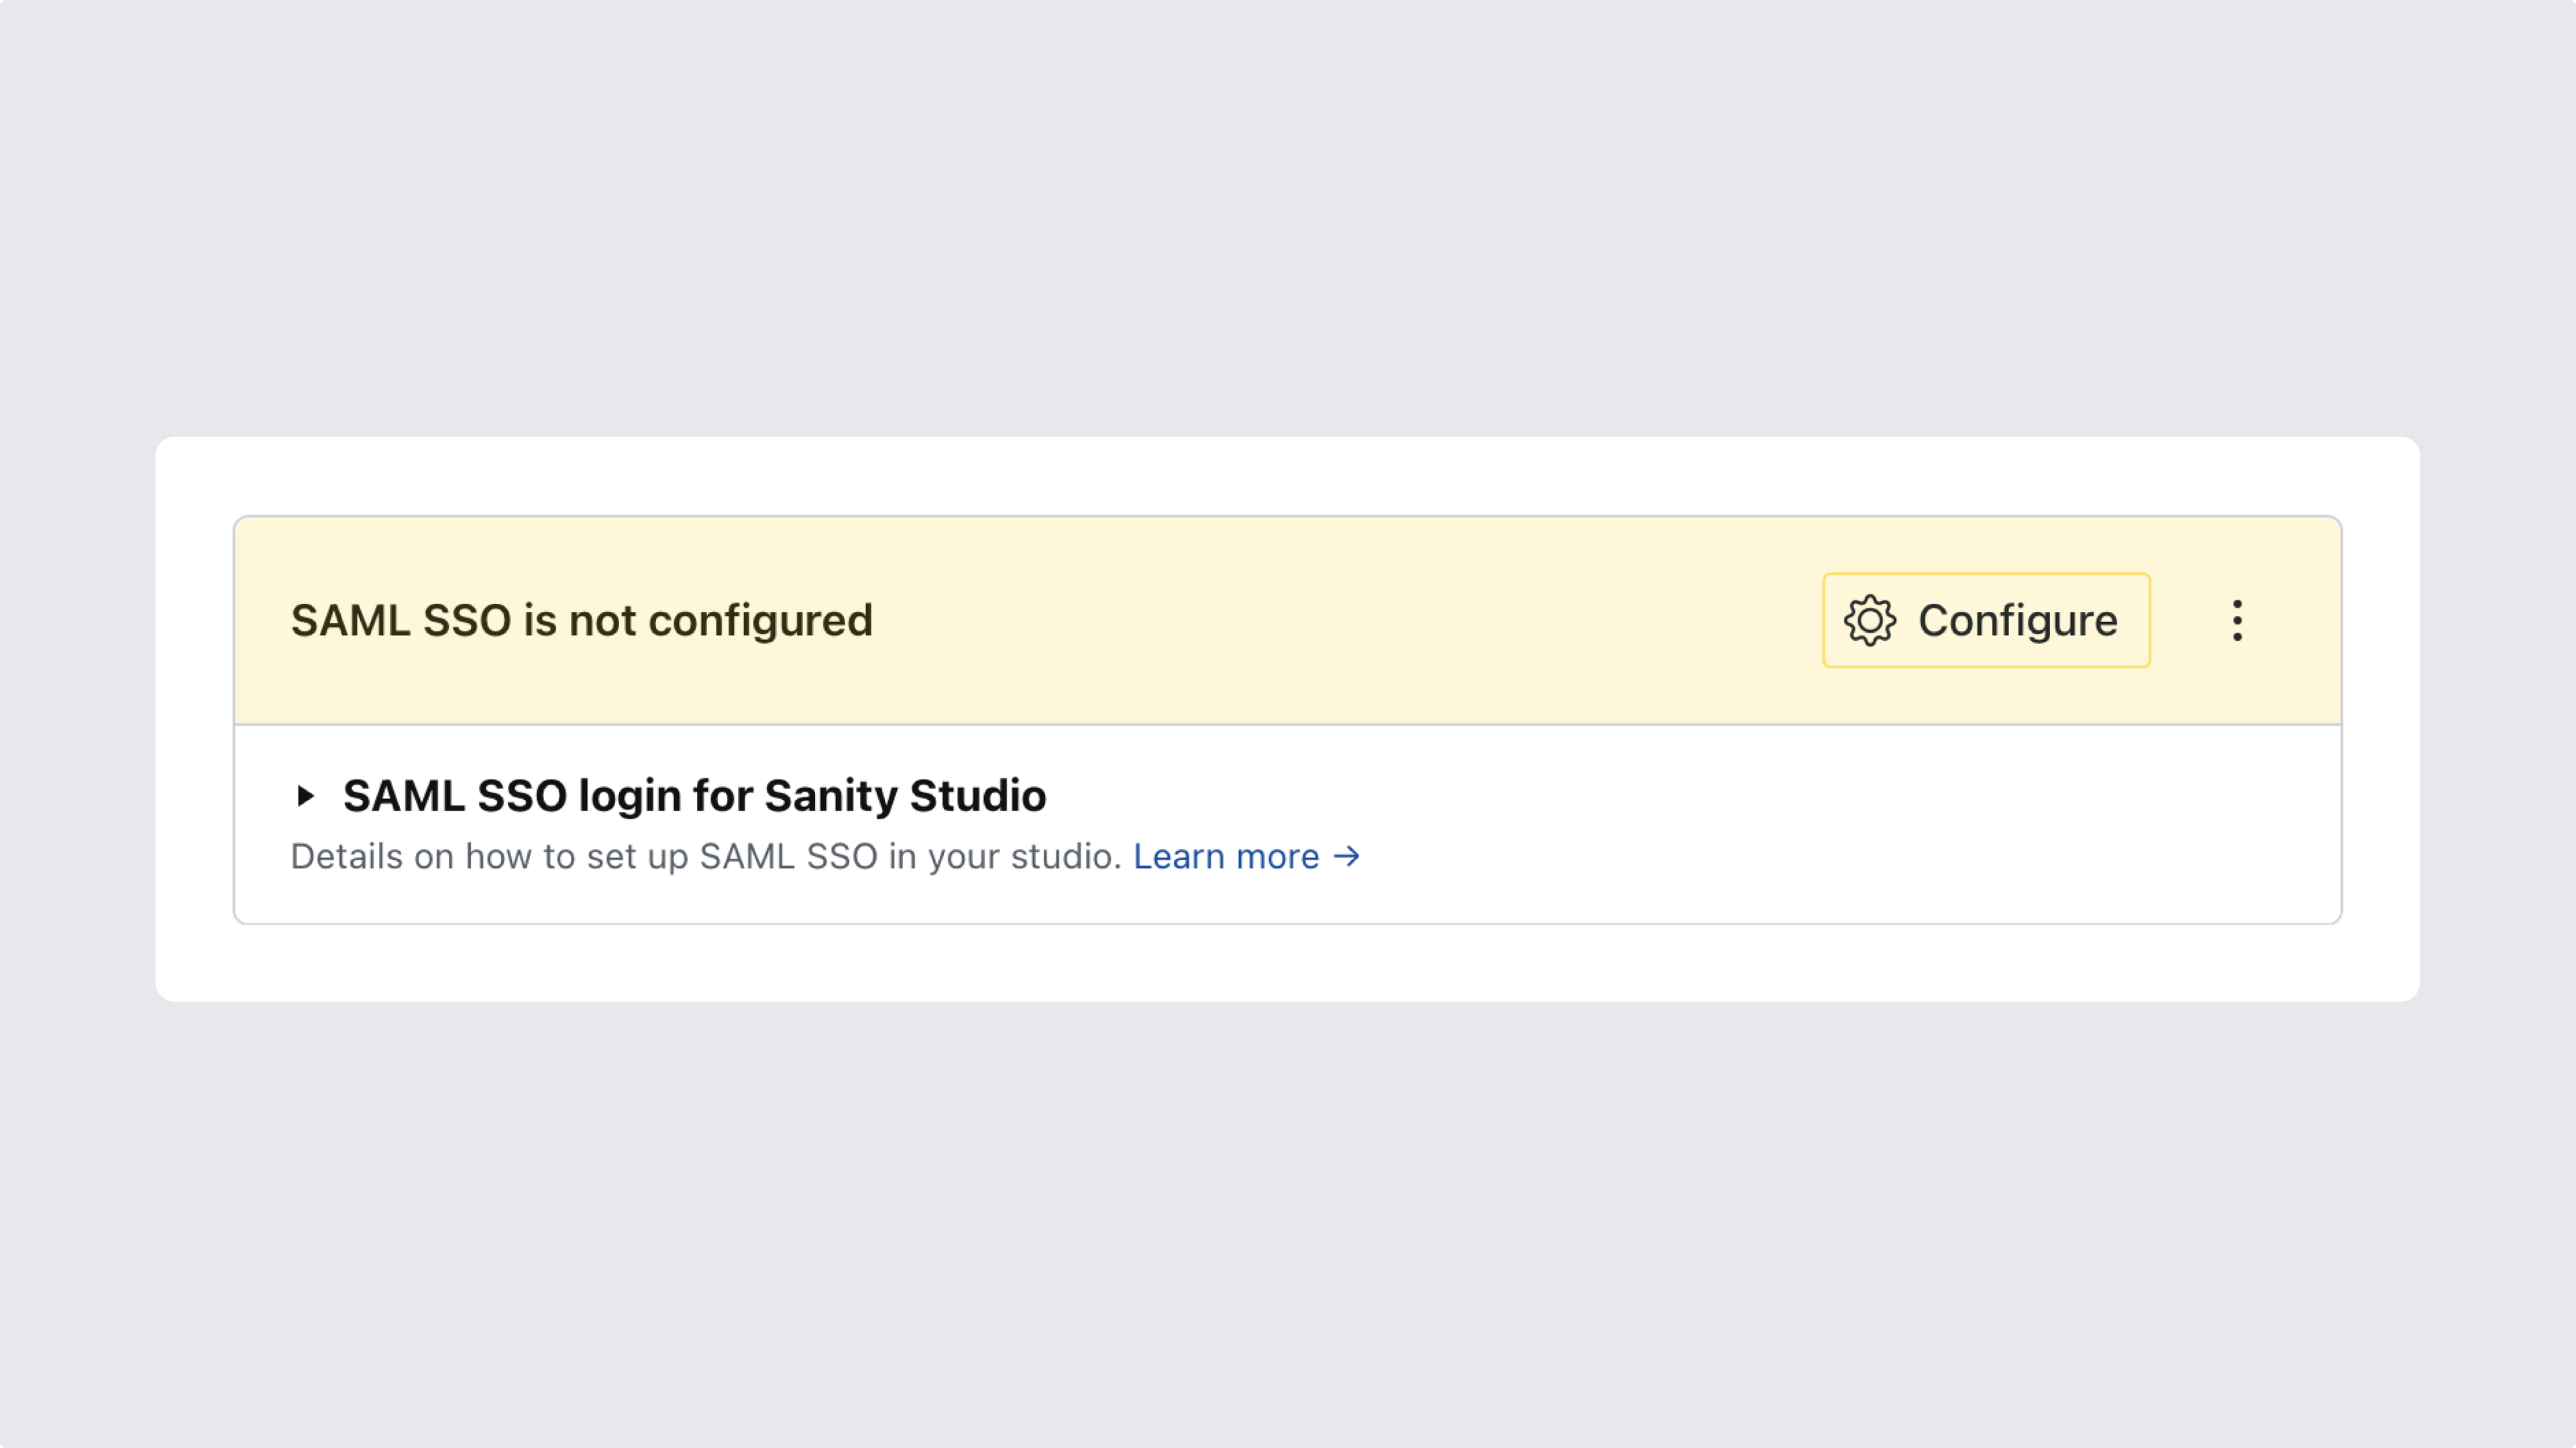
A new dialog will appear informing you that SAML SSO has not yet been configured. Click the button labeled Configure to start setting up your provider. This will generate the details needed to connect your identity provider with your organization on Sanity.
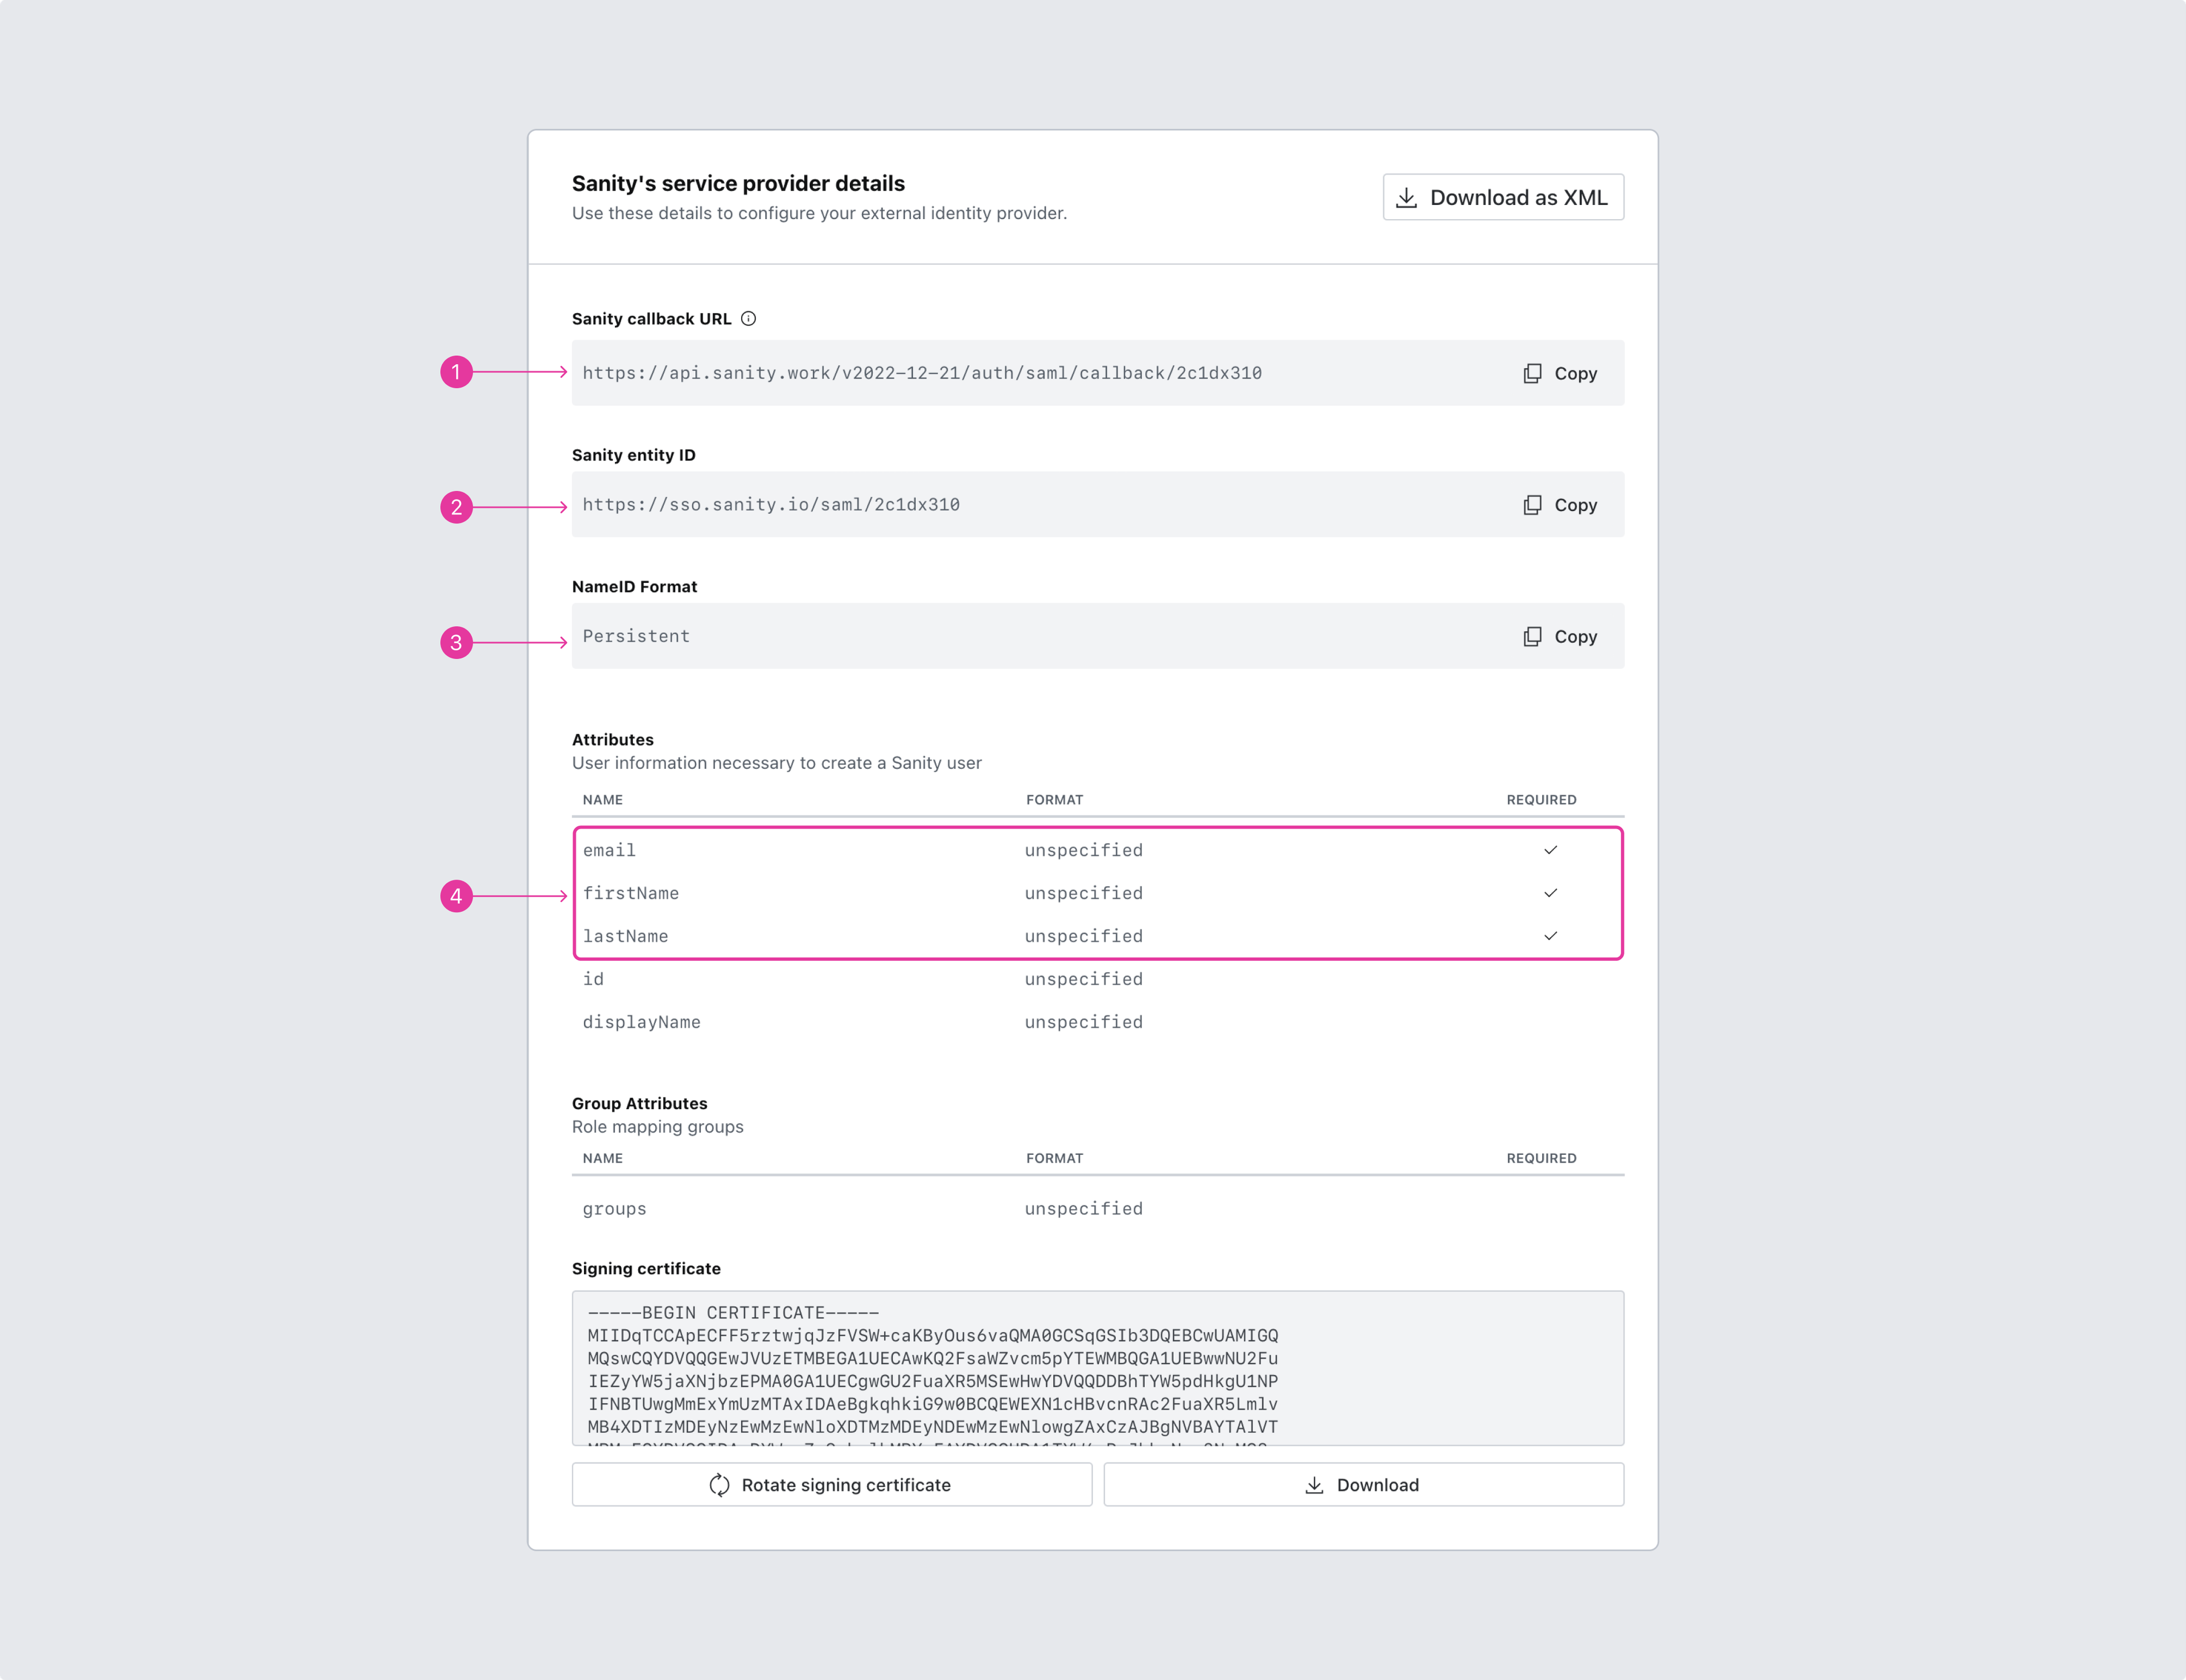
2. Use the details presented to configure the external identity provider
The process of configuring SAML SSO starts with Sanity providing you with the necessary details for setting up your external identity provider. You can use the copy buttons to put the correct strings on the clipboard. It's also possible to download the settings as a SAML XML file.
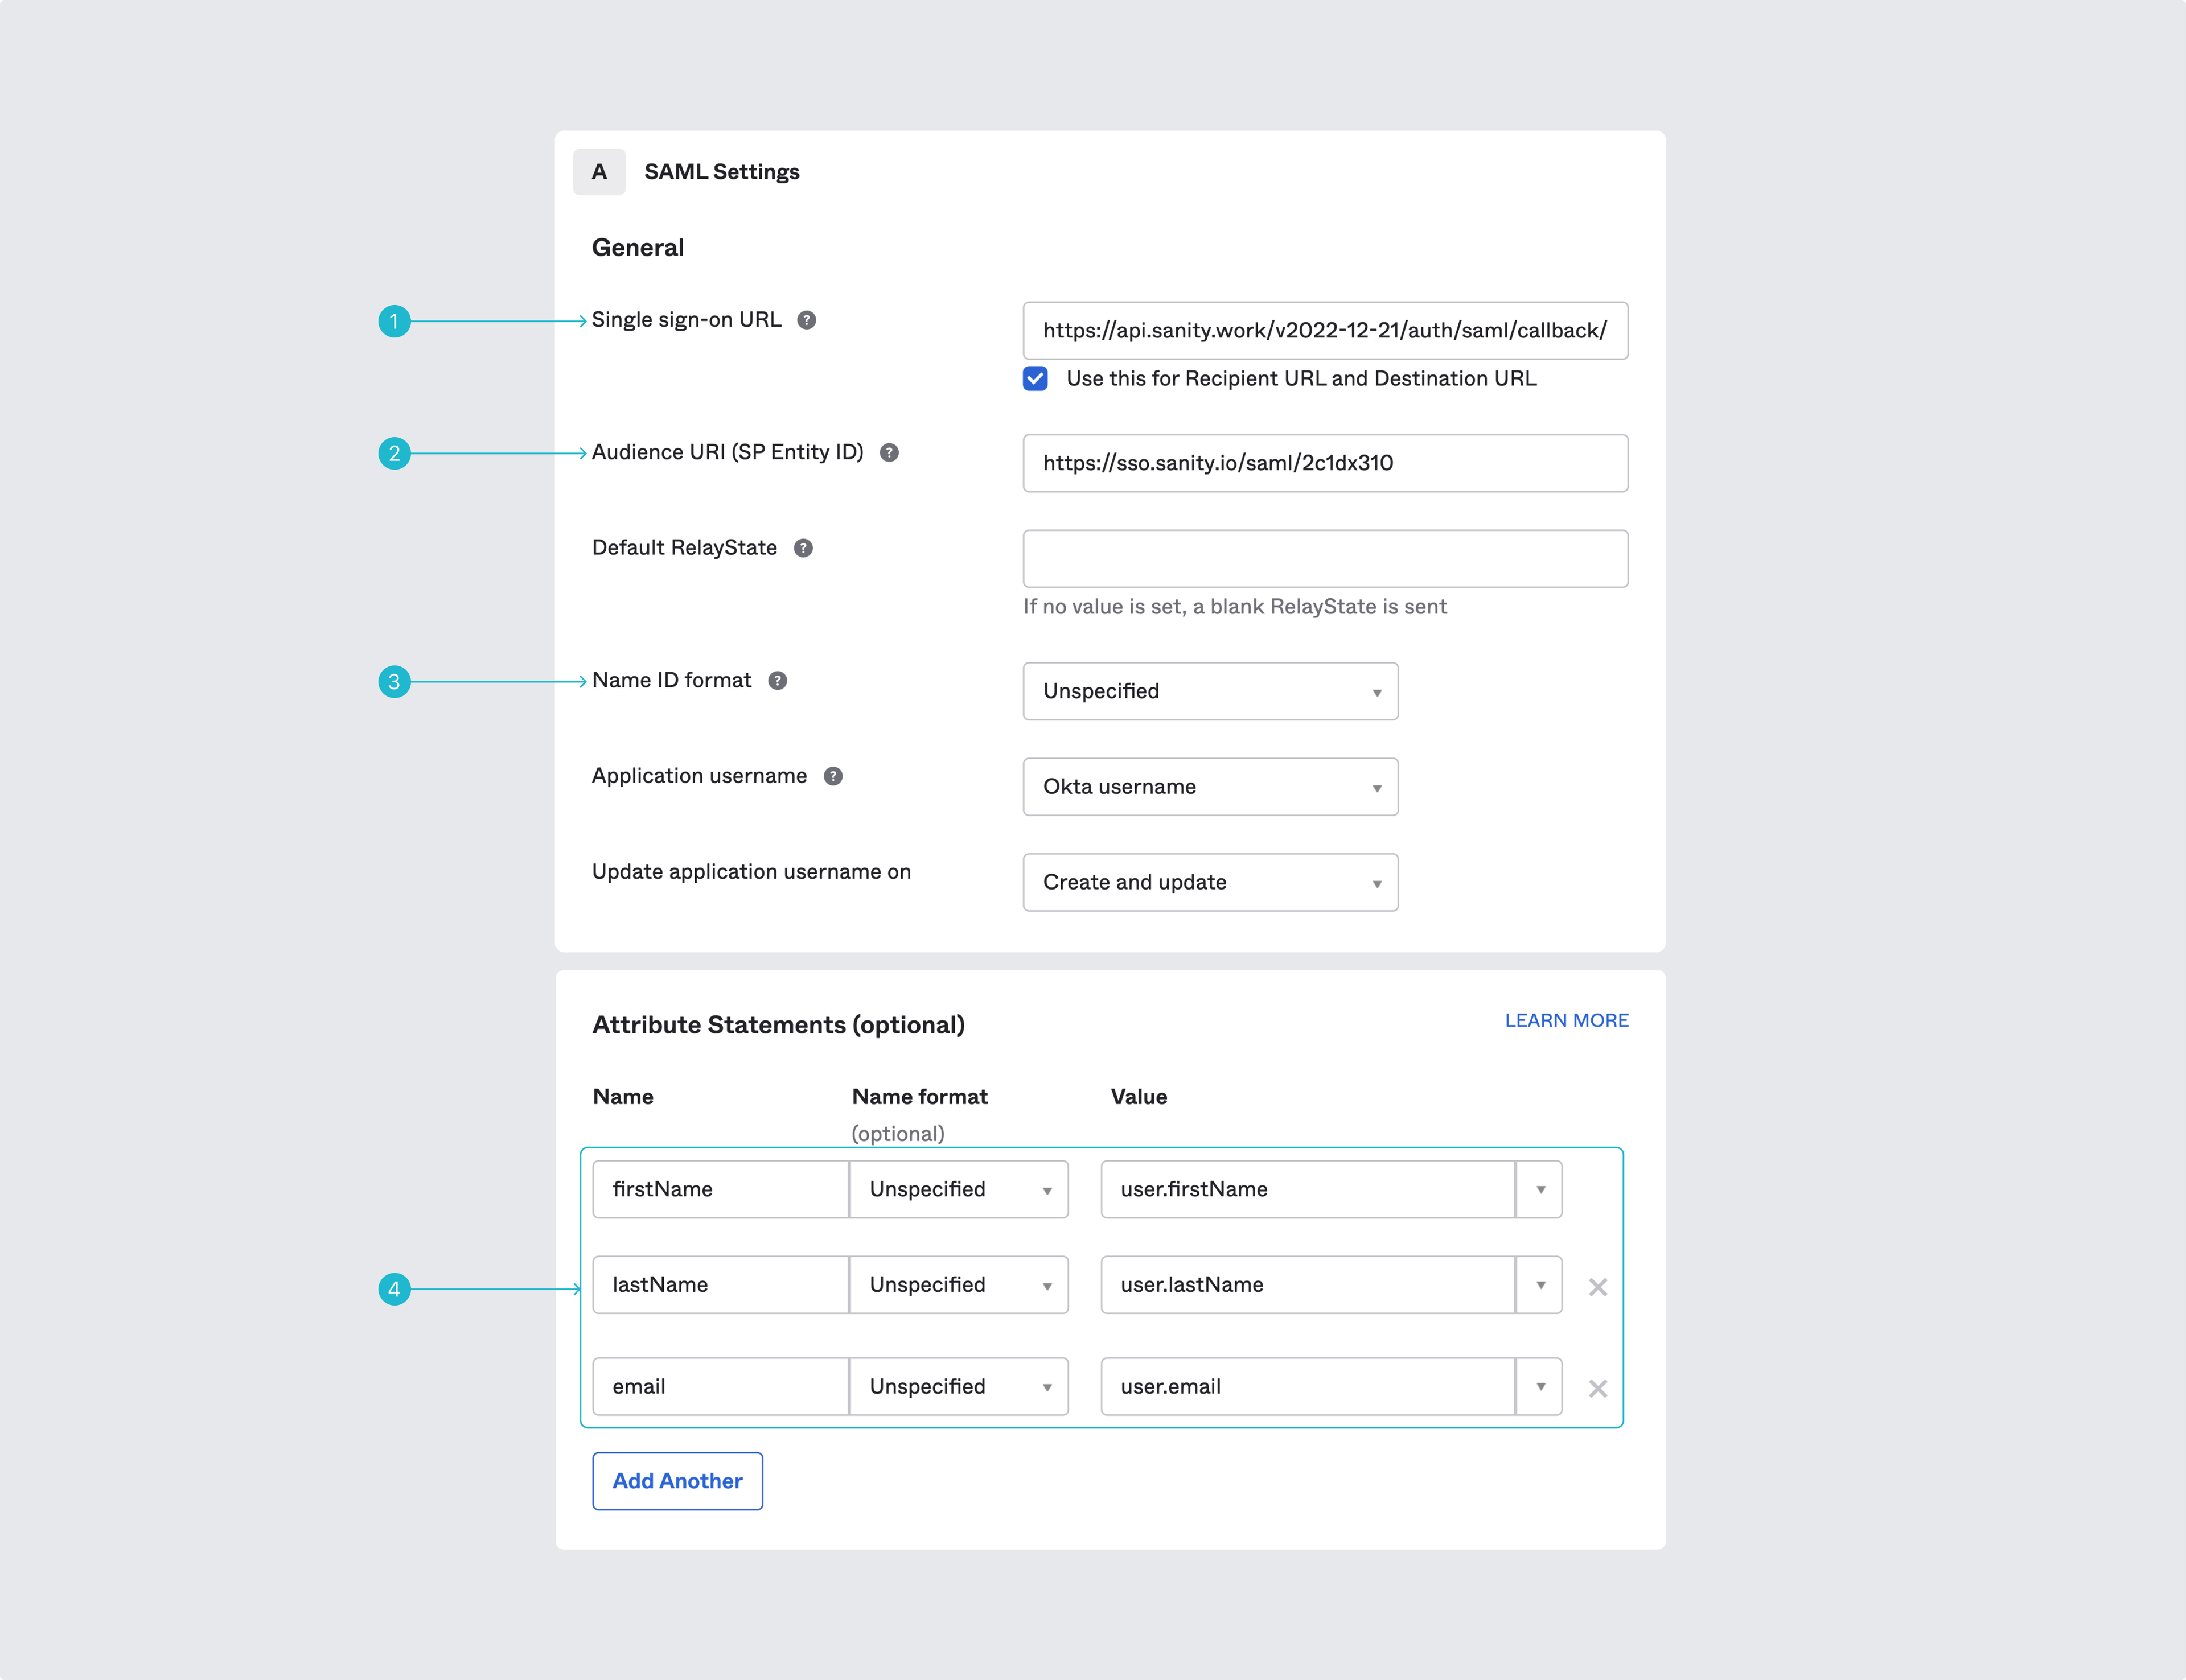
Shown here is the interface for entering these details if you're using Okta. Note that in Okta, “callback URL” is called “Single sign-on URL.” If you're using Azure AD, please also see the guide to set up SSO authentication with SAML and Azure.
Note the mapping of attributes for user accounts. Sanity requires email, firstName, and lastName to be mapped to corresponding values from the identity provider. Additional attributes will sync as user attributes.
Gotcha
Make sure to set the groups in the external identity provider that should have access to the integration.
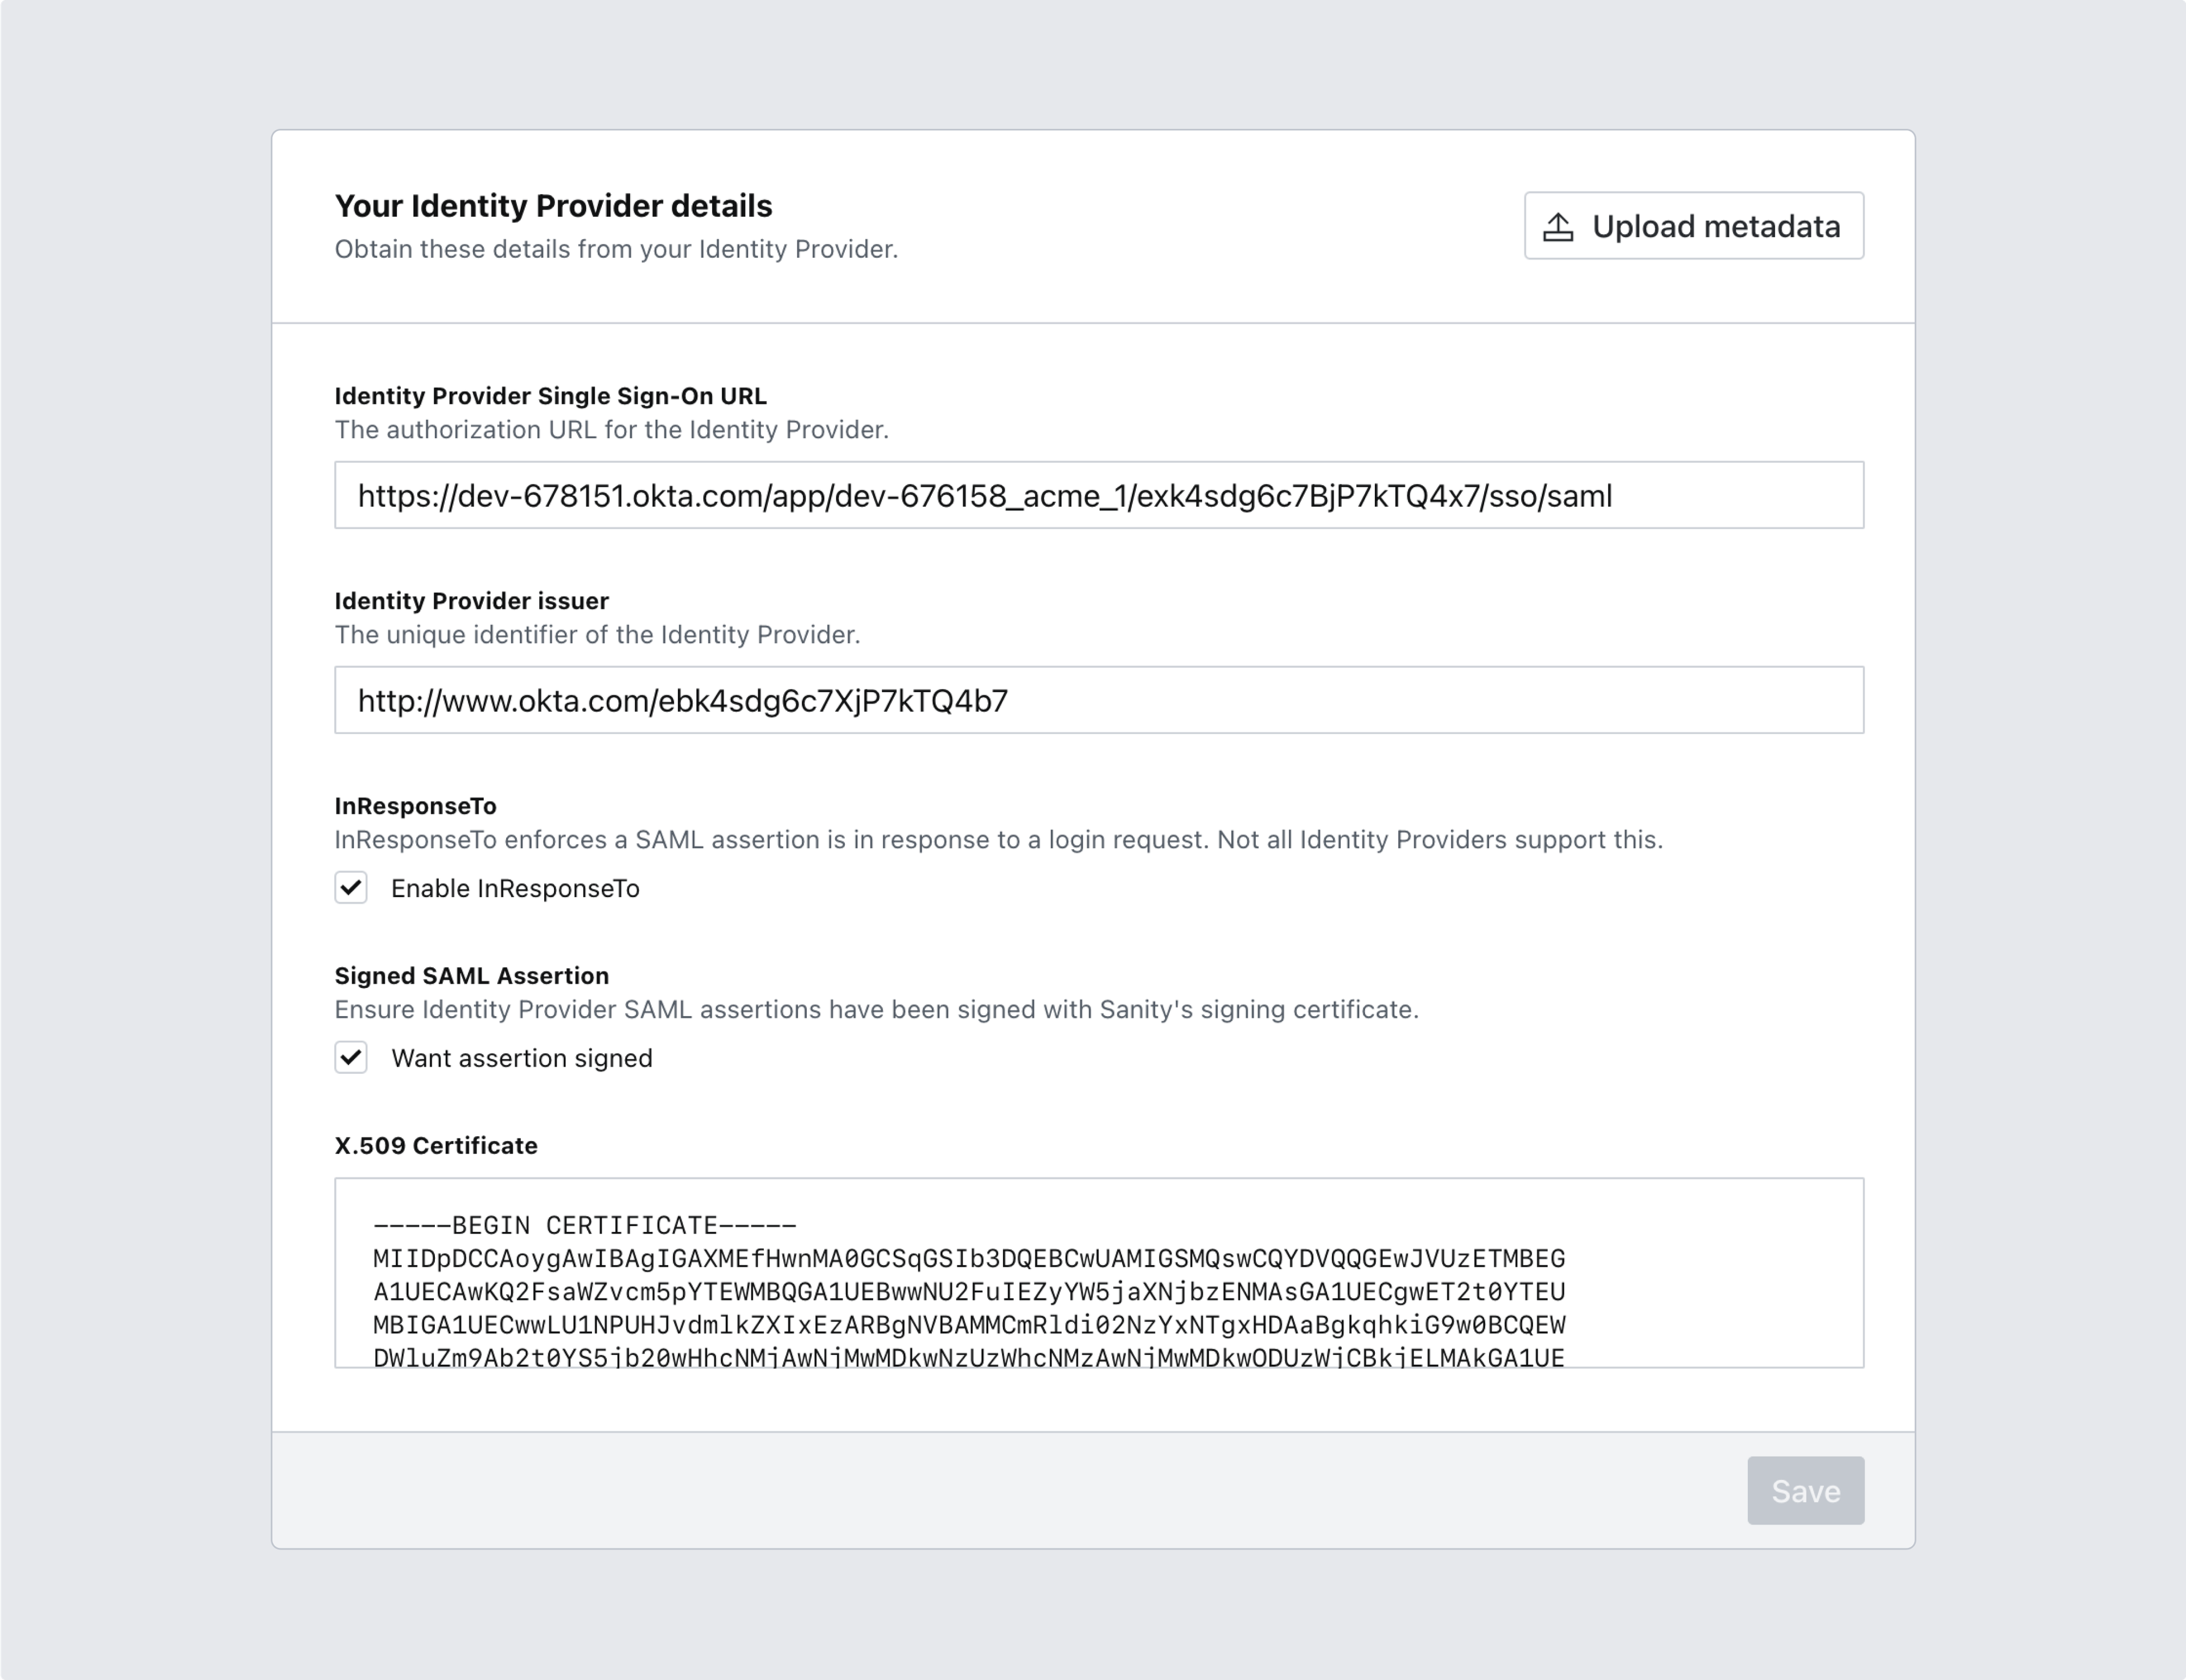
3. Configure the SAML service provider with the settings of the external identity provider
Having set up the external identity provider with the parameters you obtained from Sanity, you can now do the reverse. Scroll down to the next section with the heading Your Identity Provider details. Go ahead and fill in the appropriate values.
Protip
Many providers will let you download the required settings as an XML file. If you have such a file, click on the top-right button labeled Upload new metadata to save yourself some tedious copy/pastes.
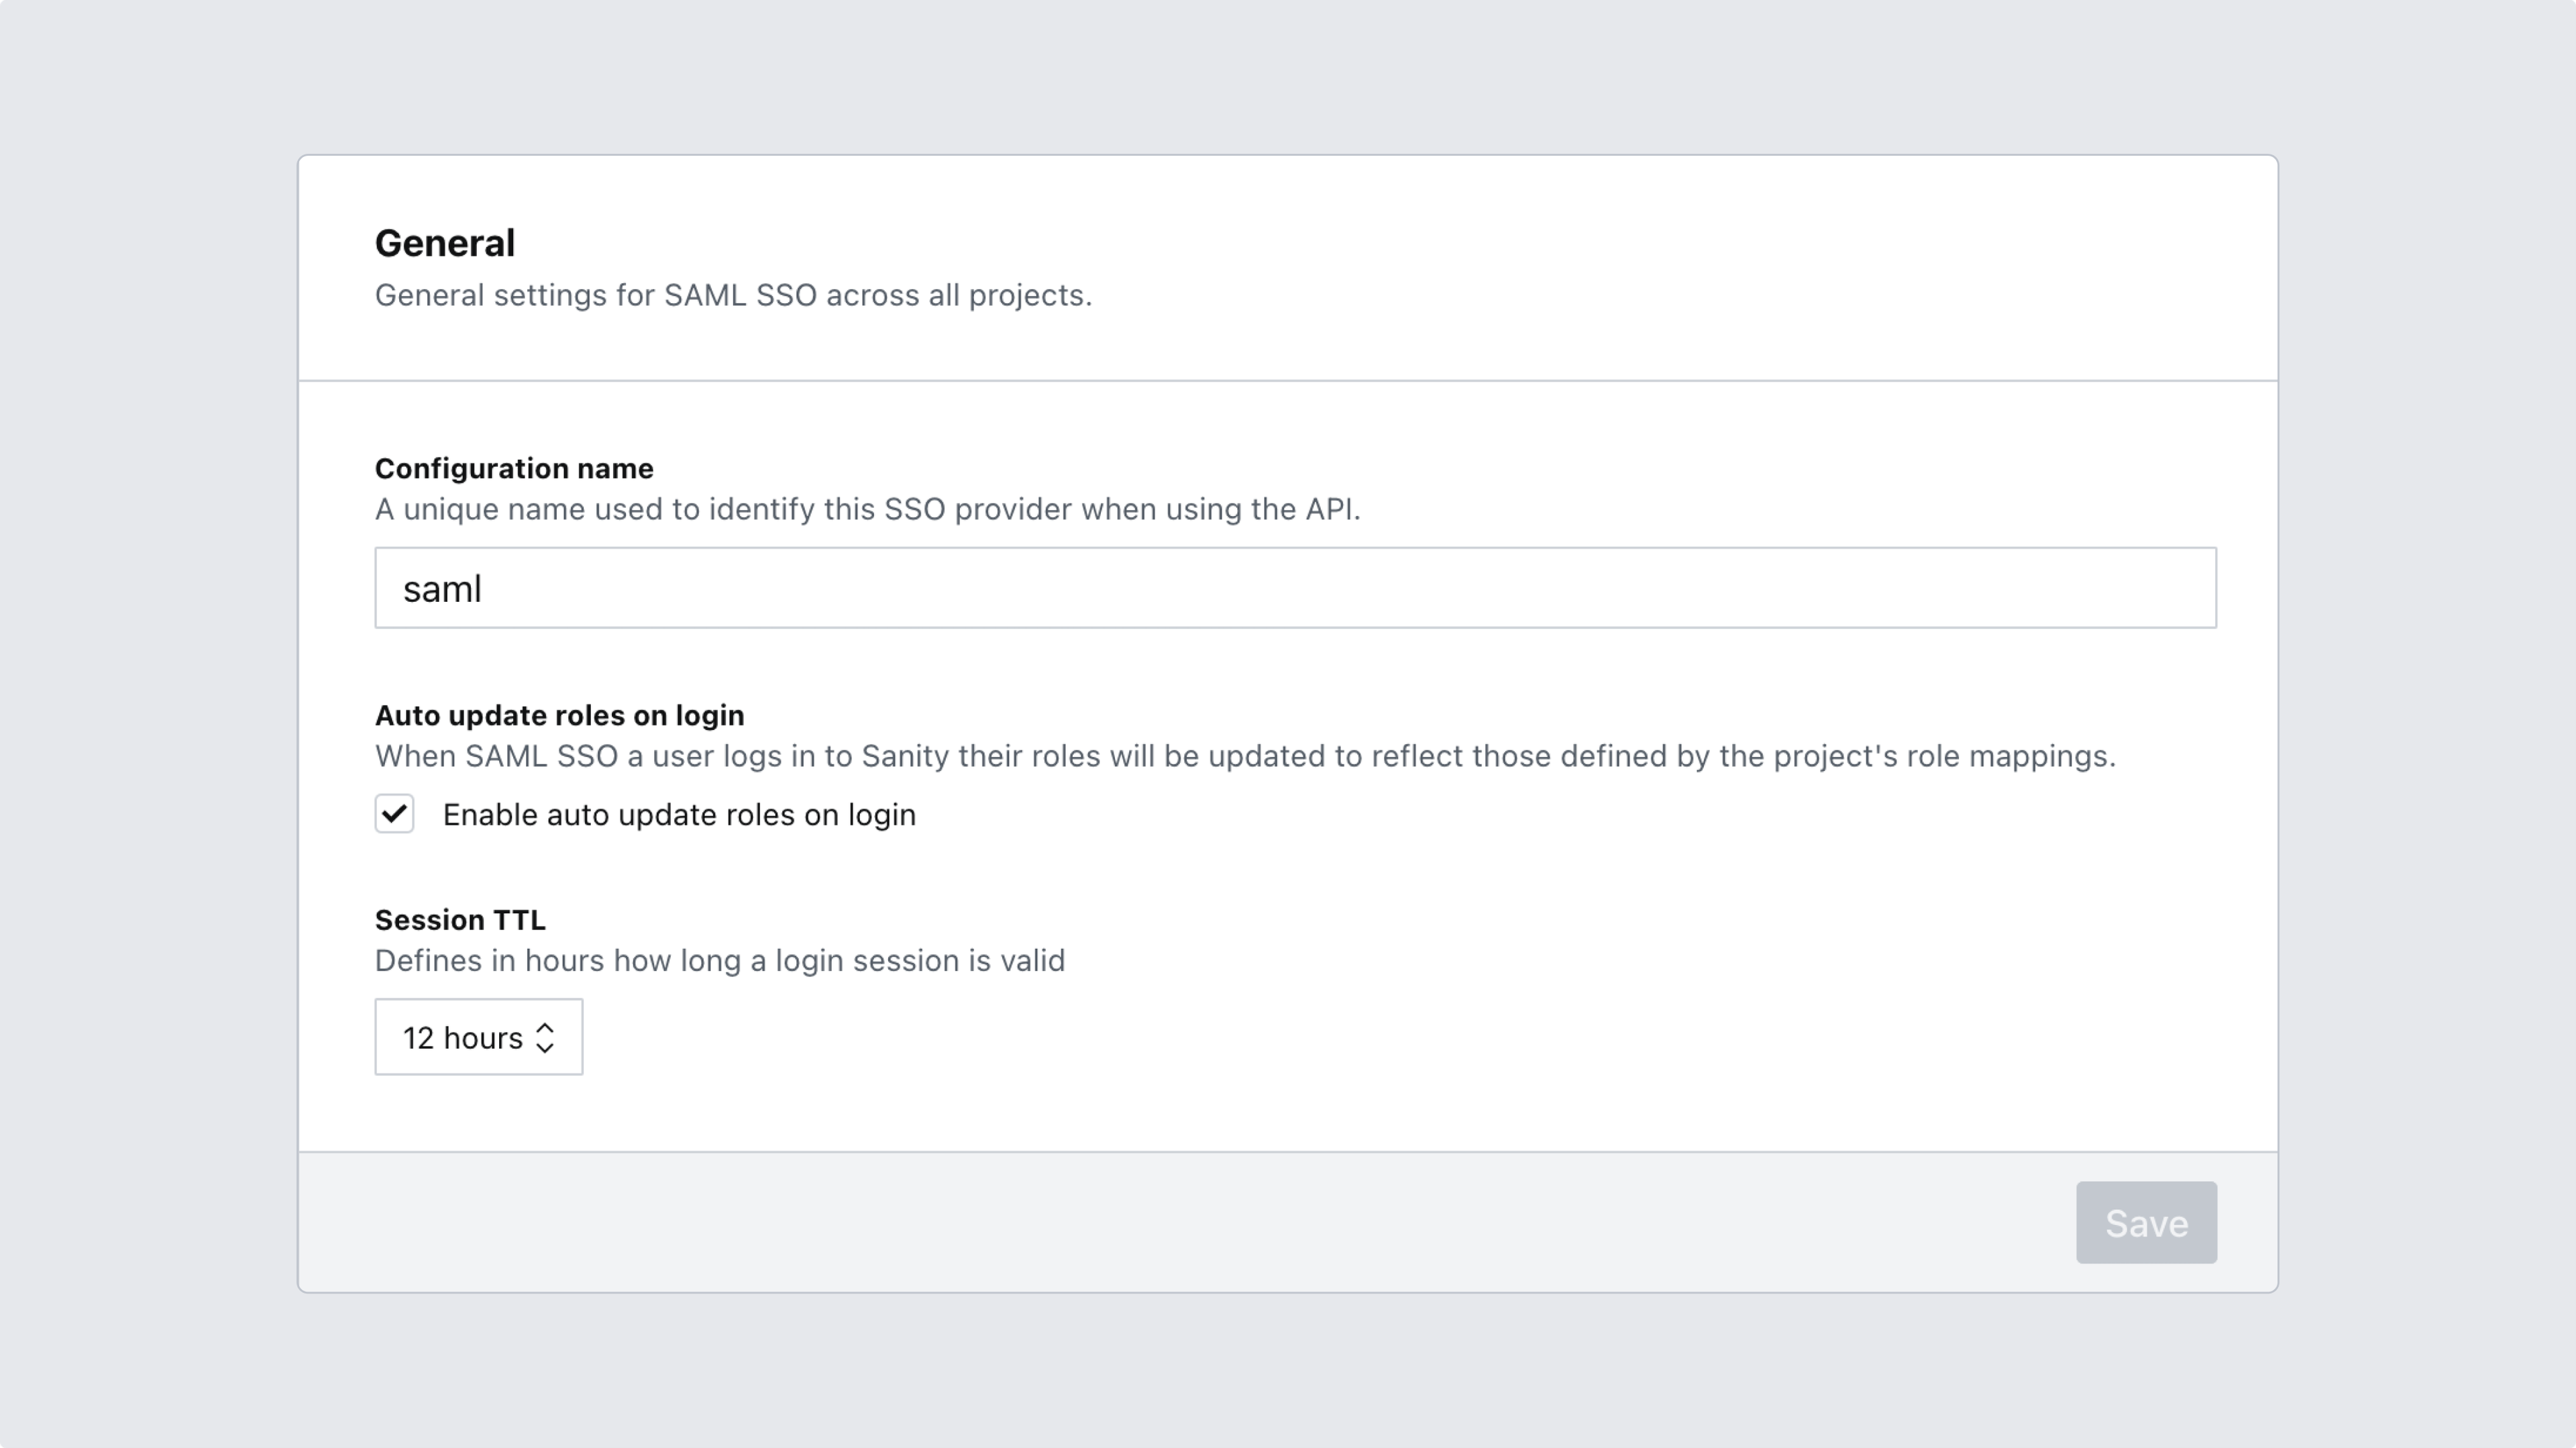
4. Name your configuration and set options for role mapping
Scroll to the next section to give your configuration a meaningful name, and choose whether or not to automatically update roles whenever a user logs in. You may also set the length of user sessions to your liking before saving your configuration.
Automatically update roles
If the option to automatically update roles is selected, the mapping of roles will happen every time a user logs in using the project-specific login URL. This will also disallow manual management of roles.
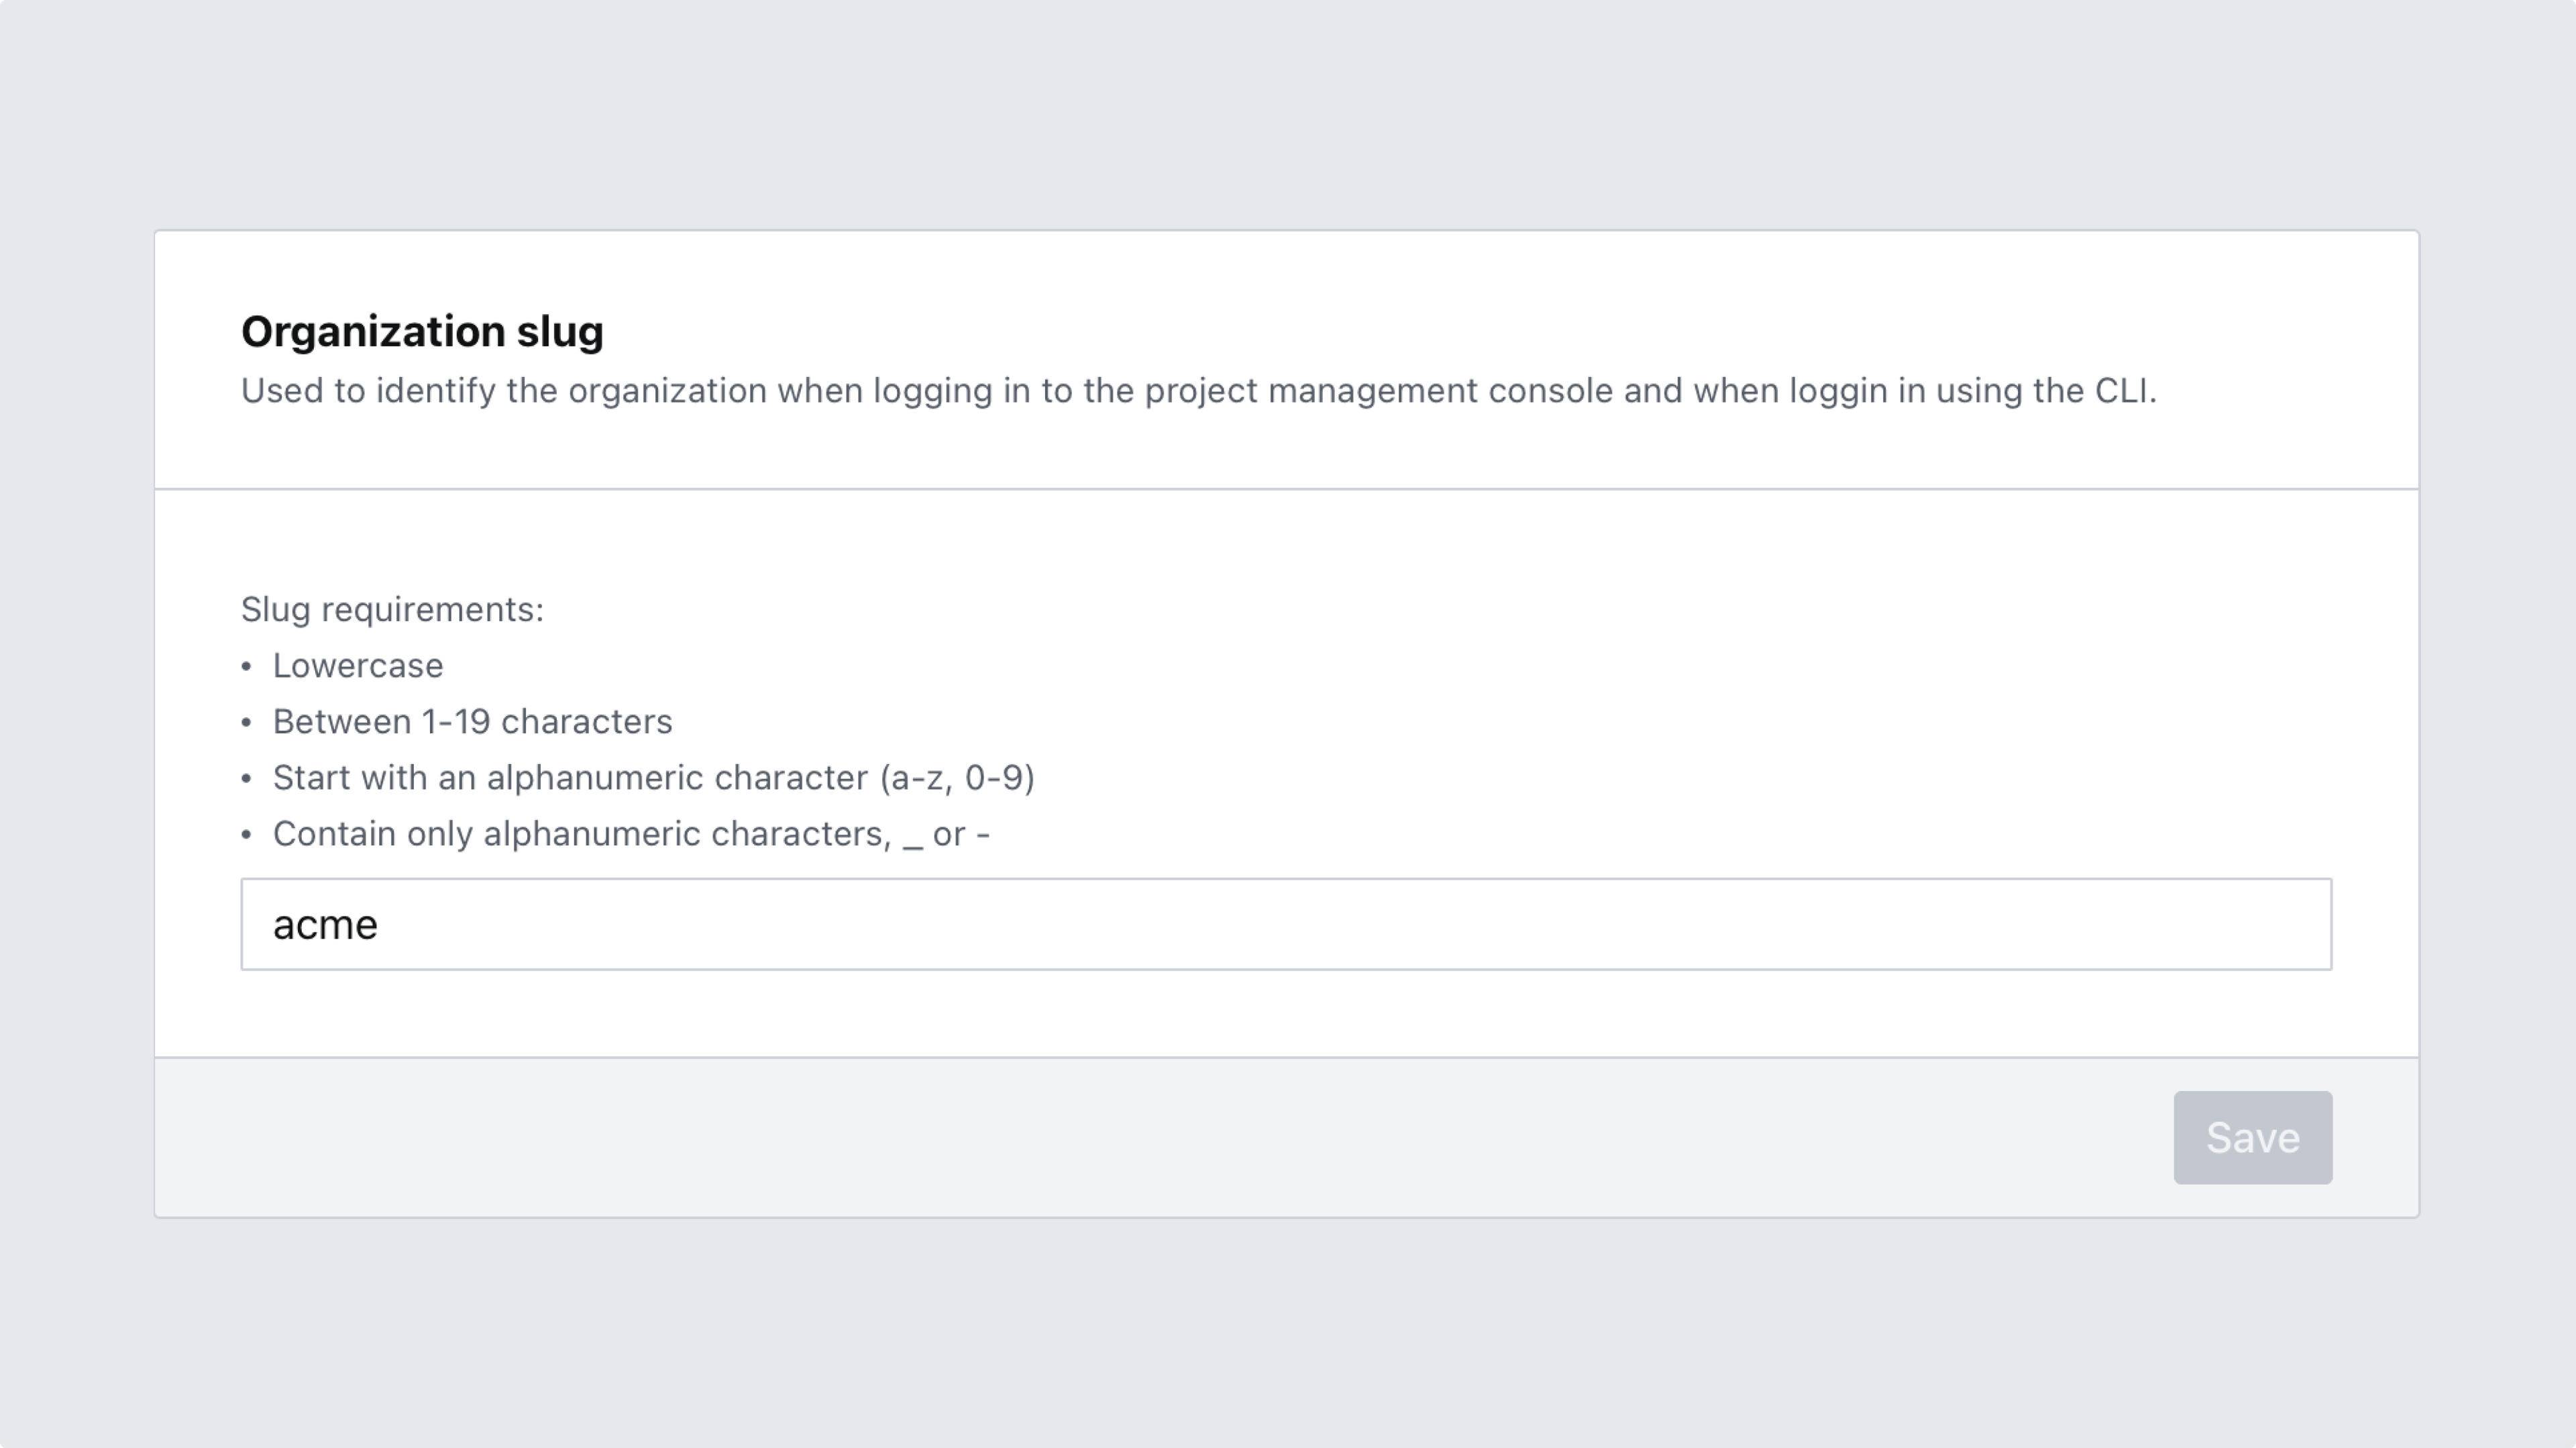
5. Set a slug for your organization
At the bottom of the SAML SSO configuration page you'll be able to define a unique slug that will identify your organization in certain SSO workflows, such as logging in via CLI or logging into the project management console. Note that this setting can also be accessed under General settings, and might therefore already have a value set.
Your organization slug must:
- Be globally unique.
- Be between 1 and 20 characters long.
- Start with an alphanumeric character.
- Contain no other characters than
a-z,0-9, and-.
# Example CLI login using the slug 'saml-docs'
sanity login --sso saml-docs
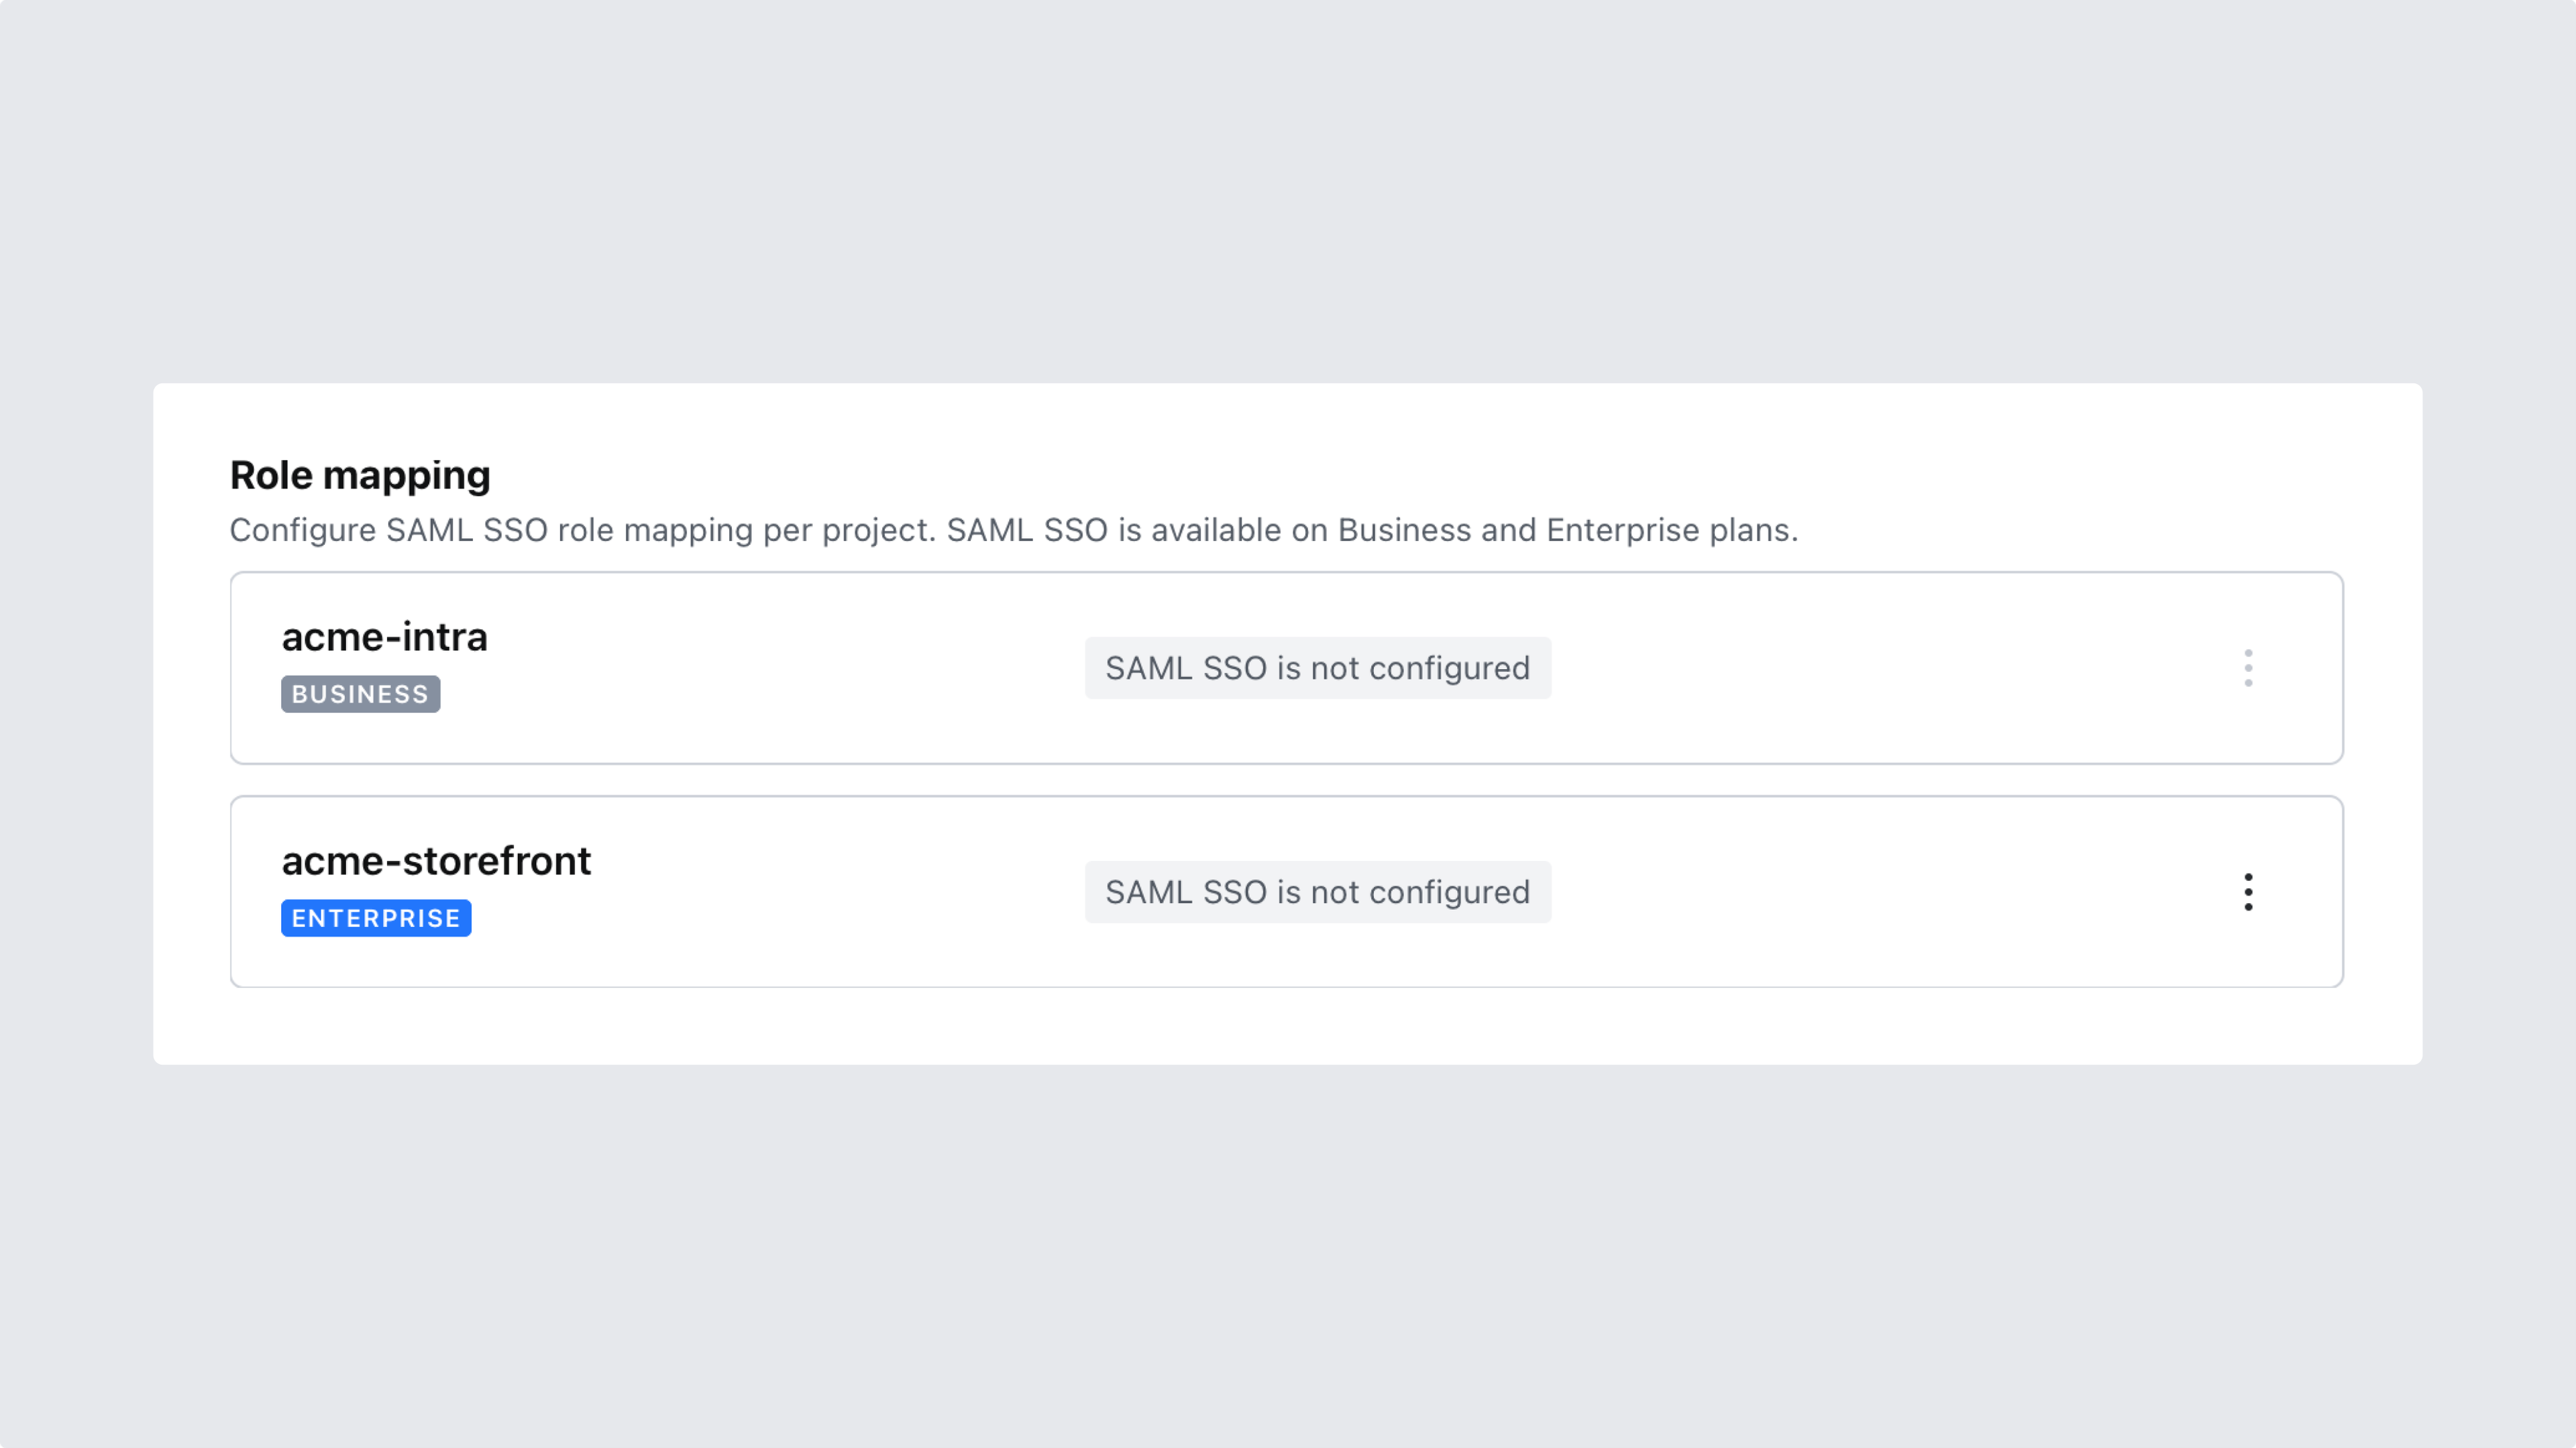
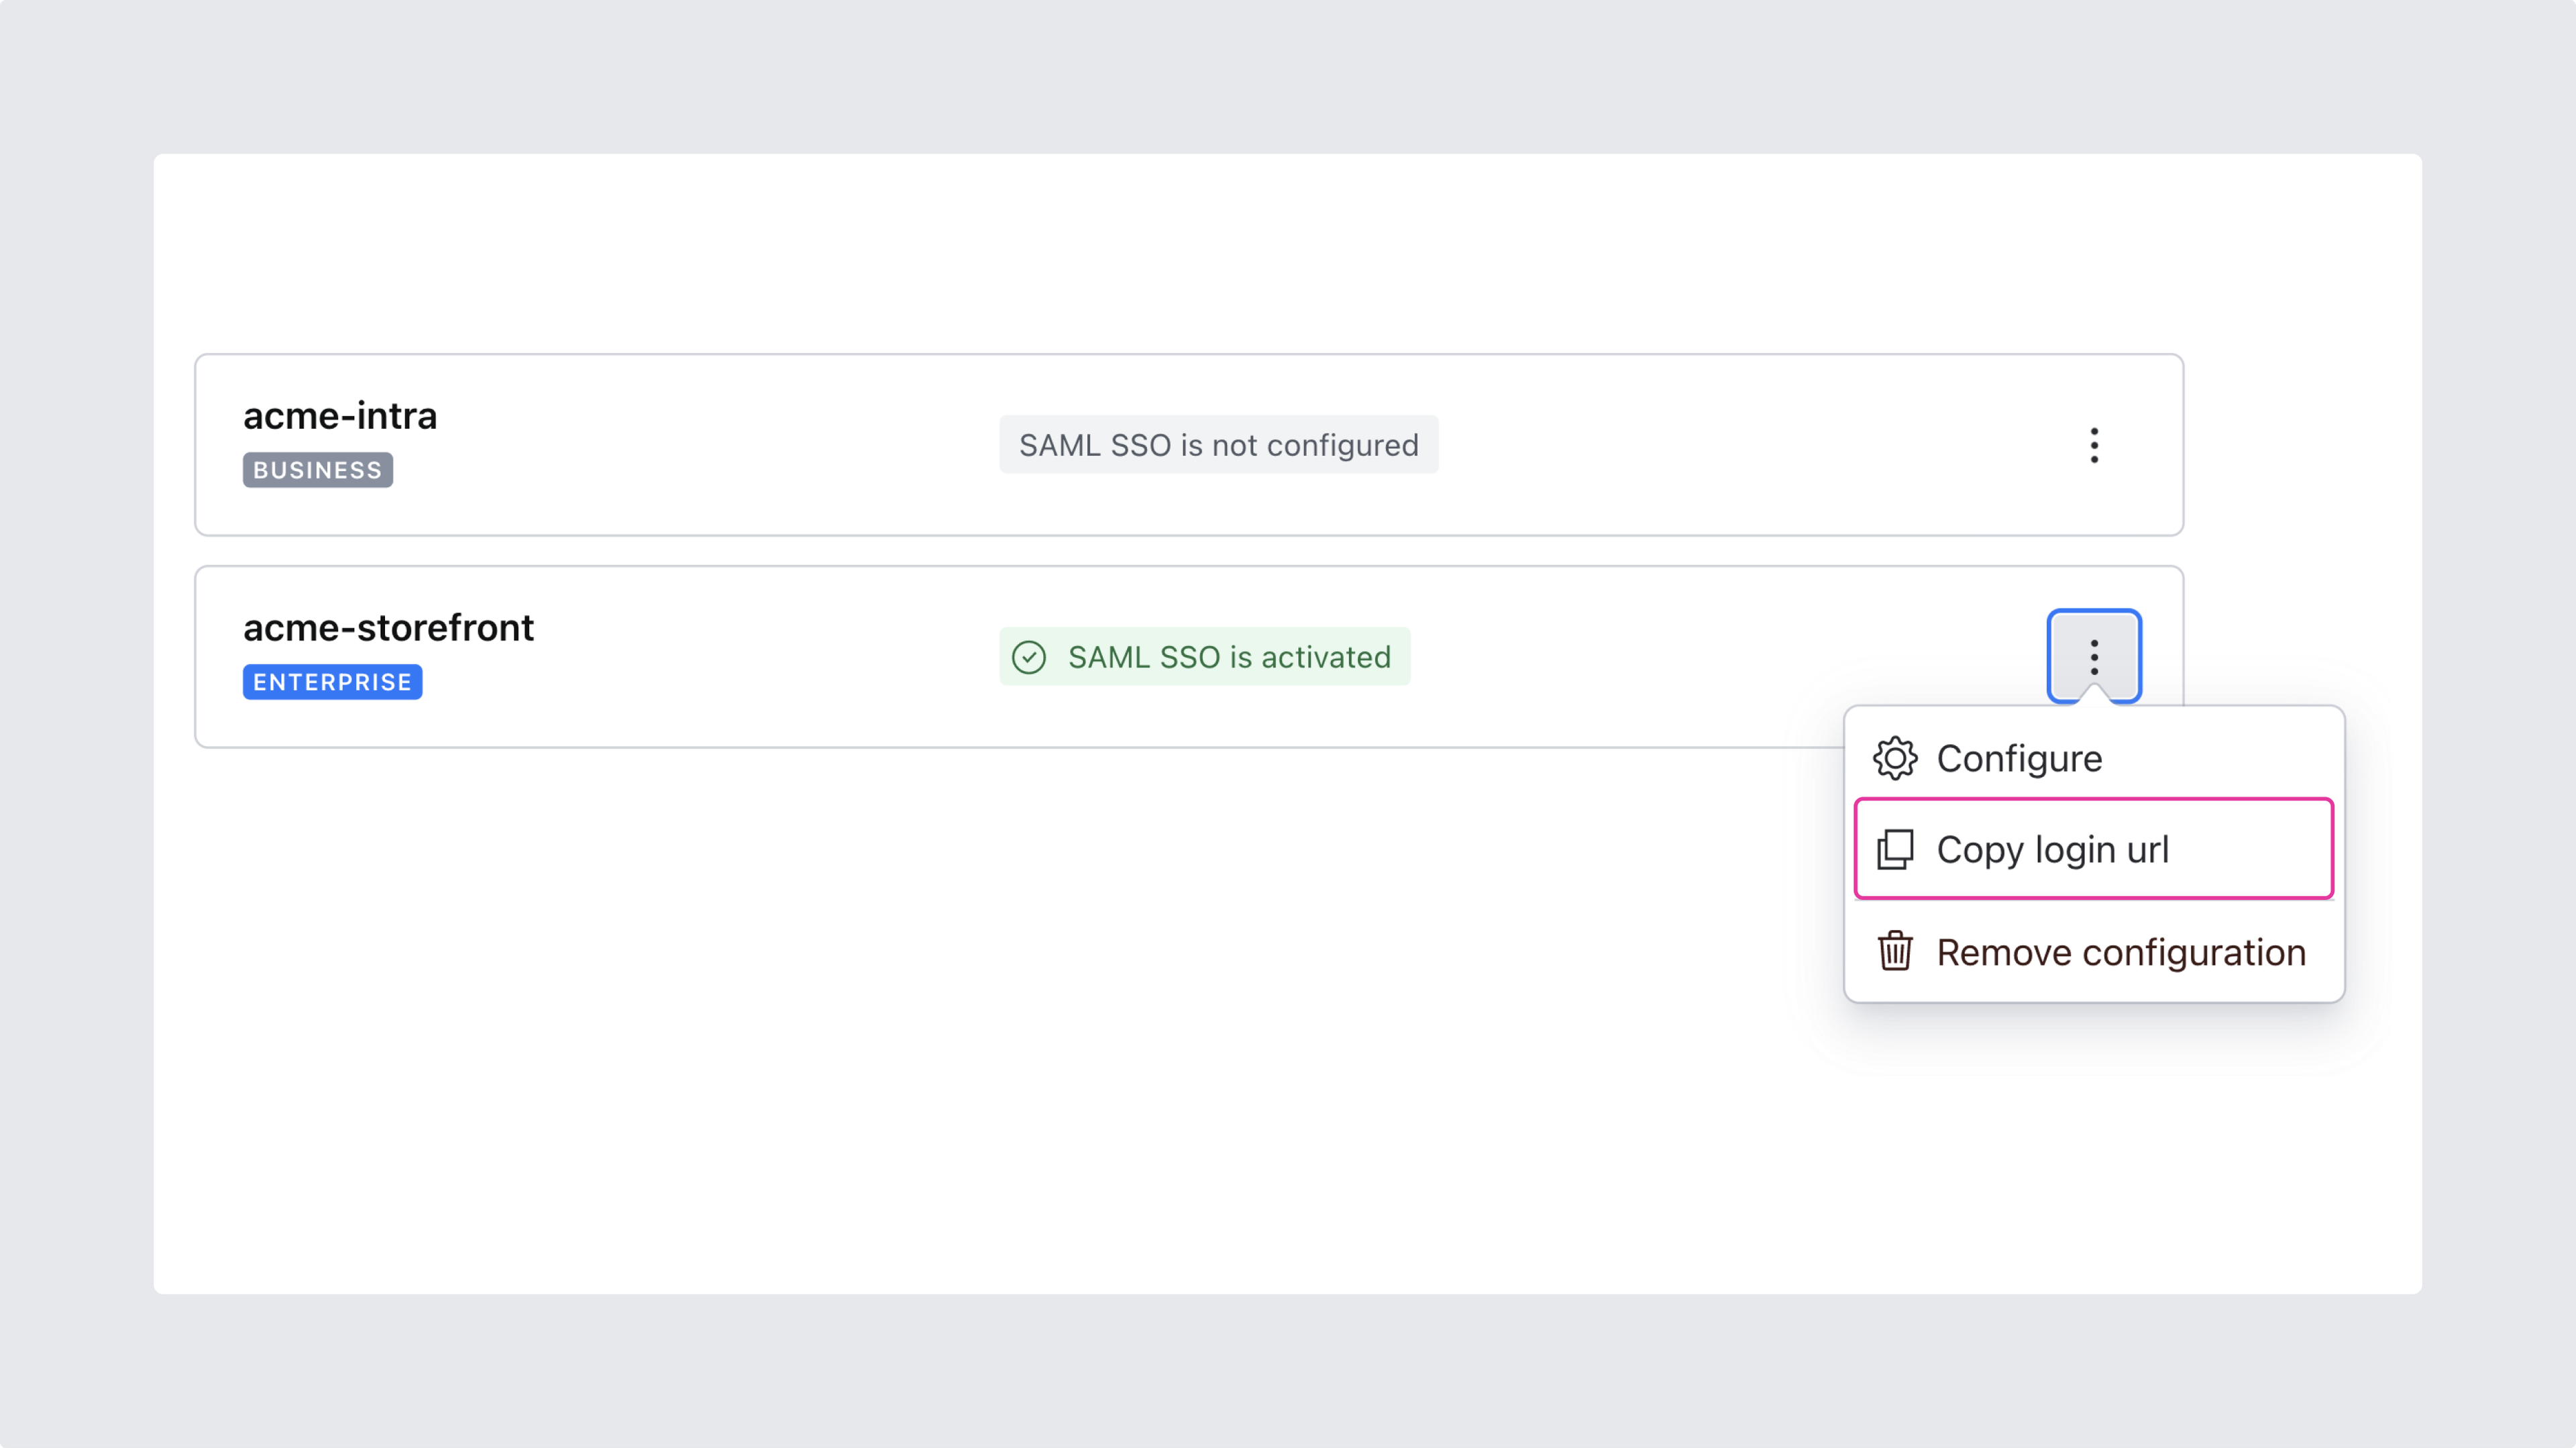
6. Enable SSO and configure role mapping for the desired projects
After saving your settings, you are ready to move on and enable SSO for one or several of your projects. In the process, you’ll also configure role mapping for each project.
This is a paid feature
This feature is available as an addon for the Growth plan.
In the role mapping dialog, you’ll set a default fallback role that will be applied to users who don’t belong to any groups matching your mapping rules, as well as rules to map groups from your SSO provider to roles in this project. Role mapping rules are evaluated against the group membership attribute of the user identity on the identity provider, and they support regular expression syntax (note that backreferences and lookahead assertions are not supported). A few examples are listed below:
editorswill match exactlyeditors.*-adminwill matchnews-admin,sales-admin, and-admin[aA]dminwill matchadminandAdmin
7. Test your configuration by attempting to log in
Before setting up your studio to use the new SSO setting, make sure everything is working as expected by visiting the project-specific link provided and logging in to your project management console. Copy-paste the Sanity manage project-specific login URL into your browser's address bar. If correctly set up, this will log you out of your current account and into the user account given to you by your SSO identity provider. It might be convenient to test this in another browser.
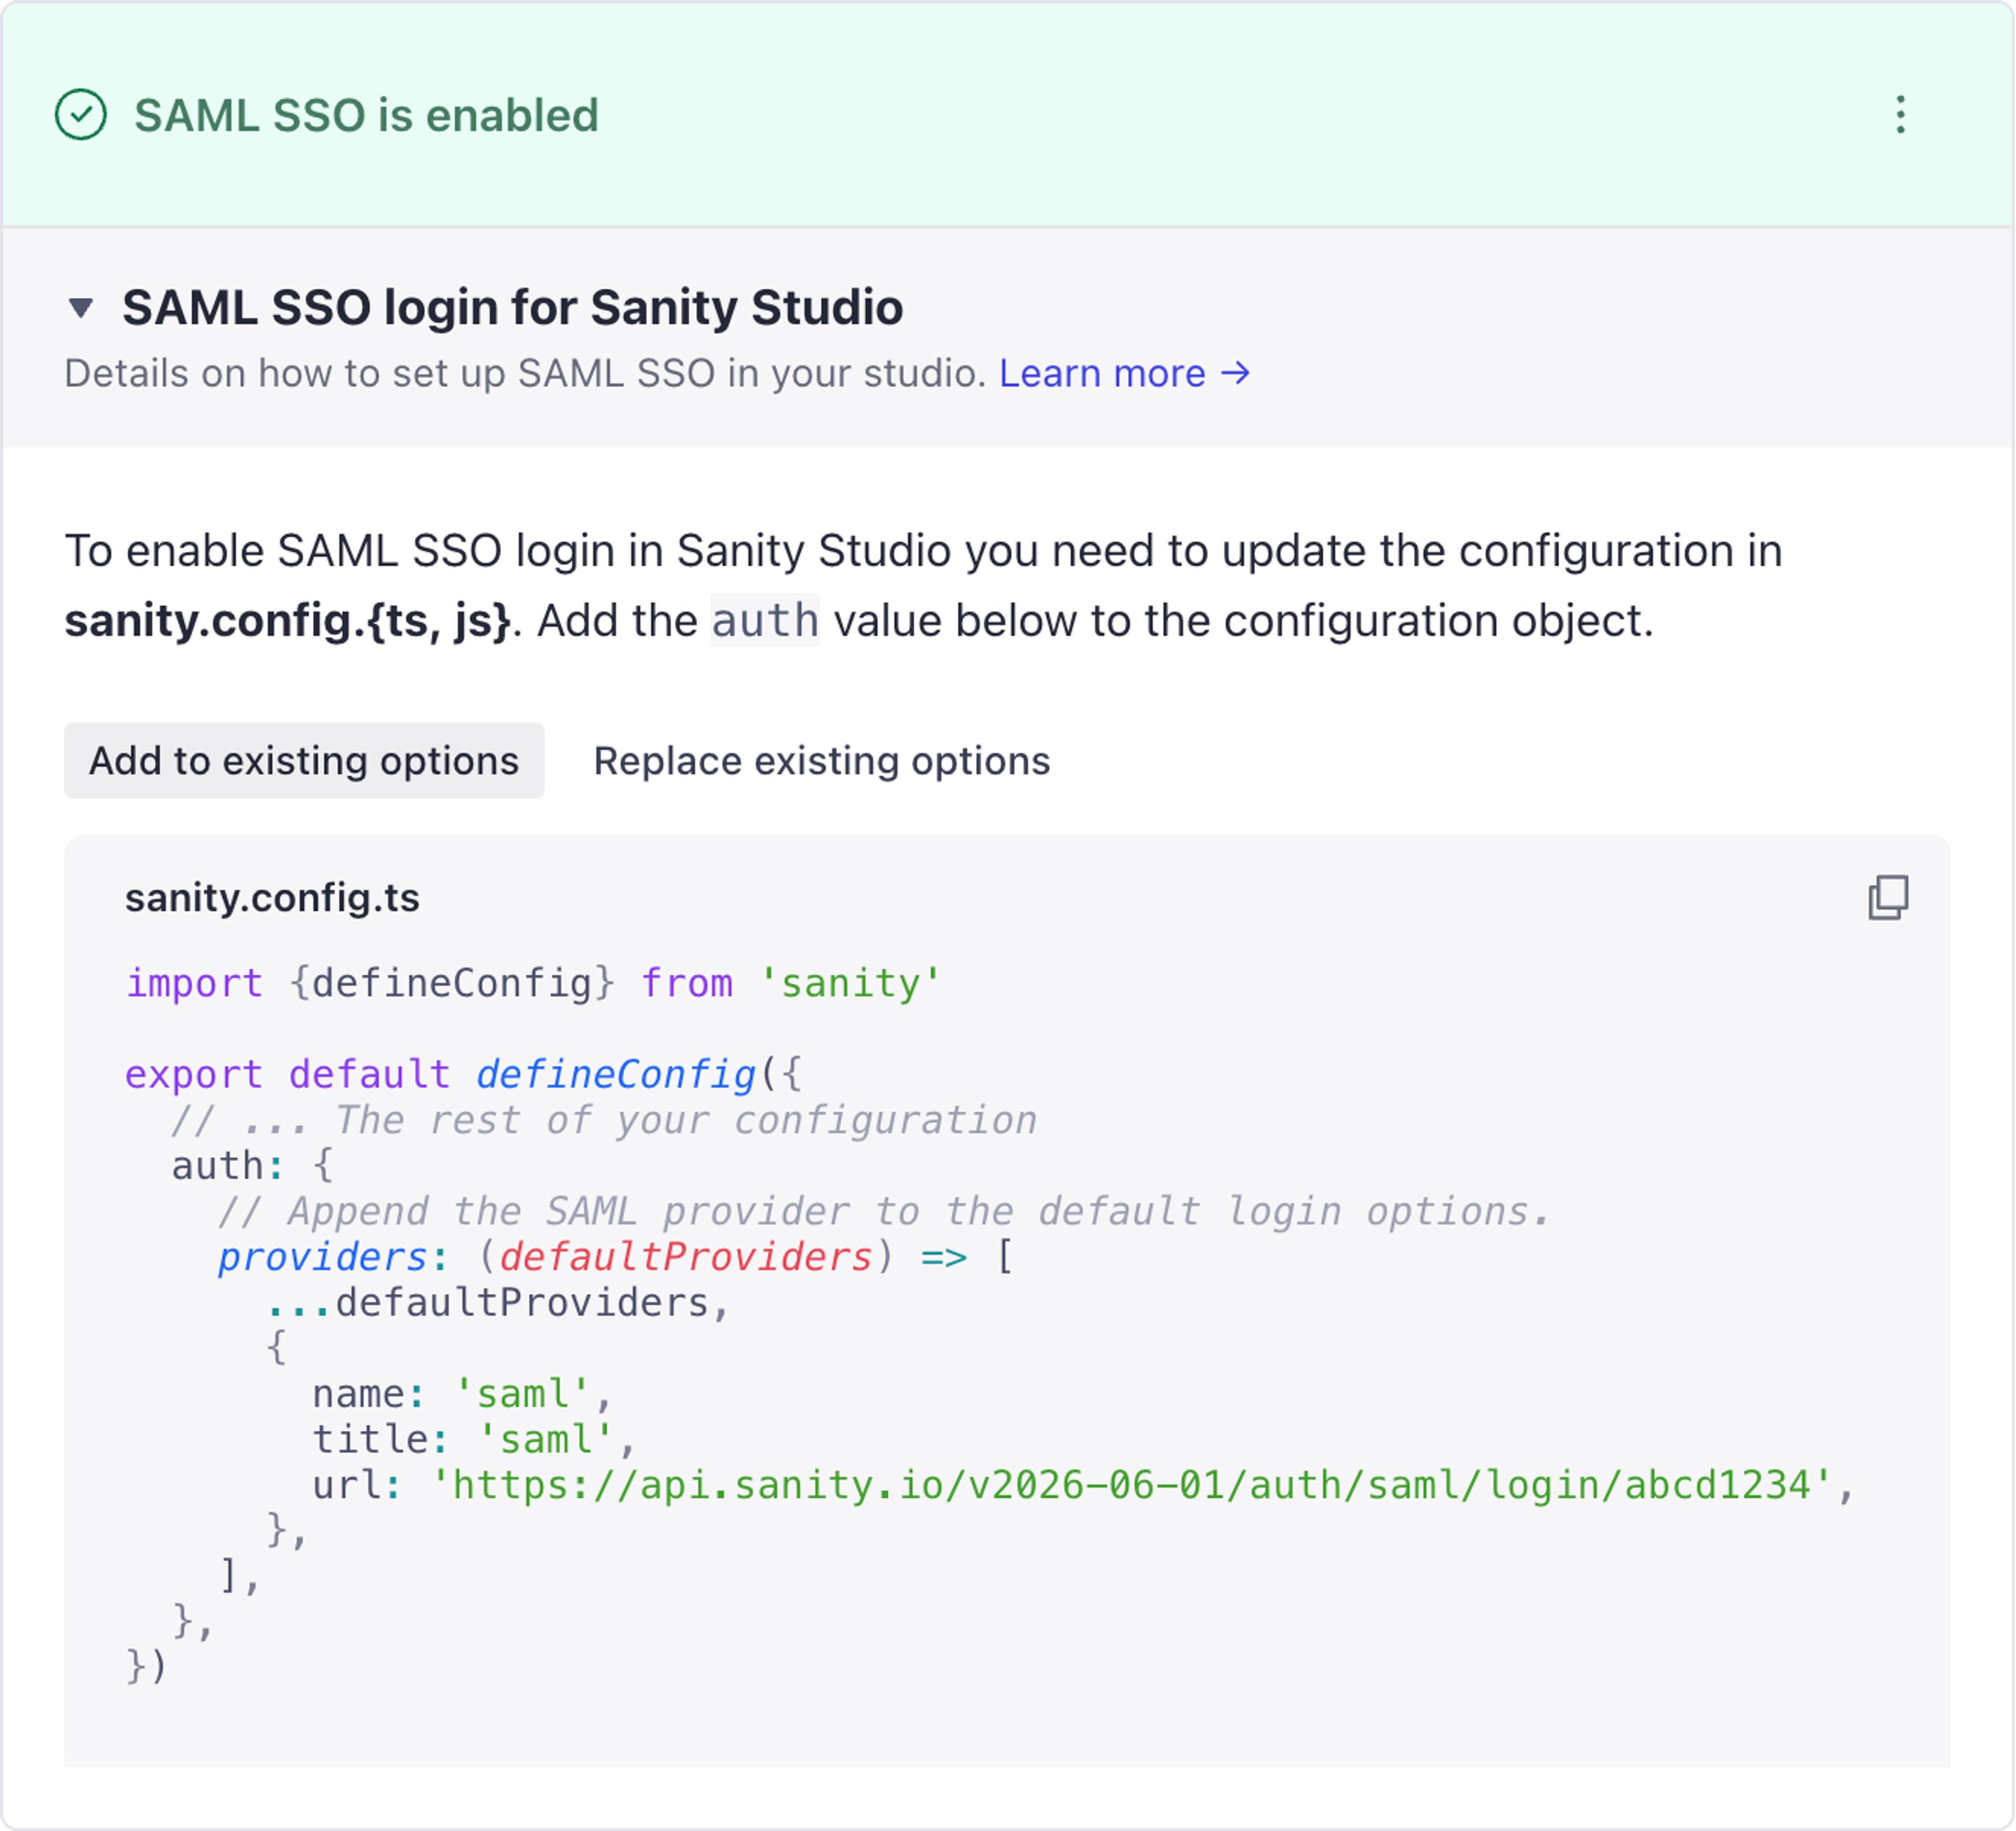
8. Configure the Studio to use the new SSO provider
Next, you'll want to update your Studio to show the login screen from your SSO identity provider by using the custom authentication configuration. Instructions for both v3 and v2 studios can be found by expanding the dropdown labeled SAML SSO login for Sanity Studio.
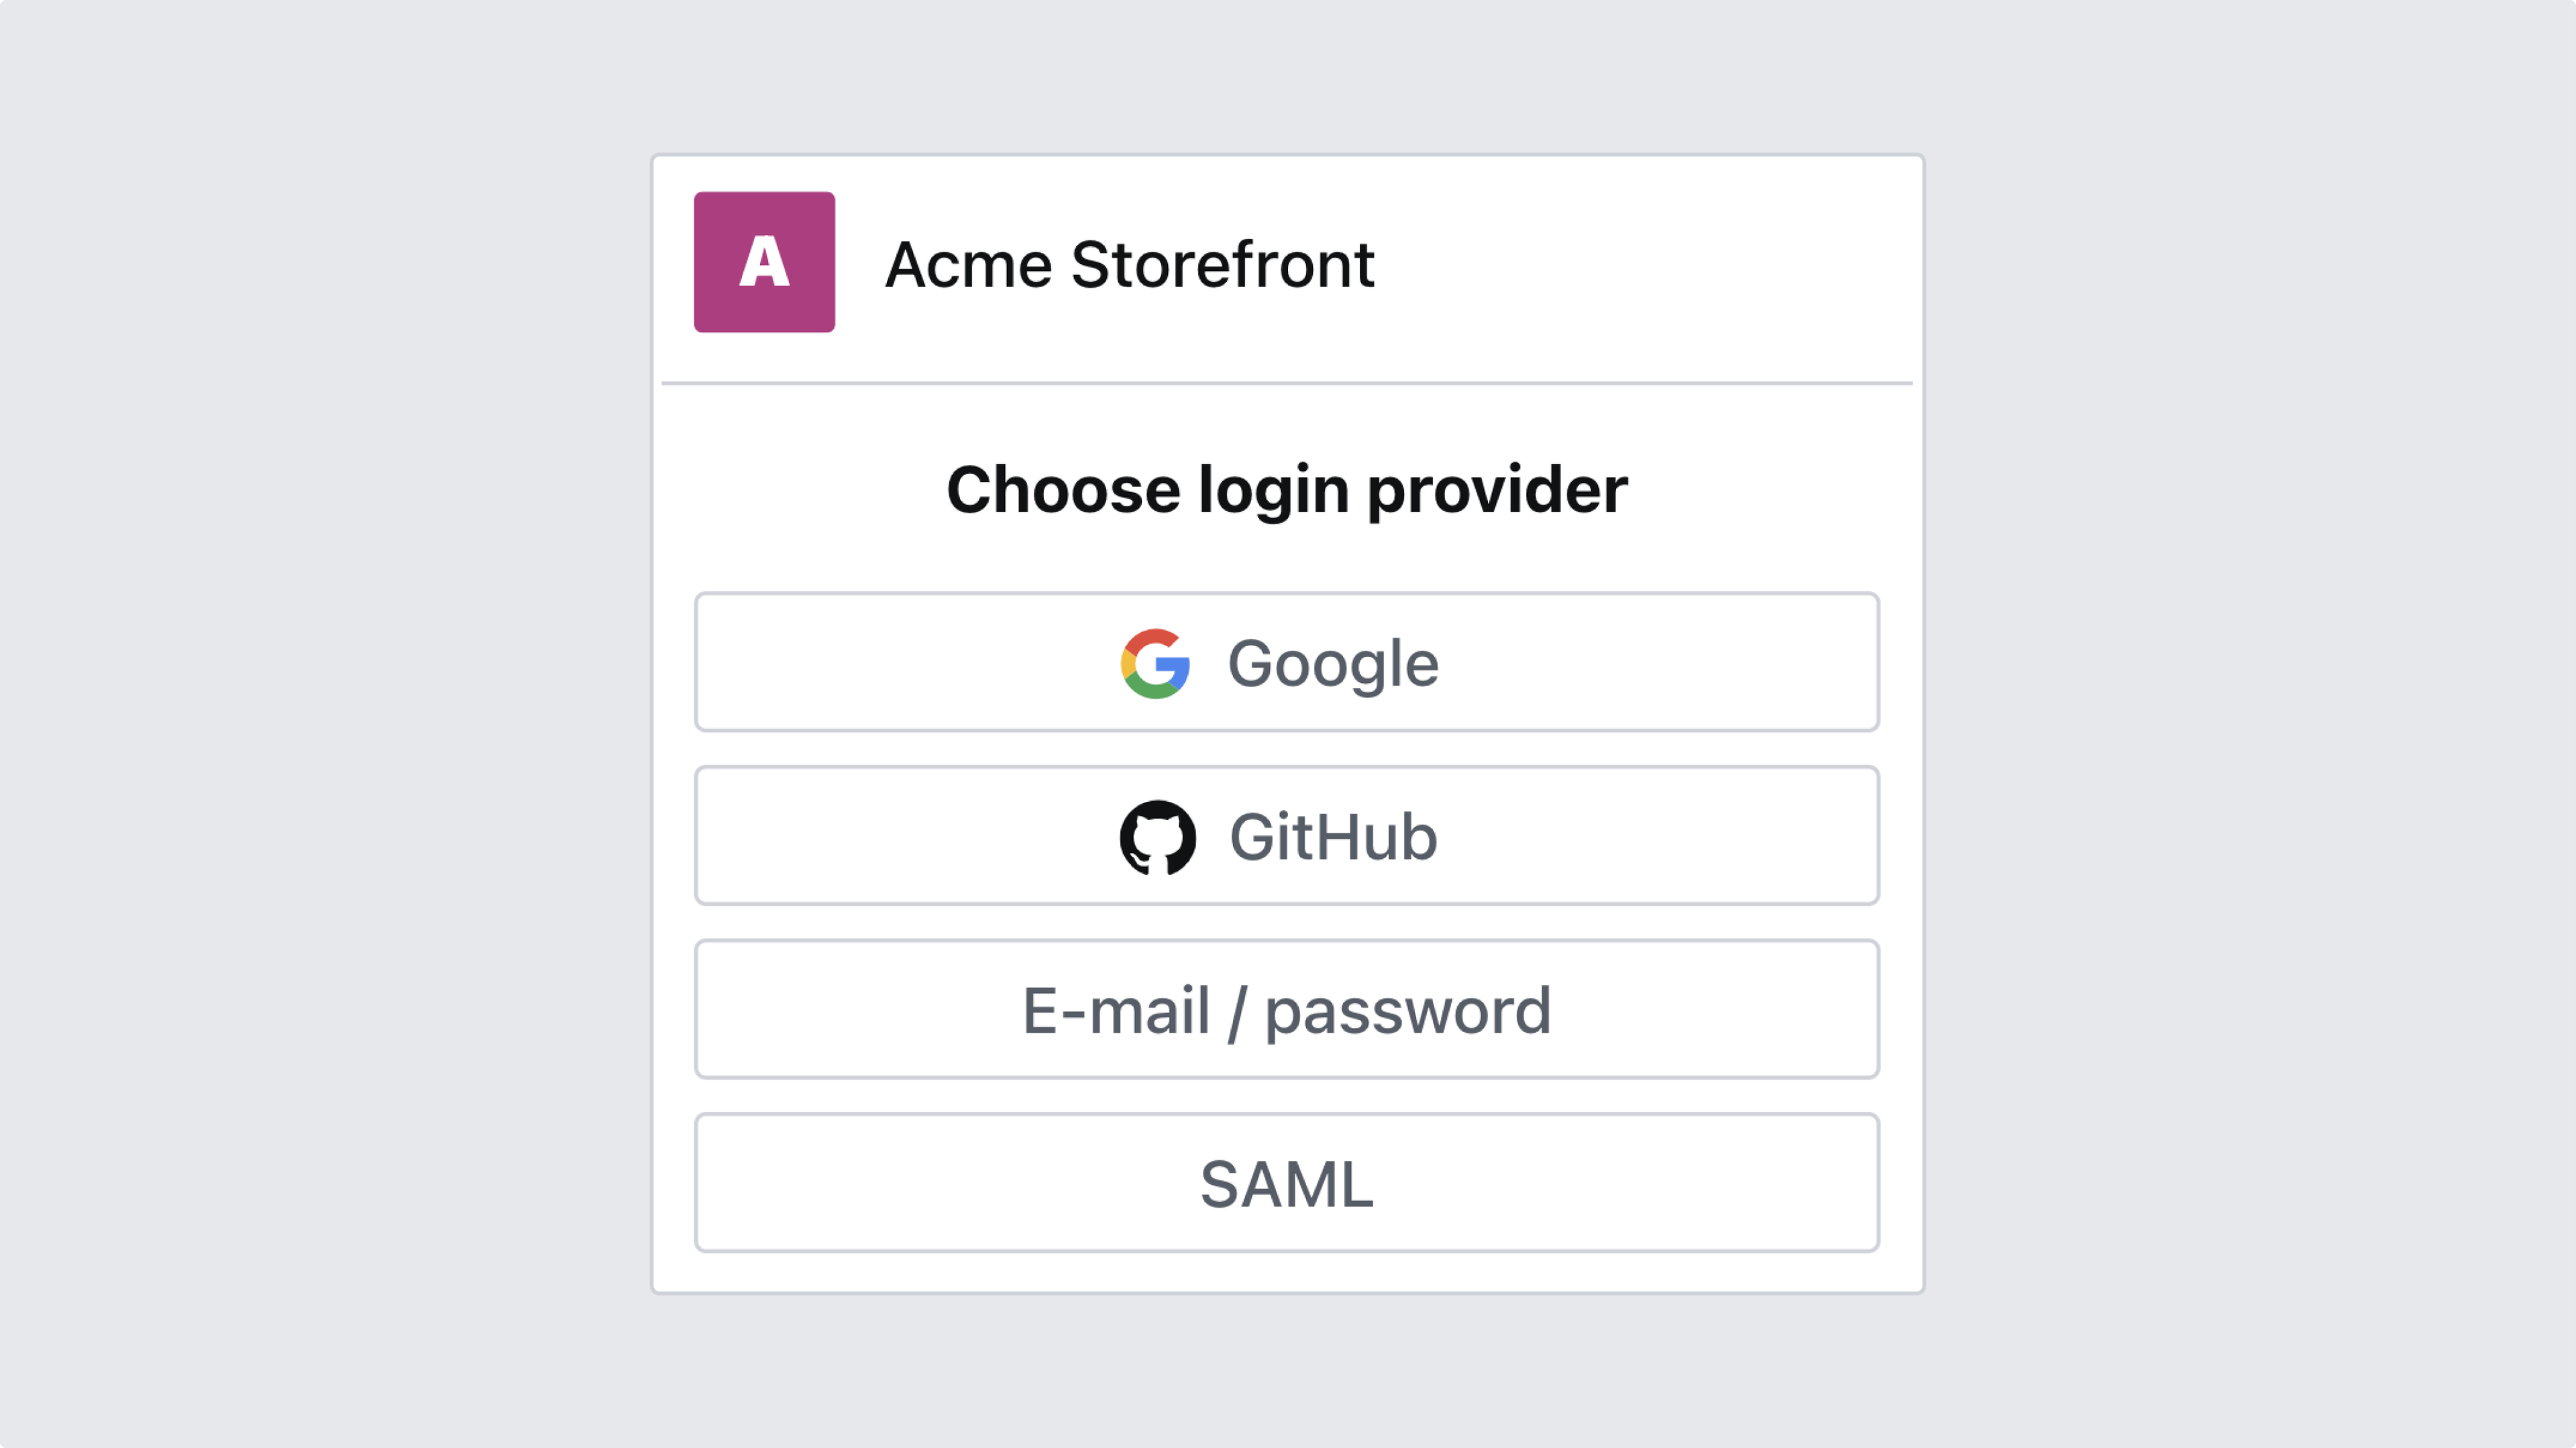
9. Verify by logging in with SSO
Finally, verify that the configuration works as expected by logging in as a user from your identity provider. Your login screen should list only the appropriate options.
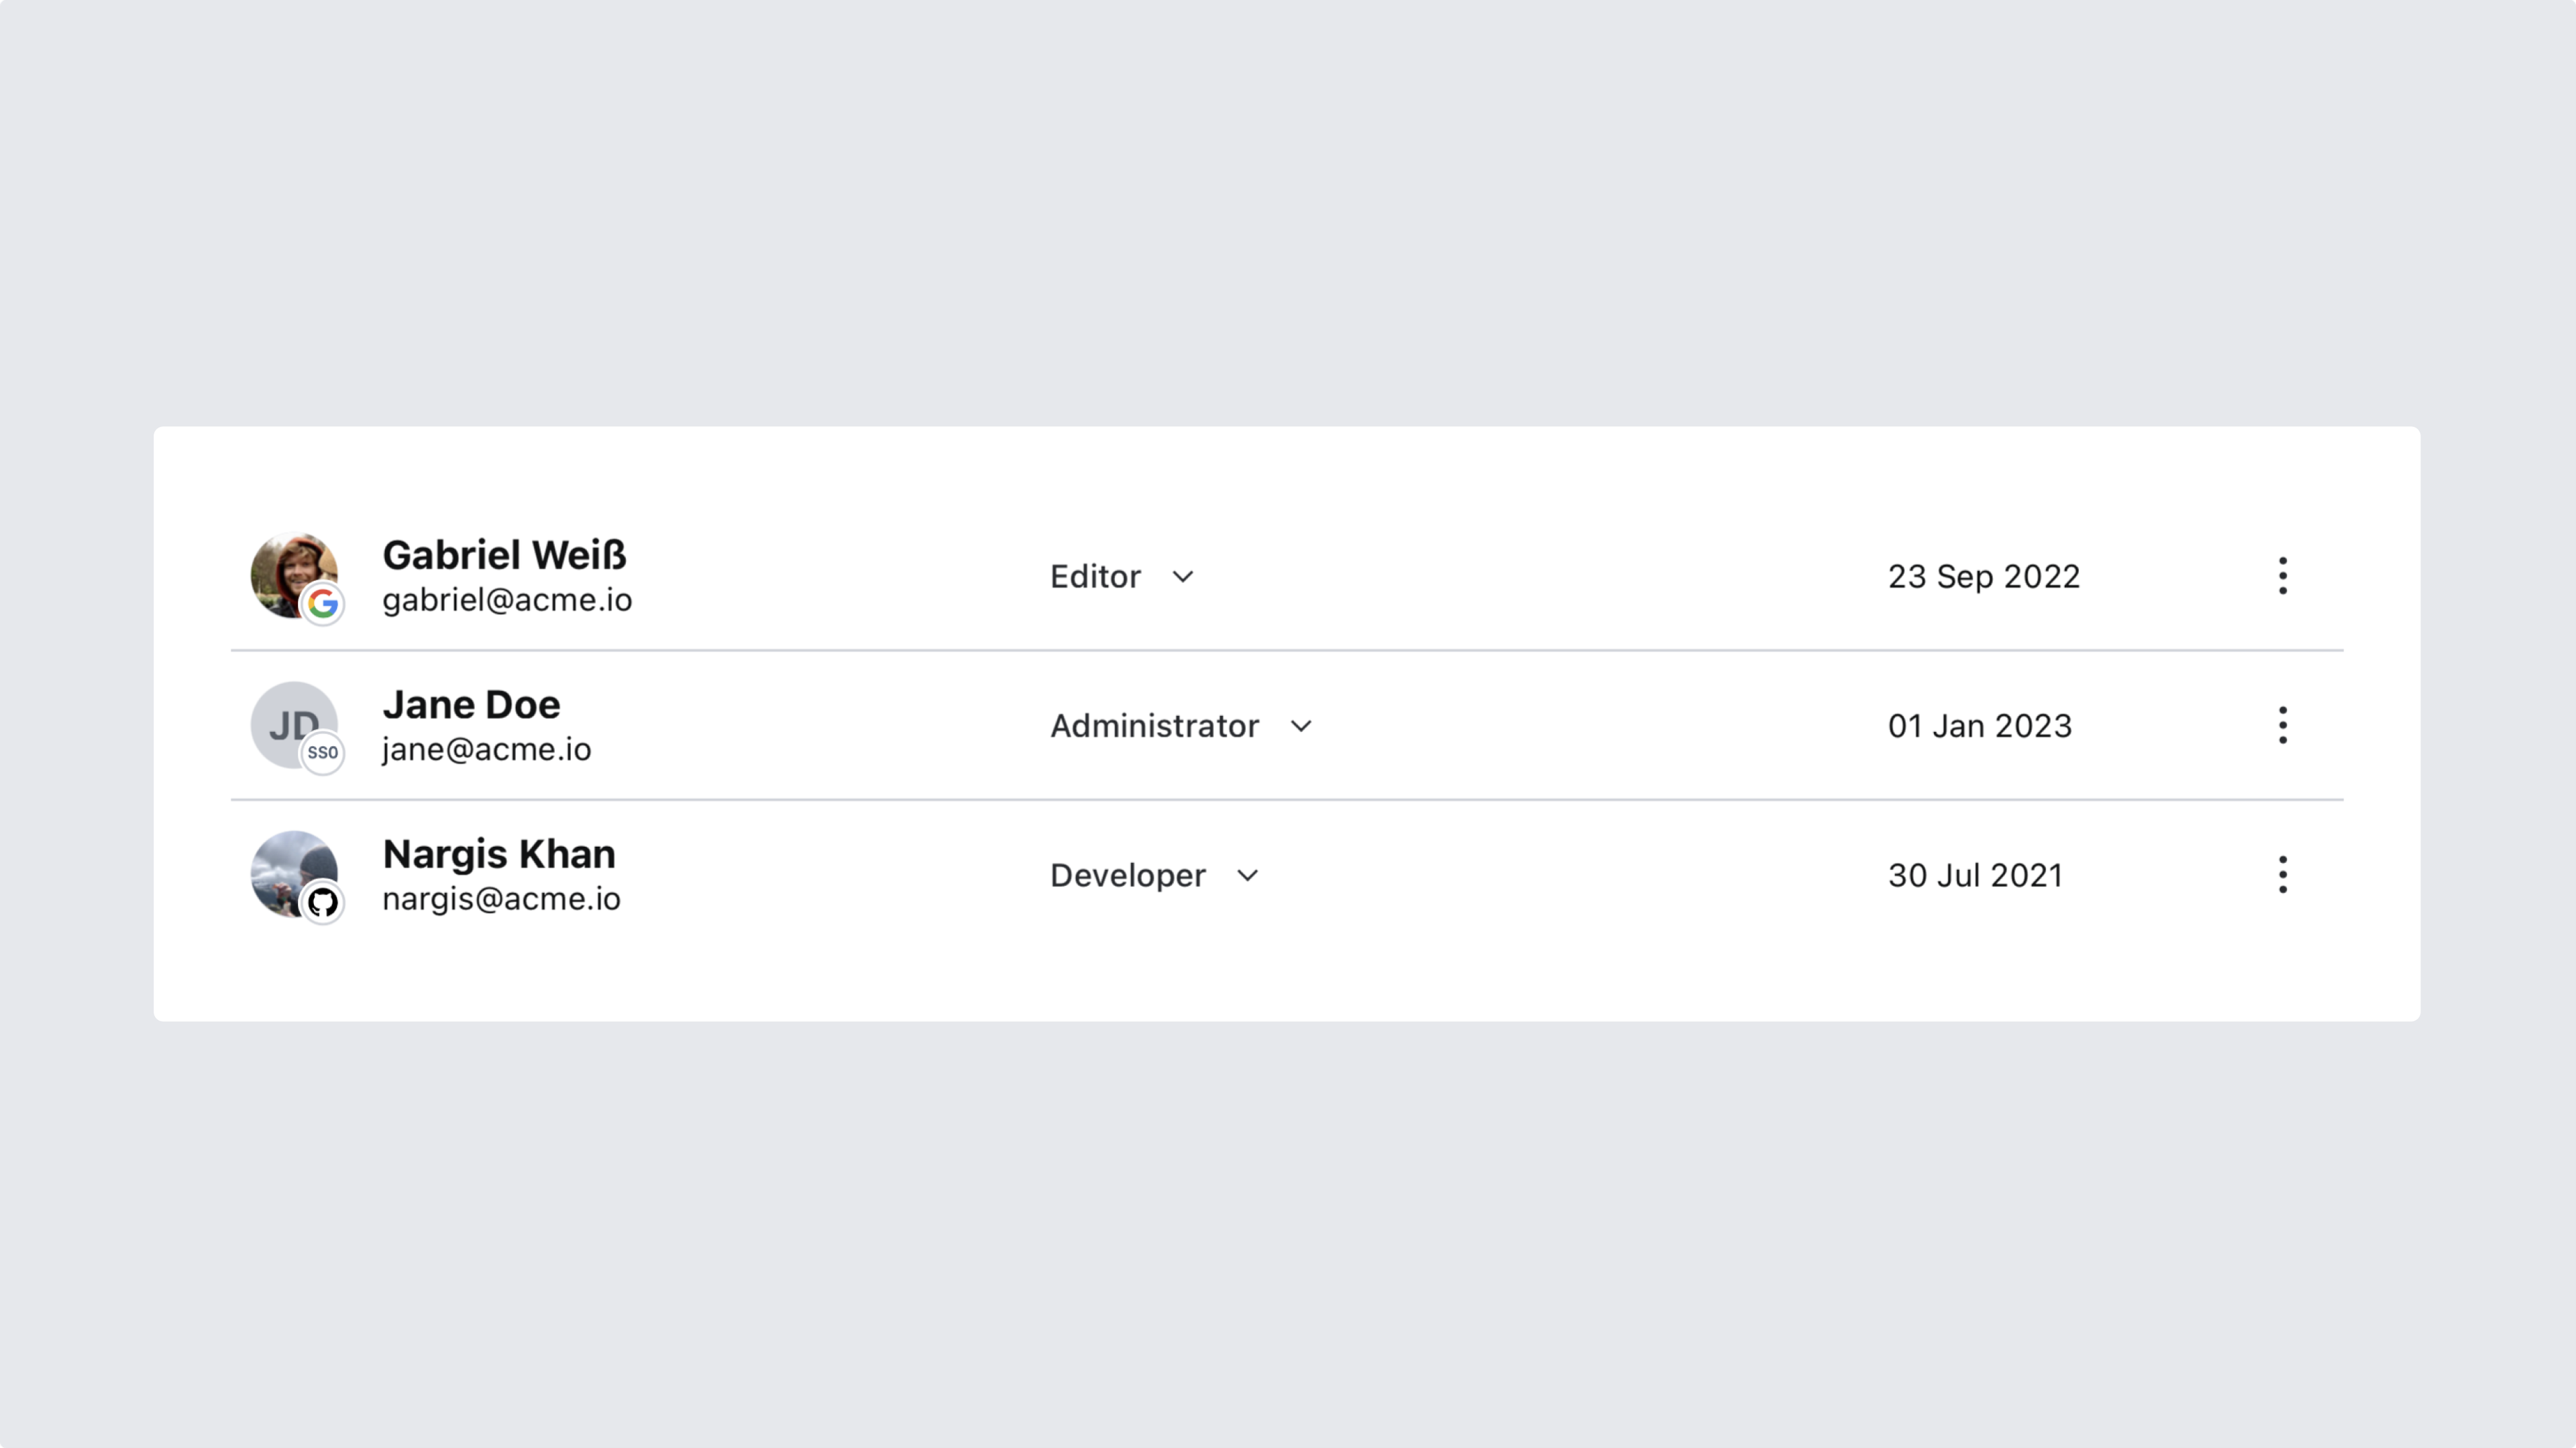
After logging in at least once with SAML SSO, you may want to check your organization's members in the management interface. You'll see a visual indicator on each member's avatar indicating what sign-in method they use, allowing you to quickly make any adjustments, such as deleting or demoting accounts outside your identity provider domain.
Gotcha
SAML SSO members will take up an additional seat toward your quota since they are considered individual users in Sanity. Checking your member list for duplicates is recommended after changing your identity provider.
Next steps
Now that SAML SSO is set up for your organization, learn more about managing access and authentication in Sanity.