Installing and configuring plugins
Learn how to extend and customize Sanity Studio with plugins.
Plugins for Sanity Studio are installed just like any other dependency in your project, using your package manager of choice – such as yarn or npm. For the remainder of this article, we'll assume you're using npm.
After installation, a plugin must be imported from the package and added to the plugins array in the studio configuration, commonly found at the root of your project in a file named sanity.config.js or .ts.
Example: Install @sanity/color-input
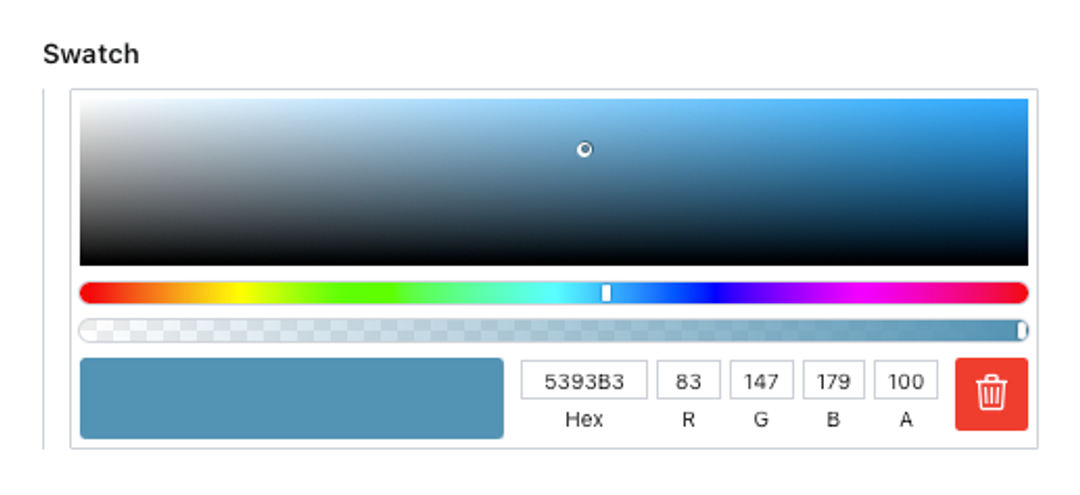
Let’s install @sanity/color-input. It adds color as a schema type and provides a handy color picker to select the color value.
Gotcha
Whether you are installing a plugin or looking at the source code to learn how it works, make sure you are looking at the correct version. Some older plugins may contain versions tied to older versions of Sanity Studio (like v2).
Navigate to your project's root folder and run the following command in your terminal to install the plugin:
npm install @sanity/color-inputpnpm add @sanity/color-inputyarn add @sanity/color-inputbun add @sanity/color-inputThen open your project configuration and import the colorInput function from the plugin package. Then add the colorInput() function call to the plugins array. Take care to include the parenthesis, as shown in the example. Then, finally, add a color field to any of your schemas.
import {defineConfig} from 'sanity'
import {colorInput} from '@sanity/color-input'

export default defineConfig({
	// here we add the @sanity/color-input plugin to the Studio
  plugins: [colorInput()],

  // example schema
  schema: {
    types: [
      {
        type: 'document',
        name: 'color-demo',
        title: 'Document with color field',
        fields: [
          {
           // The 'color' schema type was added by the plugin
            type: 'color',
            name: 'mySwatch',
            title: 'Swatch',
          },
        ],
      },
    ],
  },
})
You should be rewarded with a color picker widget in your studio.
Configure
Some plugins are configurable. Configuration is provided as an argument to the plugin function and supplied when the function is added to the plugins array.
Example: configure Vision
Let's Vision plugin as an example. It adds the GROQ Vision tool to the studio, and there's a good chance you already have it configured with the default settings. While optional, it accepts a configuration object. In this example, we set a default API version and dataset.
import {defineConfig} from 'sanity'
import {visionTool} from '@sanity/vision'

export default defineConfig({
  // ...
  plugins: [
    visionTool({
      defaultApiVersion: 'v2025-08-19',
      defaultDataset: 'production',
    })
  ],
})
Get organized
Plugins are just snippets of Studio configuration. As your studio configuration grows, it can be helpful to organize distinct features into plugins. This reduces clutter and avoids huge inline functions in studio.config.ts. It also makes your config portable.