Typical use cases for Structure builder
An overview of typical use cases for structure builder, with code examples.
You can use Structure builder to customize how documents are grouped and listed in the Sanity Studio. In this article, you find some common, but minimal use cases with complete code examples. You may want to work through the introduction guide first. For more in-depth documentation of the methods in Structure builder, check out the reference documentation.
Adding structure to the structureTool plugin
In this article we'll look at several different Structure Builder code examples that demonstrate various techniques. For the sake of brevity we will show how to import and implement a structure in the root studio configuration just this once, unless there's something special to note on that part. Unless otherwise noted you may assume that the following should work for each structure example in this article.
import {defineConfig} from 'sanity'
import {structureTool} from 'sanity/structure'
import {schemaTypes} from './schemas'
import {deskStructure} from './deskStructure'
export default defineConfig({
name: 'default',
title: 'structure-builder-example',
projectId: '<projectId>',
dataset: 'production',
plugins: [
structureTool({
structure: deskStructure,
}),
],
schema: {
types: schemaTypes,
},
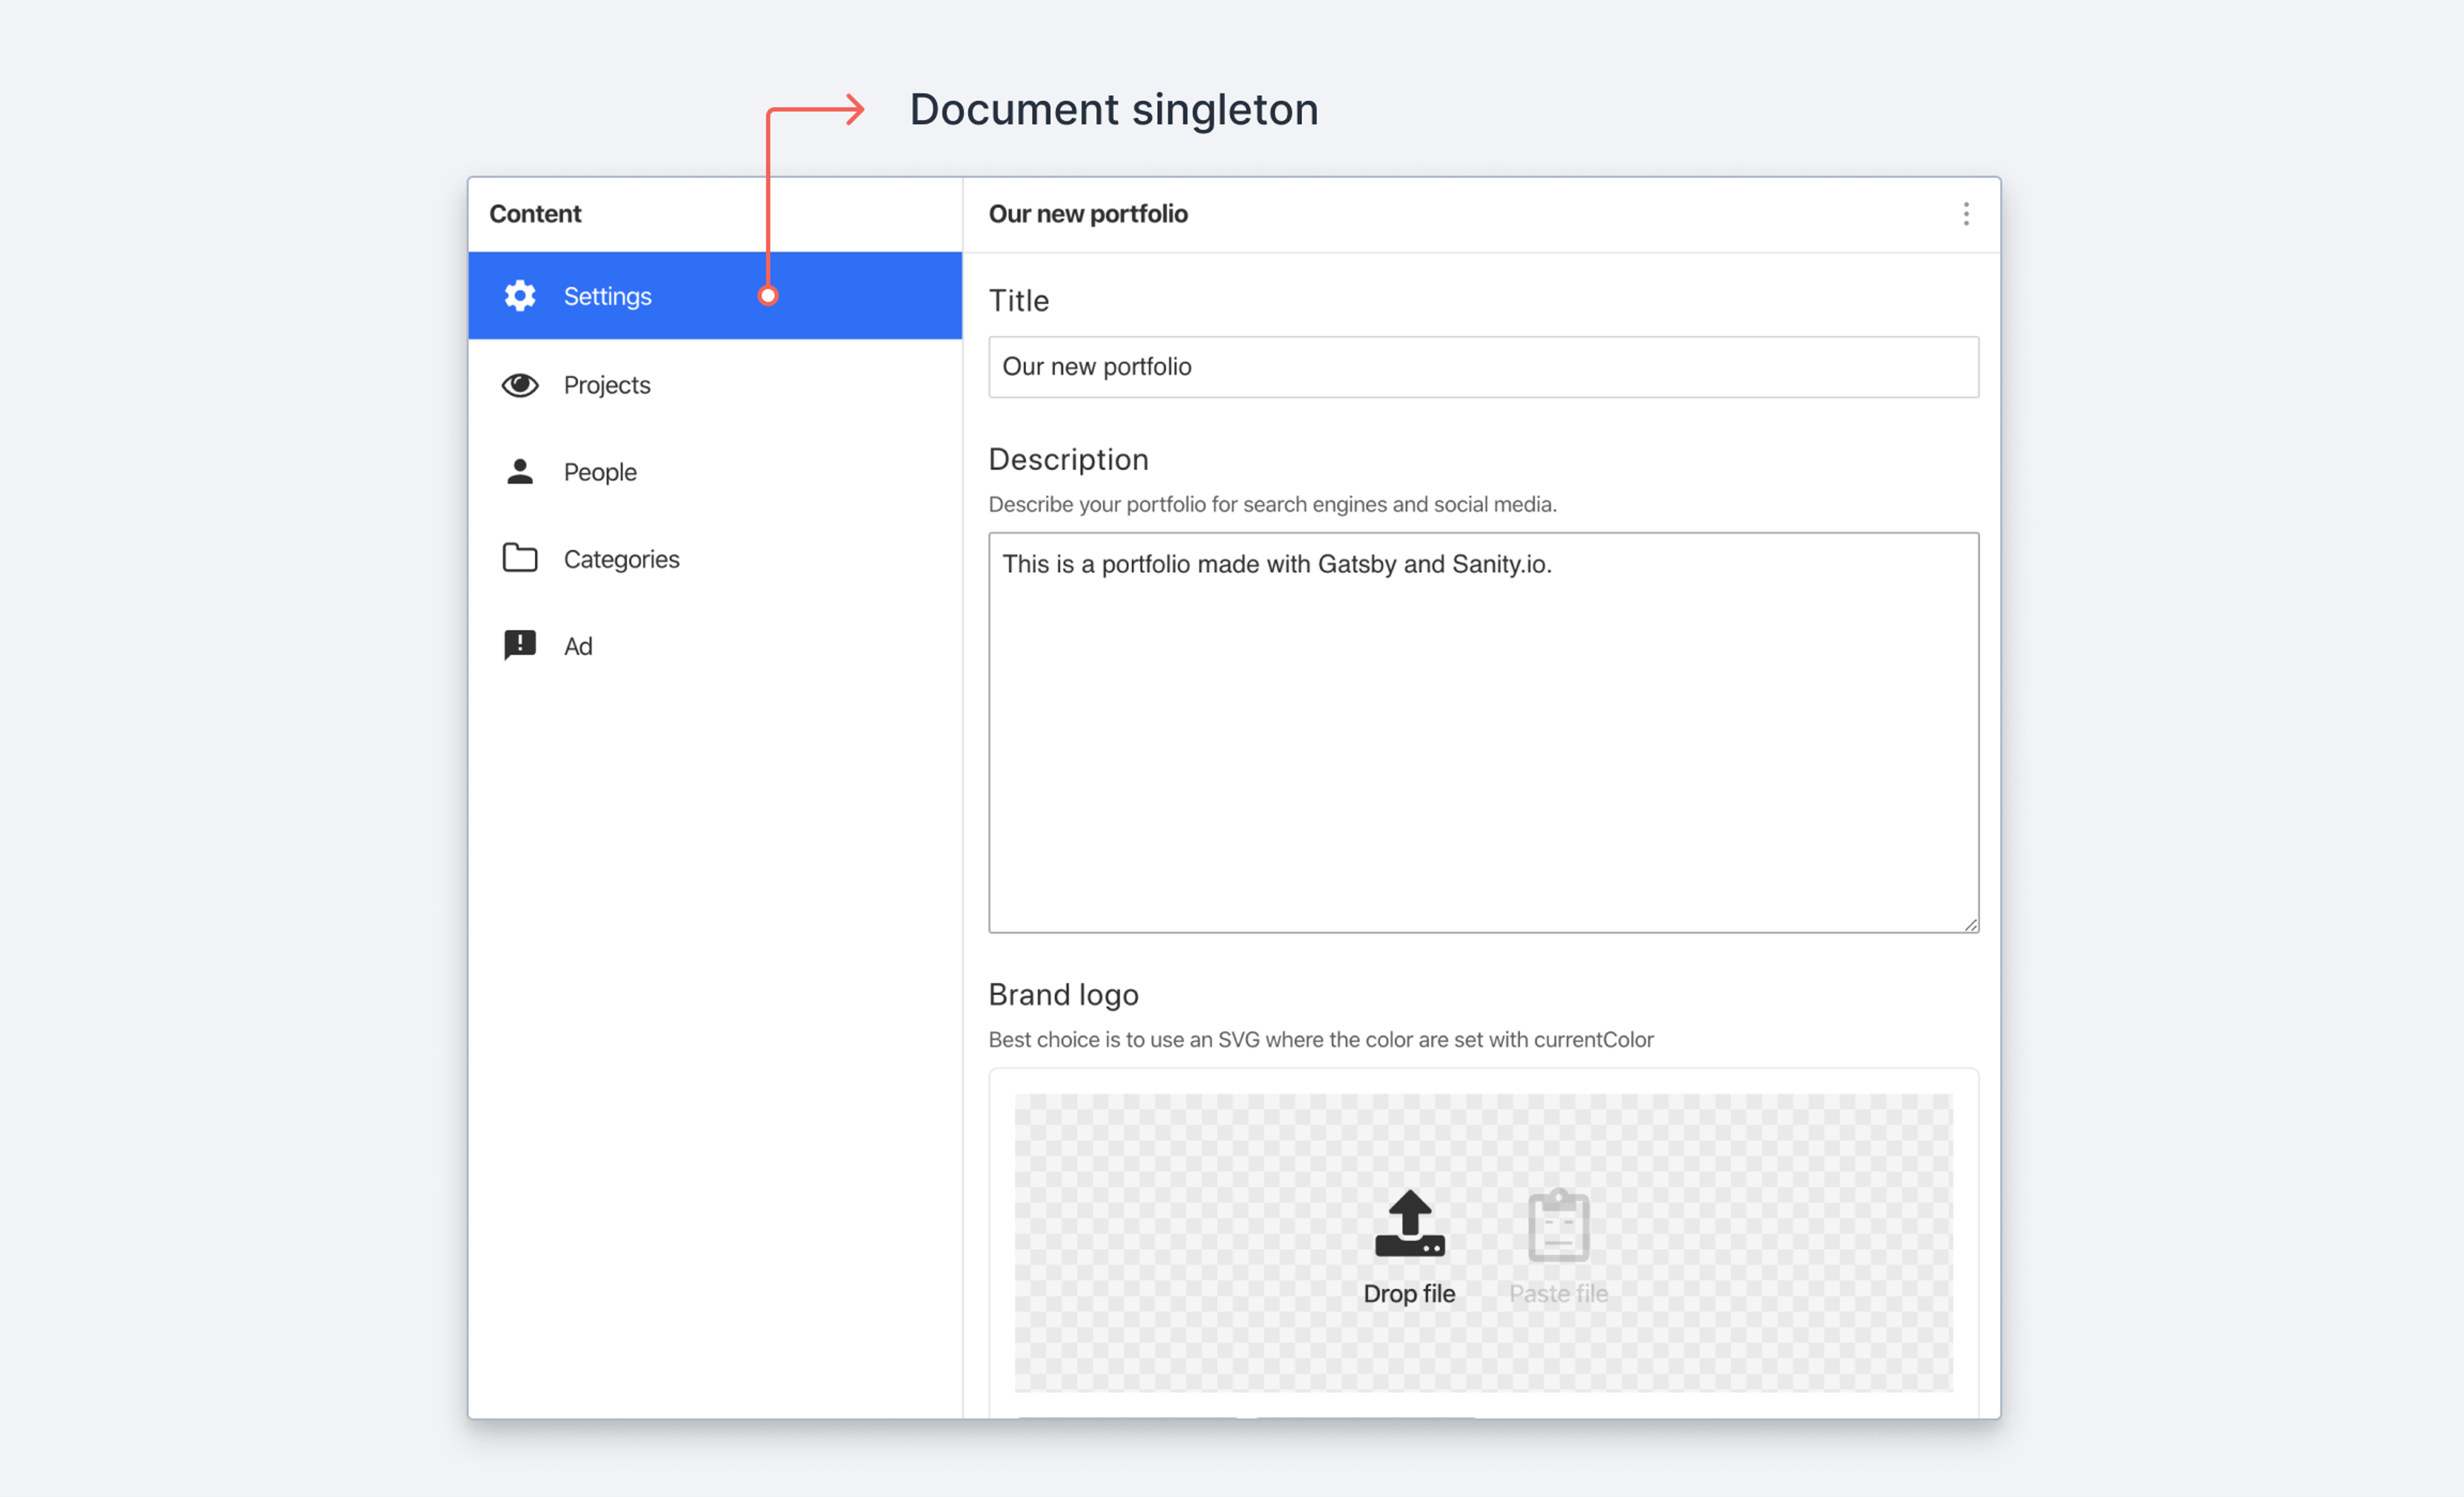
})Singletons and "one-off" documents
Often you want to restrict a document type to having just one document. This is typically some sort of global configuration, or information that's singular, such as your company’s contact information. When you add a document type, the Studio will per default allow people to create multiple documents of that type. You can use the Structure builder API to limit a document type to a limited set of document(s) with predefined id(s).
This approach is also future proofing your content model, because if the time comes where you need to have multiple configurations, or you need add contact information for your new branch, you can always “break out” of the singleton by reconfiguring the structure.
Let's look at an example:
// deskStructure.js
export const deskStructure = (S) =>
S.list()
.title('Content')
.items([
S.listItem()
.title('Site settings')
.child(
S.editor()
.schemaType('siteSettings')
.documentId('siteSettings')
),
// Add a visual divider (optional)
S.divider(),
// List out the rest of the document types, but filter out the config type
...S.documentTypeListItems()
.filter(listItem => !['siteSettings'].includes(listItem.getId()))
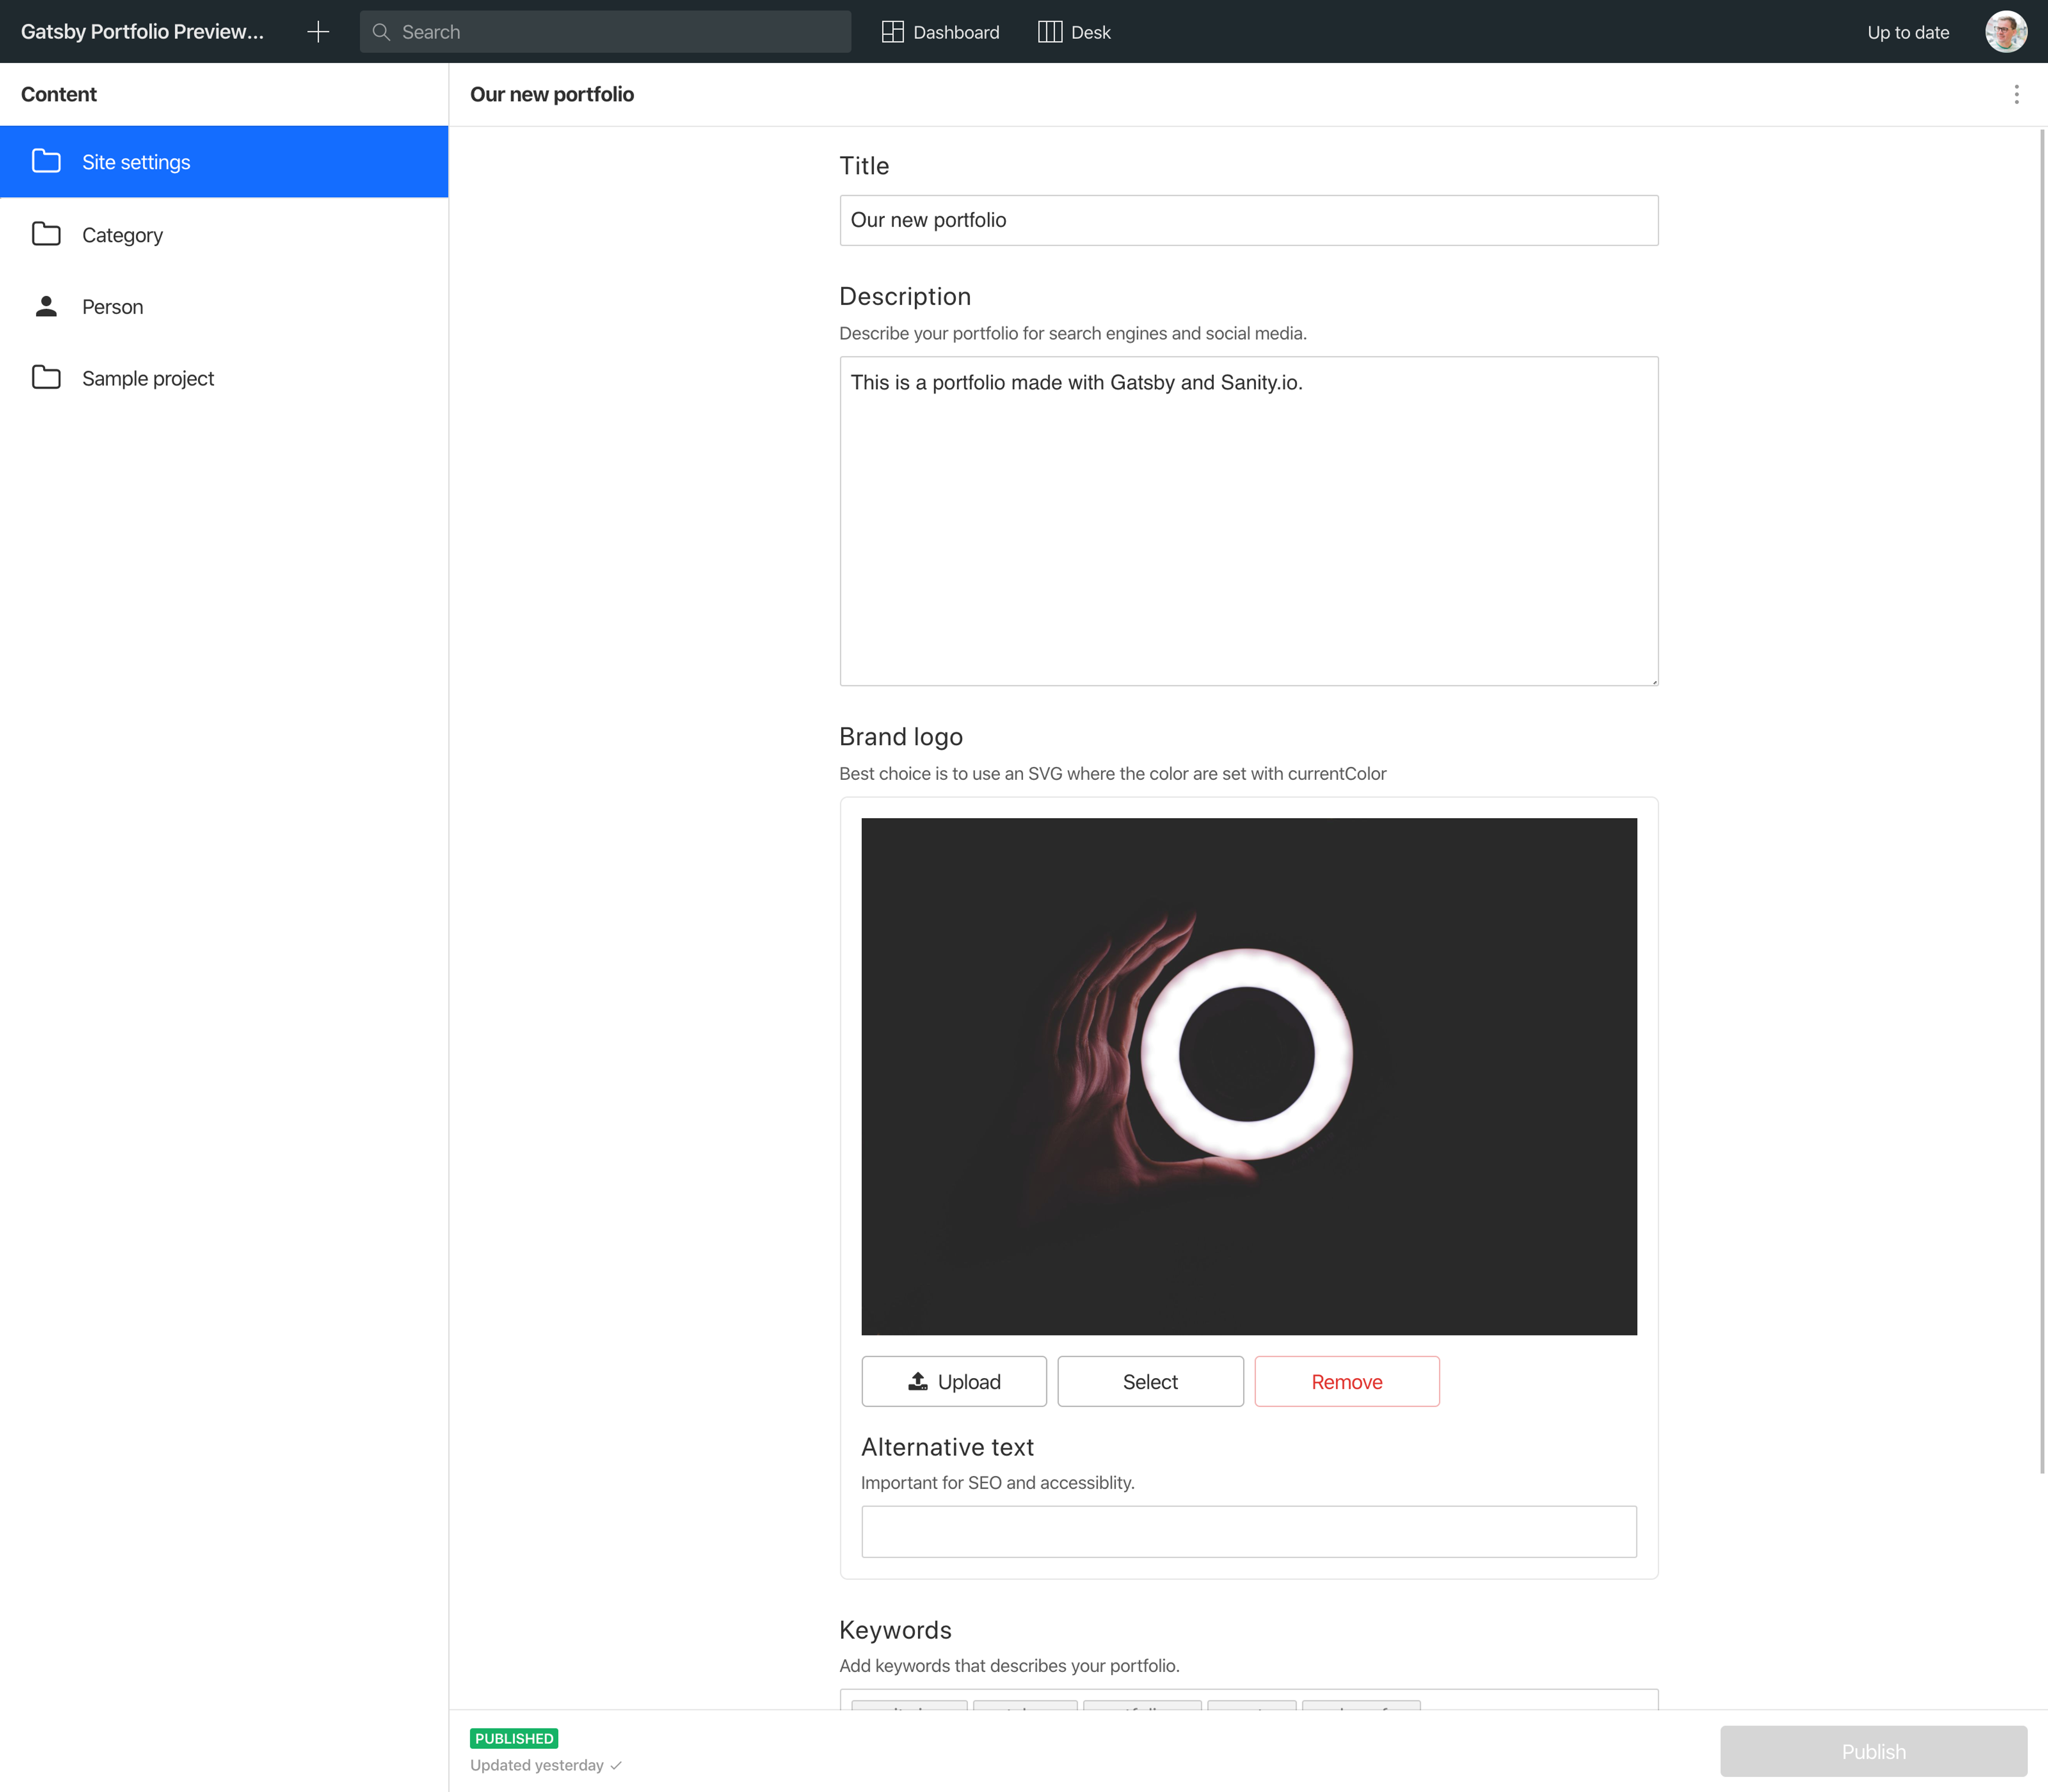
])This definition will produce the following document structure:
Manual grouping of documents
When a project matures, the content model tends to grow with many document types. At some point you probably want to organize these document types differently than listing them out in the root pane. With the Structure builder API you can override the default lists and add your own list items and define what goes into them.
Adding additional site settings documents
Building on the previous example, let's say you create another website, and want to use the same project and dataset to manage content there as well. You can add another settings document in your structure definition by adding an S.listItem in the top list, and in its child, add a new S.list that contains the “siteSettings” item, as well as your new “anotherSiteSettings” item.
// deskStructure.js

export const deskStructure = (S) =>
  S.list()
    .title('Content')
    .items([
      S.listItem()
        .title('Configs')
        .child(
          S.list()
            .title('Configs')
            .items([
              S.listItem()
                .title('Site Settings')
                .child(
                 S.document()
                  .schemaType('siteSettings')
                  .documentId('siteSettings')
                 ),
              S.listItem()
                .title('Another Site Settings')
                .child(
                 S.document()
                  .schemaType('siteSettings')
                  .documentId('anotherSiteSettings')
                 )
            ])
        ),
      // Add a visual divider (optional)
      S.divider(),
      // List out the rest of the document types, but filter out the config type
      ...S.documentTypeListItems()
        .filter(listItem => !['siteSettings'].includes(listItem.getId()))
    ])
Dynamic grouping of documents
It's often useful to group documents automatically by some field value, or a combination of field values. Common examples are grouping documents by author, publishing date periods, editorial status, by category, or even by the dominant background color in a document’s main image.
This example shows how you can list documents by the category documents they reference.
// deskStructure.js

export const deskStructure = (S) =>
  S.list()
    .title('Content')
    .items([
      // List out all the document types in schema.js
      ...S.documentTypeListItems(),
      // Add a new list item for projects by category
      S.listItem()
        .title('Projects by category')
        .child(
          // List out all categories
          S.documentTypeList('category')
            .title('Projects by category')
            .child(catId =>
              // List out project documents where the _id for the selected
              // category appear as a _ref in the project’s categories array
              S.documentList()
                .schemaType('sampleProject')
                .title('Projects')
                .filter(
                  '_type == "sampleProject" && $catId in categories[]._ref'
                )
                .params({ catId })
            )
        ),
    ])
The rationale here is that we first list out the available category documents, and then use their id (called catId in the configuration) in a GROQ filter to generate a list of sampleProject documents.
Gotcha
The .filter() function (that is, method) used in this example, is not the Array.prototype.filter function that you may be used to from JavaScript elsewhere. It is method connected to S.documentList() that returns documents from a GROQ-filter.
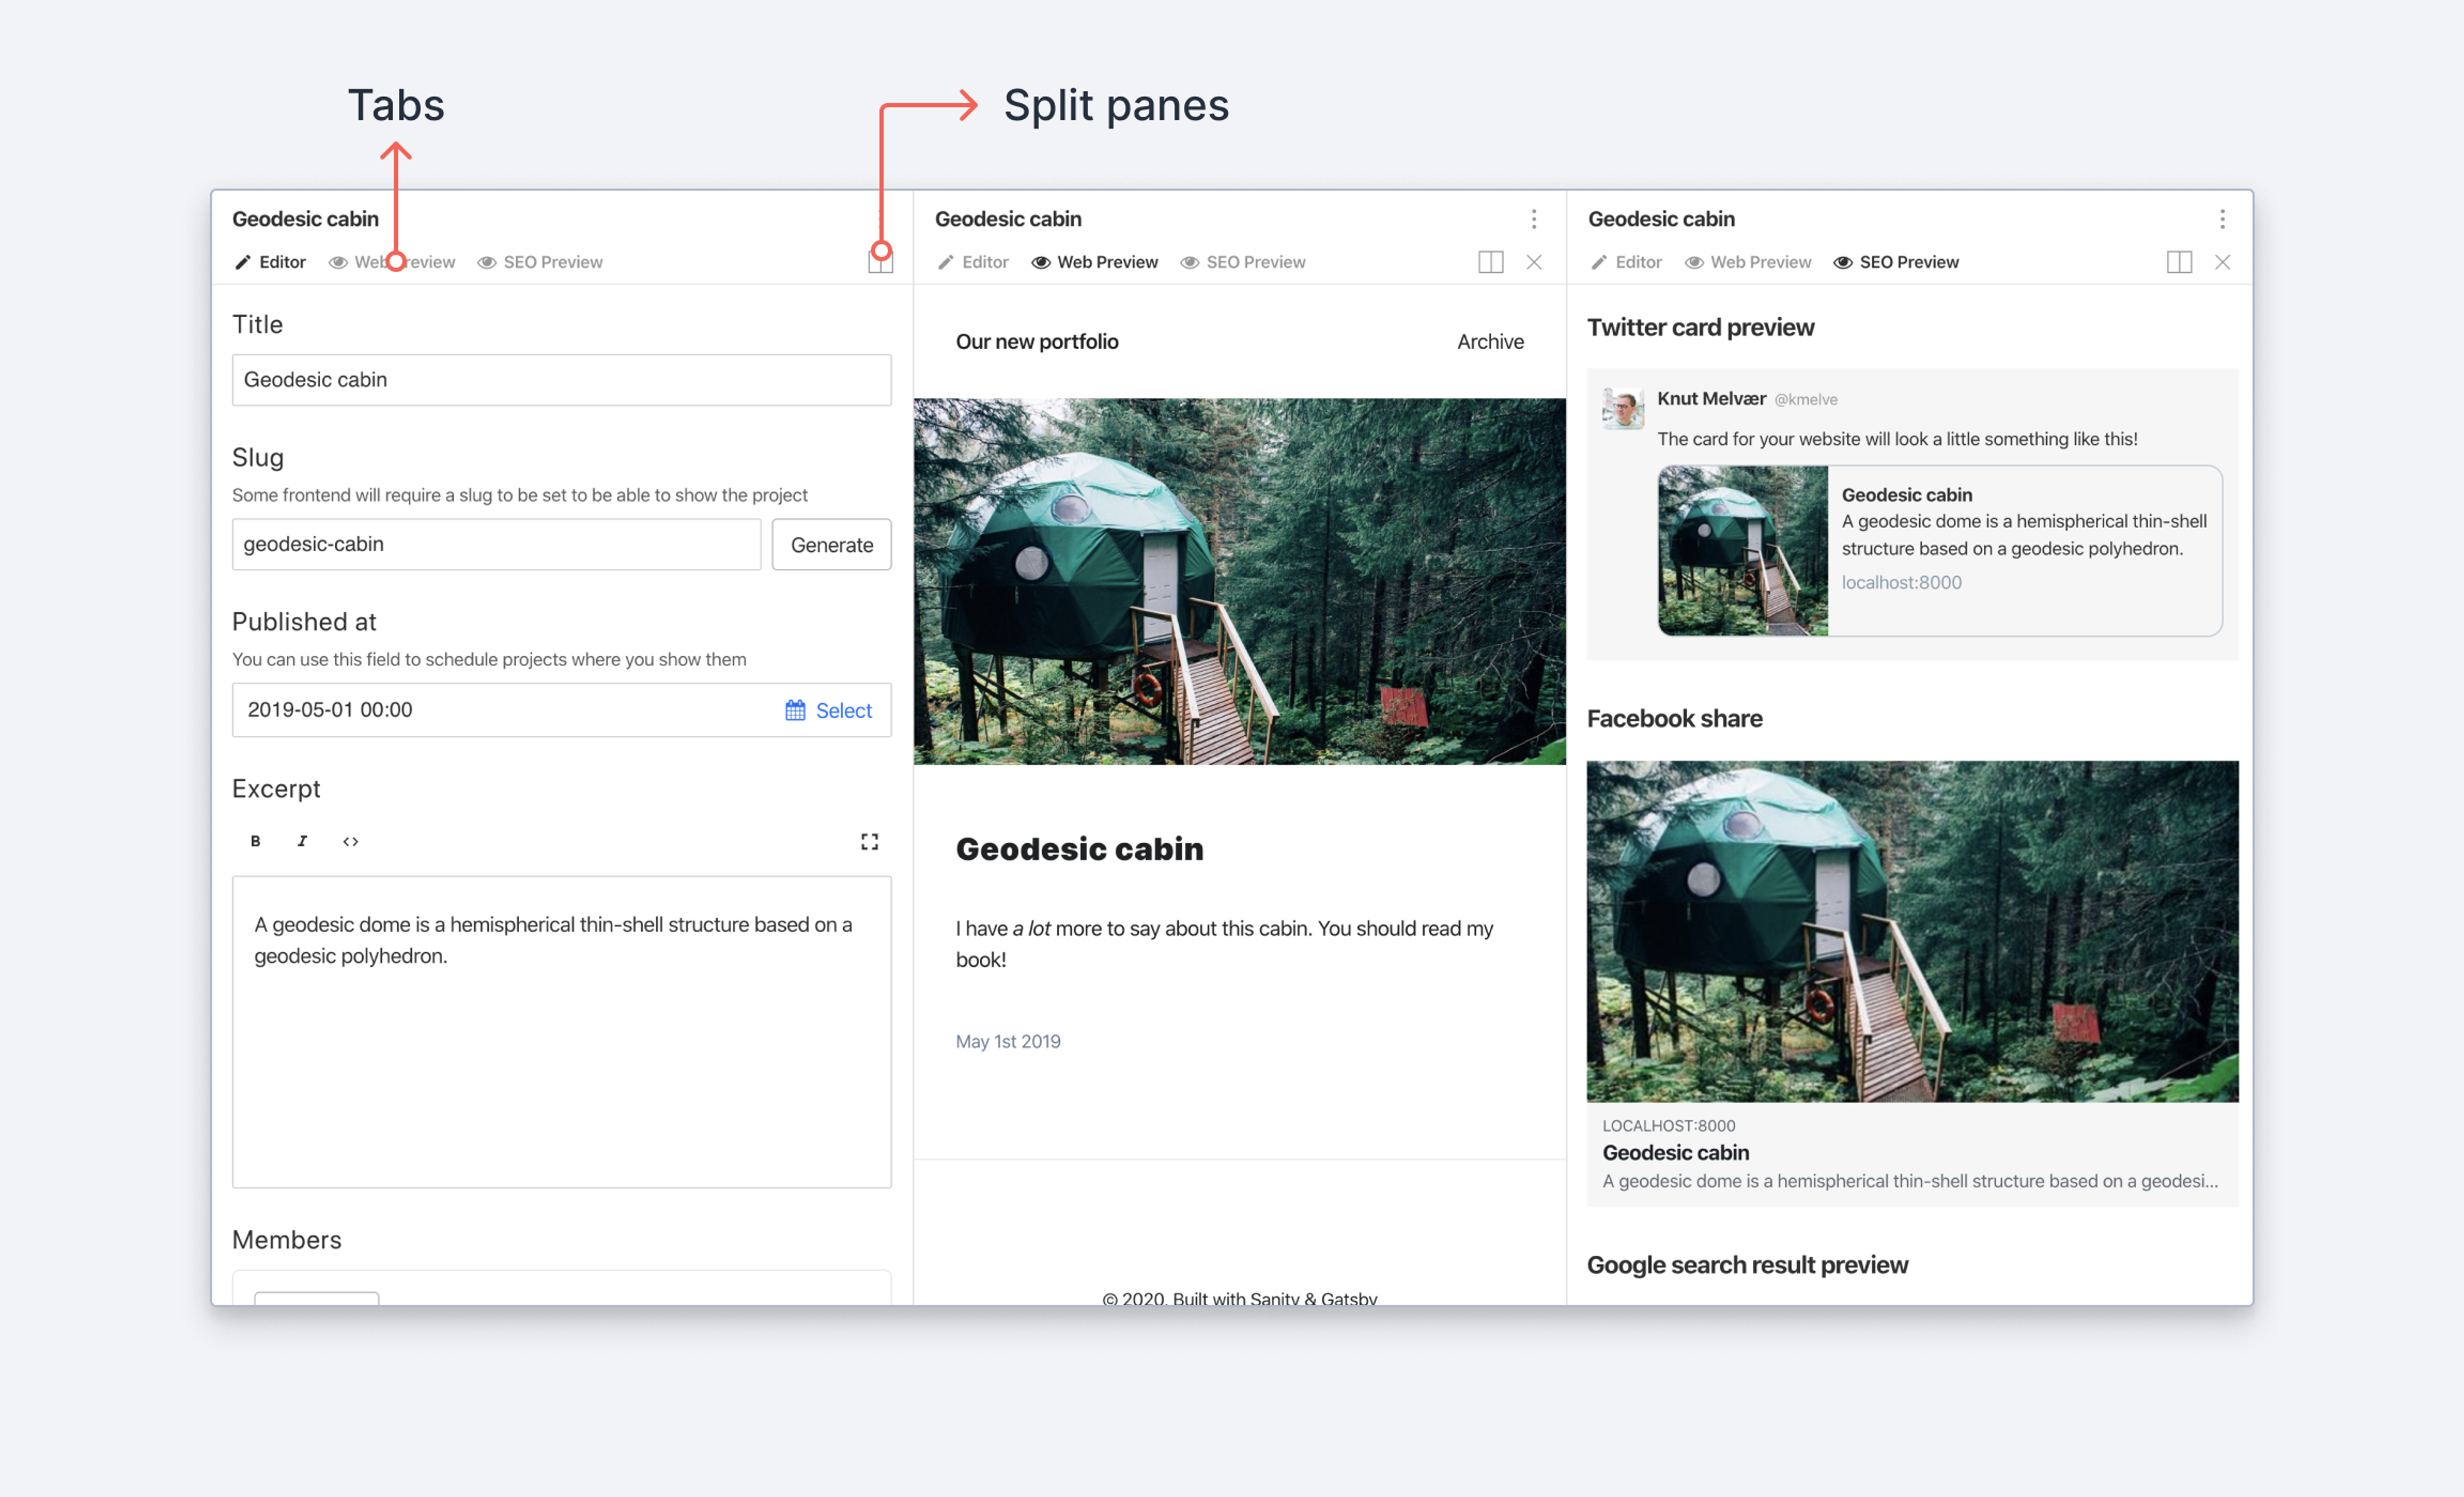
Tabs with content previews
Read the blog post about views and split panes →
The Structure Builder API also gives you control over how a document node is presented within a collapsible pane. More specifically, it lets you set up one to multiple Views that either return the default form, or a React component. A View receives a collection of props, including the values for the document in different states: draft, published, historical, and currently displayed (e.g. if you have selected a specific document revision).
In order to override the default tabs for document views, you provide a structure-resolving function to the structureTool's defaultDocumentNode property. In this example we use it to make a simple JSON preview for all document types where another view hasn't been set in a structure definition.
// deskStructure.js

const JsonPreview = ({document}) => (
  // The JSON preview
  <pre>{JSON.stringify(document.displayed, null, 2)}</pre>
)

export const documentNodeResolver = (S) => {
  // Give all documents the JSON preview,
  // as well as the default form view
  return S.document().views([
    S.view.form(),
    S.view.component(JsonPreview).title('JSON')
  ])
}
And in your root studio configuration:
import {defineConfig} from 'sanity'
import {structureTool} from 'sanity/structure'

import {schemaTypes} from './schemas'
import {deskStructure, documentNodeResolver} from './deskStructure'

export default defineConfig({
  name: 'default',
  title: 'structure-builder-example',
  projectId: '<projectId>',
  dataset: 'production',
  plugins: [
    structureTool({
      structure: deskStructure,
      defaultDocumentNode: documentNodeResolver,
    }),
  ],
  schema: {
    types: schemaTypes,
  },
})
Besides the structure builder S, the defaultDocumentNode callback function also includes a context object with some useful info. To define custom Views for specific document types only, you can use the schemaType prop from the context object inside an if statement:
// deskStructure.js

const JsonPreview = ({document}) => (
  // The JSON preview
  <pre>{JSON.stringify(document.displayed, null, 2)}</pre>
)

export const documentNodeResolver = (S, {schemaType}) => {
  if(schemaType == 'myDocument') {
    // Give all documents of type myDocument the JSON preview,
    // as well as the default form view
    S.document().views([
      S.view.form(),
      S.view.component(JsonPreview).title('JSON')
    ])
  }
}
You can also define views for documents by their ID with the documentId prop, also included in the context object:
// deskStructure.js

const JsonPreview = ({document}) => (
  // The JSON preview
  <pre>{JSON.stringify(document.displayed, null, 2)}</pre>
)

export const getDefaultDocumentNode = (S, {documentId}) => {
  if(documentId == 'siteSettings') {
    // Only give the document with ID siteSettings the JSON preview,
    // as well as the default form view
    S.document().views([
      S.view.form(),
      S.view.component(JsonPreview).title('JSON')
    ])
  }
}
Read more about the defaultDocumentNode property in the Structure Builder reference.