The Dashboard tool for Sanity Studio
How to set up and configure the Dashboard tool for Sanity Studio
Looking for Sanity Dashboard?
This article is about the Dashboard tool for Sanity Studio. Go here for documentation for Sanity Dashboard, the unified content operations workspace.
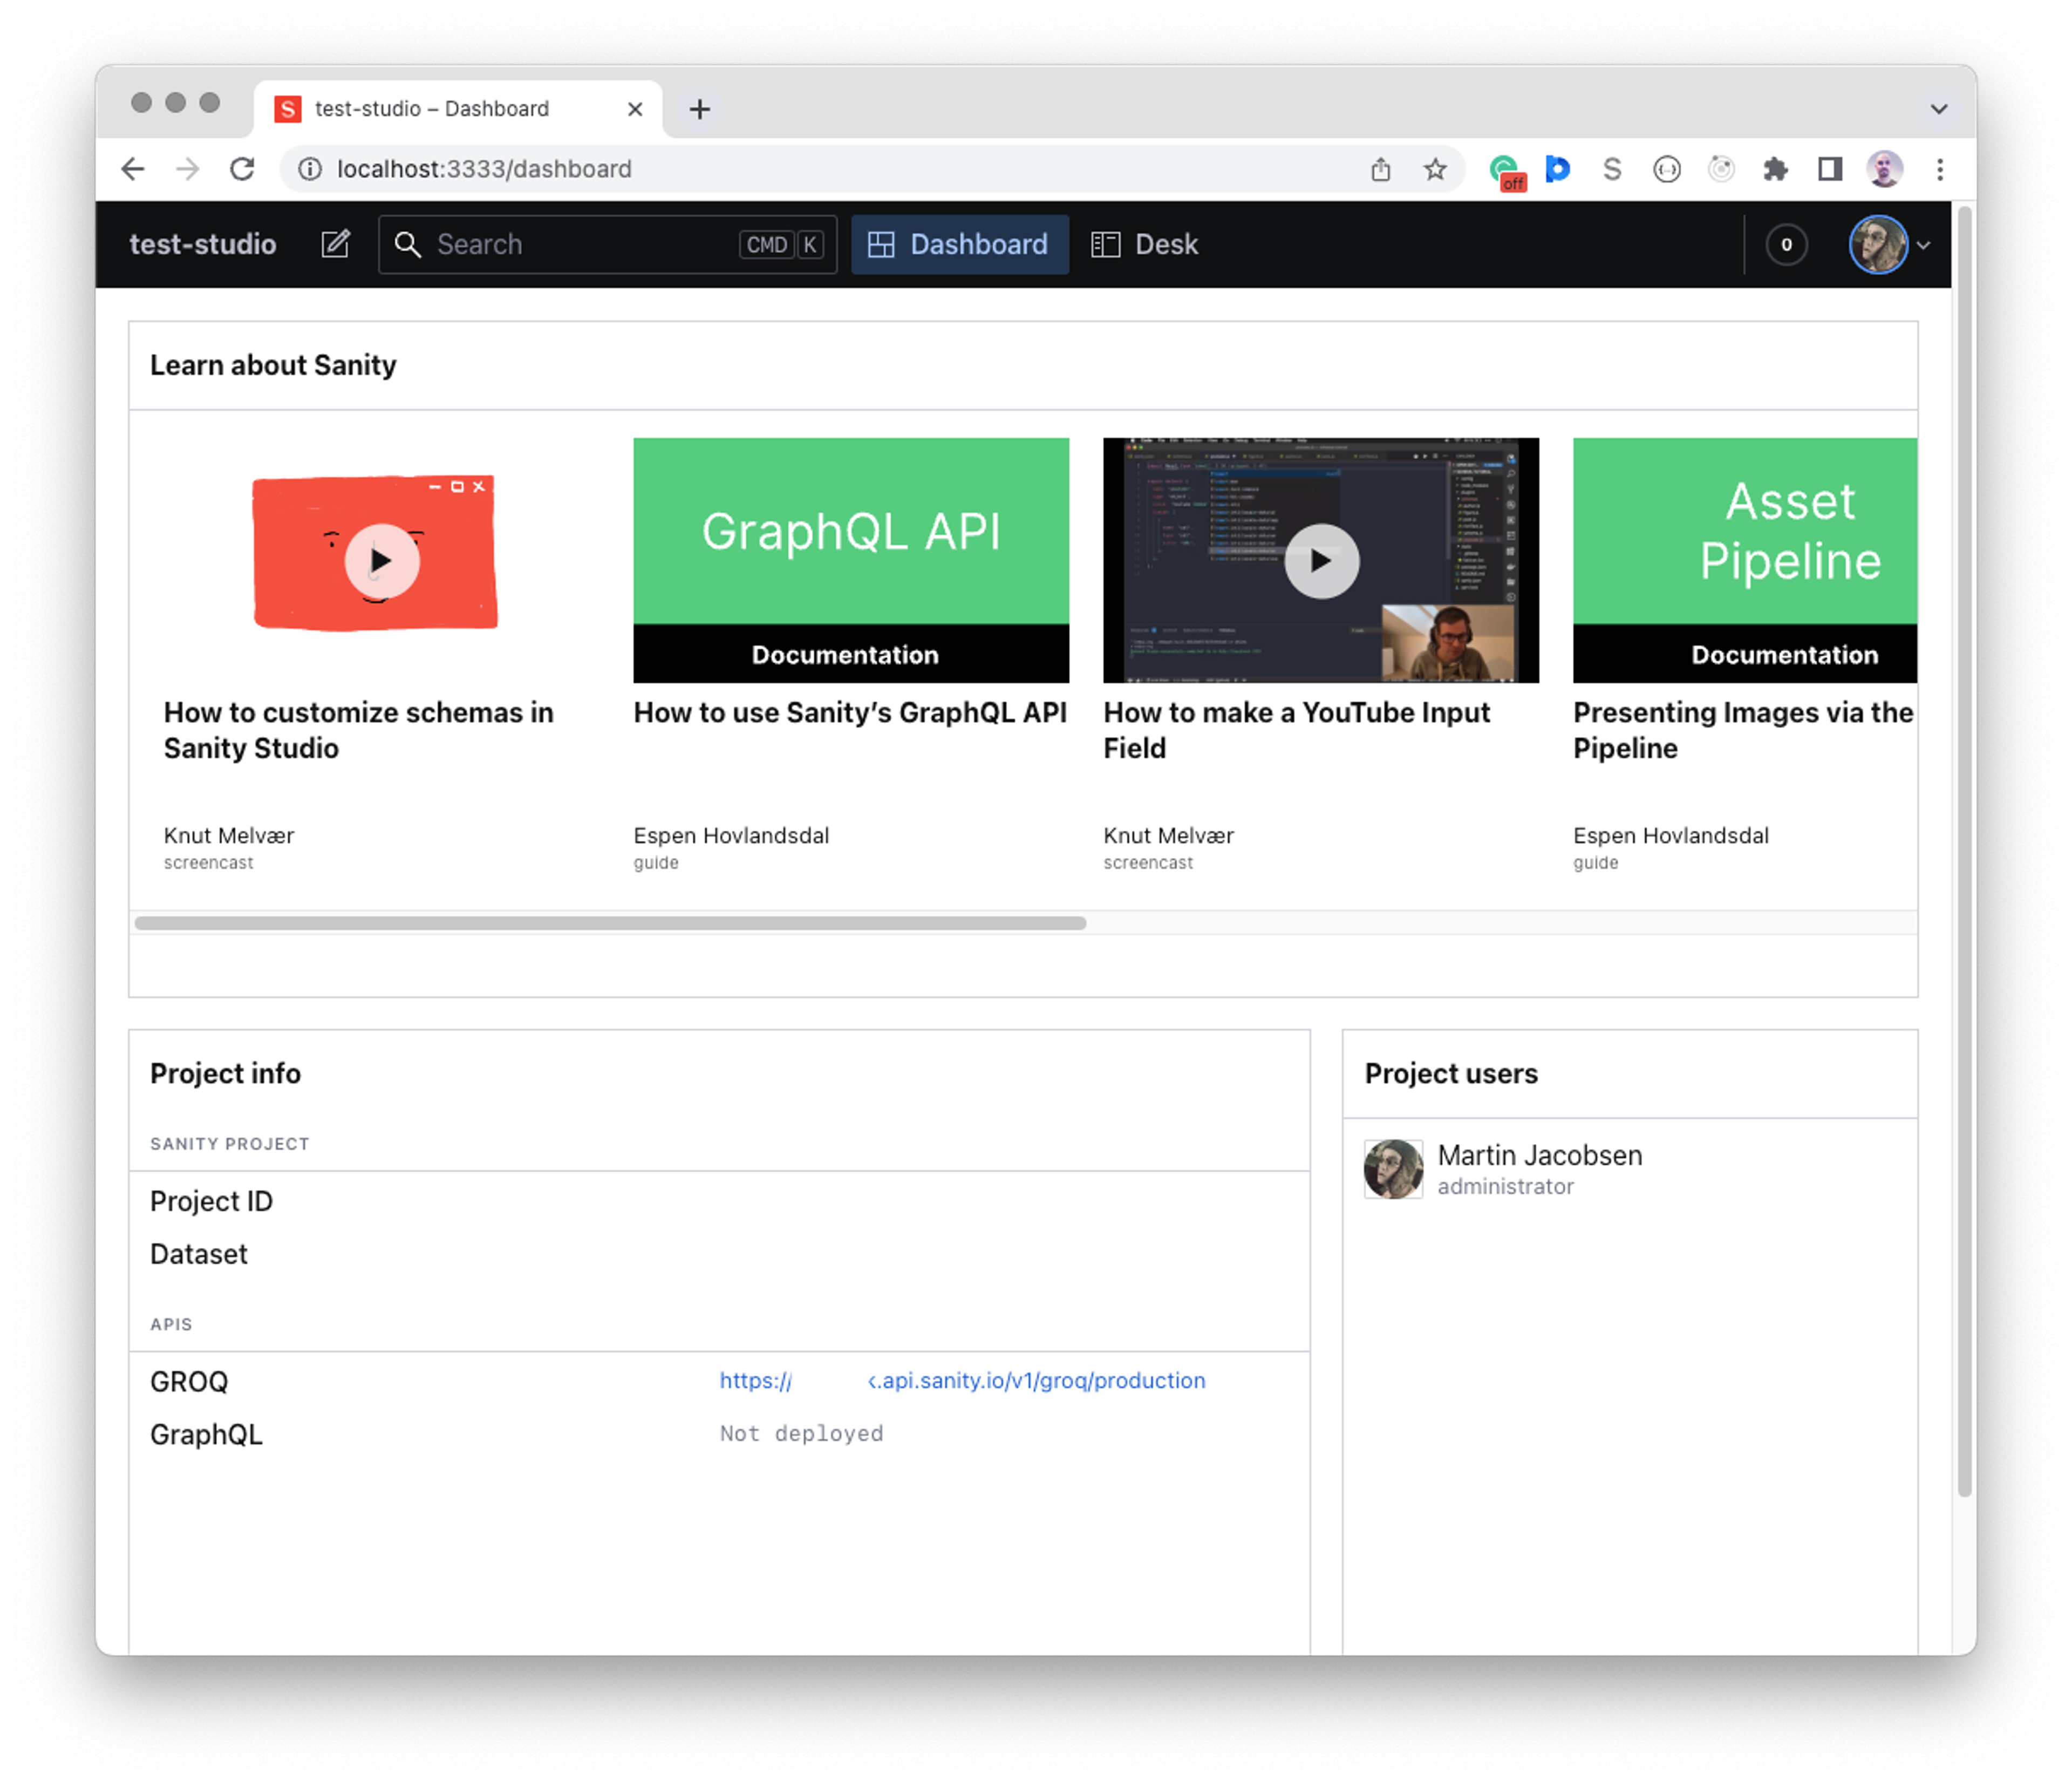
Dashboard is a Sanity Studio tool that allows you to add widgets that display information about your content, project details, or anything else you'd want to put there. You can find widgets on the Sanity Exchange and install them in your project using your preferred package manager, such as npm or yarn. You can also write your custom project-specific widgets.
Widgets are useful for displaying stats about your content, listing recently edited or stale documents, portraying the daily cat, or whatever sparks joy for those who log in to the Studio.
The Dashboard tool has been designed to be as generic as possible, making few assumptions about its widgets. The Dashboard itself is mostly concerned about the layout of the configured widgets. The layout and order, as well as the widgets’ configurable options can be set in a simple file.
Installation
If you have started a project from sanity.io/templates you might already have the Dashboard installed. If you wish to install it in existing projects, you follow the same procedure as for any other package:
cdto your project’s root folder- Install the package
npm install --save @sanity/dashboard

# OR

yarn add @sanity/dashboard
3. Add the widget to your studio configuration (typically found in sanity.config.js|ts at the root of your project)
import { defineConfig } from "sanity";
import { dashboardTool } from "@sanity/dashboard";
export default defineConfig({
    /* ... */
    plugins: [
        dashboardTool({ widgets: []})
    ]
})
To verify that all is well, fire up your Studio (sanity dev) and point your browser to http://localhost:3333/dashboard. It should show an empty dashboard with a message encouraging you to add some widgets to the dashboard.
Gotcha
Sometimes, you want the Dashboard to be the first thing people see when they log in to the Studio, and sometimes the Structure tool. This depends on what comes first in the plugins-array in sanity.config.ts.
How to configure the Dashboard
Now, add any widgets you might want. The dashboard plugin provides three widgets out-of-the-box:
import { defineConfig } from "sanity";
import {
  dashboardTool,
  sanityTutorialsWidget,
  projectUsersWidget,
  projectInfoWidget,
} from "@sanity/dashboard";


// configure the dashboard tool with widgets
dashboardTool({
  widgets: [
    sanityTutorialsWidget(),
    projectInfoWidget(),
    projectUsersWidget(),
  ]
})
Widgets can be configured by passing widget-specific config:
projectUsersWidget({ layout: { width: 'small' } }),The widgets array is how you tell the Dashboard which widgets to render in the order they appear in the array. The ones mentioned above are bundled with Sanity and require no separate installation.
You can play around with the order of the widgets array and see how the layout changes.
Some widgets have widget-specific options to change aspects of their behavior. If you install the sanity-plugin-dashboard-widget-document-list widget mentioned below, it can be configured with:
documentListWidget({
  showCreateButton: true,
  limit: 5,
  types: ["my-document-type"],
})
You can add multiple instances of a widget with different configurations. So, if you want your dashboard to display both the newest documents across all document types and another widget showing the last edited books, your dashboard config might look like this:
export default {
  widgets: [
    documentListWidget({title: 'New', order: '_createdAt desc'}),
    documentListWidget({title: 'Last edited books', order: '_updatedAt desc', types: ['book']}),
  ]
}