Create a link to a single edit page in your main document type list
In this article, we'll explore how to add a link to a single document from the main document type list.
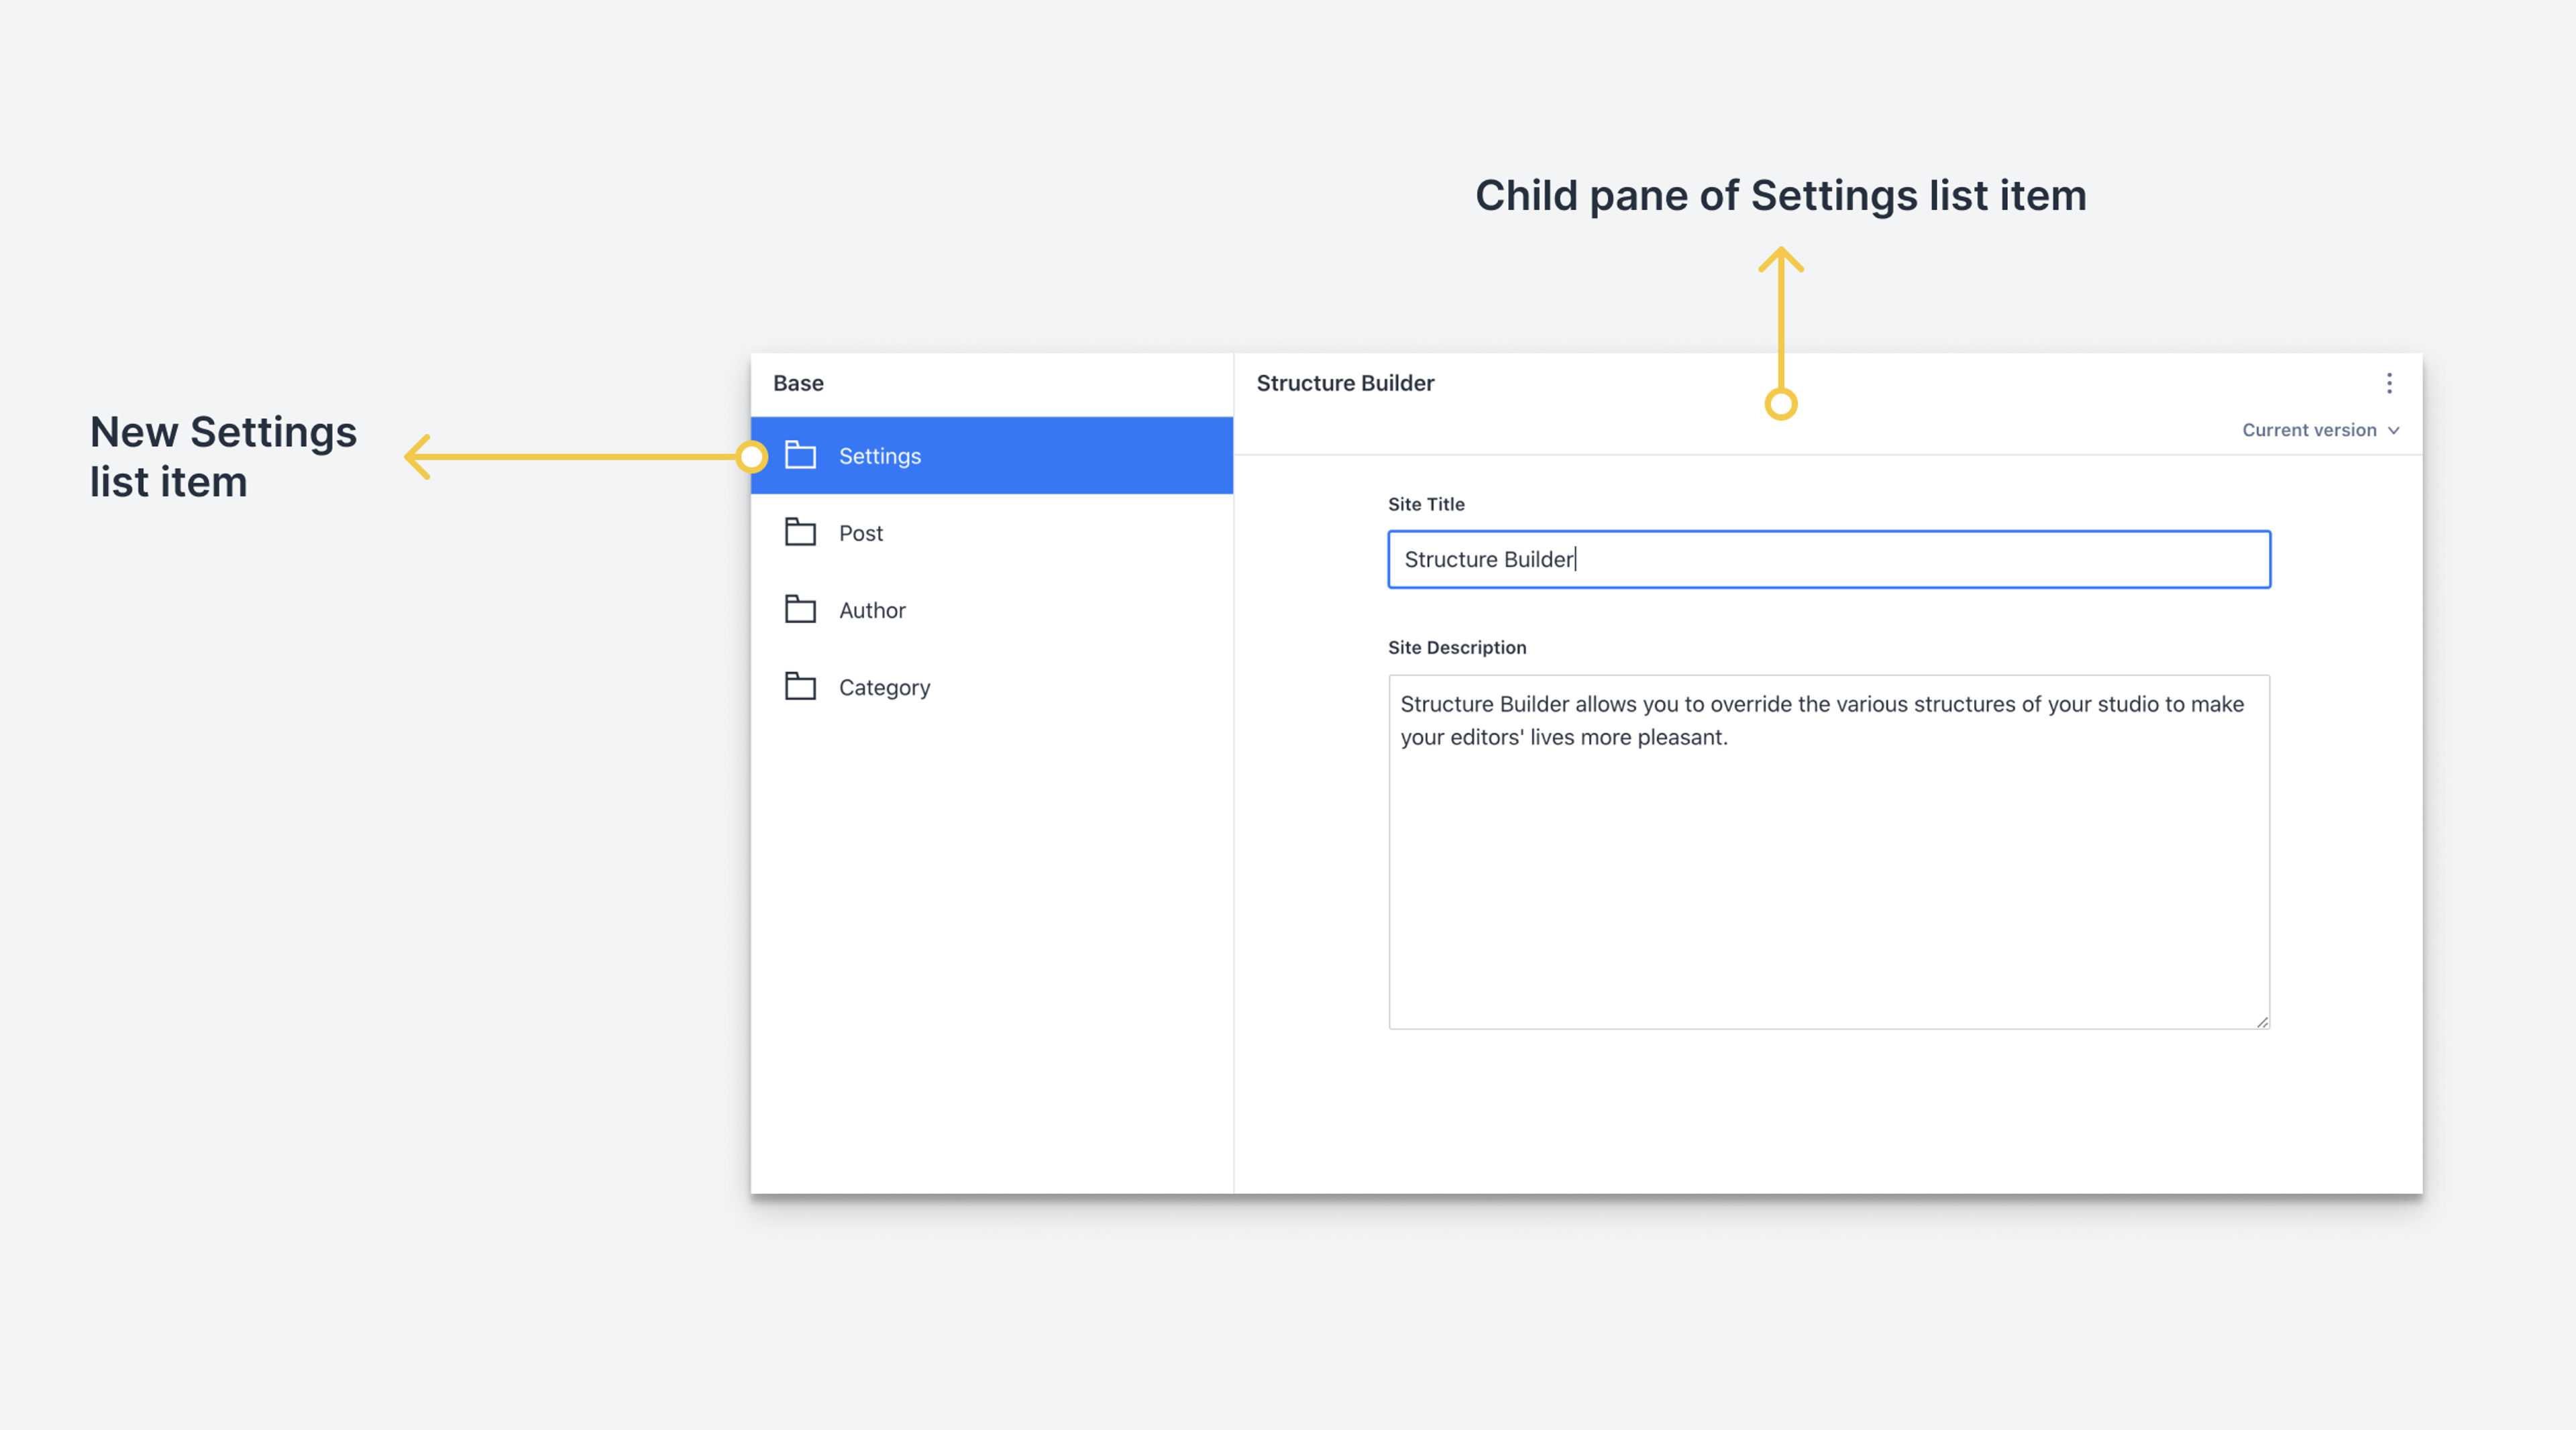
In some cases, to make a strong editing experience, it's important to create a document type that only serves one document instead of a list of documents. In this article, we'll create the often-used "site settings" pattern that implements a schema to control global variables for our front-end site. To create this pattern, we'll use the Structure Builder API to create a singleton document type.
If you're not familiar with the Structure Builder API, be sure to read through the other articles in this series.
1. Introduction and concepts
The Structure tool is included with Sanity Studio and allows you to customize the experience of creating, browsing, and managing documents.
2. Set up Structure Builder in your project
In this article, we'll explore how to initialize Structure Builder and override the default title of the "Content" list.
3. Create a link to a single edit page in your main document type list
(You're here)
4. Manually group items in your document list
In this article, we'll manually group a few singleton "site setting" documents.
5. Dynamically group documents
In this article, we'll use the documentList() method to dynamically group documents with a GROQ filter.
6. Create a custom document pane
In this article, we'll look at adding a custom document view to view the JSON data for our posts.
Creating the site settings schema and document
Before adjusting the studio's main document type list, we'll create a document type and a specific document. For this example, we'll keep it simple, but any global variable you need can be stored in a schema like this. Start by creating a new schema named siteSettings.ts in the /schemas directory.
import {defineField, defineType} from 'sanity'

export default defineType({
  name: 'siteSettings',
  title: 'Site Settings',
  type: 'document',
  fields: [
    defineField({
      name: 'title',
      title: 'Site Title',
      type: 'string'
    }),
    defineField({
      name: 'description',
      title: 'Site Description',
      type: 'text'
    })
  ]
})
Be sure to import and specify this in your project's /schemas/index.ts file. The example shows the schema setup from the default blog template you can pick when setting up a new project with the Sanity CLI, and which we'll be using as our example studio going forth. Importing and adding your siteSettings schema should work the same even if your setup looks different.
import blockContent from './blockContent'
import category from './category'
import post from './post'
import author from './author'
import siteSettings from './siteSettings'

export const schemaTypes = [
  post,
  author,
  category,
  blockContent,
  siteSettings,
]
At this point, we have a siteSettings document type but no documents. We also have the ability to create multiple site settings documents. This is potentially dangerous and confusing for our editors.
Adding the document to the first panel
To add a single document to the first panel, we'll edit the structure.ts file that we created in this article.
import {type StructureResolver, type StructureBuilder} from 'sanity/structure'

export const myStructure: StructureResolver = (S: StructureBuilder) =>
  S.list()
    .title('Base')
    .items([
      S.listItem()
        .title('Site Settings')
        .child(
          S.document()
            .schemaType('siteSettings')
            .documentId('siteSettings')),
      ...S.documentTypeListItems(),
    ])
In the last article, we overrode the title of our list but showed all of our Document Types with no modifications in the .items() method. Now, we need to modify the array that the .items() method uses.
S.listItem()
Since the items will be displayed in array order, we'll start our array with our new custom item. To make a custom list item, we'll use the .listItem() method on the main Structure Builder object.
The listItem() method has multiple nested methods that we'll use to define its properties. We'll define the item's title with the .title() method. There's an optional .id() method, as well, but by default, the ID can be built from the title.
.child()
The .child() method will define what the next pane contains when an editor clicks on this item. In our case, we want it to be a single document with a specific schema type and ID.
S.document()
The .document() method allows us to specify which document and schema type will be the focus of the next pane. If there's already a document that you want to use, you can use its _id value in the .documentId() method. By putting a string in this method, it will create a document with that ID if it doesn't already exist. In our case, we'll use the string siteSettings to make things as human-readable as possible.
Listing out all the document types
We still need to show any other document type items in our list. To do this, instead of simply calling the S.documentTypeListItems() method like we did in the last article, we need to put each of that method's array items into our current array. To do this, we use the JavaScript Spread operator: ....
When we do this, however, we see the flaw in our plan: The Site Settings document type is listed in this list and our manually defined item.
Removing singleton document types from the main document type list
To remove our site settings document type from our main list, we need to run a JavaScript filter against our document types. Luckily, we're already spreading all those items.
import {type StructureResolver, type StructureBuilder} from 'sanity/structure'

export const myStructure: StructureResolver = (S: StructureBuilder) =>
  S.list()
    .title('Base')
    .items([
      S.listItem()
        .title('Site Settings')
        .child(
          S.document()
            .schemaType('siteSettings')
            .documentId('siteSettings')),
      ...S.documentTypeListItems().filter(listItem => !['siteSettings'].includes(listItem.getId()))
    ])
The filter() method takes an anonymous function as its argument and passes each array item as a property of the function. In our filter function, we'll check to see if each listItem has an ID that matches our current string using the getId() method on the item. To set this up for more excluded document types, we can make this an array.
Next steps
We now have a working singleton in our main list pane. In the next article, we'll take a look at manually grouping multiple list items to create sections that will make an editor's life easier.